2003 VOLVO S80 spare tire
[x] Cancel search: spare tirePage 18 of 109
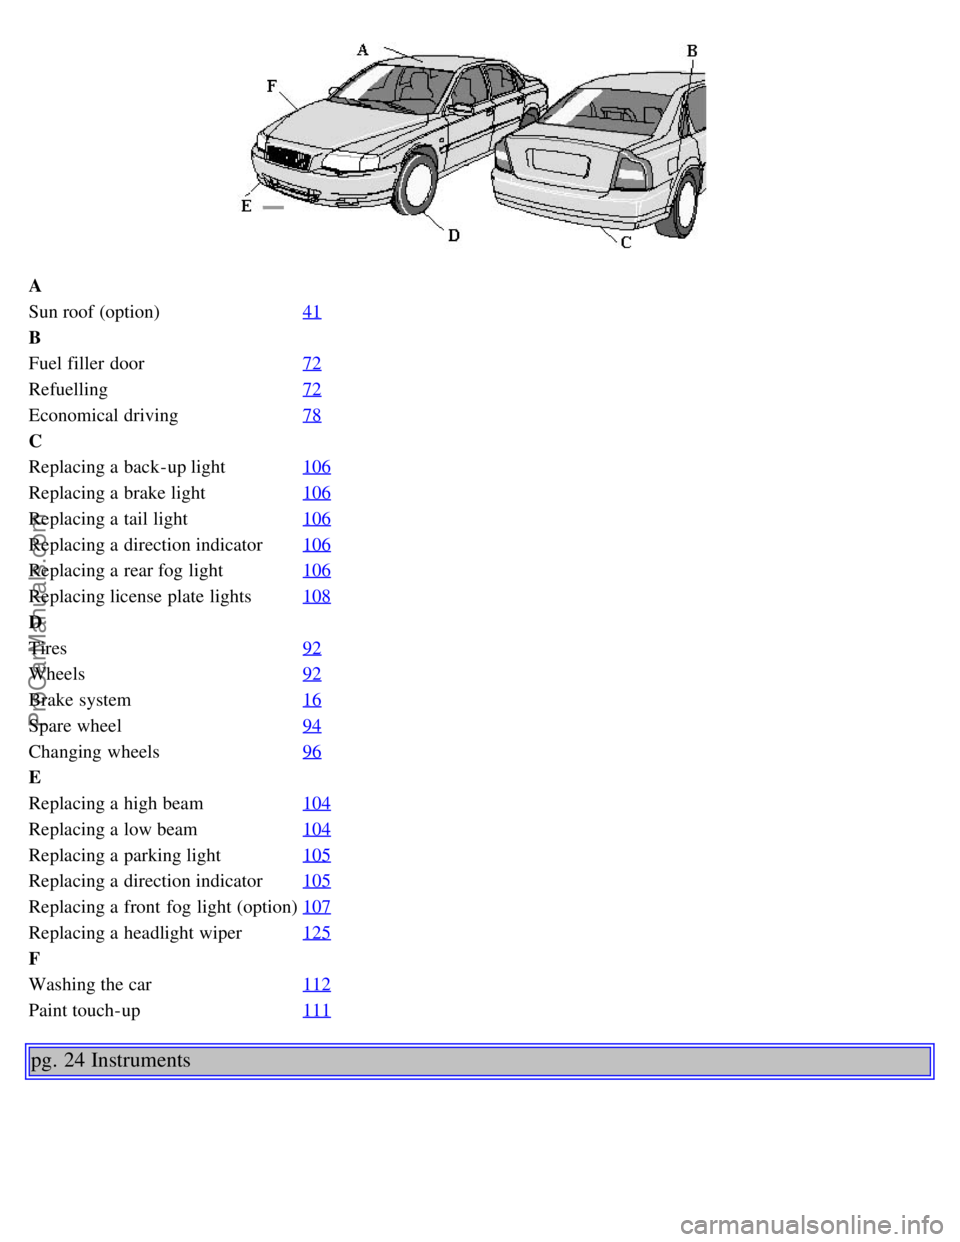
A
Sun roof (option)41
B
Fuel filler door72
Refuelling72
Economical driving78
C
Replacing a back-up light106
Replacing a brake light106
Replacing a tail light106
Replacing a direction indicator106
Replacing a rear fog light106
Replacing license plate lights108
D
Tires92
Wheels92
Brake system16
Spare wheel94
Changing wheels96
E
Replacing a high beam104
Replacing a low beam104
Replacing a parking light105
Replacing a direction indicator105
Replacing a front fog light (option)107
Replacing a headlight wiper125
F
Washing the car112
Paint touch-up111
pg. 24 Instruments
ProCarManuals.com
Page 31 of 109
2 0 0 3
VOLVO S80
Chapter 4 - Interior
pg. 51 Interior
Front seats52
Coat hanger53
Interior lighting54
Storage compartments55
Storage compartments in center console56
Spare tire, Cargo net in trunk57
Folding rear seat backrests, Carrying long loads58
pg. 52 Front seats
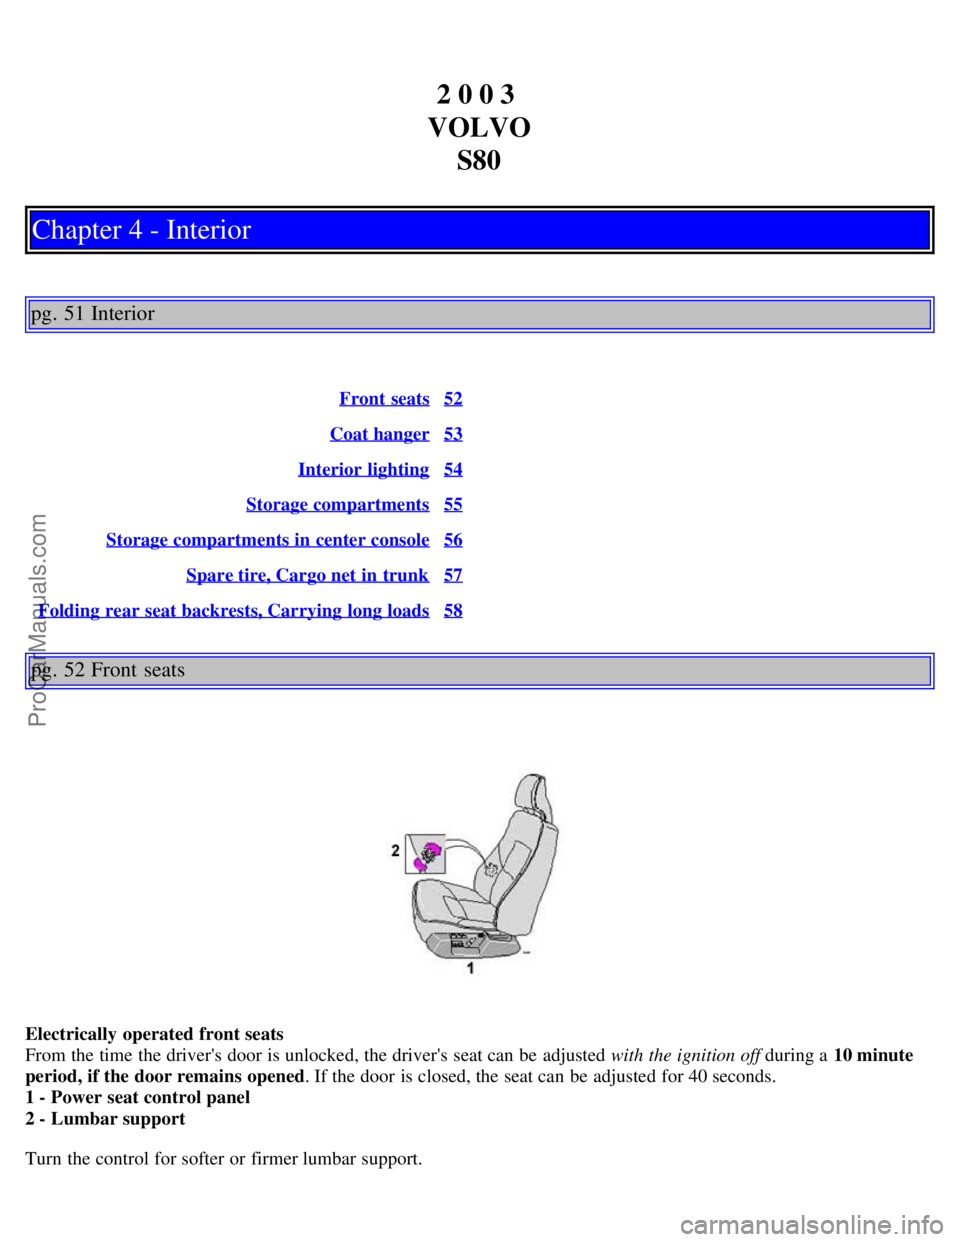
Electrically operated front seats
From the time the driver's door is unlocked, the driver's seat can be adjusted with the ignition off during a 10 minute
period, if the door remains opened . If the door is closed, the seat can be adjusted for 40 seconds.
1 - Power seat control panel
2 - Lumbar support
Turn the control for softer or firmer lumbar support.
ProCarManuals.com
Page 37 of 109
Press button A to pop open the cup holder.
Press button B to open the storage space in the center console for cassettes, change holder, etc.
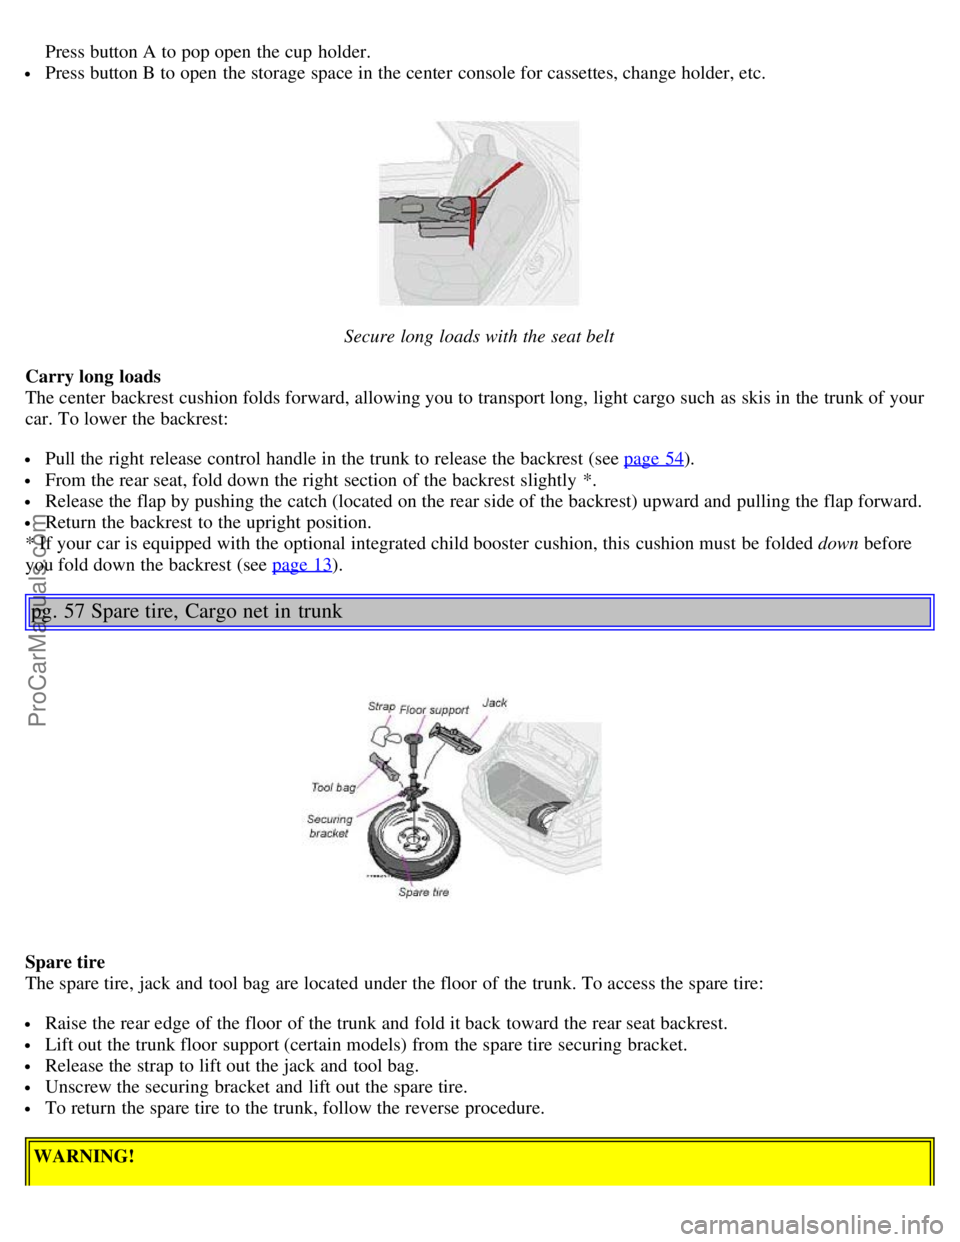
Secure long loads with the seat belt
Carry long loads
The center backrest cushion folds forward, allowing you to transport long, light cargo such as skis in the trunk of your
car. To lower the backrest:
Pull the right release control handle in the trunk to release the backrest (see page 54).
From the rear seat, fold down the right section of the backrest slightly *.
Release the flap by pushing the catch (located on the rear side of the backrest) upward and pulling the flap forward.
Return the backrest to the upright position.
* If your car is equipped with the optional integrated child booster cushion, this cushion must be folded down before
you fold down the backrest (see page 13
).
pg. 57 Spare tire, Cargo net in trunk
Spare tire
The spare tire, jack and tool bag are located under the floor of the trunk. To access the spare tire:
Raise the rear edge of the floor of the trunk and fold it back toward the rear seat backrest.
Lift out the trunk floor support (certain models) from the spare tire securing bracket.
Release the strap to lift out the jack and tool bag.
Unscrew the securing bracket and lift out the spare tire.
To return the spare tire to the trunk, follow the reverse procedure.
WARNING!
ProCarManuals.com
Page 38 of 109
Make sure that the spare tire, jack and tool bag are properly secured with the securing bracket and strap to help keep
these components in place in the event of a sudden stop.
NOTE: See page 96
for information on how the jack should be used.
Cargo net in the trunk
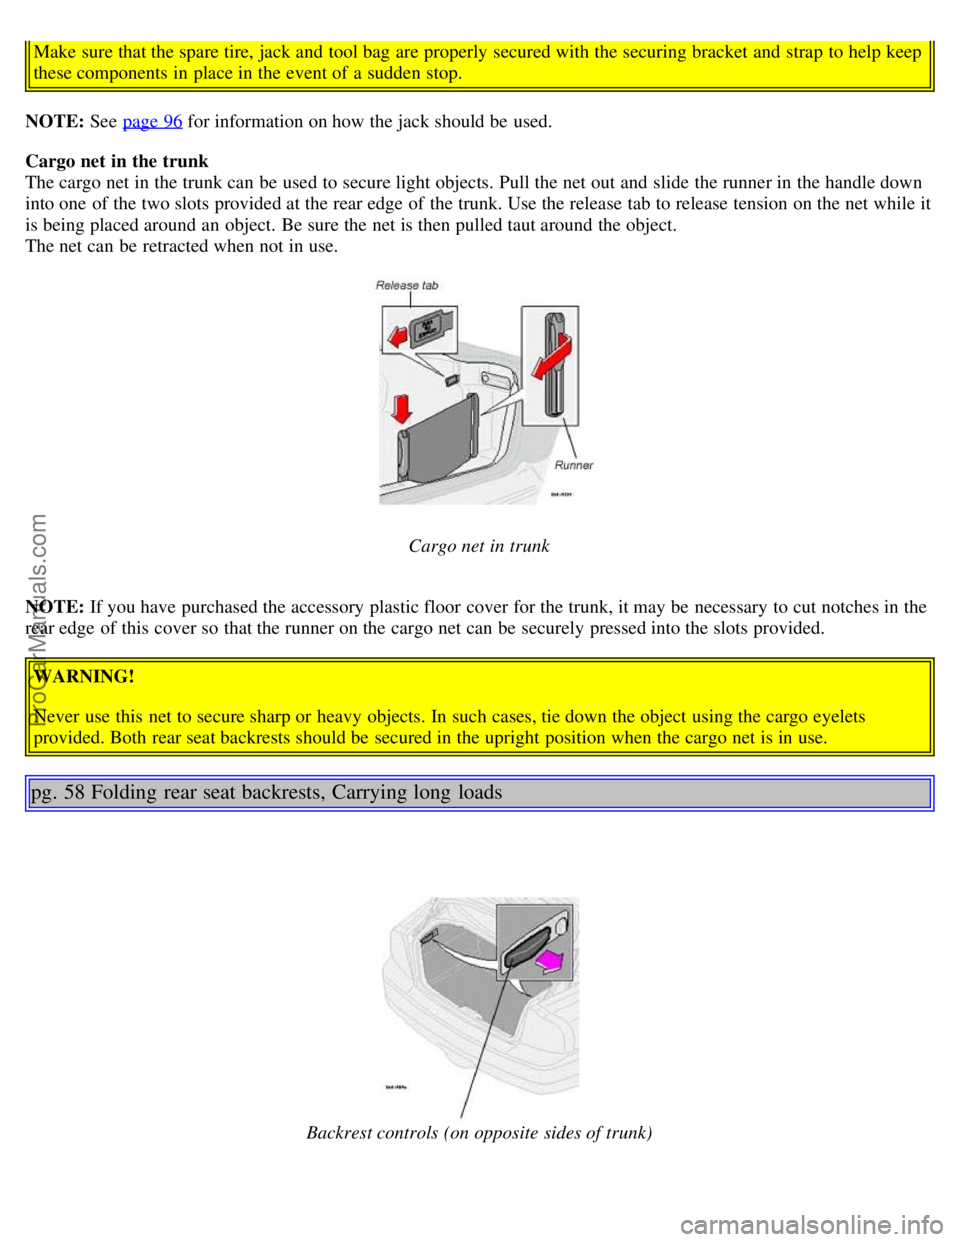
The cargo net in the trunk can be used to secure light objects. Pull the net out and slide the runner in the handle down
into one of the two slots provided at the rear edge of the trunk. Use the release tab to release tension on the net while it
is being placed around an object. Be sure the net is then pulled taut around the object.
The net can be retracted when not in use.
Cargo net in trunk
NOTE: If you have purchased the accessory plastic floor cover for the trunk, it may be necessary to cut notches in the
rear edge of this cover so that the runner on the cargo net can be securely pressed into the slots provided.
WARNING!
Never use this net to secure sharp or heavy objects. In such cases, tie down the object using the cargo eyelets
provided. Both rear seat backrests should be secured in the upright position when the cargo net is in use.
pg. 58 Folding rear seat backrests, Carrying long loads
Backrest controls (on opposite sides of trunk)
ProCarManuals.com
Page 59 of 109

2 0 0 3
VOLVO S80
Chapter 7 - Wheels and tires
pg. 91 Wheels and tires
General information, Wear indicator, Tire economy, Flat spots92
Snow chains, Snow tires/studded tires93
Inflation pressure, Spare tire94
Uniform tire quality grading95
Changing wheels96
pg. 92 Wheels and tires
General information
Your vehicle is equipped with tires according to the tire information label on the inside of the fuel filler door.
The following is an example of a tire designation code: 225/55 R16
225 = tire width in mm.
55 = tire profile. This is the relationship (in percent) between the section height and width of the tire.
R = radial tires.
16 = diameter in inches.
The tires have good road holding characteristics and offer good handling on dry and wet surfaces. It should be noted
however that the tires have been developed to give these features on snow/icefree surfaces. Certain models are
equipped with "all-season" tires, which provide a somewhat higher degree of road holding on slippery surfaces
than tires without the "all-season" rating. However, for optimum road holding on icy or snow covered roads we
recommend suitable winter tires on all four wheels. When replacing tires, be sure that the new tires are the same
size designation, type (radial) and preferably from the same manufacturer, on all four wheels. Otherwise there is a risk
of altering the car's roadholding and handling characteristics.
NOTE: When storing wheel/tire assemblies (e.g. winter tires and wheels), either stand the assemblies upright, or
suspend them off the ground. Laying wheel/tire assemblies on their sides for prolonged periods can cause wheel and/or
tire damage.
Wear indicator
The tires have wear indicator strips running across or parallel to the tread. When approx. 1/16" (1.6 mm) is left on the
ProCarManuals.com
Page 60 of 109
tread, these strips become visible and indicate that the tire should be replaced.
Tires with less than 1/16" (1.6 mm) tread have a very poor grip in rain
or snow.
When replacing worn tires, it is recommended that the tire be identical in type (radial) and size as the one being
replaced. Using a tire of the same make (manufacturer) will prevent alteration of the driving characteristics of the
vehicle.
To improve tire economy:
Maintain correct tire pressure. See the tire pressure label on the inside of the fuel filler door.
Drive smoothly: avoid fast starts, hard braking and tire screeching.
Tire wear increases with speed.
Correct front wheel alignment is very important.
Unbalanced wheels impair tire economy and driving comfort.
Volvo recommends rotating the tires every 7,500 miles (12,000 km). Tires should be rotated front -to-back/back-to-
front only. Tires must maintain the same direction of rotation throughout their lifetime, and should never be rotated
from one side of the vehicle to the other.
Hitting curbs or potholes can damage the tires and/or wheels permanently.
Flat spots
All tires become warm during use. After cooling, when the vehicle is parked, the tires have a tendency to distort
slightly, forming flat spots. These flat spots can cause vibrations similar to the vibrations caused by unbalanced wheels.
They do, however, disappear when the tire warms up. The degree to which flat spots form depends on the type of cord
used in the tire. In cold weather, it takes longer for the tire to warm up and consequently longer for the flat spot to
disappear.
CAUTION:
The car must not be driven with wheels of different dimensions or with a spare tire other than the one that came with
the car. The use of different size wheels can seriously damage your car's transmission.
pg. 93 Wheels and tires
Snow chains
Snow chains can be used on your Volvo with the following restrictions:
Snow chains should be installed on front wheels only. Use only Volvo approved snow chains.
Special snow chains must be mounted on 215/55 R16, 225/55 R16 and 225/50 R17 tires. Consult your Volvo
retailer.
If accessory, aftermarket or "custom" tires and wheels are installed and are of a size different than the original tires
and wheels, chains in some cases CANNOT be used. Sufficient clearances between chains and brakes, suspension and
body components must be maintained.
Some strap -on type chains will interfere with brake components and therefore CANNOT be used.
Consult your Volvo retailer for additional snow chain information.
CAUTION:
Check local regulations regarding the use of snow chains before installing.
Always follow the chain manufacturer's installation instructions carefully. Install chains as tightly as possible and
retighten periodically.
Never exceed the chain manufacturer's specified maximum speed limit. (Under no circumstances should that limit
be higher than
ProCarManuals.com
Page 62 of 109
The tires on your Volvo will perform to specifications at all normal loads when inflated as recommended on the tire
information label located on the inside of the fuel filler door*. This label lists both tire and vehicle design limits. Do
not load your car beyond the load limits indicated.
Temporary Spare (certain models)
The spare tire in your car is called a "Temporary Spare". It has the following designation: T125/80 R17.
Recommended tire pressure (see decal on fuel filler door) should be maintained irrespective of which position on the
car the Temporary Spare tire is used on.
In the event of damage to this tire, a new one can be purchased from your Volvo retailer.
WARNING!
Current legislation prohibits the use of the "Temporary Spare" tire other than as a temporary replacement for a
punctured tire. In other words, it must be replaced as soon as possible by a standard tire. Road holding and handling
may be affected with the "Temporary Spare" in use. Do not exceed 50 mph (80 km/h). Do not drive farther than 50
miles (80 km) on a temporary spare tire.
CAUTION:
The car must not be driven with wheels of different dimensions or with a spare tire other than the one that came with
the car. The use of different size wheels can seriously damage your car's transmission.
NOTE: Certain models may be equipped with a full-size spare tire. When used, it should be inflated to the same
pressure as the tire it is replacing.
* Please note that the tire information label indicates pressure for both comfort and fuel economy.
pg. 95 Wheels and tires
Uniform tire quality grading
ALL PASSENGER CAR TIRES MUST CONFORM TO FEDERAL SAFETY REQUIREMENTS IN
ADDITION TO THESE GRADES
Quality grades can be found, where applicable, on the tire sidewall between the tread should and maximum section
width. For example:
Treadwear 200 Traction AA Temperature A
TREADWEAR
The treadwear grade is a comparative rating based on the wear rate of the tire when tested under controlled conditions
on a specified government test course. For example, a tire graded 150 would wear one and one half (1 1/2) times as
well on the government course as a tire graded 100. The relative performance of tires depends upon the actual
conditions of their use, however, and many depart significantly from the norm due to variation in driving habits,
service practices and differences in road characteristics and climate.
TRACTION
The traction grades, from highest to lowest, are AA, A, B, and C, as measured under controlled conditions on specified
government test surfaces of asphalt and concrete. A tire marked C may have poor traction performance.
WARNING!
The traction grade assigned to this tire is based on braking (straight-ahead) traction tests and does not include
ProCarManuals.com
Page 63 of 109
cornering (turning) traction.
TEMPERATURE
The temperature grades are AA (the highest), A, B, and C, representing the tire's resistance to the generation of heat
and its ability to dissipate heat when tested under controlled conditions on a specified indoor laboratory test wheel.
Sustained high temperature can cause the material of the tire to degenerate and reduce tire life, and excessive
temperature can lead to sudden tire failure. The grade C corresponds to a minimum level of performance that all
passenger car tires must meet under the Federal Motor Safety Standard No. 109. Grades B and A represent higher
levels of performance on the laboratory test wheel than the minimum required by law.
WARNING!
The temperature grade for this tire is established for a tire that is properly inflated and not overloaded. Excessive
speed, under-inflation, or excessive loading, either separately or in combination, can cause heat buildup and possible
tire failure.
pg. 96 Changing wheels
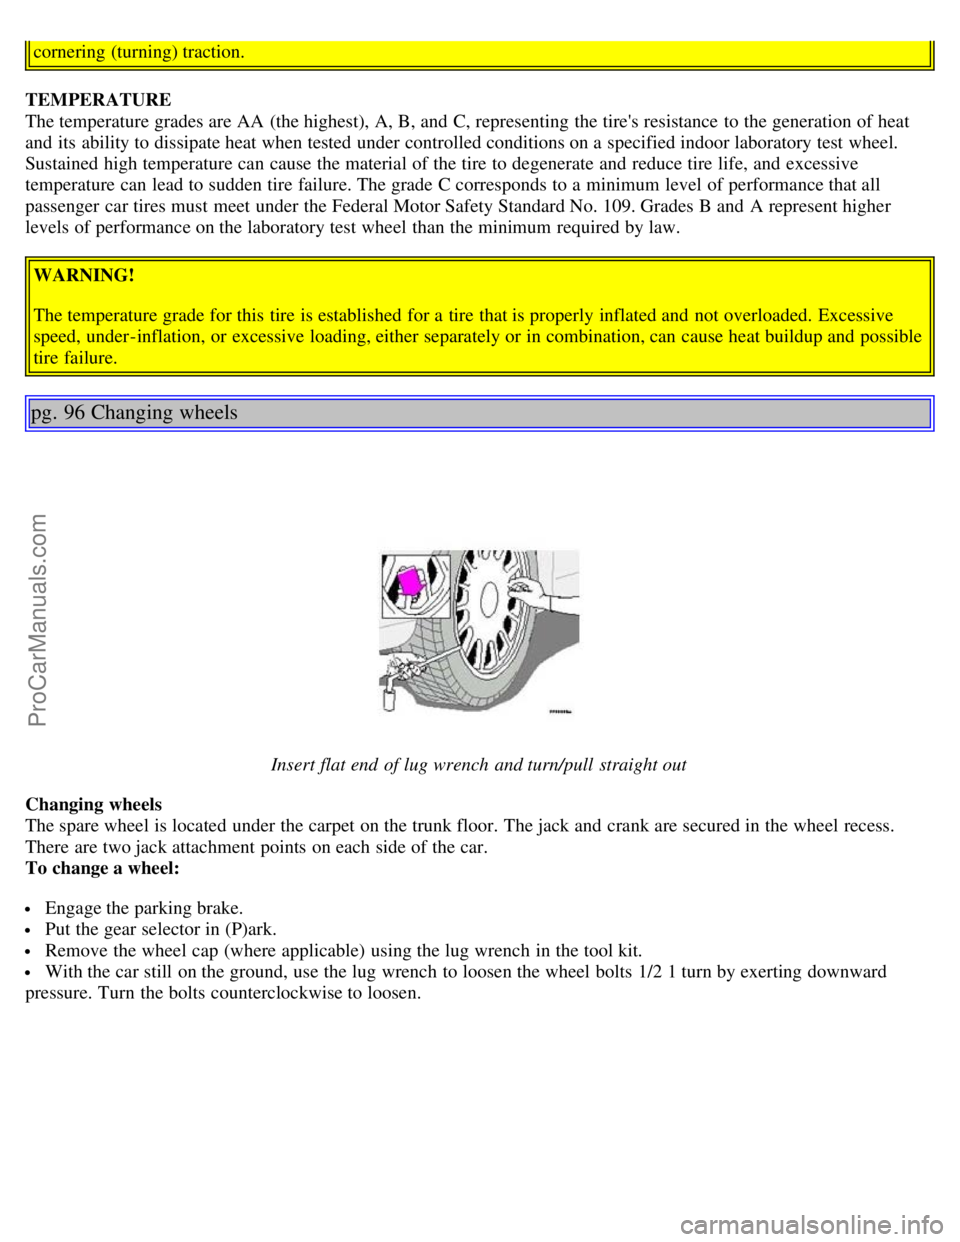
Insert flat end of lug wrench and turn/pull straight out
Changing wheels
The spare wheel is located under the carpet on the trunk floor. The jack and crank are secured in the wheel recess.
There are two jack attachment points on each side of the car.
To change a wheel:
Engage the parking brake.
Put the gear selector in (P)ark.
Remove the wheel cap (where applicable) using the lug wrench in the tool kit.
With the car still on the ground, use the lug wrench to loosen the wheel bolts 1/2 1 turn by exerting downward
pressure. Turn the bolts counterclockwise to loosen.
ProCarManuals.com