2003 VOLVO S80 manual transmission
[x] Cancel search: manual transmissionPage 54 of 109

Neutral - no gear engaged. Use the parking brake.
D (Drive)
D is the normal driving position and should be used as often as possible to help improve fuel economy. The car should
not be moving when shifting from R to the D position.
3 (Intermediate gear)
The transmission will shift automatically between gears 3, 2 or 1 from this position. The transmission cannot shift up
to (D)rive (D) from third gear.
2 (Intermediate gear)
The transmission will shift automatically between gears 2 and 1 from this position. The transmission cannot shift up
to third gear from second gear.
1 (Low gear)
If you select this gear at speeds above 30 mph (50 km/h), the transmission will first shift to second gear and then to
first gear at lower speeds.
NOTE: The intermediate and low gears can be used for:
Driving in a mountainous area
Towing a trailer
Increasing the braking effect of the engine.
The transmission has a built-in limiter designed to help prevent excessive engine speeds (high rpm) when gears 3, 2
or 1 are selected.
Kickdown
Automatic shift to a lower gear (kickdown) is achieved by depressing the accelerator pedal fully and briskly. An
upshift will occur when approaching the top speed for a particular gear or by releasing the accelerator pedal slightly.
Kickdown can be used for maximum acceleration or when passing at highway speeds.
Automatic transmission - adaptive system
The automatic transmission is controlled by an adaptive control system that constantly monitors the way in which the
transmission functions. It senses and adapts each gear shift for optimal performance. The system also monitors your
particular driving style and adapts gear shifting accordingly.
pg. 75 Automatic transmission
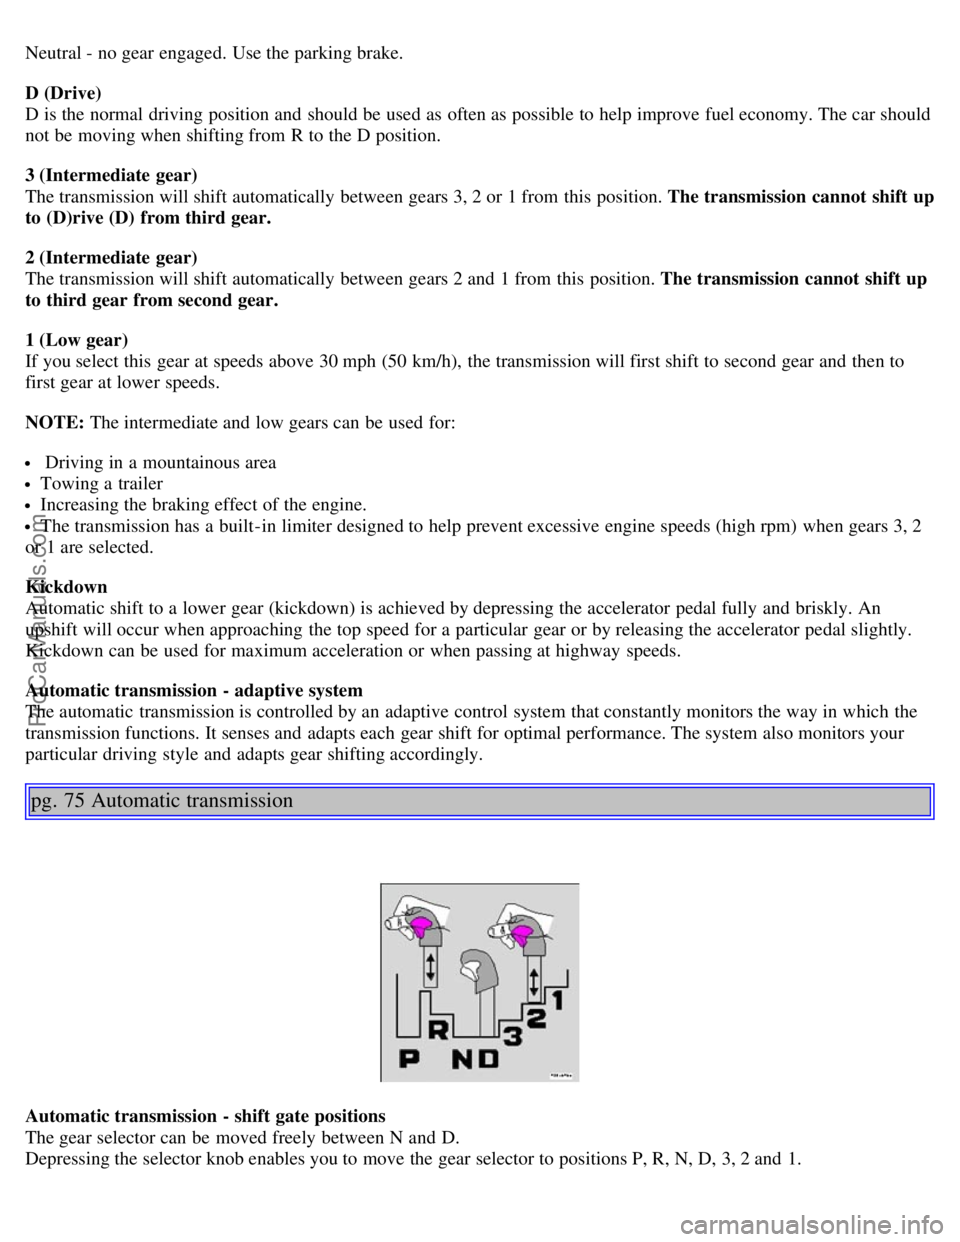
Automatic transmission - shift gate positions
The gear selector can be moved freely between N and D.
Depressing the selector knob enables you to move the gear selector to positions P, R, N, D, 3, 2 and 1.
ProCarManuals.com
Page 55 of 109

W Winter/Wet driving mode - enhanced vehicle traction
Mode W will only function if the gear selector is in the (D)rive position.
Press the button at the base of the gear selector to engage/disengage this driving mode (see illustration).
An LED in the button will light up to indicate that W is engaged and this will also be displayed in the instrument
panel (see page 25
).
This mode may be selected for starting/moving off on slippery roads.
Cold starts
When driving before the engine has reached its normal operating temperature, the transmission will shift up at slightly
higher engine speeds to heat the three-way catalytic converter as quickly as possible.
pg. 76 Automatic transmission (Geartronic)
P (Park)
Use this position when starting the engine or parking the car.
Never use P while the car is in motion.
The parking brake should also be used when parking on grades.
The gear selector is mechanically locked in the P position (SHIFTLOCK). To release the gear selector from this
position, the engine must be running (or the ignition key must be in position II) and the brake pedal must be
depressed.
WARNING!
Never leave the car unattended when the engine is running. If, by mistake, the gear selector is moved from P, the car
may start moving.
R (Reverse)
ProCarManuals.com
Page 56 of 109

Never engage R while the car is moving forward.
N (Neutral)
Neutral - no gear engaged. Use the parking brake.
D (Drive)
D is the normal driving position and should be used as often as possible to help improve fuel economy. The car should
not be moving when shifting from R to the D position.
Kickdown
Automatic shift to a lower gear (kickdown) is achieved by depressing the accelerator pedal fully and briskly. An
upshift will occur when approaching the top speed for a particular gear or by releasing the accelerator pedal slightly.
Kickdown can be used for maximum acceleration or when passing at highway speeds. Kickdown does not function
when the transmission is in the manual shift (geartronic) mode (see next page).
Shift gate positions
Automatic transmission - adaptive system
The automatic transmission is controlled by an adaptive control system that constantly monitors the way in which the
transmission functions. It senses and adapts each gear shift for optimal performance. The system also monitors your
particular driving style and adapts gear shifting accordingly.
Automatic transmission - shift gate positions
You can move the gear selector freely between the (MAN) ual and (D)rive positions while driving.
Depress the selector knob on the front side of the gear selector to move between the R, N, D and P positions.
Please see the following page for information on using the Geartronic manual shift mode.
pg. 77 Automatic transmission (Geartronic)
Manual shifting - Geartronic
You can move the gear selector freely between the (MAN) ual and (D)rive positions while driving. Gears 2, 3, and 4
have a "lock -up" function which reduces engine speed and helps save fuel.
The currently selected gear will be displayed in the instrument panel (see page 23
).
To access the (MAN)ual shifting position from (D)rive, pull the gear selector back slightly from D and move it to
the left to MAN.
To return to the (D)rive position from MAN, move the gear selector to the right and push it forward to the (D)rive
position.
While driving
If you select the (MAN)ual position while driving, the gear that was being used in the (D)rive position will also
initially be selected in (MAN)ual position.
ProCarManuals.com
Page 57 of 109

Move the gear selector forward (toward "+") to shift to a higher gear or rearward (toward "-") to shift to a lower
gear.
If you hold the gear selector toward "-", the transmission will downshift one gear , and will utilize the braking power
of the engine. If the current speed is too high for using a lower gear, the downshift will not occur until the speed has
decreased enough to allow the lower gear to be used.
If you slow down to a very low speed, the transmission will automatically shift down.
When starting in the (MAN)ual position, 3rd gear is the highest gear that may be selected.
NOTE: Kickdown (see previous page) does not function when the transmission is in the manual shift (geartronic)
mode. The gear selector must be in D (Drive) position.
W Winter/Wet driving mode - enhanced vehicle traction
Mode W will only function if the gear selector is in the (D)rive position.
Press the button at the base of the gear selector to engage/disengage this driving mode (see illustration).
An LED in the button will light up to indicate that W is engaged and this will also be displayed in the instrument
panel (see page 25
).
This mode may be selected for starting/moving off on slippery roads.
pg. 78 Driving economy
Economical driving conserves natural resources
Better driving economy may be obtained by thinking ahead, avoiding rapid starts and stops and adjusting the speed of
your vehicle to immediate traffic conditions. Observe the following rules:
Bring the engine to normal operating temperature as soon as possible by driving with a light foot on the accelerator
pedal for the first few minutes of operation. A cold engine uses more fuel and is subject to increased wear.
Whenever possible, avoid using the car for driving short distances. This does not allow the engine to reach normal
operating temperature.
Drive carefully and avoid rapid acceleration and hard braking.
Do not exceed posted speed limits.
Avoid carrying unnecessary items (extra load) in the car.
Maintain correct tire pressure. Check tire pressure regularly (when tires are cold).
Remove snow tires when threat of snow or ice has ended.
Note that roof racks, ski racks, etc., increase air resistance and also fuel consumption.
Avoid using automatic transmission kickdown feature unless necessary.
Avoid using the air conditioning when it is not required. When engaged, the A/C compressor places an additional
load on the engine. However, at higher driving speeds, fuel consumption will be lower with the air conditioning on and
the windows closed than with the air conditioning off and the windows open.
Using the onboard trip computer's fuel consumption modes can help you learn how to drive more economically.
ProCarManuals.com
Page 58 of 109

Other factors that decrease gas mileage are:
Dirty air cleaner
Dirty engine oil and clogged oil filter
Dragging brakes
Incorrect front end alignment
Some of the above mentioned items and others are checked at the standard Maintenance Service intervals.
NOTE : Vehicles equipped with automatic transmissions should use (D)rive as often as possible and avoid using
"kickdown" to help improve fuel economy.
Cooling system
The risk for engine overheating is greatest, especially in hot weather, when:
Towing a trailer up steep inclines for prolonged periods at wide open throttle and low engine rpm.
Stopping the engine suddenly after high speed driving (so-called "after-boiling" can occur).
To avoid overheating, the following rules should be followed:
Do not drive for prolonged periods at engine speeds above 4500 rpm if you are towing a trailer in hilly terrain.
Reduce speed when towing a trailer up long, steep inclines. The risk of overheating can be reduced by switching off
the air conditioning system for a short time.
Do not let the engine idle unnecessarily for prolonged periods.
Do not mount auxiliary lamps in front of the grill.
When the risk of overheating is imminent, or in the event of overheating (the temperature gauge goes repeatedly into,
or stays continually in, the red section), the following precautions should be taken:
Switch off the air conditioning system.
Pull off the road, away from traffic, stop the car and put the gear selector into Park. Do not stop the engine!
Switch the heater to full (maximum) position. Increase the engine speed to approx. 2000 rpm (twice idling speed)
until the temperature begins to drop.
If the warning light in the center of the instrument panel is red, and the message "Coolant level lo stop engine" is
displayed, switch off the engine as soon as possible.
WARNING!
Do not remove coolant expansion tank cap. The coolant will be extremely hot.
If necessary, see page 116
for information on checking and topping-up the coolant level.
Contents | Top of Page
ProCarManuals.com
Page 60 of 109

tread, these strips become visible and indicate that the tire should be replaced.
Tires with less than 1/16" (1.6 mm) tread have a very poor grip in rain
or snow.
When replacing worn tires, it is recommended that the tire be identical in type (radial) and size as the one being
replaced. Using a tire of the same make (manufacturer) will prevent alteration of the driving characteristics of the
vehicle.
To improve tire economy:
Maintain correct tire pressure. See the tire pressure label on the inside of the fuel filler door.
Drive smoothly: avoid fast starts, hard braking and tire screeching.
Tire wear increases with speed.
Correct front wheel alignment is very important.
Unbalanced wheels impair tire economy and driving comfort.
Volvo recommends rotating the tires every 7,500 miles (12,000 km). Tires should be rotated front -to-back/back-to-
front only. Tires must maintain the same direction of rotation throughout their lifetime, and should never be rotated
from one side of the vehicle to the other.
Hitting curbs or potholes can damage the tires and/or wheels permanently.
Flat spots
All tires become warm during use. After cooling, when the vehicle is parked, the tires have a tendency to distort
slightly, forming flat spots. These flat spots can cause vibrations similar to the vibrations caused by unbalanced wheels.
They do, however, disappear when the tire warms up. The degree to which flat spots form depends on the type of cord
used in the tire. In cold weather, it takes longer for the tire to warm up and consequently longer for the flat spot to
disappear.
CAUTION:
The car must not be driven with wheels of different dimensions or with a spare tire other than the one that came with
the car. The use of different size wheels can seriously damage your car's transmission.
pg. 93 Wheels and tires
Snow chains
Snow chains can be used on your Volvo with the following restrictions:
Snow chains should be installed on front wheels only. Use only Volvo approved snow chains.
Special snow chains must be mounted on 215/55 R16, 225/55 R16 and 225/50 R17 tires. Consult your Volvo
retailer.
If accessory, aftermarket or "custom" tires and wheels are installed and are of a size different than the original tires
and wheels, chains in some cases CANNOT be used. Sufficient clearances between chains and brakes, suspension and
body components must be maintained.
Some strap -on type chains will interfere with brake components and therefore CANNOT be used.
Consult your Volvo retailer for additional snow chain information.
CAUTION:
Check local regulations regarding the use of snow chains before installing.
Always follow the chain manufacturer's installation instructions carefully. Install chains as tightly as possible and
retighten periodically.
Never exceed the chain manufacturer's specified maximum speed limit. (Under no circumstances should that limit
be higher than
ProCarManuals.com
Page 62 of 109

The tires on your Volvo will perform to specifications at all normal loads when inflated as recommended on the tire
information label located on the inside of the fuel filler door*. This label lists both tire and vehicle design limits. Do
not load your car beyond the load limits indicated.
Temporary Spare (certain models)
The spare tire in your car is called a "Temporary Spare". It has the following designation: T125/80 R17.
Recommended tire pressure (see decal on fuel filler door) should be maintained irrespective of which position on the
car the Temporary Spare tire is used on.
In the event of damage to this tire, a new one can be purchased from your Volvo retailer.
WARNING!
Current legislation prohibits the use of the "Temporary Spare" tire other than as a temporary replacement for a
punctured tire. In other words, it must be replaced as soon as possible by a standard tire. Road holding and handling
may be affected with the "Temporary Spare" in use. Do not exceed 50 mph (80 km/h). Do not drive farther than 50
miles (80 km) on a temporary spare tire.
CAUTION:
The car must not be driven with wheels of different dimensions or with a spare tire other than the one that came with
the car. The use of different size wheels can seriously damage your car's transmission.
NOTE: Certain models may be equipped with a full-size spare tire. When used, it should be inflated to the same
pressure as the tire it is replacing.
* Please note that the tire information label indicates pressure for both comfort and fuel economy.
pg. 95 Wheels and tires
Uniform tire quality grading
ALL PASSENGER CAR TIRES MUST CONFORM TO FEDERAL SAFETY REQUIREMENTS IN
ADDITION TO THESE GRADES
Quality grades can be found, where applicable, on the tire sidewall between the tread should and maximum section
width. For example:
Treadwear 200 Traction AA Temperature A
TREADWEAR
The treadwear grade is a comparative rating based on the wear rate of the tire when tested under controlled conditions
on a specified government test course. For example, a tire graded 150 would wear one and one half (1 1/2) times as
well on the government course as a tire graded 100. The relative performance of tires depends upon the actual
conditions of their use, however, and many depart significantly from the norm due to variation in driving habits,
service practices and differences in road characteristics and climate.
TRACTION
The traction grades, from highest to lowest, are AA, A, B, and C, as measured under controlled conditions on specified
government test surfaces of asphalt and concrete. A tire marked C may have poor traction performance.
WARNING!
The traction grade assigned to this tire is based on braking (straight-ahead) traction tests and does not include
ProCarManuals.com
Page 65 of 109

Install the wheel bolts and tighten handtight. use the lug wrench, tighten crosswise(see illustration above) until all
bolts are snug.
Lower the vehicle to the ground and alternately tighten the bolts crosswise to 100 ft. lbs. (136 Nm).
Install the wheel cap (where applicable).
WARNING!
The jack must correctly engage the bar in the jack attachment (A). The car's weight must not rest on the jack
attachment (B). See illustration on page 96
.
Be sure the jack is on a firm, level, non-slippery surface.
Never allow any part of your body to be extended under a car supported by a jack.
Use the jack intended for the car when replacing a wheel. For any other job, use stands to support the side of the
car being worked on.
Apply the parking brake and put the gear selector in the (P)ark position.
Block the wheels standing on the ground, use rigid wooden blocks or large stones.
The jack should be kept well-greased.
CAUTION:
The car must not be driven with wheels of different dimensions or with a spare tire other than the one that came
with the car. The use of different size wheels can seriously damage your car's transmission.
Correct tightening torque on wheel bolts must be observed. The wheel bolts should never be greased or lubricated.
The extended, chromed wheel bolts must not be used with steel rims, as they make it impossible to fit the hub caps.
pg. 94
This page intentionally left blank.
Contents | Top of Page
ProCarManuals.com