Page 1046 of 1574
CLUTCH 5C-11
5. Unscrew the bolts and remove the clutch cover, pressure
plate and clutch disc. NoticeBe careful not to drop the pressure plate and clutch disc.Installation Notice
Tightening Torque 21 - 27 Nm
6. Installation should follow the removal procedure in the reverse order. Notice
� Before installation, clean oil and grease on the flywheel surface.
� Do not clean the clutch disc and release bearing insolvent.
Page 1140 of 1574

TRANSFER CASE (TOD) 5D2-51
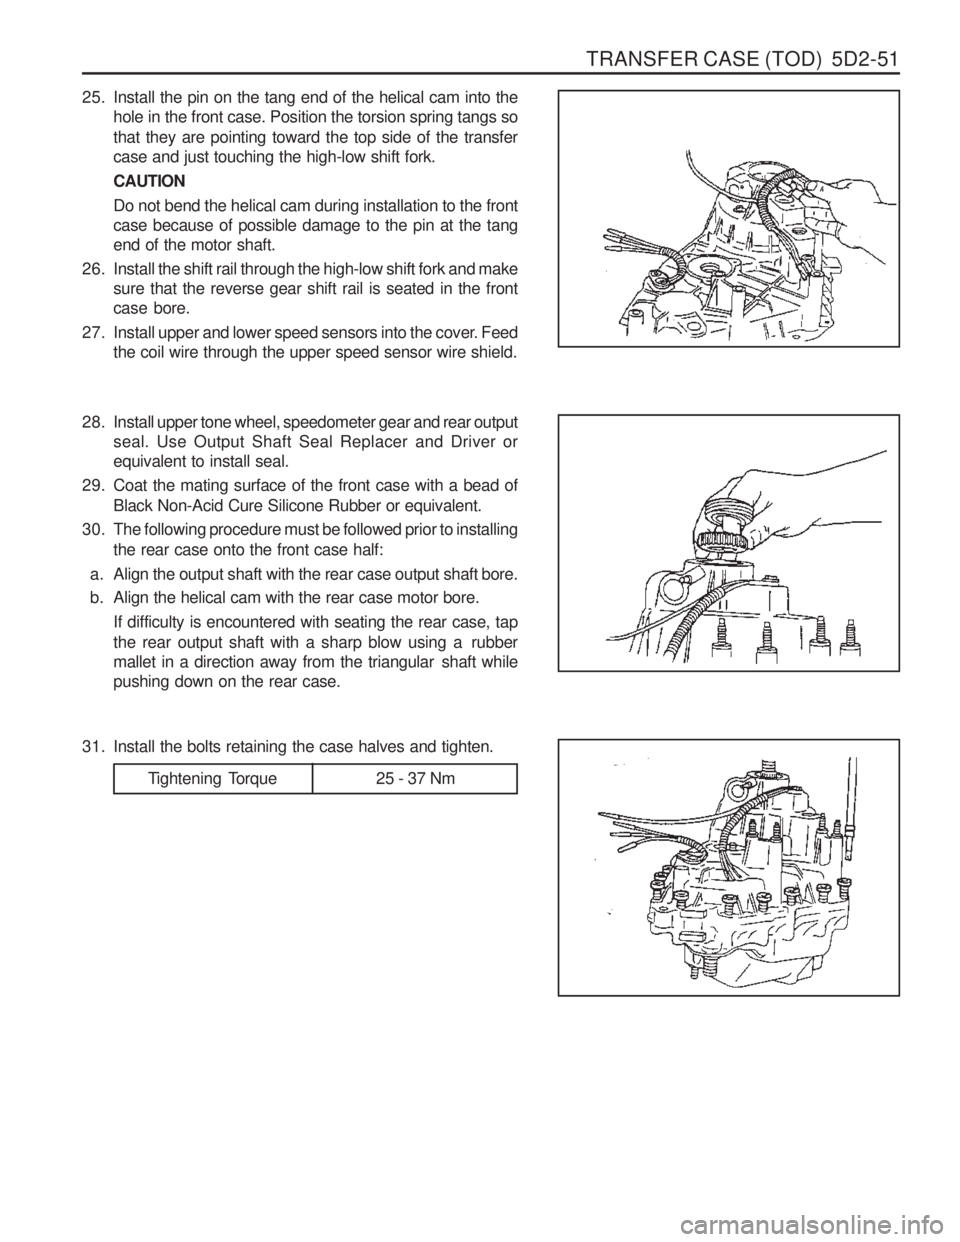
25. Install the pin on the tang end of the helical cam into thehole in the front case. Position the torsion spring tangs so that they are pointing toward the top side of the transfer case and just touching the high-low shift fork. CAUTIONDo not bend the helical cam during installation to the front case because of possible damage to the pin at the tangend of the motor shaft.
26. Install the shift rail through the high-low shift fork and make sure that the reverse gear shift rail is seated in the frontcase bore.
27. Install upper and lower speed sensors into the cover. Feed the coil wire through the upper speed sensor wire shield.
2 8. Install upper tone wheel, speedometer gear and rear output seal. Use Output Shaft Seal Replacer and Driver orequivalent to install seal.
29. Coat the mating surface of the front case with a bead of Black Non-Acid Cure Silicone Rubber or equivalent.
30. The following procedure must be followed prior to installing the rear case onto the front case half:
a. Align the output shaft with the rear case output shaft bore.
b. Align the helical cam with the rear case motor bore. If difficulty is encountered with seating the rear case, tap
the rear output shaft with a sharp blow using a rubber
mallet in a direction away from the triangular shaft whilepushing down on the rear case.
Tightening Torque 25 - 37 Nm
31. Install the bolts retaining the case halves and tighten.
Page 1155 of 1574
6E-4 STEERING WHEEL AND COLUMN
6. Disconnect each connectors.
7. Remove the vacuum hose from the ignition switch(Dieselonly) .
9. Remove the lower shaft by removing the bolt of the steering column shaft. Installation Notice
Tightening Torque 9 - 14 Nm
8. Remove the combination switch assembly.
10. Remove the dash panel mounting bolts. Installation Notice
Tightening Torque 30 - 40 Nm
Page 1156 of 1574
STEERING WHEEL AND COLUMN 6E-5
Tightening Torque 30 - 40 Nm
11. Remove the steering column upper mounting bolt and pull
out steering column assembly. Installation Notice
12. Installation is reverse order of the removal.
Page 1198 of 1574
8B-18 SUPPLEMENTAL RESTRAINT SYSTEM(SRS)
MAINTENANCE AND REPAIR ON-VEHICLE SERVICE AIR BAG MODULE Removal & Installation Procedure
1. Remove the steering wheel rid (LH,RH) with a screwdriver.Installation Notice Each position mark (LH,RH) is stamped on the inner surface of the rids.
Tightening Torque 7 - 11 Nm
3. Disconnect the connectors and remove the air bag module.
4. Installation should follow the removal procedure in thereverse order.
2. Unscrew the bolts from both sides.
Installation Notice
Page:
< prev 1-8 9-16 17-24