Page 132 of 177

17-02-2003
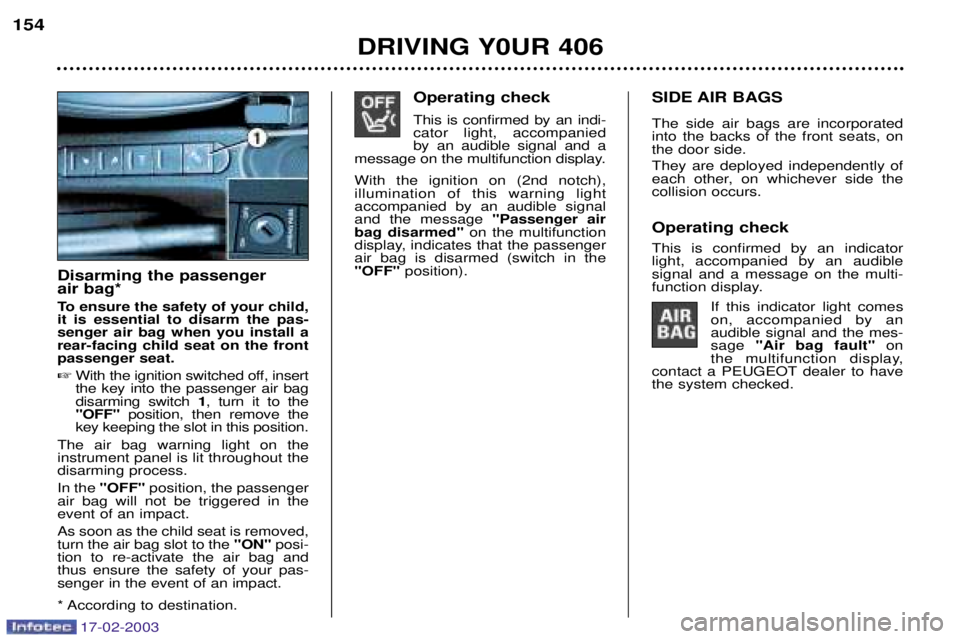
Operating check This is confirmed by an indi- cator light, accompanied by an audible signal and a
message on the multifunction display. With the ignition on (2nd notch), illumination of this warning lightaccompanied by an audible signaland the message "Passenger air
bag disarmed" on the multifunction
display, indicates that the passengerair bag is disarmed (switch in the"OFF" position).
DRIVING Y0UR 406
154
Disarming the passenger air bag*
To ensure the safety of your child, it is essential to disarm the pas-senger air bag when you install arear-facing child seat on the frontpassenger seat. �With the ignition switched off, insert the key into the passenger air bagdisarming switch 1, turn it to the
"OFF" position, then remove the
key keeping the slot in this position.
The air bag warning light on theinstrument panel is lit throughout thedisarming process. In the "OFF" position, the passenger
air bag will not be triggered in the event of an impact. As soon as the child seat is removed, turn the air bag slot to the "ON"posi-
tion to re-activate the air bag andthus ensure the safety of your pas-senger in the event of an impact.
* According to destination. SIDE AIR BAGS The side air bags are incorporated into the backs of the front seats, onthe door side. They are deployed independently of
each other, on whichever side thecollision occurs. Operating check This is confirmed by an indicator light, accompanied by an audiblesignal and a message on the multi-
function display.
If this indicator light comeson, accompanied by anaudible signal and the mes-sage "Air bag fault" on
the multifunction display,
contact a PEUGEOT dealer to havethe system checked.
Page 140 of 177

17-02-2003
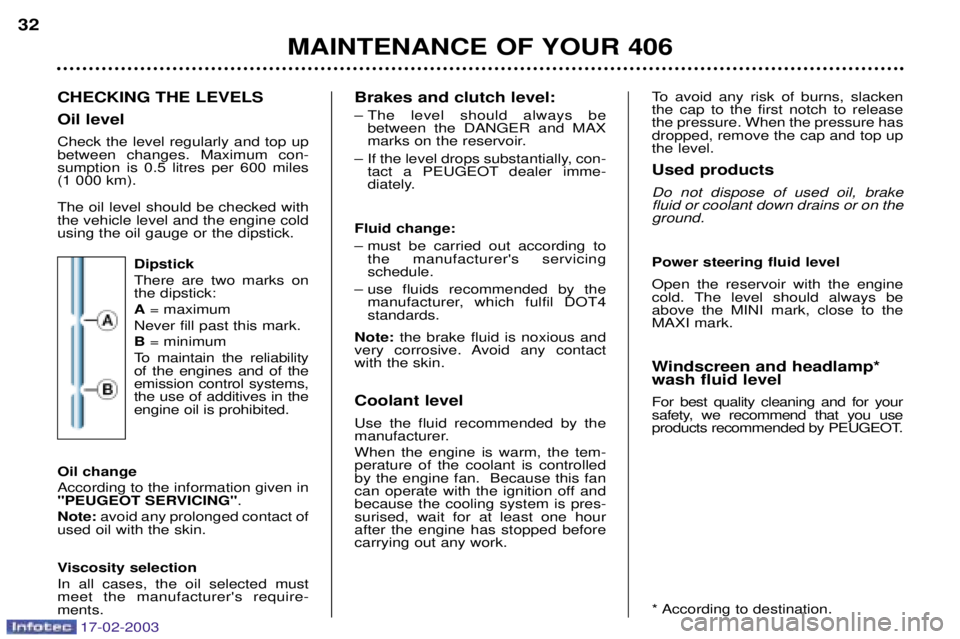
CHECKING THE LEVELS Oil levelCheck the level regularly and top up between changes. Maximum con-sumption is 0.5 litres per 600 miles(1 000 km). The oil level should be checked with the vehicle level and the engine coldusing the oil gauge or the dipstick.Dipstick There are two marks on the dipstick: A= maximum
Never fill past this mark.B = minimum
To maintain the reliability of the engines and of theemission control systems,the use of additives in theengine oil is prohibited.
Oil change According to the information given in
"PEUGEOT SERVICING" .
Note: avoid any prolonged contact of
used oil with the skin.
Viscosity selection In all cases, the oil selected must meet the manufacturer's require-ments.
MAINTENANCE OF YOUR 406
32
Brakes and clutch level:
Ð The level should always be
between the DANGER and MAX
marks on the reservoir.
Ð If the level drops substantially, con- tact a PEUGEOT dealer imme-
diately.
Fluid change:
Ð must be carried out according to the manufacturer's servicing schedule.
Ð use fluids recommended by the manufacturer, which fulfil DOT4standards.
Note: the brake fluid is noxious and
very corrosive. Avoid any contactwith the skin. Coolant level Use the fluid recommended by the
manufacturer. When the engine is warm, the tem- perature of the coolant is controlledby the engine fan. Because this fan
can operate with the ignition off andbecause the cooling system is pres-surised, wait for at least one hourafter the engine has stopped beforecarrying out any work. To avoid any risk of burns, slackenthe cap to the first notch to releasethe pressure. When the pressure hasdropped, remove the cap and top upthe level. Used products Do not dispose of used oil, brake fluid or coolant down drains or on theground. Power steering fluid level Open the reservoir with the engine
cold. The level should always beabove the MINI mark, close to theMAXI mark.
Windscreen and headlamp* wash fluid level For best quality cleaning and for your
safety, we recommend that you use
products recommended by PEUGEOT.
* According to destination.
Page 143 of 177

17-02-2003
MAINTENANCE OF YOUR 406
34
CHANGING A WHEEL Access to the spare wheel and jack Saloon:
lift the boot carpet using the
lifting hook. Secure the hook behind the boot seal. Estate: unscrew the two carpet
retaining screws a quarter turn using the ignition key or a coin. Lift the car-pet and secure the retaining hookbehind the tailgate seal. 7-seater estate: fold back the third
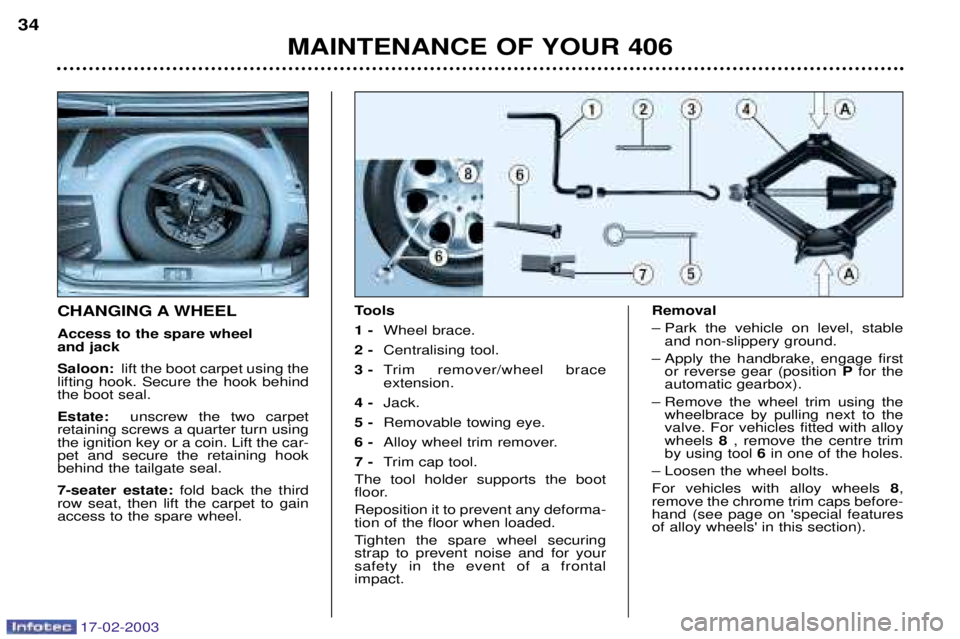
row seat, then lift the carpet to gain access to the spare wheel. Tools 1 -
Wheel brace.
2 - Centralising tool.
3 - Trim remover/wheel brace extension.
4 - Jack.
5 - Removable towing eye.
6 - Alloy wheel trim remover.
7 - Trim cap tool.
The tool holder supports the boot
floor. Reposition it to prevent any deforma- tion of the floor when loaded.
Tighten the spare wheel securing strap to prevent noise and for yoursafety in the event of a frontalimpact. Removal
Ð Park the vehicle on level, stable
and non-slippery ground.
Ð Apply the handbrake, engage first or reverse gear (position Pfor the
automatic gearbox).
Ð Remove the wheel trim using the wheelbrace by pulling next to the valve. For vehicles fitted with alloywheels 8, remove the centre trim
by using tool 6in one of the holes.
Ð Loosen the wheel bolts. For vehicles with alloy wheels 8,
remove the chrome trim caps before-
hand (see page on 'special featuresof alloy wheels' in this section).
Page 150 of 177
17-02-2003
Rear lights, estate
Wing lights
To remove the trim, pull the handle towards you and release the panelupwards.Open the flap using the ignition key. Remove the connector by pressing the metal bar
A.
Unscrew the wing nut B.
Release the light. To gain access to the bulbs, press
the tabs and release the bulb holder.
1 - Brake/side lights (P 21/5 W).
2 - Direction indicators (P 21 W). Change the faulty bulb.
MAINTENANCE OF YOUR 406
39
Page 154 of 177
17-02-2003
Fuse N¡ RatingFunctions
11* 10 ALeft hand main beam.
12* 10 A Right hand main beam.
13* 15 AHorn.
14 10 AFront and rear screen wash pump.
15* 30 A Ignition coil - Windscreen wiper - Oxygen sensor - Oil pressure - Injection system.
16* 30 A Air pump - Oil temperature - Oil level - Brake lights operation - Alternator - Water in diesel
detector - Injection relay control.
17* 30 A Passenger's electric seat.
18 40 A Heater blower - Starter - Windscreen wiper slow speed.
MAINTENANCE OF YOUR 406 45
Page 157 of 177
17-02-2003
Fuse N¡ RatingFunctions
1 shuntCentral air bag.
25 AVentilation controls.
3 10 A Instrument panel.
45 AIgnition +ve signal for Built-in Systems Interface.
5Ð Not used.
6 10 ASteering wheel stalk.
7 15 AAlarm siren.
8 10 ASatellite navigation system.
95 ABattery +ve signal for Built-in Systems Interface.
10 15 A Audio equipment.
11 10 AThird brake light.
12 10 A Right-hand brake light.
13 20 ADriver's electric window.
14 30 ARear window power.
15 ÐBattery +ve towing socket.
16 20 AMemorisation of seats.
17 20 APassenger's electric seat.
18 10 A Lighter lighting - Display - Lighting for switches and ash tray, automatic gearbox selector lever.
Fascia fuse box
MAINTENANCE OF YOUR 406
42
Page 159 of 177

17-02-2003
BATTERY
To charge the battery using a battery charger:
Ð Disconnect the battery,
Ð Follow the instructions for use given by the battery charger manufacturer,
Ð Reconnect starting with the negative (Ð) terminal,
Ð Check that the terminals and connectors are clean. If they are covered with sul-phate (white or greenish deposit), disconnect them and clean them.
To start the vehicle from another battery:
Ð Connect the red cable to the positive (+) terminals of the two batteries,
Ð Connect one end of the green or black cable to the negative (Ð) terminal of the slave battery,
Ð Connect the other end of the green or black cable to an earth point on the bro- ken down vehicle, as far as possible from the battery,
Operate the starter, let the engine run.
Wait for the engine to return to idle, then disconnect the cables.
Ð Never disconnect a terminal when the engine is running.
Ð Never charge a battery without first disconnecting the terminals.
Ð Close the sunroof before disconnecting the battery. If it does not operate normally following re-connection of the battery, you must
re-initialise it by turning the control to the maximum tilt position and pressing it for a few seconds.
Ð After every reconnection of the battery, switch on the ignition and wait 1 minute before starting to allow the electronic systems to be initialised. Ifslight difficulties are experienced after this, please contact a PEUGEOT deal-
er.
It is advisable to disconnect the battery if the vehicle
is not to be used for a period of more than one month.
Economy mode
With the engine switched off and the ignition key in the "running" or"accessories" position for about half
an hour, certain electrical equipment(displays, instrument panel, warninglights, courtesy lights, electric win-
dows, wipers etc.) will switch offautomatically to avoid draining the
battery. Once the electrical equipment goes into economy mode, it is necessaryto start the engine to enable theequipment to work again.
MAINTENANCE OF YOUR 406
46