2003 Peugeot 206 SW Dag ESP
[x] Cancel search: ESPPage 54 of 168
26-05-2003
PTY function: Audio RD3 This allows you to listen to stations broadcasting a specific type of programme (news, culture, sport, rock etc.).With FMselected, press the "TA"button for more than two seconds to switch this function on or off.
To search for a PTYprogramme:
Ð select the PTYfunction,
Ð briefly press button Lor Nto scroll down the list of the various types of programmes offered,
Ð when the programme of your choice is displayed, keep button Lor Npressed for more than
two seconds to carry out an automatic search (after an automatic search the PTYfunction is
switched off).
In PTY mode the different types of programmes can be stored in the memory. To do this, press the preselection buttons
"1" to "6" for more than two seconds. Briefly press the corresponding button to recall the type of programme stored in
the memory.
EON system: Audio RD3
This connects stations which are part of the same network. It enables the broadcast of traffic information, by a station that is part of the same network as the station to which you are listening. This service is available when you have selected the TAtraffic information programme or the PTYfunction.
YOUR 206 IN DETAIL 51
Page 74 of 168
26-05-2003
YOUR 206 IN DETAIL73
5. Air distribution
Pressing this button sever- al times in successionenables the air flow to bedirected in turn towards:
Ð the windscreen (de-icing or demisting),
Ð the windscreen and the footwells,
Ð the footwells,
Ð the centre and side vents and the footwells,
Ð the centre and side vents.
7. Air intake
Press this button for recircu-
lation of the interior air.Recirculation, shown on the
display, enables the passen-
ger compartment to be insulated fromexterior odours and smoke.
Avoid prolonged recirculation of interi-
or air. To do this, press the buttonagain to resume automatic manage-
ment of the intake of air. Note: To prevent condensation on the
inside of the vehicle in cold or wet
weather, you are advised to avoidusing this mode.
4. Air conditioning
Press this button to switch
off the air conditioning. Thesymbol ECOis displayed.
Automatic operation of the
air conditioning is resumed when the
button is pressed again. The symbolA/C is displayed. 8. Switching the system off
The OFF button enables
the entire system to be
switched off.
Temperature-related com-
fort is no longer guaranteed.Pressing the OFF, AUTO , or visi-
bility button again reactivates the
system with the values set before it
was switched off.
9. Demisting the rear screen Press this button to demistthe rear screen and themirrors. Demisting switches
off automatically. It is pos-
sible to stop operation of the
demisting before it is switched offautomatically by pressing the buttonagain. Important precaution Operate the air conditioning for 5 to 10 minutes, once or twice a month,
to keep it in good working order. If the system does not produce cold
air, do not use it and contact your
PEUGEOT dealer.
Manual operation
If you wish, you can make a different
choice from that offered by the sys-
tem by changing a setting. The otherfunctions will still be controlled auto-
matically. Pressing the
AUTObutton
returns the system to completelyautomatic operation.
6. Air flowThe flow of air can beincreased or reducedby pressing buttons+or Ðrespectively.
Notes It is quite normal that the condensa- tion created by the air conditioningresults in a flow of water under the
vehicle when it is stationary.
To prevent condensation on the inside of the vehicle in cold or wet
weather, you are advised to avoidusing the ECOmode.
Page 81 of 168
26-05-2003
YOUR 206 IN DETAIL79
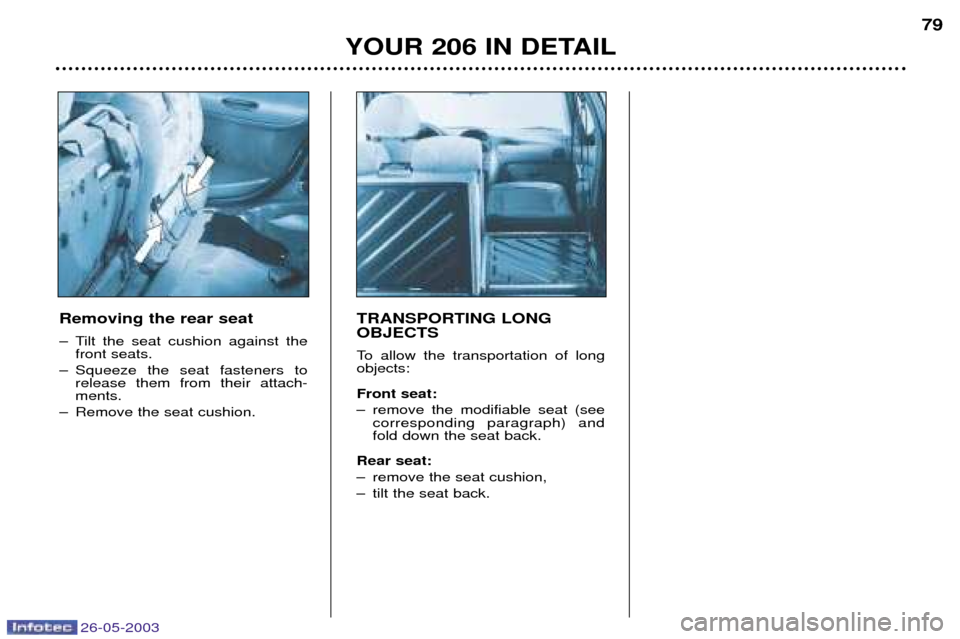
Removing the rear seat
Ð Tilt the seat cushion against the front seats.
Ð Squeeze the seat fasteners to release them from their attach- ments.
Ð Remove the seat cushion. TRANSPORTING LONG OBJECTS
To allow the transportation of long objects: Front seat:
Ð remove the modifiable seat (see
corresponding paragraph) and fold down the seat back.
Rear seat:
Ð remove the seat cushion,
Ð tilt the seat back.
Page 83 of 168

26-05-2003
YOUR 206 IN DETAIL81
"ISOFIX" MOUNTINGS The front passenger seat, the two rear side seats (saloon and 206 SW)and the one third section of the rearseat (206 RC) are fitted with ISOFIX
mountings . These are two rings
located between the seat back andthe seat cushion. The ISOFIX child seats are fitted
with two locks which are secured
easily on these rings. All this guar-antees reliable, safe and fast fitting. The ISOFIX child seat approved for
PEUGEOT vehicles and sold by
PEUGEOT dealers is the
Isofix
KIDDY* child seat. It can be fitted in
the "rear facing" position from birthto 13 kg and in the "forwards facing"position from 9 to 18 kg. In the front, in the "rear facing" posi- tion, the front passenger seat mustbe moved as far forward as possibleso that the body of the child seat isin contact with or as close as possi-ble to the fascia.
In the rear, in the "forwards facing"
position, in the saloon and 206 SW,it is imperative that the front passen-ger seat is in the mid-way position
on the runner, seat back upright. Inthe 206 RC, the body of the childseat must be in the most uprightposition. Refer to the child seat'sinstallation guide for this setting. In the rear, in the "rear facing" posi-tion, the body of the child seat mustbe in contact with the back of thecorresponding front seat. This seat can also be used on seats not fitted with ISOFIX mountings. Inthis case it is compulsory to attach itto the vehicle's seat by means of thethree-point seat belt for both the"rear facing" and "forwards facing"positions. Refer to the "Summary table for fitting child seats".
When the ISOFIX KIDDY seat is fitted in the "rear facing" positionon the front passenger seat, it isessential to disarm the passengerair bag. Otherwise, the child would risk being killed or seriously injured ifthe air bag were to inflate. Follow the instructions for fitting the child seat in the seat manu-facturer's instruction booklet.
* You can only fit ISOFIX child seats
approved by PEUGEOT and sold
by PEUGEOT dealers on yourvehicle's ISOFIX mountings.
Page 106 of 168
26-05-2003
YOUR 206 IN DETAIL
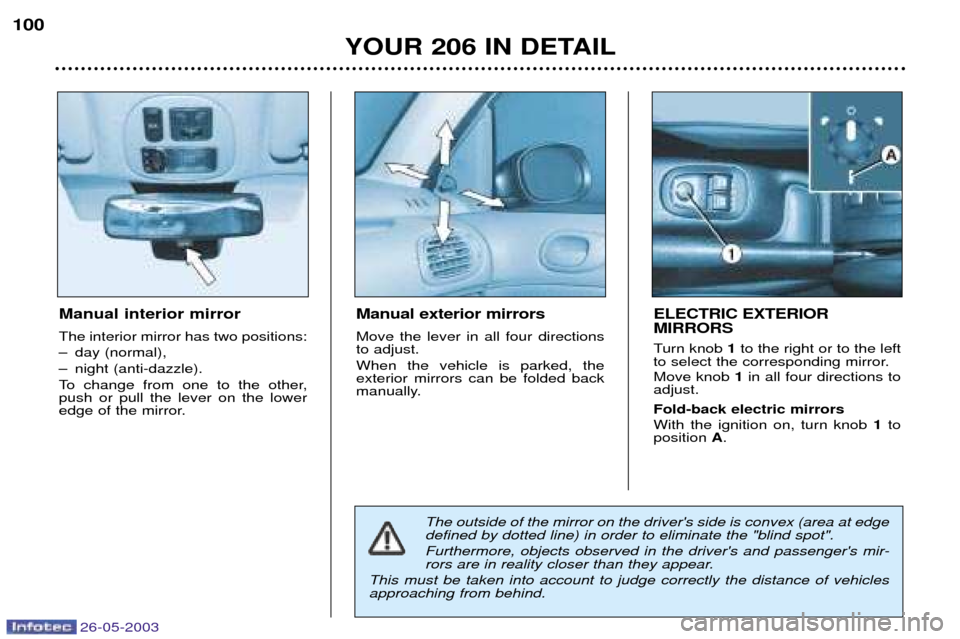
Manual interior mirror The interior mirror has two positions:
Ð day (normal),
Ð night (anti-dazzle).
To change from one to the other, push or pull the lever on the lower
edge of the mirror.Manual exterior mirrors Move the lever in all four directions to adjust. When the vehicle is parked, the exterior mirrors can be folded back
manually.
ELECTRIC EXTERIOR MIRRORS
Turn knob
1to the right or to the left
to select the corresponding mirror. Move knob 1in all four directions to
adjust. Fold-back electric mirrors With the ignition on, turn knob 1to
position A.
The outside of the mirror on the driver's side is convex (area at edge defined by dotted line) in order to eliminate the "blind spot". Furthermore, objects observed in the driver's and passenger's mir-
rors are in reality closer than they appear.
This must be taken into account to judge correctly the distance of vehiclesapproaching from behind.
100
Page 107 of 168
26-05-2003
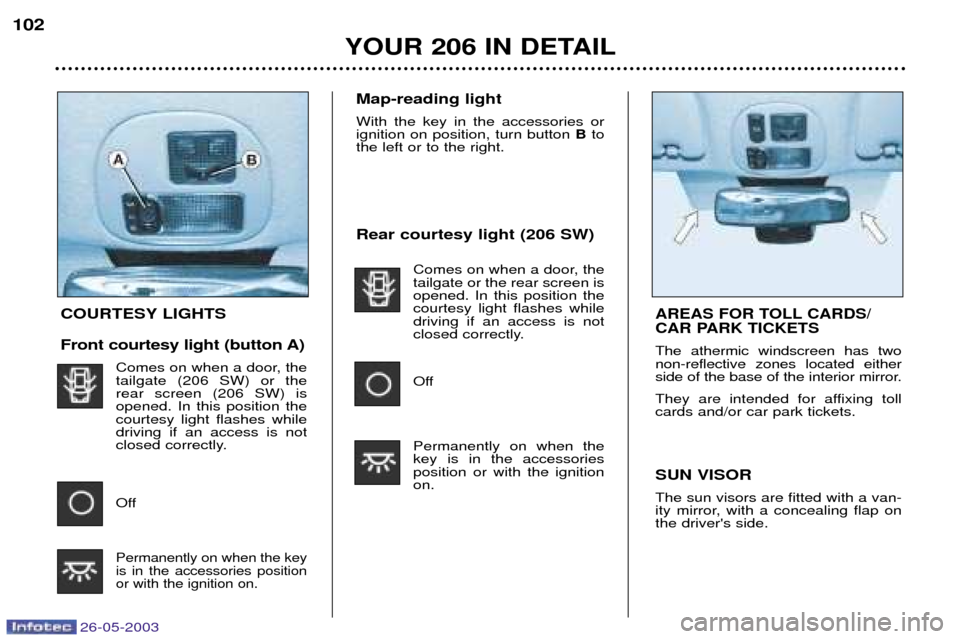
Rear courtesy light (206 SW)Comes on when a door, the tailgate or the rear screen isopened. In this position thecourtesy light flashes whiledriving if an access is not
closed correctly.
Off Permanently on when the key is in the accessoriesposition or with the ignitionon.
YOUR 206 IN DETAIL
102
COURTESY LIGHTS
Front courtesy light (button A)Comes on when a door, the tailgate (206 SW) or therear screen (206 SW) isopened. In this position thecourtesy light flashes whiledriving if an access is not
closed correctly.
Off
Permanently on when the key is in the accessories positionor with the ignition on.
SUN VISOR The sun visors are fitted with a van-
ity mirror, with a concealing flap onthe driver's side.
AREAS FOR TOLL CARDS/
CAR PARK TICKETS
The athermic windscreen has two non-reflective zones located either
side of the base of the interior mirror.
They are intended for affixing toll cards and/or car park tickets.
Map-reading light With the key in the accessories or ignition on position, turn button Bto
the left or to the right.
Page 112 of 168

26-05-2003
YOUR 206 IN DETAIL
107
BOOT LAYOUT (206 SW)
1. Grab handles and coat hooks
2. Coat hooksThere are six hooks to accommodate coats.
3. High load retaining net fastenings The high load retaining net can be installed behind the front seats or behind the rear seat. Open the covers of the corresponding upper fastenings.
Install one end of the metal bar in one of the two fastenings, compress the bar, then install the other end and release.
Secure the two net strap hooks behind the front seats, with the rear seat folded down, or in the stowing rings on the floor.The rings are located directly below the corresponding upper fastenings.Pull the two straps taut.
4. Hooks
There are two side hooks on which to hang light bags.
5. 12 V Socket for accessories This is a 12 volt socket (lighter type) installed on the the rear left trim and supplied from the accessories position(1st notch).
6. Storage nets There are two nets (which cannot be removed) which can contain the luggage retaining net, a first aid kit etc.
7. Retaining straps There are two straps for securing various objects: cans etc.
8. Load space cover Note: release the rear seat back to make installation and removal of the load space cover easier.
To install it: Ð position one end of the roller in one of the two supports, Ð compress the opposite end of the roller and position it,Ð release it to allow it to engage,Ð unroll the cover as far as the boot pillars,Ð insert the cover guides in the rails in the pillars.
To remove it: Ð remove the cover guides from the pillar rails,
Ð return the cover into its roller, compress it and remove it from its support.
9. Stowing rings There are eight stowing rings for securing the luggage retaining net: four on the rear seat back and four on the boot floor(two of which are under the carpet, at the far end of the boot).
Warning triangle The tailgate has a location intended for a warning triangle.
Page 116 of 168
26-05-2003
YOUR 206 IN DETAIL
111
Operating programmes
You have a choice of three operating programmes:
Ð Autoadaptive (normal)
Ð Sport
Ð SnowOne press on button Aor Bwill
select Sport or Snow respectively. The selection is displayed on theinstrument panel. Pressing the but-ton a second time will return to theautoadaptive (normal) programme. Autoadaptive programme (normal)Gear changes are carried out on the basis of various parameters, suchas:
Ð driving style,
Ð road characteristics,
Ð vehicle load.The gearbox selects the most suit- able programme from those in thememory for the current driving con-ditions. Sport programme The Sport programme automatically favours more dynamic driving. Snow Programme In position
D, the Snow programme
provides smooth driving suited to slippery roads in order to improve
traction and stability. Starting is in2nd gear and changing down is at
low engine speeds. Special operating features
Ð During prolonged braking, the gearbox changes down automati-
cally, so as to provide efficientengine braking.
Ð If you take your foot off the accel- erator suddenly (when you aretaken by surprise, for example),the gearbox will not change up, so
as to improve safety.
Ð When the engine is cold, the gear- box automatically selects a spe-cial programme that enables theengine to reach its ideal tempera-ture more quickly in order todecrease pollution.
Kickdown For immediate maximum accelera-
tion without touching the gear lever,press the accelerator pedal down as
far as it will go. The gearbox willchange down automatically or stayin the gear selected, up to maximumengine speed.Any disruption of the sys- tem is signalled by thesimultaneous flashing ofthe Sport and Snow
lights on the instrument panel. Insuch a case, the gearbox will oper-
ate in downgrade mode. You mayfeel a substantial knock whenreverse is selected from Pto Ror
N to R(without any risk of damage
to the gearbox). Do not exceed 60 mph (100km/h).Contact a PEUGEOT dealer with-
out delay. When the engine is idling with the
car in gear, the car will move evenwithout you accelerating. Do not accelerate while a gear is being selected, when the vehicle is
stationary.
When stationary, have your foot on the brake pedal when selecting a
gear. Do not accelerate in gear with the brakes on. If work needs to be done with the engine running, apply the hand-brake and select position P.
Do not change down to brake onslippery roads. Never select position Nwhen the
vehicle is moving.Never engage Por Runless the
vehicle is stationary.Do not leave children inside the vehicle unsupervised when theengine is running.