Page 70 of 131
30-06-2003
YOUR 206 CC IN DETAIL71
SEAT BELTS
To lock the seat belts Pull the strap, then insert the buckle into the stalk.Pre-tensioning and force-limitingfront seat belts Safety in the event of a frontal impact has been improved by theintroduction of pre-tensioning andforce-limiting front seat belts.Depending on the seriousness ofthe impact, the pre-tensioning sys-tem instantly tightens the seat beltsfirmly against the body of the occu-pant. The pre-tensioning seat belts are armed when the ignition is on. The force-limiting device reduces the pressure of the seat belt againstthe occupant's body in the event ofan accident. Rear seat belts The rear seats are fitted with two three-point inertia reel seat belts.
To be effective, a seat belt must be tightened as closeto the body as possible. Depending on the nature
and the seriousness of the impact, the pre-tensioners may be trig-gered before and independently oftriggering of the air bags. In all cases, the air bag warning light on the instrument panelcomes on. Following a collision, have the sys- tem checked by a PEUGEOT
dealer.
Page 71 of 131

30-06-2003
YOUR 206 CC IN DETAIL
72
Changing the battery of the remote control
Warning that the battery is flat is given by an audible signal accompa-nied by the message
''Remote
control battery low'' on the multi-
function display.
To replace the battery, remove the screw then unclip the casing using acoin at the ring (CR 2016/3 volt battery). If the remote control does not work after the battery has been changed,reprogramme the remote control.
THE KEYS The keys allow you to
independent-
ly operate the locks on the doors,
the tailgate (opening), the fuel filler cap, the steering lock, the glove boxand the passenger air bag disarmingcontrol and to switch on the ignition. Central locking From the driver's door the keys allow you:
Ðto lock or unlock the doors and tail-
gate simultaneously,
Ð to unlock simultaneously just thedoors.
Unlocking the boot is possible
only by using the boot key. If one of the doors is open, the cen- tral locking does not work. The remote control This fulfils the same functions as the
key, at a distance. Locking Pressing button
Alocks the vehicle
by remote control. This is displayed by the continuouslighting of the direction indicators forapproximately two seconds. Unlocking Pressing button Bunlocks just the
doors. This is shown by the rapid flashingof the direction indicators. Notes: if the vehicle is locked and
the unlocking control is pressed inadvertently without the doorsbeing opened within 30 seconds, the
vehicle will lock again automatically.
Avoid pressing the buttons of your remote control out of range of your
vehicle. You risk causing it not towork and the remote control wouldhave to be reprogrammed.
Key in ignition
A buzzer sounds on opening the dri-
ver's door, if the key has been left inthe ignition. Locating your car
To locate your car in a car park, if you have locked it: �
press button A, the courtesy light
comes on and the direction indi- cators flash for a few seconds.Programming the remote control � Switch off the ignition.
� Switch the ignition on again.
� Press button Aimmediately.
� Switch off the ignition and remove the remote control key from the
ignition lock. The remote control isnow working again.
Page 74 of 131
30-06-2003
YOUR 206 CC IN DETAIL
74
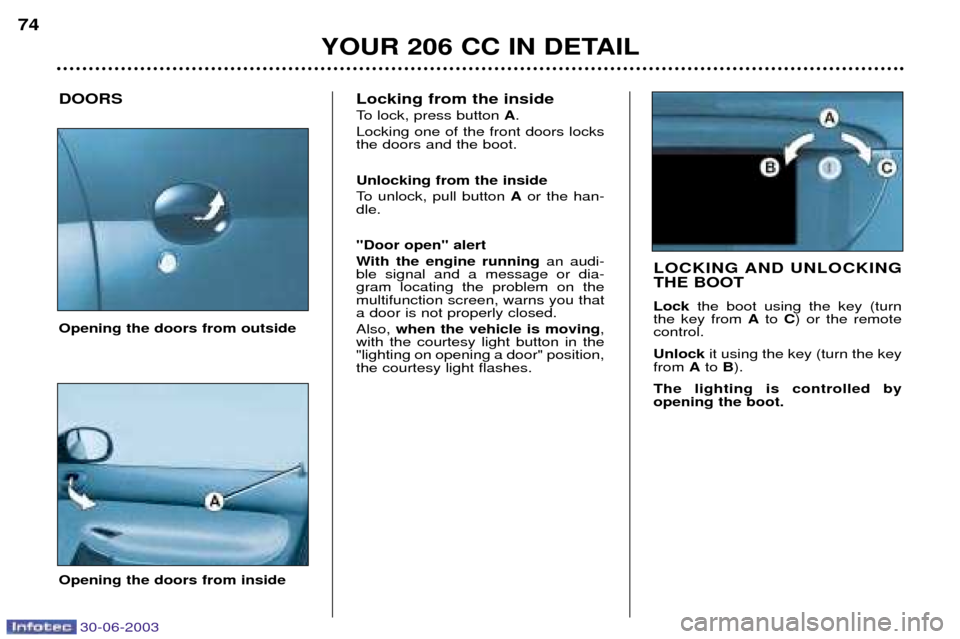
Opening the doors from outside
DOORS
Opening the doors from inside
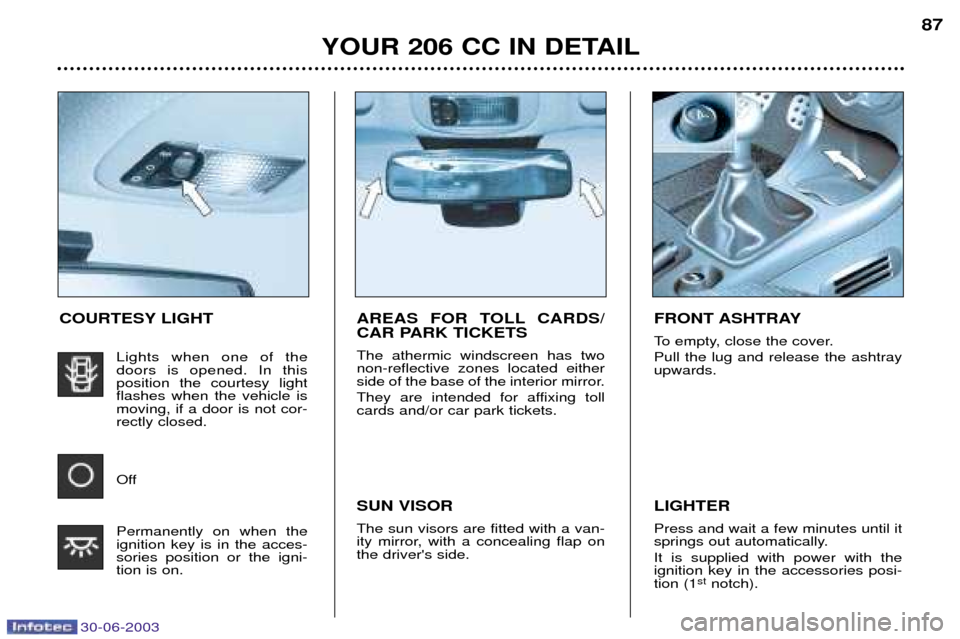
LOCKING AND UNLOCKING THE BOOT Lock the boot using the key (turn
the key from Ato C) or the remote
control. Unlock it using the key (turn the key
from Ato B).
The lighting is controlled by opening the boot.
Locking from the inside
To lock, press button A.
Locking one of the front doors locks the doors and the boot. Unlocking from the inside
To unlock, pull button Aor the han-
dle. ''Door open'' alert
With the engine running an audi-
ble signal and a message or dia- gram locating the problem on themultifunction screen, warns you thata door is not properly closed. Also, when the vehicle is moving ,
with the courtesy light button in the "lighting on opening a door" position,the courtesy light flashes.
Page 78 of 131
30-06-2003
YOUR 206 CC IN DETAIL
78
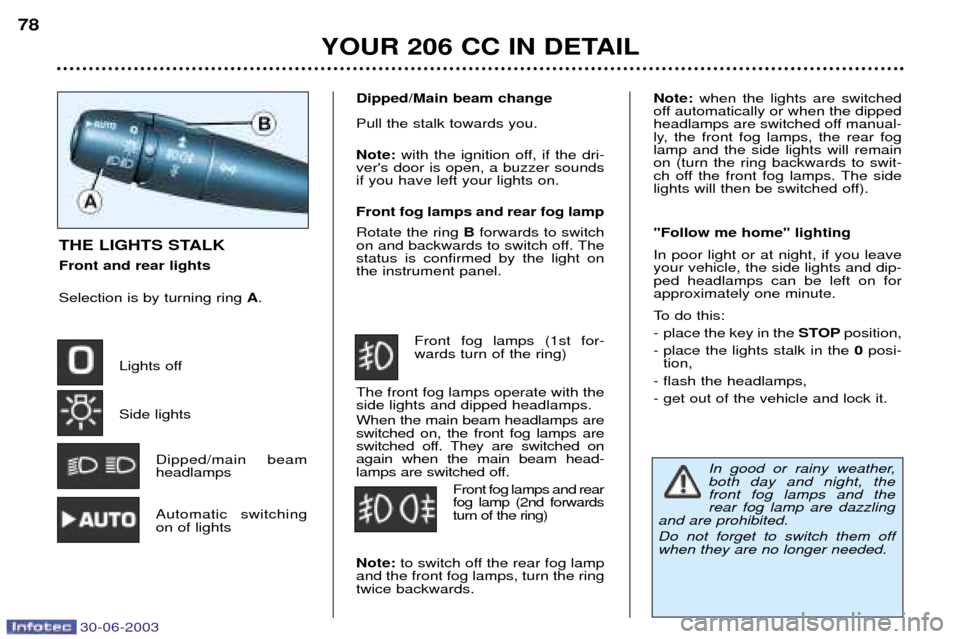
THE LIGHTS STALK Front and rear lights Selection is by turning ring
A.
Lights off Side lights Dipped/main beam headlamps
Automatic switchingon of lights
Dipped/Main beam change Pull the stalk towards you. Note: with the ignition off, if the dri-
ver's door is open, a buzzer sounds if you have left your lights on. Front fog lamps and rear fog lamp Rotate the ring Bforwards to switch
on and backwards to switch off. The status is confirmed by the light onthe instrument panel.
Front fog lamps (1st for-wards turn of the ring)
The front fog lamps operate with theside lights and dipped headlamps. When the main beam headlamps are switched on, the front fog lamps are
switched off. They are switched onagain when the main beam head-
lamps are switched off. Front fog lamps and rearfog lamp (2nd forwardsturn of the ring)
Note: to switch off the rear fog lamp
and the front fog lamps, turn the ringtwice backwards.
In good or rainy weather, both day and night, thefront fog lamps and therear fog lamp are dazzling
and are prohibited. Do not forget to switch them off when they are no longer needed.
Note: when the lights are switched
off automatically or when the dipped
headlamps are switched off manual-
ly, the front fog lamps, the rear foglamp and the side lights will remainon (turn the ring backwards to swit-
ch off the front fog lamps. The side
lights will then be switched off). "Follow me home" lighting In poor light or at night, if you leave your vehicle, the side lights and dip-ped headlamps can be left on forapproximately one minute.
To do this:
- place the key in the STOPposition,
- place the lights stalk in the 0posi-
tion,
- flash the headlamps,- get out of the vehicle and lock it.
Page 79 of 131

30-06-2003
Direction indicators (flashers)Left:downwards.
Right: upwards. YOUR 206 CC IN DETAIL
79AUTOMATIC SWITCHING ON OF LIGHTS Side lights and dipped beam head- lamps switch on automatically if thelight is poor and when the wind-
screen wipers operate continuously.
They switch off at the same time when the light becomes brightenough or the windscreen wipers
are switched off. Note:
In foggy weather or in snow
the brightness sensor can detect
sufficient light. As a result, the lights
will not come on automatically. This function is active when the
vehicle is supplied to the customer.
To disarm or activate the function:
- Place the key in the accessories position (1st notch),
- Press the end of the lights stalk for more than four seconds. Operating check Activation Acivation of this function is accom- panied by an audible signal and themessage
"Automatic lighting
active'' on the multifunction display.
Disarming Disarming of the function is accom- panied by an audible signal. Note: the function is temporarily dis-
armed when the driver uses the manual lighting controls. If the brightness sensor does not function correctly , the system acti-
vates the function (the lights come
on). The driver is alerted by an audi-ble signal, accompanied by the mes-sage "Auto lighting fault" on the
multifunction display.
Contact a PEUGEOT dealer to have the system checked.
The brightness sensor, coupled
with the rain sensor, is located inthe centre of the windscreen,
behind the interior mirror. It isused for automatic switching onof the lights.
Page 80 of 131

30-06-2003
Direction indicators (flashers)Left:downwards.
Right: upwards. YOUR 206 CC IN DETAIL
79AUTOMATIC SWITCHING ON OF LIGHTS Side lights and dipped beam head- lamps switch on automatically if thelight is poor and when the wind-
screen wipers operate continuously.
They switch off at the same time when the light becomes brightenough or the windscreen wipers
are switched off. Note:
In foggy weather or in snow
the brightness sensor can detect
sufficient light. As a result, the lights
will not come on automatically. This function is active when the
vehicle is supplied to the customer.
To disarm or activate the function:
- Place the key in the accessories position (1st notch),
- Press the end of the lights stalk for more than four seconds. Operating check Activation Acivation of this function is accom- panied by an audible signal and themessage
"Automatic lighting
active'' on the multifunction display.
Disarming Disarming of the function is accom- panied by an audible signal. Note: the function is temporarily dis-
armed when the driver uses the manual lighting controls. If the brightness sensor does not function correctly , the system acti-
vates the function (the lights come
on). The driver is alerted by an audi-ble signal, accompanied by the mes-sage "Auto lighting fault" on the
multifunction display.
Contact a PEUGEOT dealer to have the system checked.
The brightness sensor, coupled
with the rain sensor, is located inthe centre of the windscreen,
behind the interior mirror. It isused for automatic switching onof the lights.
Page 88 of 131
30-06-2003
YOUR 206 CC IN DETAIL87
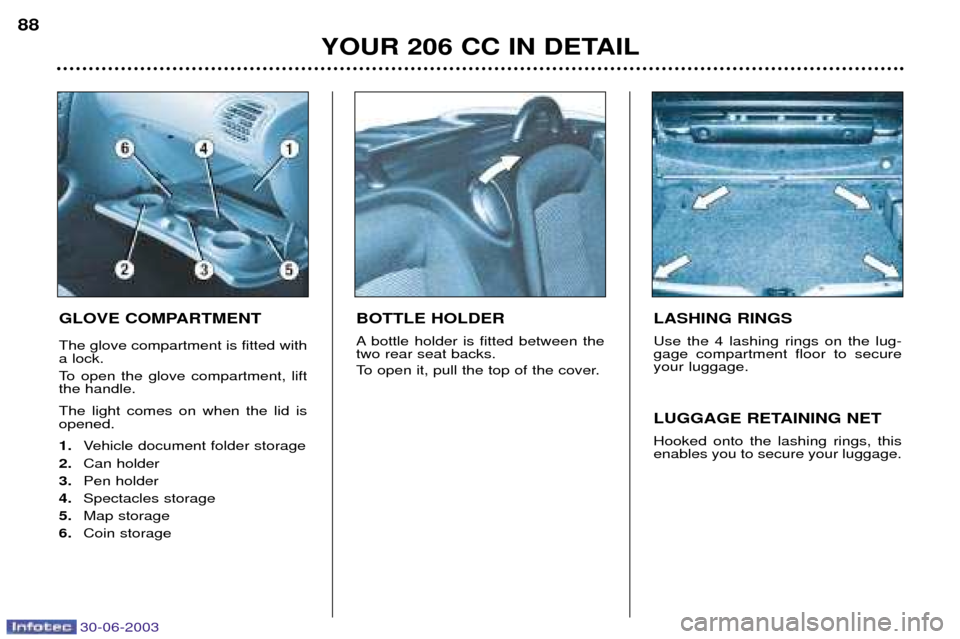
AREAS FOR TOLL CARDS/
CAR PARK TICKETS The athermic windscreen has two non-reflective zones located either
side of the base of the interior mirror.
They are intended for affixing toll cards and/or car park tickets.
COURTESY LIGHT
Lights when one of thedoors is opened. In thisposition the courtesy lightflashes when the vehicle ismoving, if a door is not cor-rectly closed.
Off Permanently on when the ignition key is in the acces-sories position or the igni-tion is on. SUN VISOR The sun visors are fitted with a van-
ity mirror, with a concealing flap onthe driver's side. FRONT ASHTRAY
To empty, close the cover. Pull the lug and release the ashtray upwards. LIGHTER Press and wait a few minutes until it
springs out automatically. It is supplied with power with the ignition key in the accessories posi-tion (1
st
notch).
Page 89 of 131
30-06-2003
YOUR 206 CC IN DETAIL
88
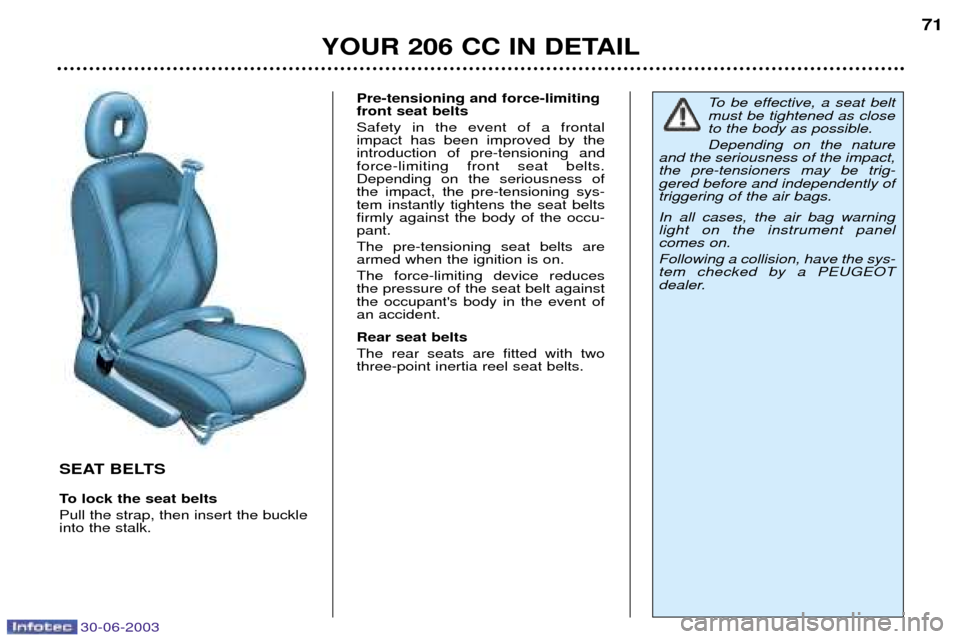
GLOVE COMPARTMENT The glove compartment is fitted with a lock.
To open the glove compartment, lift the handle. The light comes on when the lid is opened. 1.
Vehicle document folder storage
2. Can holder
3. Pen holder
4. Spectacles storage
5. Map storage
6. Coin storage BOTTLE HOLDER
A bottle holder is fitted between the two rear seat backs.
To open it, pull the top of the cover.
LASHING RINGS Use the 4 lashing rings on the lug- gage compartment floor to secureyour luggage.
LUGGAGE RETAINING NET Hooked onto the lashing rings, this enables you to secure your luggage.