2003 Oldsmobile Alero torque
[x] Cancel search: torquePage 97 of 354
Leaving Your Vehicle With the
Enm‘ne Running
-L can be ..mgerous tc -3ave your vehicle \II .-.I
the engine running. Your vehicle could move
suddenly
if the shift lever is not fully in
PARK (P) with the parking brake firmly set.
And,
if you leave the vehicle with the engine
running, it could overheat and even catch fire.
You or others could be injured. Don’t leave
your vehicle with the engine running.
If you have to leave your automatic transaxle model
vehicle with the engine running, be sure your vehicle is
in PARK (P) and your parking brake is firmly set
before you leave it. After you’ve moved the shift lever
into PARK (P), hold the regular brake pedal down. Then,
see
if you can move the shift lever away from PARK (P)
without first pushing the button.
If you can, it means that the shift lever wasn’t fully
locked into PARK (P).
Torque Lock
If you are parking on a hill and you don’t shift your
automatic transaxle into PARK
(P) properly, the weight
of the vehicle may put too much force on the parking
pawl in the transaxle. You may find it difficult to pull the
shift lever out of PARK (P). This is called “torque
lock.“ To prevent torque lock, set the parking brake and
then shift into PARK (P) properly before you leave
the driver’s seat. To find out how, see
Shifting Into
Park (P)
on page 2-27.
When you are ready to drive, move the shift lever out of
PARK
(P) before you release the parking brake.
If torque lock does occur, you may need to have another
vehicle push yours a little uphill to take some of the
pressure from the parking pawl in the transaxle,
so you
can pull the shift lever out of PARK (P).
Shifting Out of Park (P)
If your vehicle has an automatic transaxle it has an
automatic transaxle shift lock control system. You have
to apply your regular brake before you can shift from
PARK (P) when the ignition is in
ON. See Automatic
Transaxle Operation
on page 2-22.
If you cannot shift out of PARK (P), ease pressure on
the shift lever and push the shift lever all the way
into PARK (P) as you maintain brake application. Then
move the shift lever into the gear you wish. (Press
the shift lever button before moving the shift lever.)
2-28
Page 255 of 354
Brake Wear
Your vehicle has four-wheel disc brakes.
Disc brake pads have built-in wear indicators that make
a high-pitched warning sound when the brake pads
are worn and new pads are needed. The sound
may come and go or be heard all the time your vehicle
is moving (except when you are pushing on the
brake pedal firmly).
--
le bra wear warning sound means that
soon your brakes won’t work well. That could
lead to an accident. When you hear the brake
wear warning sound, have your vehicle
serviced.
Notice: Continuing to drive with worn-out brake
pads could result in costly brake repair.
Some driving conditions or climates may cause a brake
squeal when the brakes are first applied or lightly
applied. This does not mean something is wrong with
your brakes. Properly torqued
wheel nuts are necessary to help
prevent brake pulsation. When tires are rotated, inspect
brake pads for wear and evenly tighten wheel nuts in
the proper sequence
to GM torque specifications.
Brake linings should always be replaced as complete
axle sets.
See
Brake System Inspection on page 6-14.
Brake Pedal Travel
See your dealer if the brake pedal does not return to
normal height, or
if there is a rapid increase in
pedal travel. This could be a sign of brake trouble.
Brake Adjustment
Every time you make a moderate brake stop, your disc
brakes adjust for wear.
If you rarely make a moderate
or heavier stop, then your brakes might not adjust
correctly. If you drive in that way, then
- very
carefully
- make a few moderate brake stops about
every
1,000 miles (1 600 km), so your brakes will adjust
properly.
5-40
Page 270 of 354
Tire Inspection and Rotation
Tires should be rotated every 7,500 miles (12 500 km).
Any time you notice unusual wear, rotate your tires
as soon as possible and check wheel alignment. Also
check for damaged tires or wheels. See
When It Is Time
for New Tires on page
5-56 and Wheel Replacement
on page
5-59 for more information.
The purpose of regular rotation is to achieve more
uniform wear for all tires on the vehicle. The first rotation
is the most important. See “Part A: Scheduled
Maintenance Services,” in Section 6, for scheduled
rotation intervals. Don’t include the
compact spare tire in your tire rotation.
After the tires have been rotated, adjust the front and
rear inflation pressures as shown
on the Tire-Loading
Information label.
Make certain that all wheel nuts are properly tightened.
See “Wheel Nut Torque” under
Capacities and
Specifications on page
5-86.
Rust or dirt on a wheel, or or parts to
which
it is fastened, can make wheel nuts
become loose after a time. The wheel could
come
off and cause an accident. When you
change a wheel, remove any rust
or dirt from
places where the wheel attaches to the vehicle.
In an emergency, you can use a cloth or a
paper towel to do
this; but be sure to use a
3cllCapcI VI VVll c; ut U3If IBLGI, II ywu IIG‘CSU LW, LW
get all the rust or dirt off. See “Changing a Flat
Tire”
in the Index.
--_ .------ -_. ... :-- L”..-L I-*-” :+ .--. ~ “...-A 4- 4-
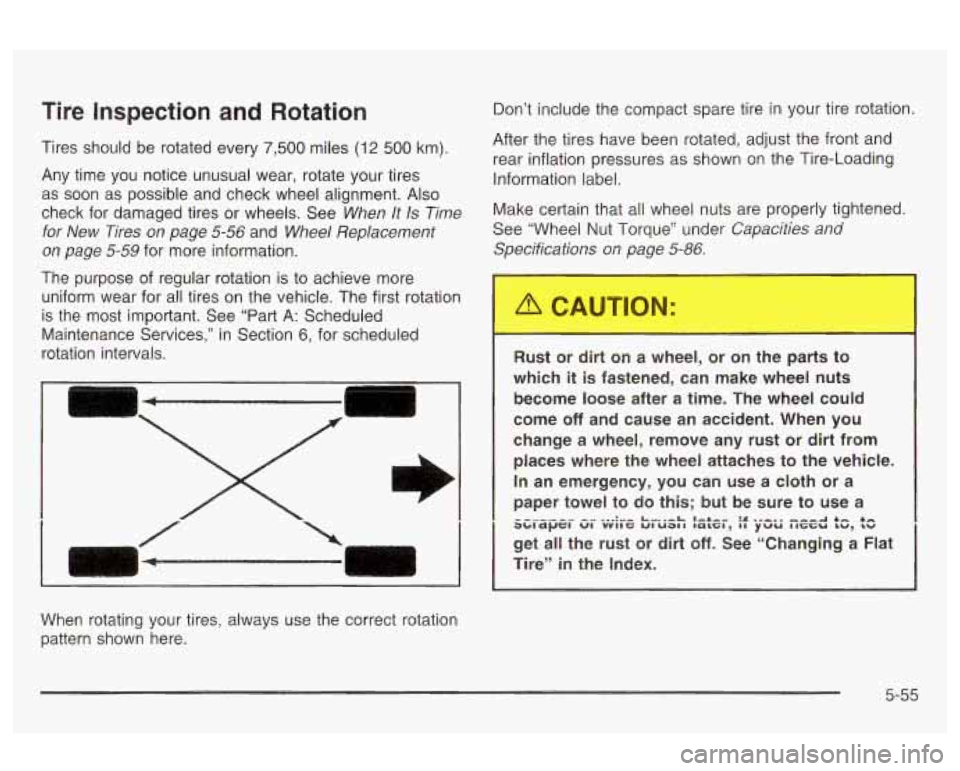
When rotating your tires, always use the correct rotation
pattern shown here.
5-55
Page 283 of 354
12. Lower the vehicle by turning the wheel wrench
counterclockwise. Lower the jack completely.
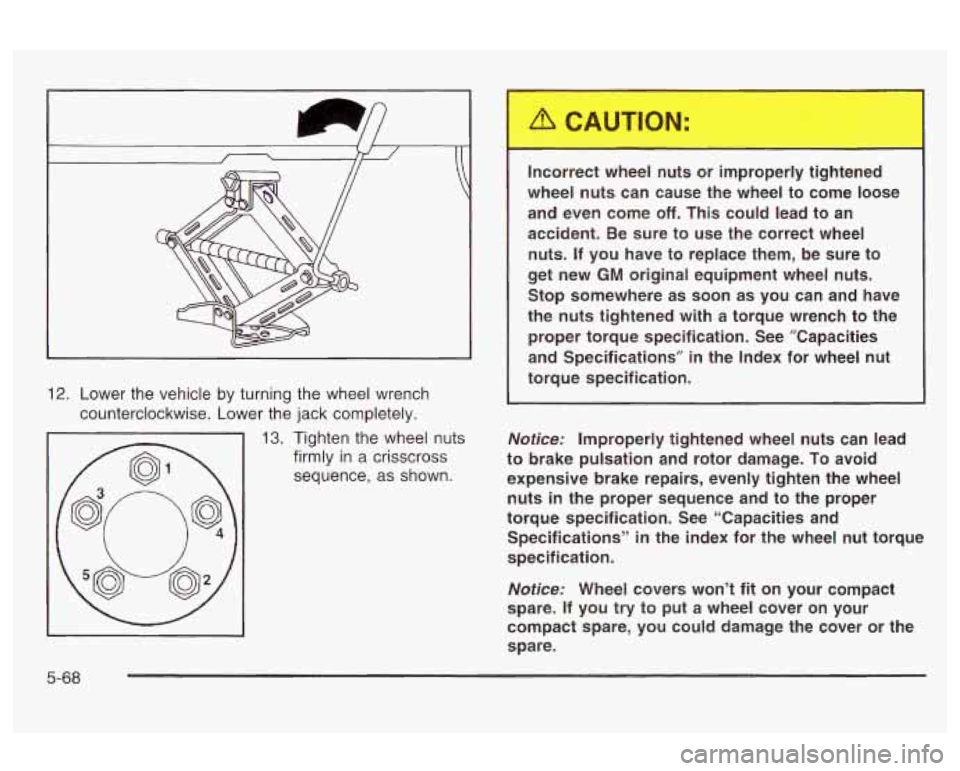
13. Tighten the wheel nuts
firmly
in a crisscross
sequence,
as shown. Incorrect wheel nuts or improperly tightened
wheel nuts can cause the wheel to come loose
and even come
off. This could lead to an
accident. Be sure to use the correct wheel
nuts. If you have to replace them, be sure to
get new GM original equipment wheel nuts.
Stop somewhere as soon as you can and have
the nuts tightened with a torque wrench to the proper torque specification. See ”Capacities
and Specifications’’ in the Index for wheel nut
torque specification.
Notice: Improperly tightened wheel nuts can lead
to brake pulsation and rotor damage.
To avoid
expensive brake repairs, evenly tighten the wheel
nuts in the proper sequence and to the proper
torque specification. See “Capacities and
Specifications”
in the index for the wheel nut torque
specification.
Notice: Wheel covers won’t fit on your compact
spare. If you try
to put a wheel cover on your
compact spare, you could damage the cover or the
spare.
5-68
Page 302 of 354
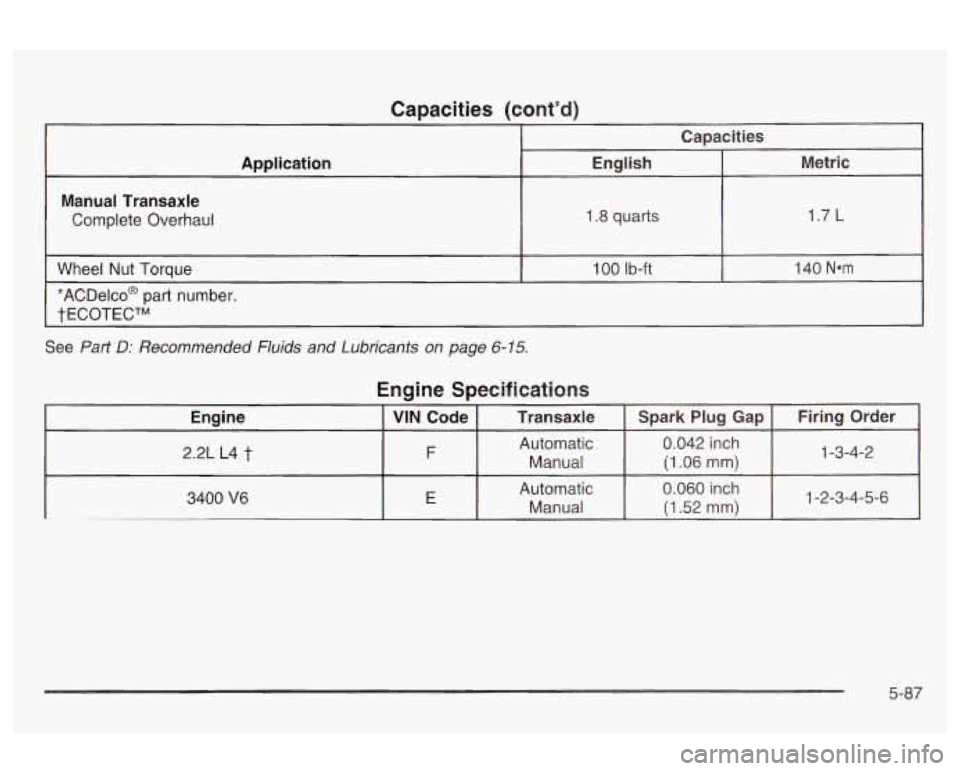
Capacities (cont’d)
Manual Transaxle Complete Overhaul 1.8
quarts 1.7
L
I
Wheel Nut Torque
*ACDelco@ part number. 1
00 Ib-ft
tECOTECTM I 140 Nom
See Part D: Recommended Fluids and Lubricants on page 6-15.
Engine Specidicatians
I
3400 V6 E Automatic 0.060 inch
Manual
(1.52 mm) 1-2-3-4-5-6
5-87
Page 346 of 354
Tires (cont.) Wheel Alignment and Tire Balance
................. 5-58
Wheel Replacement
..................................... 5-59
When It
Is Time for New Tires ...................... 5-56
To Use the Engine Coolant Heater
.................... 2-21
Top of the Instrument Panel
............................. 5-74
Top Strap
...................................................... 1-41
Top Strap Anchor Location
............................... 1-42
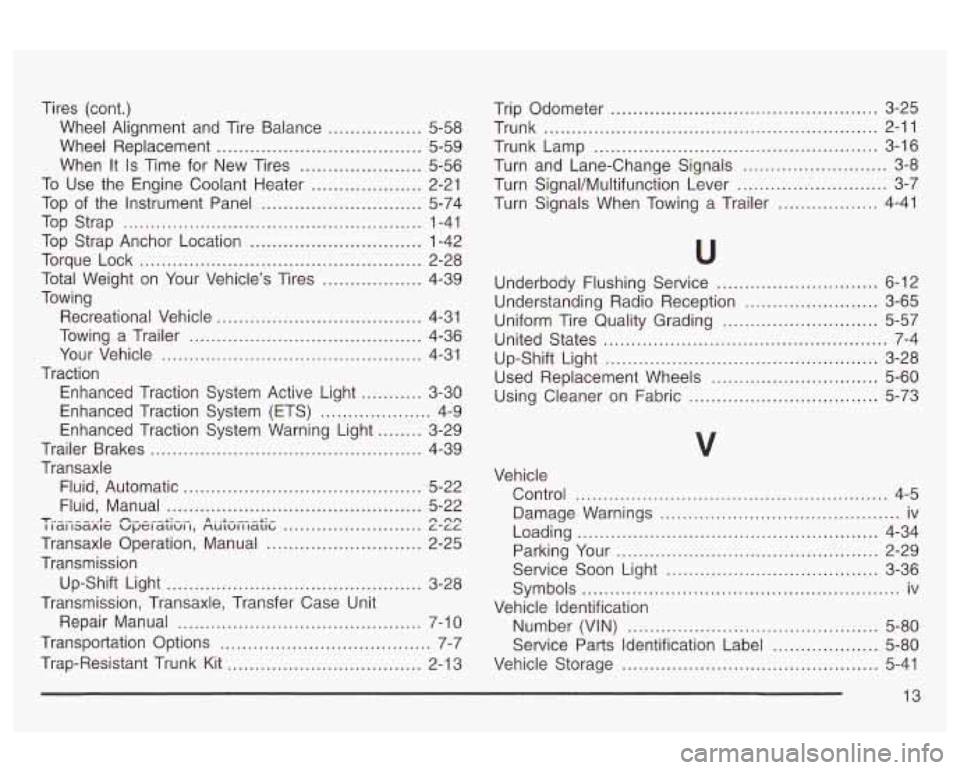
Torque Lock
................................................... 2-28
Total Weight on Your Vehicle’s Tires
.................. 4-39
Towing Recreational Vehicle
..................................... 4-31
Towing a Trailer
.......................................... 4-36
Your Vehicle
............................................... 4-31
Traction Enhmced Traction Systerr; Active Light
........... 3-30
Enhanced Traction System Warning Light
........ 3-29
Enhanced
Traction System (ETS)
.................... 4-9
Trailer Brakes
................................................. 4-39
Transaxle Fluid, Automatic
........................................... 5-22
Fluid, Manual
.............................................. 5-22 T - - .. I - n- -.--a: - .- A . .I -.-- -L:- I I dl 13dAlt: Upel dllUl I, fiUlUl1 ldllb 6-66 A nA .........................
Transaxle Operation, Manual ............................ 2-25
Transmission Up-Shift Light
.............................................. 3-28
Transmission, Transaxle, Transfer Case Unit
Repair Manual
........................................ 7-10
Transportation Options
...................................... 7-7
Trap-Resistant Trunk Kit
................................... 2-1 3 Trip Odometer
.......... ........................... 3-25
Trunk
............................................................ 2-11
Turn and Lane-Change Signals
.......................... 3-8
Turn Signal/Multifunction Lever
........................... 3-7
Turn Signals When Towing a Trailer
.................. 4-41
Trunk Lamp
................................................... 3-16
Underbody Flushing Service
............................. 6-12
Understanding Radio Reception
........................ 3-65
Uniform Tire Quality Grading
............................ 5-57
United States
................................................... 7-4
Up-Shift Light
................................................. 3-28
Used Replacement Wheels
.............................. 5-60
using Cleaner on Fabric
.................................. 5-73
v
Vehicle
Control
........................... ..................... 4-5
Damage Warnings
........................................... iv
Loading
...................................................... 4-34
Service Soon Light
...................................... 3-36
Parking
Your
............................................... 2-29
Symbols
......................................................... iv
Vehicle Identification
Number (VIN)
............................................. 5-80
Service Parts Identification Label
................... 5-80
Vehicle Storage
.............................................. 5-41
13