2003 Oldsmobile Alero service
[x] Cancel search: servicePage 155 of 354
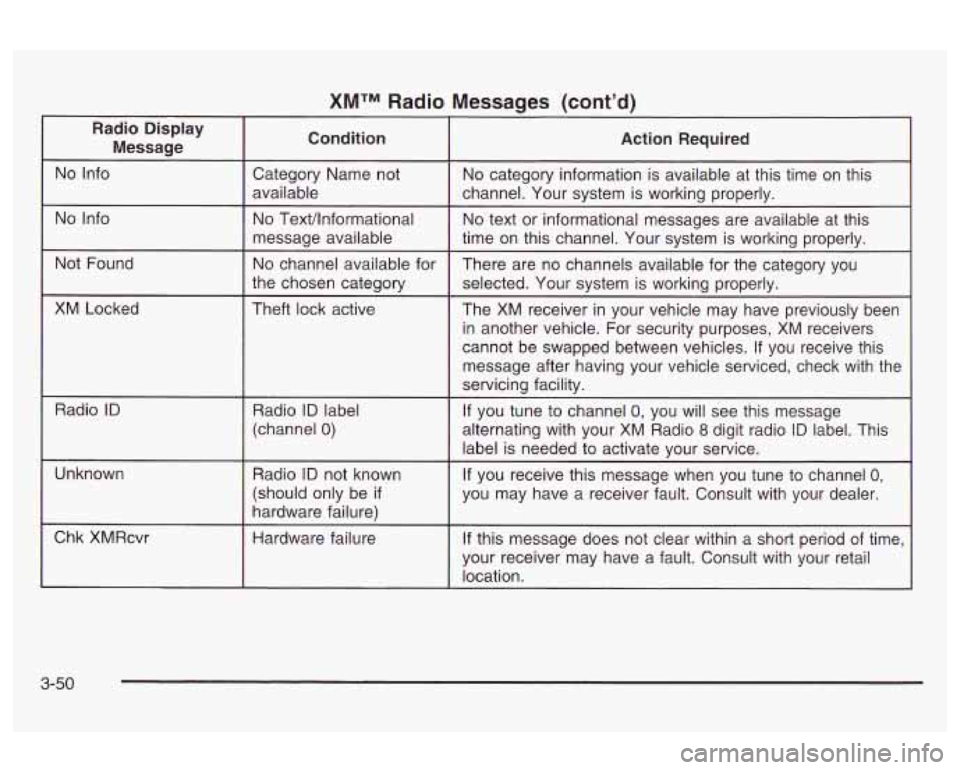
XMTM Radio Messages (cont’d) -
Radio Display
Message Condition Action Required
I
Not Found
XM Locked Category Name
not
No category information is available at this time on this
available channel. Your system is working properly.
No TexVlnformational No text or informational messages are available at this
message available
time on this channel. Your system is working properly.
No channel available for
There are no channels available for the category you
the chosen category
selected. Your system is working properly.
Theft lock active The XM receiver in your vehicle may have previously been
in another vehicle. For security purposes,
XM receivers
cannot be swapped between vehicles. If you receive this
message after having your vehicle serviced, check with the
servicing facility.
Radio
ID Radio ID label
(channel
0)
Unknown Radio ID not known
(should only be
if
hardware failure) If
you tune to channel
0, you will see this message
alternating with your XM Radio
8 digit radio ID label. This
label is needed to activate your service.
~~ ~~ ~ ~ ~~~~~~
If you receive this message when you tune to channel 0,
you may have a receiver fault. Consult with your dealer.
~ ~~~ ~~~
Chk XMRcvr
Hardware failure
If this message does not clear within a short period of time,
your receiver may have a fault. Consult with your retail
location.
3-50
Page 158 of 354
This system relies upon receiving specific information
from these stations and will only work when the
information is available. In rare cases, a radio station
may broadcast incorrect information that will cause
the radio features to work improperly.
If this happens,
contact the radio station.
While you are tuned to an RDS station, the station
name
or the call letters will appear on the display instead
of the frequency.
RDS stations may also provide the
time of day, a program type (PTY) for current
programming and the name of the program being
broadcast.
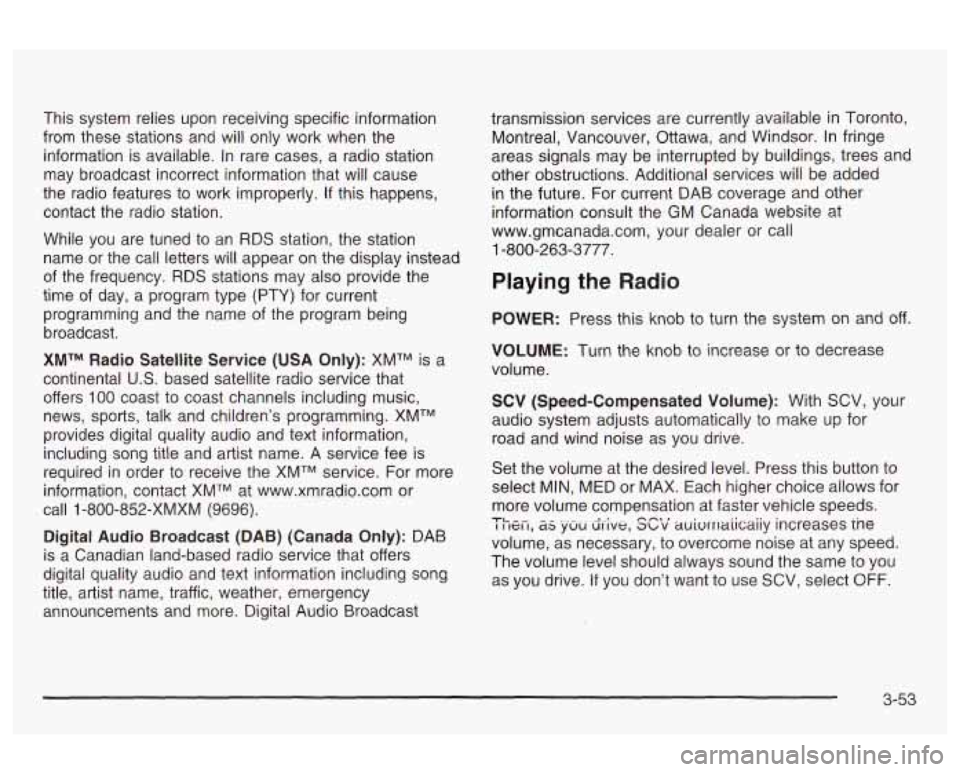
XMTM Radio Satellite Service (USA Only): XMTM is a
continental
US. based satellite radio service that
offers
100 coast to coast channels including music,
news, sports, talk and children’s programming. XMTM
provides digital quality audio and text information,
including song title and artist name. A service fee
is
required in order to receive the XMTM service. For more
information, contact XMTM at www.xmradio.com or
call
1 -800-852-XMXM (9696).
Digital Audio Broadcast (DAB) (Canada Only): DAB
is a Canadian land-based radio service that offers
digital quality audio and text information including song
title, artist name, traffic, weather, emergency
announcements and more. Digital Audio Broadcast transmission services are currently available
in Toronto,
Montreal, Vancouver, Ottawa, and Windsor. In fringe
areas signals may be interrupted by buildings, trees and
other obstructions. Additional services will be added
in the future. For current DAB coverage and other
information consult the GM Canada website at
www.gmcanada.com, your dealer or call
1-800-263-3777.
Playing the Radio
POWER: Press this knob to turn the system on and off.
VOLUME: Turn the knob to increase or to decrease
volume.
SCV (Speed-Compensated Volume): With SCV, your
audio system adjusts automatically to make up for
road and wind noise as you drive.
Set the volume at the desired level. Press this button to
select MIN, MED or MAX. Each higher choice allows for
more volume compensation at faster vehicle speeds.
I I ICI I, as yUU drive, abv auivrrlaiicaiiy increases ine
volume, as necessary, to overcome noise at any speed.
The volume level should always sound the same to you
as you drive.
If you don’t want to use SCV, select OFF.
TL ^- n-t I
3-53
Page 159 of 354

RCL (Recall): Push this knob to switch the display
between the radio station frequency and the time.
Pushing this knob with the ignition off
Will display
the time.
For XMTM (USA only,
if your radio is equipped with
XMTM Satellite Radio Service), pressing this button while
in XMTM mode to retrieve various pieces of information
related to the current song or channel. By pressing
and releasing the RCL button, you may retrieve
four different categories of information: Artist,
Song Title, Category or PTY, Channel
NumberEhannel Name.
For DAB (Canada only,
if your radio is equipped with
DAB), pushing this knob switches the display between
channel name and PTY name.
To change the default on the display, push the knob
until you see the display you want, then hold the knob
until the display flashes. The selected display will
now be the default.
Finding a Station
BAND: Press this button to switch between AM, FM,
FM2, or XMI
, XM2 (USA only, if your radio is equipped
with XMTM Satellite Radio Service) or DABI, DAB2
(Canada only,
if your radio is equipped with DAB). The
display will show your selection.
TUNE: Turn this knob to select radio stations.
For DAB (Canada only,
if your radio is equipped with
DAB), the TUNE knob allows you to navigate the
DAB frequency range. Turning this knob will tune up or
tune down the range. The radio will display the letter
L with a number next to it (1 through 23). Each L number
refers to a frequency and there can be multiple
stations contained in one frequency. It may also take a
few seconds, once you have tuned to a frequency,
for that frequency
to gather all of the stations.
Depending on how many stations are within a frequency,
with every tune up or down, you may be tuning to
another station or to another frequency. The display will
show your selections.
< SEEK > : Press the right or the left arrow to go to
the next or to the previous station and stay there.
The radio will seek only to stations that are
in the
selected band and only to those with a strong signal.
3-54
Page 160 of 354
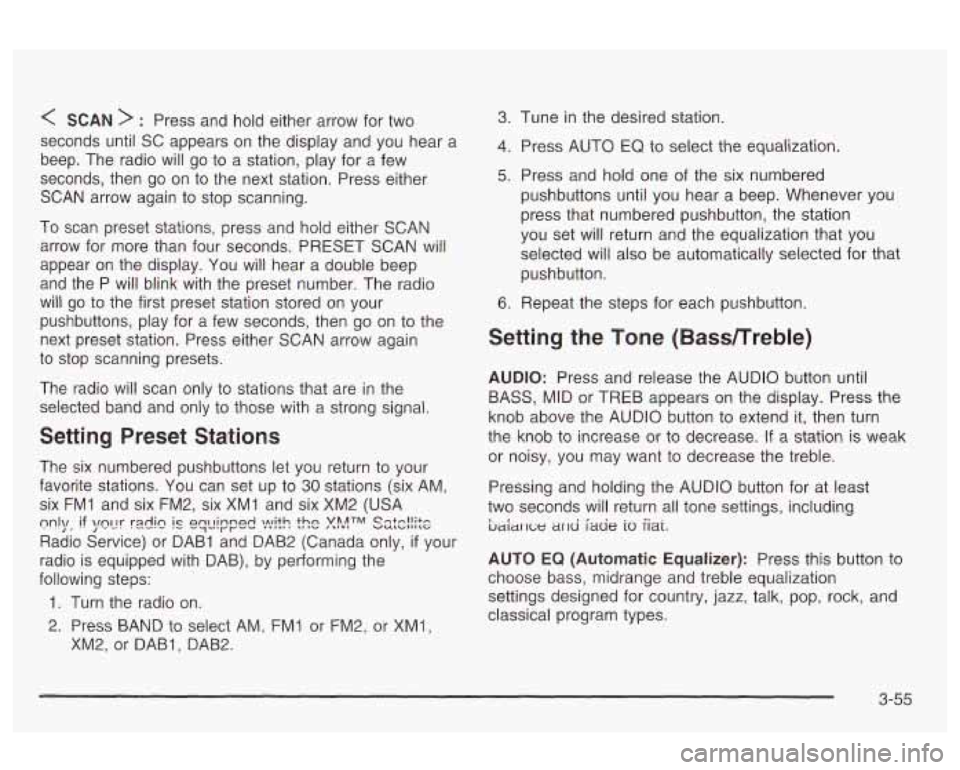
< SCAN > : Press and hold either arrow for two
seconds until SC appears on the display and you hear a
beep. The radio will go
to a station, play for a few
seconds, then go on to the next station. Press either
SCAN arrow again to stop scanning.
To scan preset stations, press and hold either SCAN
arrow for more than four seconds. PRESET SCAN will
appear on the display. You will hear a double beep
and the P will blink with the preset number. The radio
will
go to the first preset station stored on your
pushbuttons, play for a few seconds, then go on to the
next preset station. Press either SCAN arrow again
to stop scanning presets.
The radio will scan only to stations that are in the
selected band and only to those with a strong signal.
Setting Preset Stations
The six numbered pushbuttons let you return to your
favorite stations. You can
set up to 30 stations (six AM,
six
FMI and six FM2, six XMI and six XM2 (USA
Radio Service) or DAB1 and DAB2 (Canada only,
if your
radio is equipped with DAB), by performing the
following steps:
m1\/, if \/fly rdi~ ql_lir"p& ).!"lit.c! ?$ATM ss:c!!$e
1. Turn the radio on.
2. Press BAND to select AM, FMI or FM2, or XMl,
XM2, or DABI, DAB2.
3. Tune in the desired station.
4. Press AUTO EQ to select the equalization.
5. Press and hold one of the six numbered
pushbuttons until you hear a beep. Whenever you
press that numbered pushbutton, the station
you set will return and the equalization that you
selected will
also be automatically selected for that
pushbutton.
6. Repeat the steps for each pushbutton.
Setting the Tone (Bassmreble)
AUDIO: Press and release the AUDIO button until
BASS, MID or TREB appears on the display. Press the
knob above the AUDIO button
to extend it, then turn
the knob
to increase or to decrease. If a station is weak
or noisy, you may want to decrease the treble.
Pressing and holding the AUDIO button for at least
two seconds will return
all tone settings, including
ljaiar 1c;e ar~d fade io iiai.
AUTO EQ (Automatic Equalizer): Press this button to
choose bass, midrange and treble equalization
settings designed for country, jazz, talk, pop, rock, and
classical program types.
3-55
Page 170 of 354
Understanding Radio Reception
AM
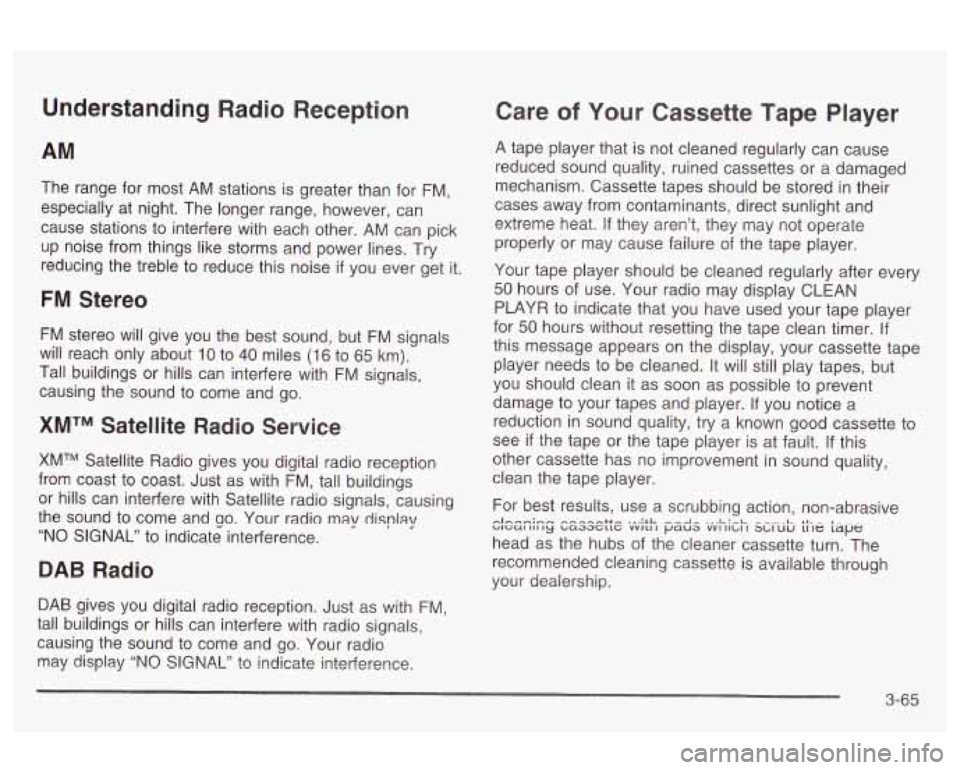
The range for most AM stations is greater than for FM,
especially at night. The longer range, however, can
cause stations to interfere with each other. AM can pick
up noise from things like storms and power lines. Try
reducing the treble to reduce this noise
if you ever get it.
FM Stereo
FM stereo will give you the best sound, but FM signals
will reach only about
10 to 40 miles (16 to 65 km).
Tall buildings or hills can interfere with FM signals,
causing the sound to come and go.
XMTM Satellite Radio Service
XMTM Satellite Radio gives you digital radio reception
from coast to coast. Just as with FM, tall buildings
or hills can interfere with Satellite radio signals, causing
the sound to come and
so. Your radio may display
“NO SIGNAL” to indicate interference.
DAB Radio
DAB gives you digital radio reception. Just as with FM,
tall buildings or hills can interfere with radio signals,
causing the sound to come and go. Your radio
may display “NO
SIGNAL” to indicate interference,
Care of Your Cassette Tape Player
A tape player that is not cleaned regularly can cause
reduced sound quality, ruined cassettes or a damaged
mechanism. Cassette tapes should be stored in their
cases away from contaminants, direct sunlight and
extreme heat.
If they aren’t, they may not operate
properly or may cause failure of the tape player.
Your tape player should be cleaned regularly after every
50 hours of use. Your radio may display CLEAN
PLAYR to indicate that you have used your tape player
for 50 hours without resetting the tape clean timer.
If
this message appears on the display, your cassette tape
player needs to be cleaned. It will still play tapes, but
you should clean
it as soon as possible to prevent
damage to your tapes and player.
If you notice a
reduction in sound quality, try a known good cassette to
see
if the tape or the tape player is at fault. If this
other cassette has no improvement in sound quality,
clean the tape player.
For best results, use a scrubbing action, non-abrasive
head as the hubs of the cleaner cassette turn. The
recommended cleaning cassette is available through
your dealership.
WGUI III ty baaacttc VVILI I paua VVI IILI I X,IUIJ LI te tape nlhnn;,..r* ,-..-..-.--++e ... :rL ...-A- ..,L:-L *I- - I-.- -
3-65
Page 171 of 354
The cut tape detection feature of your cassette tape
player may identify the cleaning cassette as a damaged
tape, in error. To prevent the cleaning cassette from
being ejected, use the following steps.
1. Turn the ignition on.
2. Turn the radio off.
3. Press and hold the TP CD button for five seconds.
4. Insert the scrubbing action cleaning cassette.
5. Eject the cleaning cassette after the manufacturer’s
recommended cleaning time.
You may also choose a non-scrubbing action, wet-type
cleaner which uses a cassette with a fabric belt to
clean the tape head. This type
of cleaning cassette will
not eject on its own. A non-scrubbing action cleaner
may not clean as thoroughly as the scrubbing type
cleaner. The use of a non-scrubbing action, dry-type
cleaning cassette is not recommended.
After you clean the player, press and hold the eject
button for five seconds to reset the CLEAN PLAYR
indicator. The radio will display CLEANED to show the
indicator was reset.
Cassettes are subject to wear and the sound quality
may degrade over time. Always make sure the cassette
tape is in good condition before you have your tape
player serviced.
Care of Your CDs
Handle discs carefully. Store them in their original cases
or other protective cases and away from direct sunlight
and dust.
If the surface of a disc is soiled, dampen
a clean, soft cloth in a mild, neutral detergent solution
and clean
it, wiping from the center to the edge.
Be sure never to touch the side without writing when
handling discs. Pick up discs by grasping the outer
edges or the edge of the hole and the outer edge.
Care of Your CD Player
The use of CD lens cleaner discs is not advised, due to
the risk of contaminating the lens of the CD optics
with lubricants internal to the CD mechanism.
Backglass Antenna
Your AM-FM antenna is integrated with your rear
window defogger, located in the rear window. Be sure
that the inside surface of the rear window is not
scratched and that the lines on the glass are not
damaged.
If the inside surface is damaged, it could
interfere with radio reception.
3-66
Page 195 of 354
The exit ramp can be curved, sometimes quite sharply.
The exit speed
is usually posted. Reduce your speed
according
to your speedometer, not to your sense
of motion. After driving for any distance at higher
speeds, you may tend
to think you are going slower
than you actually are.
Before Leaving on a Long Trip
Make sure you’re ready. Try to be well rested. If you
must start when you’re not fresh
- such as after a day’s
work
- don’t plan to make too many miles that first
part of the journey. Wear comfortable clothing and shoes
you can easily drive in.
Is your vehicle ready for a long trip?
If you keep it
serviced and maintained, it’s ready
to go. If it needs
service, have it done before starting out. Of course,
you’ll find experienced and able service experts
in dealerships all across North America. They’ll be
ready and willing
to help if you need it.
Here are some things you can check before a trip:
Windshield Washer Fluid: Is the reservior full? Are
all windows clean inside and outside?
Wiper Blades: Are they in good shape?
Lamps: Are they all working? Are the lenses clean?
Tires: They are vitally important to a safe,
trouble-free trip. Is the tread good enough for
long-distance driving? Are the tires all inflated to the
recommended pressure?
Weather Forecasts: What’s the weather outlook
along your route? Should you delay your trip a
short time
to avoid a major storm system?
Maps: Do you have up-to-date maps?
Highway Hypnosis
Is there actually such a condition as “highway
hypnosis”? Or is it just plain falling asleep at the wheel?
Call it highway hypnosis, lack of awareness, or
whatever.
There is something about an easy stretch of road with
the same scenery, along with the hum of the tires on the
road, the drone of the engine, and the rush of the
wind against the vehicle that can make you sleepy. Don’t
let it happen to you!
If it does, your vehicle can leave
the road in
less than a second, and you could crash and
be injured.
Fuel, Engine Oil, Other Fluids: Have you checked
all levels?
4-22
Page 196 of 354
What can you do about highway hypnosis? First, be
aware that it can happen.
Then here are some tips:
e
e
e
Make sure your vehicle is well ventilated, with a
comfortably cool interior.
Keep your eyes moving. Scan the road ahead and
to the sides. Check your rearview mirrors and your
instruments frequently.
If you get sleepy, pull off the road into a rest,
service
or parking area and take a nap, get some
exercise, or both. For safety, treat drowsiness
on the highway as an emergency.
Hill and Mountain Roads
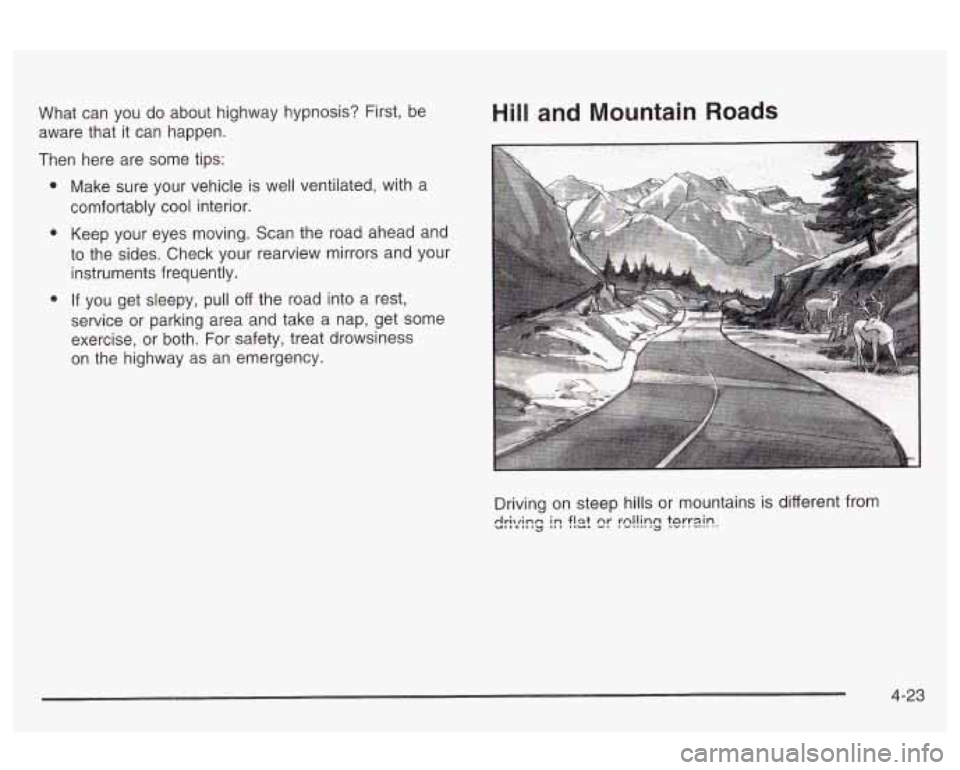
Driving on steep hills or mountains is different from
dri\/iy Y i~ f!& cy +!inn tnrrain 3 --..I....
4-23