2003 Oldsmobile Alero mirror
[x] Cancel search: mirrorPage 2 of 354

The 2003 Oldsmobile Alero Owner Manual a
Seats and Restraint Systems ........................... 1-1
Front Seats
............................................... 1-2
Rear Seats
............................................... 1-8
Safety Belts
.............................................. 1-9
Child Restraints
....................................... 1-32
Supplemental Restraint System (SRS)
...................................... 1-53
Restraint System Check
............................ 1-60
Keys
........................................................ 2-2
Doors and Locks
....................................... 2-7
Windows
................................................. 2-1 4
Theft-Deterrent Systems ............................ 2-1 6
Starting and Operating Your Vehicle
........... 2-17
Mirrors
.................................................... 2-32
Siorage Areas
......................................... 2-34
Sunroof .................................................. 2-35
Instrument Panel Overview
.......................... 3-4
Climate Controls
...................................... 3-1 9
.w .arning Lights, Gages and indicators ......... 3-23
Audio System(s) ....................................... 3-38
Features and Controls
..................................... 2-1
Instrument Panel
............................................. 3-1 Driving Your Vehicle
....................................... 4-1
Your Driving, the Road, and Your Vehicle
..... 4-2
Towing
................................................... 4-31
Service
..................................................... 5-3
Fuel ......................................................... 5-5
Checking Things Under
the
Hood ............................................... 5-9
Headlamp Aiming
..................................... 5-47
Bulb Replacement .................................... 5-49
Windshield Wiper Blade Replacement
......... 5-52
Tires
...................................................... 5-53
Appearance Care
..................................... 5-72
Vehicle Identification
................................. 5-80
Electrical System
...................................... 5-81
Zapai;iiit=s at-tii ~J~LIIIL~LIUI I> 5-w~
Normal Maintenance Replacement Parts ...... 5-88
Maintenance Schedule ........................... ... 6-1
Maintenance Schedule
................................ 6-2
Customer Assistance Information
.................... 7-1
Customer
Assistance iniorrnation .................. 7-2
Index ................................................................. 1
Service
and Appearance Care
.......................... 5-1
n.- - -:I: - -1: - .- - .....................
Page 70 of 354

Section 2 Features and Controls
Keys ............................................................... 2.2
Remote Keyless Entry System
......................... 2.3
Remote Keyless Entry System Operation
.......... -2-4
Doors and
Locks ............................................. 2-7
Door Locks
................................................... -2-7
Power Door Locks
.......................................... 2-8
Delayed Locking
............................................ -2-8
Programmable Automatic Door Locks
................................................ 2.8
Rear Door Security Locks
.............................. 2-10
Lockout Protection
........................................ 2.11
Leaving Your Vehicle
.................................... 2-1 1
Trunk .......................................................... 2-1 1
Windows .......................... ...................... -2-1 4
Manual Windows
...................................... -2-1 4
Power Windows
............................. ....... 2.15
Sun Visors
............................................... 2.15
Theft-Deterrent Systems
.................................. 2.16
Passlock@
@ ................................................. 2.16
Starting and Operating Your Vehicle
................ 2.17
New Vehicle Break-In
.................................... 2.17
Ignition Positions
.......................................... 2.17 Starting
Your Engine
................................. 2.18
Engine Coolant Heater
.................................. 2.20
Automatic Transaxle Operation
....................... 2.22
Manual Transaxle Operation
........................... 2.25
Parking Brake
.............................................. 2.26
Parking Your Vehicle/Key Removal
.................. 2-29
Engine Exhaust
............................................ 2-30
Running Your Engine While You Are Parked
.... 2-30
Mirrors
........................................................... 2-32
Manual Rearview Mirror
................................. 2-32
Outside Remote Control Mirror
....................... 2-32
Outside Power Mirrors
................................... 2-33
Outside Convex Mirror
................................... 2-33
Storage Areas
................................................ 2-34
Glove Box
................................................... 2.34
Cupnoiaerjsj
d-34
Center Console Storage Area ......................... 2-34
Sunroof
......................................................... 2.35
Shifting Into
Park
(P) ..................................... 2-27
Shifting Out
of Park (P) ................................. 2-28
Parking Over Things That Burn
....................... 2-29
n e’ ................................................
2- 1
Page 84 of 354
Power Windows
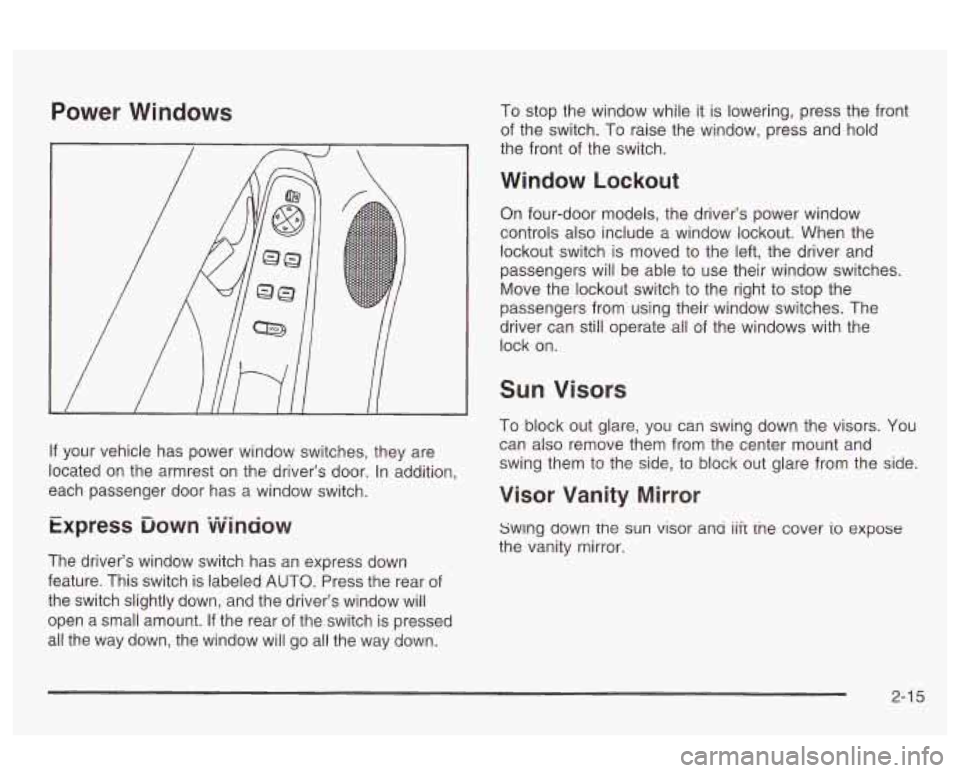
If your vehicle has power window switches, they are
located on the armrest on the driver’s door. In addition,
each passenger door has a window switch.
Express ‘Down vvinaow
The driver’s window switch has an express down
feature. This switch is labeled
AUTO. Press the rear of
the switch slightly down, and the driver‘s window will
open a small amount.
If the rear of the switch is pressed
all the way down, the window will go all the way down. To stop the
window while it is lowering, press the front
of the switch.
To raise the window, press and hold
the front of the switch.
Window Lockout
On four-door models, the driver’s power window
controls also include a window lockout. When the
lockout switch is moved to the left, the driver and
passengers will be able to use their window switches.
Move the lockout switch to the right to stop the
passengers from using their window switches. The
driver can still operate
all of the windows with the
lock on.
Sun Visors
To block out glare, you can swing down the visors. You
can also remove them from the center mount and
swing them to the side, to block out glare from the side.
Visor Vanity Mirror
Swlng down tne sun visor ana iiit tne cover io expose
the vanity mirror.
2-1 5
Page 101 of 354
Mirrors
Manual Rearview Mirror
The mirror can be adjusted two ways. First, to adjust
the height
of the mirror, adjust the arm that connects the
mirror to the windshield. Second, adjust the angle
of
the mirror, by moving the mirror to a position that allows
you to see out
of the back window.
To reduce glare from headlamps behind you, move the
lever toward you to the night position. To return the
mirror
to the daytime position, move the lever away
from you.
Outside Remote Control Mirror
The outside rearview mirror should be adjusted so you
can see a little
of the side of your vehicle when you
are sitting in a comfortable driving position.
Adjust the driver’s outside mirror with the control lever
on the driver’s door.
To adjust your passenger’s mirror, sit in the driver’s seat
and have a passenger adjust the mirror for you.
2-32
Page 102 of 354
Outside Power Mirrors
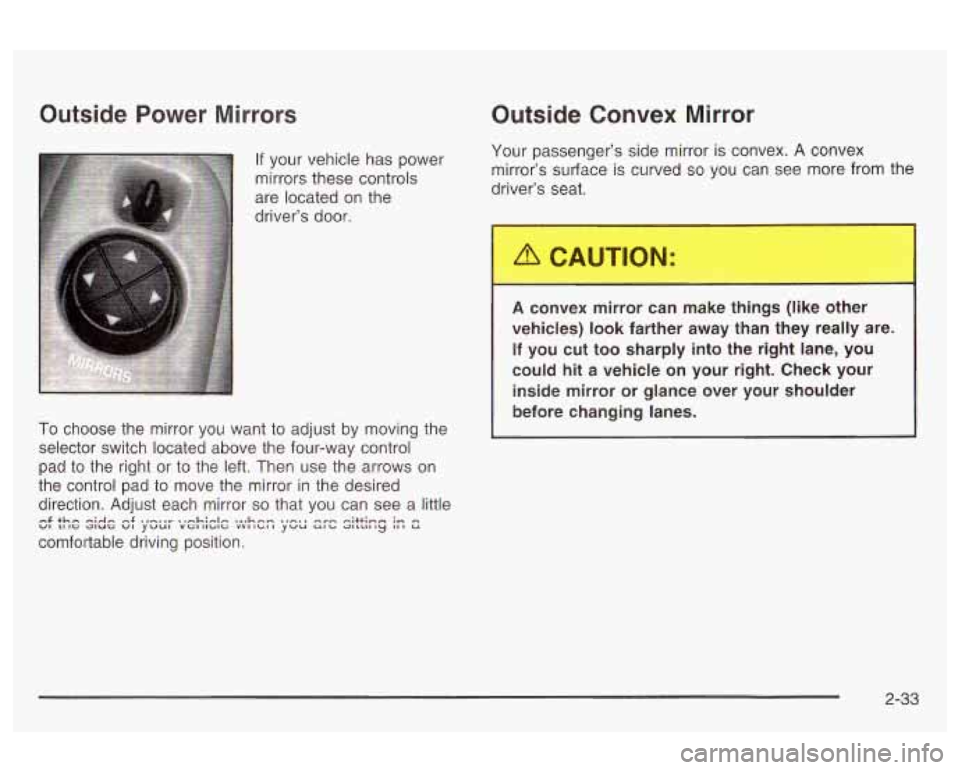
If your vehicle has power
mirrors these controls
are located on the
driver’s door.
To choose the mirror you want to adjust by moving the
selector switch located above the four-way control
pad to the right or to the left. Then use the arrows on
the control pad
to move the mirror in the desired
direction. Adjust each mirror
so that you can see a little
comfortable driving position.
VI LI IG JIUG VI YVUl VGIIlblG VVIIbII YVU Ulb QlLLlllLJ Ill U n$ +hn nidn n$ .,nsnr n,nh:nIn %a,hnw. nrn -;++in- ;n n
Outside Convex Mirror
Your passenger’s side mirror is convex. A convex
mirror’s surface
is curved so you can see more from the
driver’s seat.
A convex mirror can make things (like o ?r
vehicles)
look farther away than they really are.
If you cut too sharply into the right lane, you
could hit a vehicle on your right. Check your
inside mirror or glance over your shoulder
before changing lanes.
2-33
Page 122 of 354
Battery Run-Down Protection
Your vehicle has a battery run-down protection feature
designed to protect your vehicle's battery.
When any interior lamp (trunk, mirror reading lamps,
dome lamp or glove box) is left on when the ignition is
turned
off, the battery saver system will automatically
shut the lamp
off after 20 minutes. This will avoid
draining the battery.
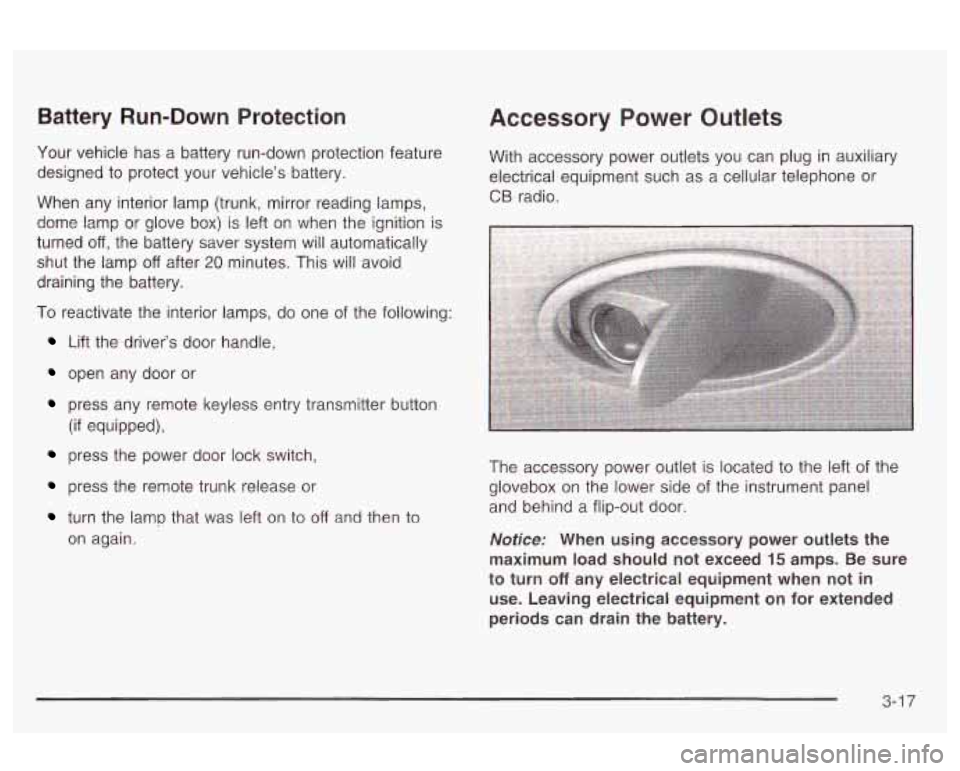
Accessory Power Outlets
With accessory power outlets you can plug in auxiliary
electrical equipment such as a cellular telephone or
CB radio.
I
To reactivate the interior lamps, do one of the following: I
Lift the driver's door handle,
open any door or
press any remote keyless entry transmitter button
(if equipped),
press the power door lock switch,
press the remote trunk release or
turn the lamp that was left on to off and then to
on again. The accessory power
outlet is located to the left of the
glovebox on the lower side of the instrument panel
and behind a flip-out door.
Notice: When using accessory power outlets the
maximum load should not exceed
15 amps. Be sure
to turn
off any electrical equipment when not in
use. Leaving electrical equipment on for extended
periods can drain the battery.
3-1 7
Page 187 of 354
Check your mirrors, glance over your shoulder, and
start your left lane change signal before moving out
of the right lane to pass. When you are far
enough ahead of the passed vehicle to see its front
in your inside mirror, activate your right lane
change signal and move back into the right lane.
(Remember that your right outside mirror is convex.
The vehicle you just passed may seem to be
farther away from you than it really is.)
Try not to pass more than one vehicle at a time on
two-lane roads. Reconsider before passing the
next vehicle.
Don’t overtake a slowly moving vehicle too rapidly.
Even though the brake lamps are not flashing, it
may be slowing down or starting to turn.
If you’re being passed, make it easy for the
following driver to get ahead of you. Perhaps you
can ease a little to the right.
Loss of Control
Let’s review what driving experts say about what
happens when the three control systems (brakes,
steering and acceleration) don’t have enough friction
where the tires meet the road to do what the driver
has asked.
Skidding
In a skid, a driver can lose control of the vehicle.
Defensive drivers avoid most skids by taking reasonable
care suited to existing conditions, and by not
“overdriving” those conditions. But skids are always
possible.
The three types of skids correspond to your vehicle’s
three control systems. In the braking skid, your wheels
aren’t rolling. In the steering or cornering skid, too
much speed or steering in a curve causes tires to slip
and lose cornering force. And in the acceleration
skid, too much throttle causes the driving wheels
to spin.
A cornering skid is best handled by easing your foot off
the accelerator pedal.
If you have the Enhanced Traction System, remember:
It helps to avoid only the acceleration skid. If you do
not have the Enhanced Traction System, or
if the system
is
off, then an acceleration skid is also best handled
by easing your foot
off the accelerator pedal.
If your vehicle starts to slide, ease your foot
off the
accelerator pedal and quickly steer the way you want
the vehicle to go.
If you start steering quickly enough,
your vehicle may straighten out. Always be ready
for a second skid
if it occurs.
In any emergency, don’t give up. Keep trying to steer
and constantly seek an escape route
or area of
less danger.
4-1 4
Page 188 of 354
Of course, traction is reduced when water, snow, ice, Driving at Night
gravel or other material is on the road. For safety, you’ll
want to slow down and adjust your driving to these
conditions. It is important to slow down on slippery
surfaces because stopping distance will be longer and
vehicle control more limited.
While driving on a surface with reduced traction, try
your best to avoid sudden steering, acceleration
or braking (including engine braking by shifting to a
lower gear). Any sudden changes could cause the tires
to slide. You may not realize the surface is slippery
until your vehicle is skidding. Learn to recognize warning
clues
- such as enough water, ice or packed snow
on the road to make a “mirrored surface”
- and slow
down when you have any doubt.
If you have the anti-lock braking system, remember: It
helps avoid only the braking skid.
If you do not have
anti-lock, then in a braking skid (where the wheels are
no longer rolling), release enough pressure on the
.A
brakes to get the wheels rolling again. This restores
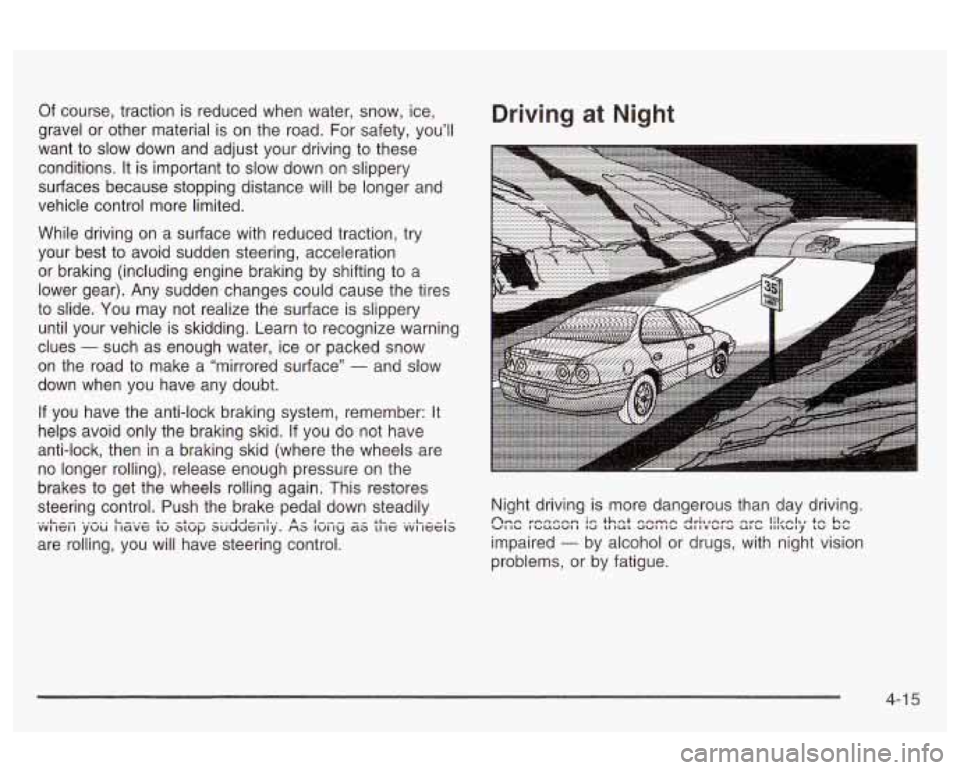
steering control. Push the brake pedal down steadily Night driving is more dangerous than day driving.
are rolling, you will have steering control. impaired
- by alcohol or drugs, with night vision
... Le- ..-.. Le..- A- -Le- -..AA--l.. A- I--- ^^ IL- ... L--l- VVI IGfI YUU I IaVG LU
31Up 3UUUGI Ily. fi3 IUI IY 63 11 It; VVI lGGl3 An,-, rnmpnn ia- thrrt a-nmn AriItnrp -srn l;i,nlt, tn hn VI Ib IbU.2WI I 1.2 LI IUC .2VIII~ UIIVbl.2 UlCI III\bIy cv Ub
problems, or by fatigue.
4-1 5