Page 235 of 299
CHANGING ENGINE OIL1. Park the vehicle on a level surface and apply
the parking brake.
2. Warm up the engine until it reaches operat-
ing temperature, and then turn it off and wait
more than 10 minutes.
3. Place a large drain pan under the drain plug.
4. Remove the oil filler cap.
5. Remove the drain plug with a wrench and
completely drain the oil.If the oil filter is to be changed, remove and
replace it at this time. See later in this section
for changing engine oil filter.
CAUTION
Be careful not to burn yourself, as the
engine oil is hot.
�Waste oil must be disposed of prop-
erly.
�Check your local regulations.
6. Clean and re-install the drain plug and new
SDI0487B
SDI1112
SDI0416
8-14
Maintenance and do-it-yourself
�
03.1.28/R50-D/V5
�
Page 236 of 299
washer. Securely tighten the drain plug with a
wrench. Do not use excessive force.
Drain plug tightening torque:
22 to 29 ft-lb (29 to 39 N⋅m)
7. Refill engine with recommended oil through
the oil filler opening, then install the oil filler
cap securely.
See “Capacities and recommended
fuel/lubricants” in the “9. Technical and con-
sumer information” section for drain and refill
capacity.
The drain and refill capacity depends on the
oil temperature and drain time. Use these
specifications for reference only. Always use
the dipstick to determine when the proper
amount of oil is in the engine.
8. Start the engine.
Check for leakage around the drain plug.
Correct as required.
9. Turn the engine off and wait more than 10
minutes. Check the oil level with the dipstick.
Add engine oil if necessary.
WARNING
�Prolonged and repeated contact withused engine oil may cause skin can-
cer.
�Try to avoid direct skin contact with
used oil. If skin contact is made,
wash thoroughly with soap or hand
cleaner as soon as possible.
�Keep used engine oil out of reach of
children.
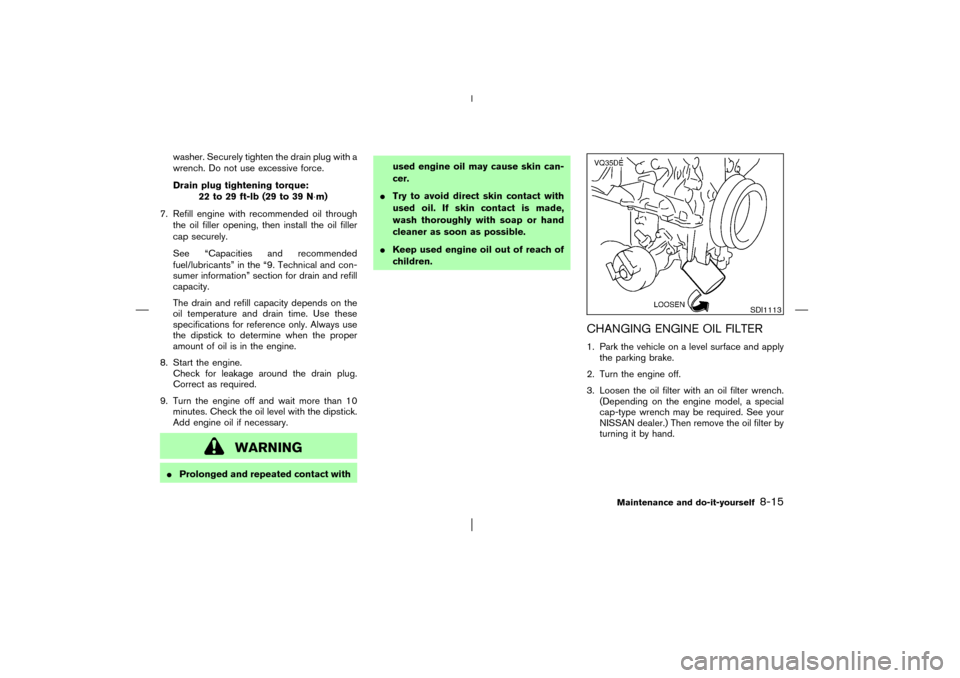
CHANGING ENGINE OIL FILTER1. Park the vehicle on a level surface and apply
the parking brake.
2. Turn the engine off.
3. Loosen the oil filter with an oil filter wrench.
(Depending on the engine model, a special
cap-type wrench may be required. See your
NISSAN dealer.) Then remove the oil filter by
turning it by hand.
SDI1113
Maintenance and do-it-yourself
8-15
�
03.1.28/R50-D/V5
�
Page 237 of 299
CAUTION
Be careful not to burn yourself, as the
engine oil may be hot.
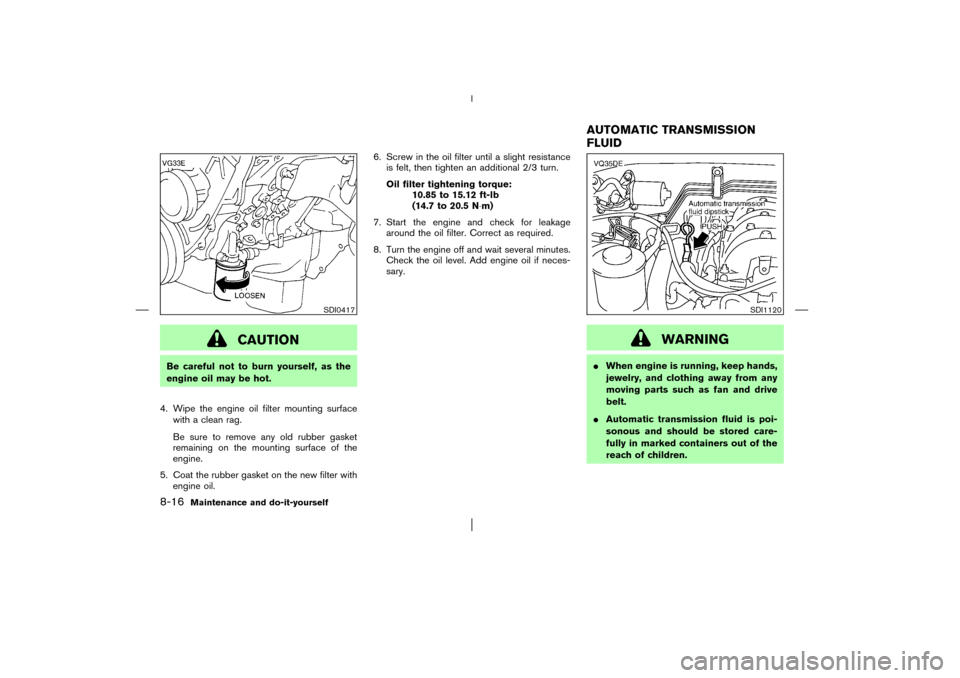
4. Wipe the engine oil filter mounting surface
with a clean rag.
Be sure to remove any old rubber gasket
remaining on the mounting surface of the
engine.
5. Coat the rubber gasket on the new filter with
engine oil.6. Screw in the oil filter until a slight resistance
is felt, then tighten an additional 2/3 turn.
Oil filter tightening torque:
10.85 to 15.12 ft-lb
(14.7 to 20.5 N⋅m)
7. Start the engine and check for leakage
around the oil filter. Correct as required.
8. Turn the engine off and wait several minutes.
Check the oil level. Add engine oil if neces-
sary.
WARNING
�When engine is running, keep hands,
jewelry, and clothing away from any
moving parts such as fan and drive
belt.
�Automatic transmission fluid is poi-
sonous and should be stored care-
fully in marked containers out of the
reach of children.
SDI0417
SDI1120
AUTOMATIC TRANSMISSION
FLUID
8-16
Maintenance and do-it-yourself
�
03.1.28/R50-D/V5
�
Page 238 of 299
TEMPERATURE CONDITIONS FOR
CHECKINGThe fluid level should be checked using the HOT
range (L & H marks) on the dipstick at fluid
temperatures between 122 and 176°F (50 and
80°C) after the vehicle has been driven approxi-
mately 5 minutes in urban areas after the engine
is warmed up. The level can be checked at fluid
temperatures between 86 and 122°F (30 and
50°C) using the COLD range on the dipstick for
reference, after the engine is warmed up but
before driving. However, the fluid level must be
rechecked using the HOT range.1. Park the vehicle on a level surface and set the
parking brake.
2. Start the engine and then move the selector
lever through each gear range, ending in P.
3. Check the fluid level with the engine idling.
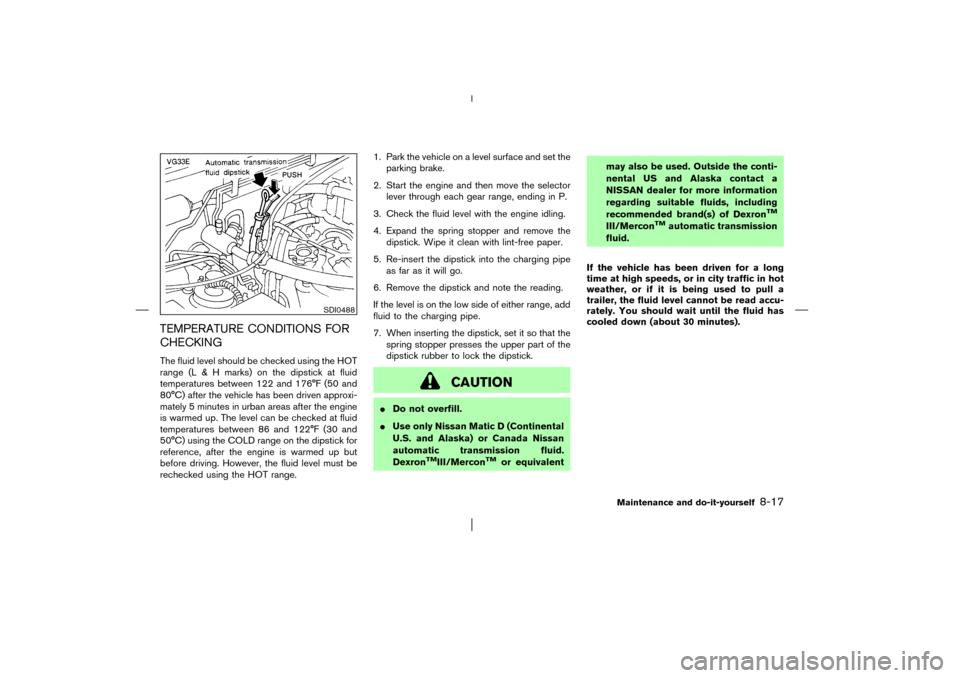
4. Expand the spring stopper and remove the
dipstick. Wipe it clean with lint-free paper.
5. Re-insert the dipstick into the charging pipe
as far as it will go.
6. Remove the dipstick and note the reading.
If the level is on the low side of either range, add
fluid to the charging pipe.
7. When inserting the dipstick, set it so that the
spring stopper presses the upper part of the
dipstick rubber to lock the dipstick.
CAUTION
�Do not overfill.
�Use only Nissan Matic D (Continental
U.S. and Alaska) or Canada Nissan
automatic transmission fluid.
Dexron
TMIII/Mercon
TM
or equivalentmay also be used. Outside the conti-
nental US and Alaska contact a
NISSAN dealer for more information
regarding suitable fluids, including
recommended brand(s) of Dexron
TM
III/Mercon
TM
automatic transmission
fluid.
If the vehicle has been driven for a long
time at high speeds, or in city traffic in hot
weather, or if it is being used to pull a
trailer, the fluid level cannot be read accu-
rately. You should wait until the fluid has
cooled down (about 30 minutes).
SDI0488
Maintenance and do-it-yourself
8-17
�
03.1.28/R50-D/V5
�
Page 241 of 299
WINDOW WASHER FLUID
RESERVOIR
For USTo check the fluid level, use your finger to plug
the center hole of the cap/tube assembly (as
shown above), then remove it from the tank. If
there is no fluid in the tube, add fluid. Add a
washer solvent to the water for better cleaning.
In the winter season, add a windshield washer
anti-freeze. Follow the manufacturer’s instruc-
tions for the mixture ratio.
For CANADAAdd fluid when the low washer fluid warning light
comes on. Add a washer solvent to the water for
better cleaning. In the winter season, add a
windshield washer anti-freeze. Follow the manu-
facturer’s instructions for the mixture ratio.
CAUTION
Do not substitute engine anti-freeze
coolant for window washer solution.
This may result in damage to the paint.
WARNING
Anti-freeze is poisonous and should be
stored carefully marked containers out
of the reach of children.
SDI0423A
SDI0389
WINDOW WASHER FLUID8-20
Maintenance and do-it-yourself
�
03.1.28/R50-D/V5
�
Page 242 of 299
�Keep the battery surface clean and dry. Any
corrosion should be washed off with a solu-
tion of baking soda and water.
�Make certain the terminal connections are
clean and securely tightened.
�If the vehicle is not to be used for 30 days or
longer, disconnect the (—) negative battery
terminal cable to prevent discharge.
WARNING
�Do not expose the battery to flames
or electrical sparks. Hydrogen gas
generated by battery action is explo-
sive. Do not allow battery fluid to
contact your skin, eyes, fabrics, or
painted surfaces. After touching a
battery or battery cap, do not touch
or rub your eyes. Thoroughly wash
your hands. If the acid contacts your
eyes, skin or clothing, immediately
flush with water for at least 15 min-
utes and seek medical attention.
�When working on or near a battery,
always wear suitable eye protection
and remove all jewelry.�Battery posts, terminals and related
accessories contain lead and lead
compounds. Wash hands after han-
dling.
�Keep the battery out of the reach of
children.
�Do not operate the vehicle if the fluid
in the battery is low. Low battery fluid
can cause a higher load on the bat-
tery which can generate heat, reduce
battery life, and in some cases lead
to an explosion.
JUMP STARTINGIf jump starting is necessary, see “Jump starting”
in the “6. In case of emergency” section. If the
engine does not start by jump starting, the
battery may have to be replaced. Contact your
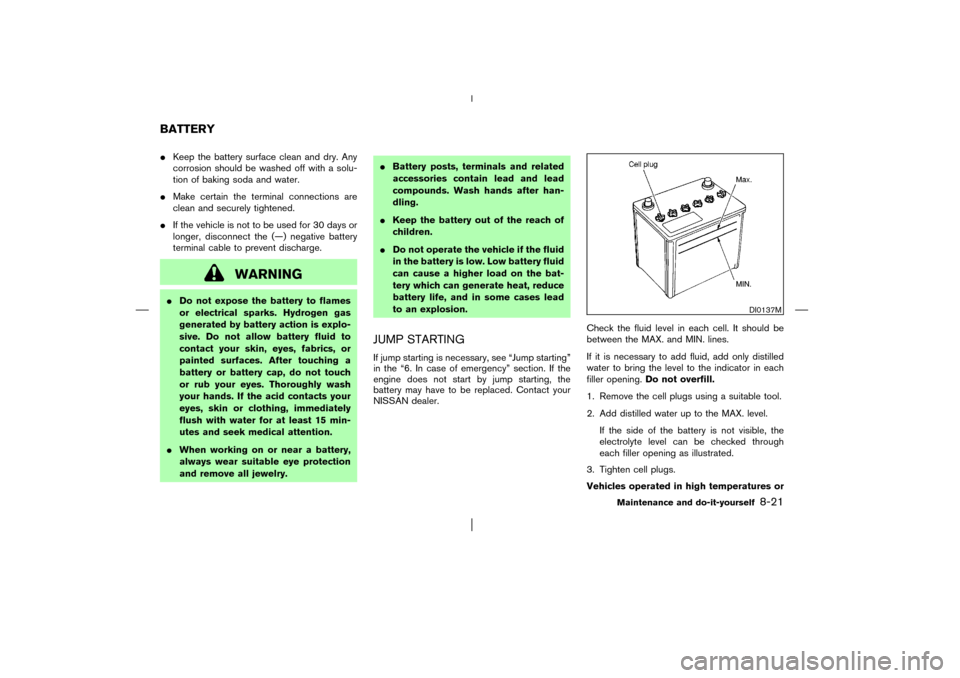
NISSAN dealer.Check the fluid level in each cell. It should be
between the MAX. and MIN. lines.
If it is necessary to add fluid, add only distilled
water to bring the level to the indicator in each
filler opening.Do not overfill.
1. Remove the cell plugs using a suitable tool.
2. Add distilled water up to the MAX. level.
If the side of the battery is not visible, the
electrolyte level can be checked through
each filler opening as illustrated.
3. Tighten cell plugs.
Vehicles operated in high temperatures or
DI0137M
BATTERY
Maintenance and do-it-yourself
8-21
�
03.1.28/R50-D/V5
�
Page 243 of 299
under severe conditions require frequent
checks of the battery fluid level.
WARNING
Be sure the ignition key is in the OFF or
LOCK position. The engine could rotate
unexpectedly.
1. Visually inspect each belt for signs of unusual
wear, cuts, fraying oil adhesion or looseness.
If the belt is in poor condition or loose, have
it replaced or adjusted by your NISSAN
dealer.
2. Have the belts checked regularly for condi-tion and tension.
SDI1480
SDI1119
SDI0424
DRIVE BELTS
8-22
Maintenance and do-it-yourself
�
03.1.28/R50-D/V5
�
Page 244 of 299
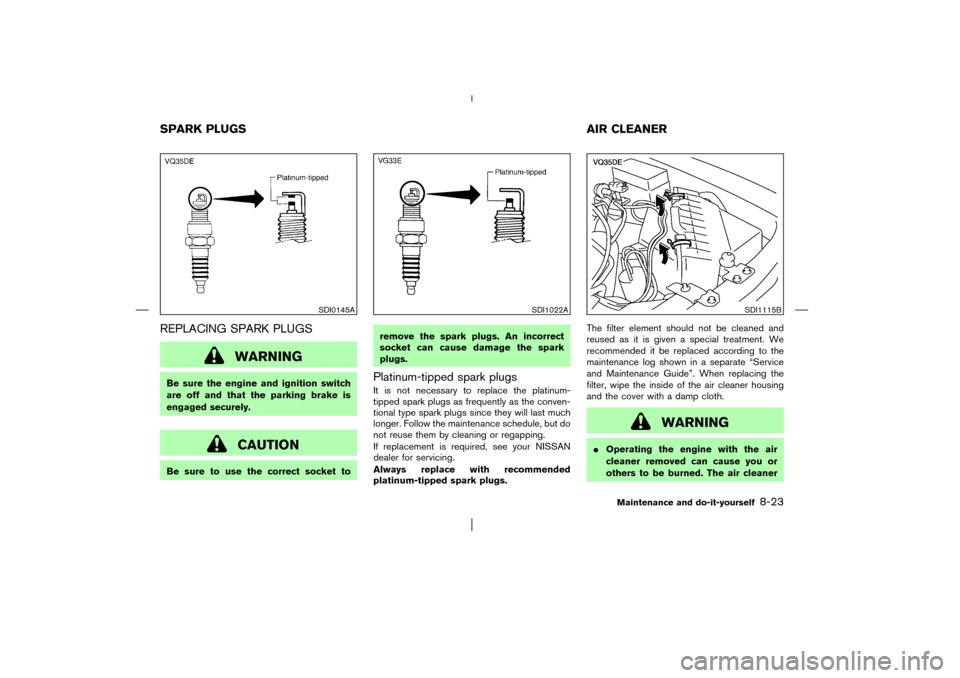
REPLACING SPARK PLUGS
WARNING
Be sure the engine and ignition switch
are off and that the parking brake is
engaged securely.
CAUTION
Be sure to use the correct socket toremove the spark plugs. An incorrect
socket can cause damage the spark
plugs.
Platinum-tipped spark plugsIt is not necessary to replace the platinum-
tipped spark plugs as frequently as the conven-
tional type spark plugs since they will last much
longer. Follow the maintenance schedule, but do
not reuse them by cleaning or regapping.
If replacement is required, see your NISSAN
dealer for servicing.
Always replace with recommended
platinum-tipped spark plugs.The filter element should not be cleaned and
reused as it is given a special treatment. We
recommended it be replaced according to the
maintenance log shown in a separate “Service
and Maintenance Guide”. When replacing the
filter, wipe the inside of the air cleaner housing
and the cover with a damp cloth.
WARNING
�Operating the engine with the air
cleaner removed can cause you or
others to be burned. The air cleaner
SDI0145A
SDI1022A
SDI1115B
SPARK PLUGS AIR CLEANER
Maintenance and do-it-yourself
8-23
�
03.1.28/R50-D/V5
�