2003 NISSAN MAXIMA tire pressure
[x] Cancel search: tire pressurePage 151 of 247
IKeep your engine tuned up.
IFollow the recommended periodic mainte-
nance schedule.
IKeep the tires inflated at the correct pres-
sure. Low pressure will increase tire wear
and waste fuel.
IKeep the front wheels in correct alignment.
Improper alignment will cause not only tire
wear but also lower fuel economy.
IAir conditioner operation lowers fuel
economy. Use the air conditioner only when
necessary.
IWhen cruising at highway speeds, it is
more economical to use the air conditioner
and leave the windows closed to reduce
drag.
WARNING
IDo not stop or park the vehicle over
flammable materials such as dry
grass, waste paper or rags. They may
ignite and cause a fire.
INever leave the engine running while
the vehicle is unattended.
INever leave children unattended in
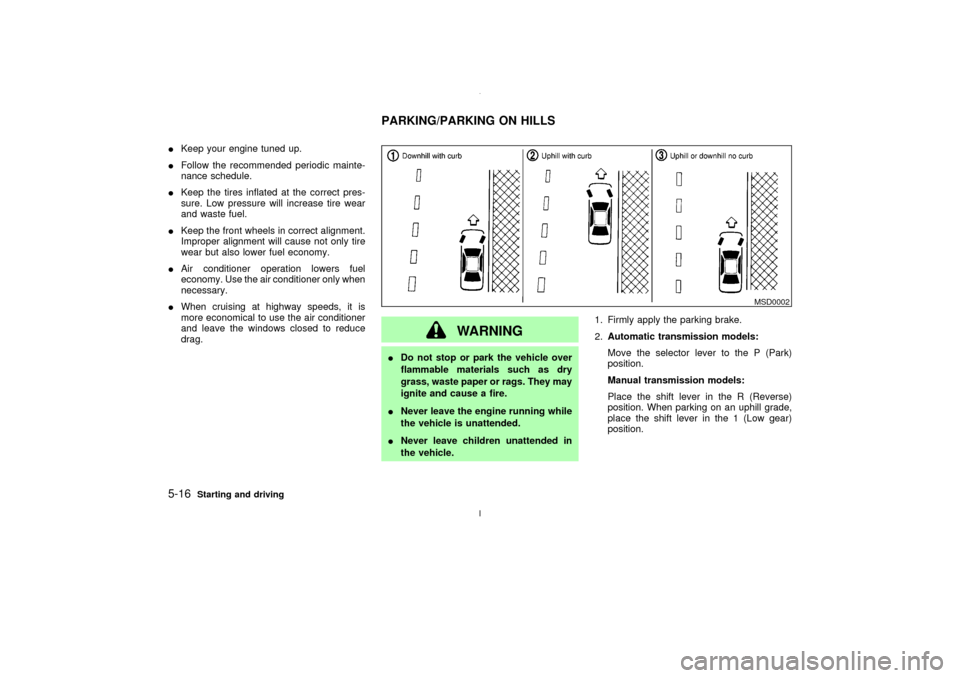
the vehicle.1. Firmly apply the parking brake.
2.Automatic transmission models:
Move the selector lever to the P (Park)
position.
Manual transmission models:
Place the shift lever in the R (Reverse)
position. When parking on an uphill grade,
place the shift lever in the 1 (Low gear)
position.
MSD0002
PARKING/PARKING ON HILLS
5-16
Starting and driving
Z
02.7.12/A33-D/V5.0
X
Page 162 of 247
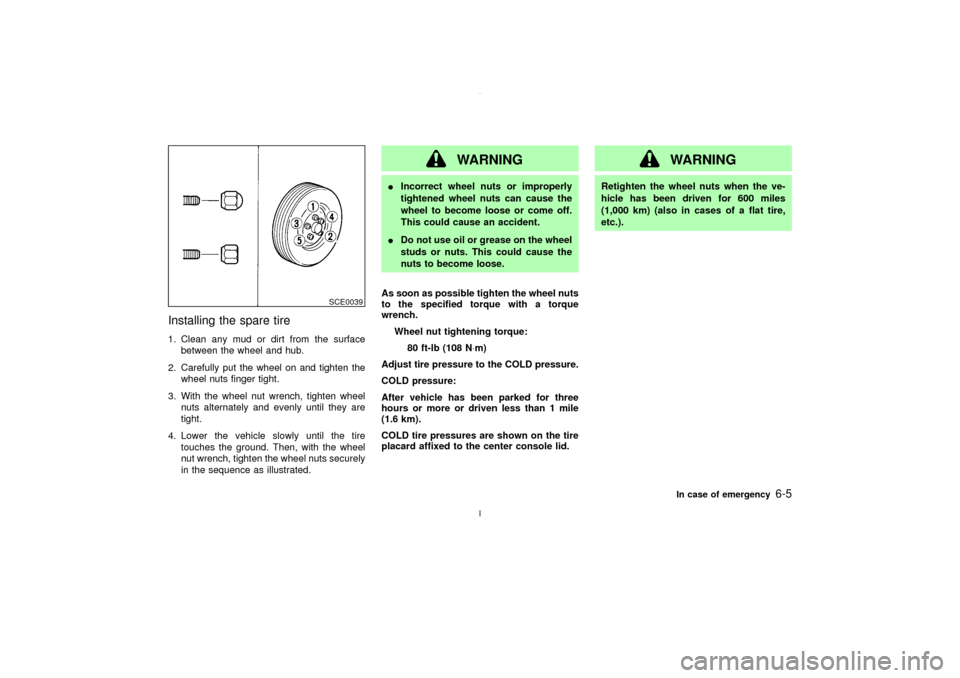
Installing the spare tire1. Clean any mud or dirt from the surface
between the wheel and hub.
2. Carefully put the wheel on and tighten the
wheel nuts finger tight.
3. With the wheel nut wrench, tighten wheel
nuts alternately and evenly until they are
tight.
4. Lower the vehicle slowly until the tire
touches the ground. Then, with the wheel
nut wrench, tighten the wheel nuts securely
in the sequence as illustrated.
WARNING
IIncorrect wheel nuts or improperly
tightened wheel nuts can cause the
wheel to become loose or come off.
This could cause an accident.
IDo not use oil or grease on the wheel
studs or nuts. This could cause the
nuts to become loose.
As soon as possible tighten the wheel nuts
to the specified torque with a torque
wrench.
Wheel nut tightening torque:
80 ft-lb (108 N×m)
Adjust tire pressure to the COLD pressure.
COLD pressure:
After vehicle has been parked for three
hours or more or driven less than 1 mile
(1.6 km).
COLD tire pressures are shown on the tire
placard affixed to the center console lid.
WARNING
Retighten the wheel nuts when the ve-
hicle has been driven for 600 miles
(1,000 km) (also in cases of a flat tire,
etc.).
SCE0039
In case of emergency
6-5
Z
02.7.12/A33-D/V5.0
X
Page 176 of 247

8 Maintenance and do-it-yourselfMaintenance requirements ........................................ 8-2
General maintenance ................................................ 8-2
Explanation of general maintenance items .......... 8-2
Maintenance precautions .......................................... 8-5
Engine compartment check locations ....................... 8-7
Engine cooling system .............................................. 8-8
Checking engine coolant level ............................. 8-8
Changing engine coolant ..................................... 8-9
Engine oil ................................................................ 8-10
Checking engine oil level ................................... 8-10
Changing engine oil ........................................... 8-11
Changing engine oil filter ................................... 8-12
Automatic transmission fluid ................................... 8-12
Temperature conditions for checking ................. 8-13
Power steering fluid ................................................ 8-14
Brake and clutch fluid ............................................. 8-14
Window washer fluid ............................................... 8-15
Battery ..................................................................... 8-15
Drive belts ............................................................... 8-17
Spark plugs ............................................................. 8-17
Replacing spark plugs ........................................ 8-18Air cleaner ............................................................... 8-18
Windshield wiper blades ......................................... 8-19
Cleaning ............................................................. 8-19
Replacing............................................................ 8-20
Parking brake and brake pedal ............................... 8-21
Checking parking brake ..................................... 8-21
Checking brake pedal ........................................ 8-21
Brake booster ..................................................... 8-22
Fuses....................................................................... 8-22
Engine compartment .......................................... 8-22
Passenger compartment .................................... 8-24
Keyfob battery replacement .................................... 8-24
Lights ....................................................................... 8-26
Headlights........................................................... 8-27
Exterior and interior lights .................................. 8-28
Wheels and tires ..................................................... 8-33
Tire pressure ...................................................... 8-33
Types of tires...................................................... 8-33
Tire chains .......................................................... 8-34
Changing wheels and tires ................................. 8-35
Z
02.7.12/A33-D/V5.0
X
Page 177 of 247

Your new NISSAN has been designed to have
minimum maintenance requirements with
longer service intervals to save you both time
and money. However, some day-to-day and
regular maintenance is essential to maintain
your NISSAN's good mechanical condition, as
well as its emission and engine performance.
It is the owner's responsibility to make sure
that scheduled maintenance, as well as gen-
eral maintenance, is performed.
As the vehicle owner, you are the only one
who can ensure that your vehicle receives the
proper maintenance care. You are a vital link
in the maintenance chain.
Scheduled maintenance:
For your convenience, both required and op-
tional scheduled maintenance items are de-
scribed and listed in your ªService and Main-
tenance Guideº. You must refer to that guide to
ensure that necessary maintenance is per-
formed on your NISSAN at regular intervals.
General maintenance:
General maintenance includes those items
which should be checked during normal day-
to-day operation of the vehicle. They are es-
sential if your vehicle is to continue to operate
properly. It is your responsibility to perform
these procedures regularly as prescribed.Performing general maintenance checks re-
quire minimal mechanical skill and only a few
general automotive tools.
These checks or inspections can be done by
yourself, a qualified technician or, if you prefer,
your NISSAN dealer.
Where to go for service:
If maintenance service is required or your
vehicle appears to malfunction, have the sys-
tems checked and tuned by an authorized
NISSAN dealer.
NISSAN technicians are well-trained special-
ists and are kept up to date with the latest
service information through technical bulletins,
service tips, and in-dealership training pro-
grams. They are completely qualified to work
on NISSAN vehiclesbeforethey work on your
vehicle, rather than after they have worked on
it.
You can be confident that your NISSAN deal-
er's service department performs the best job
to meet the maintenance requirements of your
vehicle Ð in a reliable and economic way.During the normal day-to-day operation of the
vehicle, general maintenance should be per-
formed regularly as prescribed in this section.
If you detect any unusual sounds, vibrations or
smell, be sure to check for the cause or have
your NISSAN dealer check it promptly. In
addition, you should notify your NISSAN
dealer if you think that repairs are required.
When performing any checks or maintenance
work, closely observe the ªMaintenance pre-
cautionsº later in this section.
EXPLANATION OF GENERAL
MAINTENANCE ITEMSAdditional information on the following
items with ª*º is found later in this section.Outside the vehicleThe maintenance items listed here should be
performed from time to time, unless otherwise
specified.
Tires*:Check the pressure with a gauge at
least once a month and always prior to long
distance trips. If necessary, adjust the pres-
sure in all tires, including the spare, to the
pressure specified. Check carefully for dam-
age, cuts or excessive wear.
Wheel nuts*:When checking the tires, make
sure no nuts are missing, and check for any
MAINTENANCE REQUIREMENTS GENERAL MAINTENANCE8-2
Maintenance and do-it-yourself
Z
02.7.12/A33-D/V5.0
X
Page 208 of 247
If you have a flat tire, see ªFlat tireº in the
ª6. In case of emergencyº section.TIRE PRESSURE
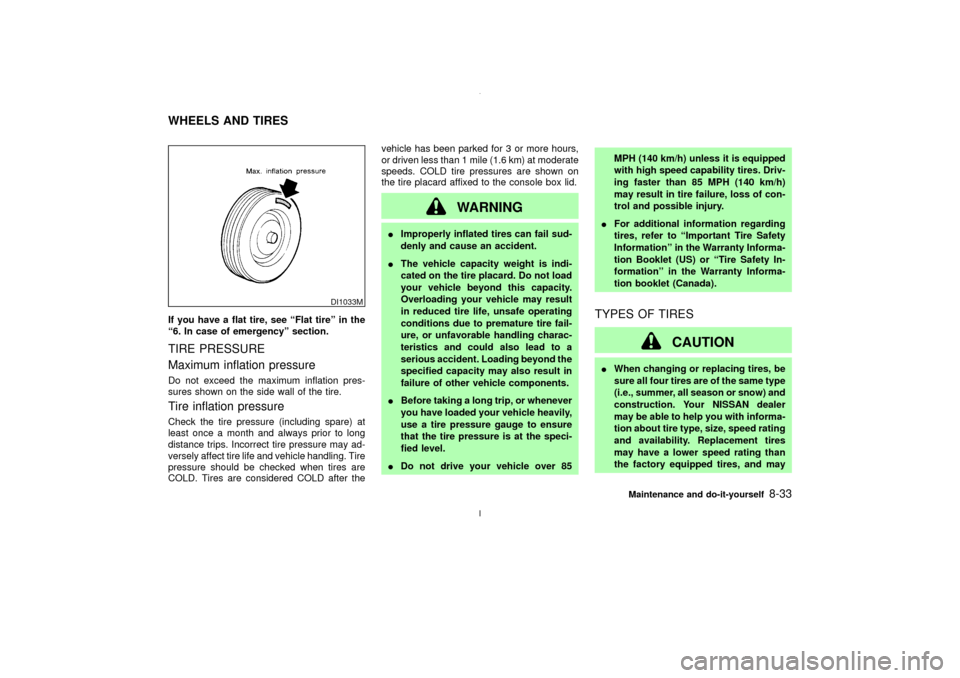
Maximum inflation pressureDo not exceed the maximum inflation pres-
sures shown on the side wall of the tire.Tire inflation pressureCheck the tire pressure (including spare) at
least once a month and always prior to long
distance trips. Incorrect tire pressure may ad-
versely affect tire life and vehicle handling. Tire
pressure should be checked when tires are
COLD. Tires are considered COLD after thevehicle has been parked for 3 or more hours,
or driven less than 1 mile (1.6 km) at moderate
speeds. COLD tire pressures are shown on
the tire placard affixed to the console box lid.
WARNING
IImproperly inflated tires can fail sud-
denly and cause an accident.
IThe vehicle capacity weight is indi-
cated on the tire placard. Do not load
your vehicle beyond this capacity.
Overloading your vehicle may result
in reduced tire life, unsafe operating
conditions due to premature tire fail-
ure, or unfavorable handling charac-
teristics and could also lead to a
serious accident. Loading beyond the
specified capacity may also result in
failure of other vehicle components.
IBefore taking a long trip, or whenever
you have loaded your vehicle heavily,
use a tire pressure gauge to ensure
that the tire pressure is at the speci-
fied level.
IDo not drive your vehicle over 85MPH (140 km/h) unless it is equipped
with high speed capability tires. Driv-
ing faster than 85 MPH (140 km/h)
may result in tire failure, loss of con-
trol and possible injury.
IFor additional information regarding
tires, refer to ªImportant Tire Safety
Informationº in the Warranty Informa-
tion Booklet (US) or ªTire Safety In-
formationº in the Warranty Informa-
tion booklet (Canada).
TYPES OF TIRES
CAUTION
IWhen changing or replacing tires, be
sure all four tires are of the same type
(i.e., summer, all season or snow) and
construction. Your NISSAN dealer
may be able to help you with informa-
tion about tire type, size, speed rating
and availability. Replacement tires
may have a lower speed rating than
the factory equipped tires, and may
DI1033M
WHEELS AND TIRES
Maintenance and do-it-yourself
8-33
Z
02.7.12/A33-D/V5.0
X
Page 210 of 247
CHANGING WHEELS AND TIRES
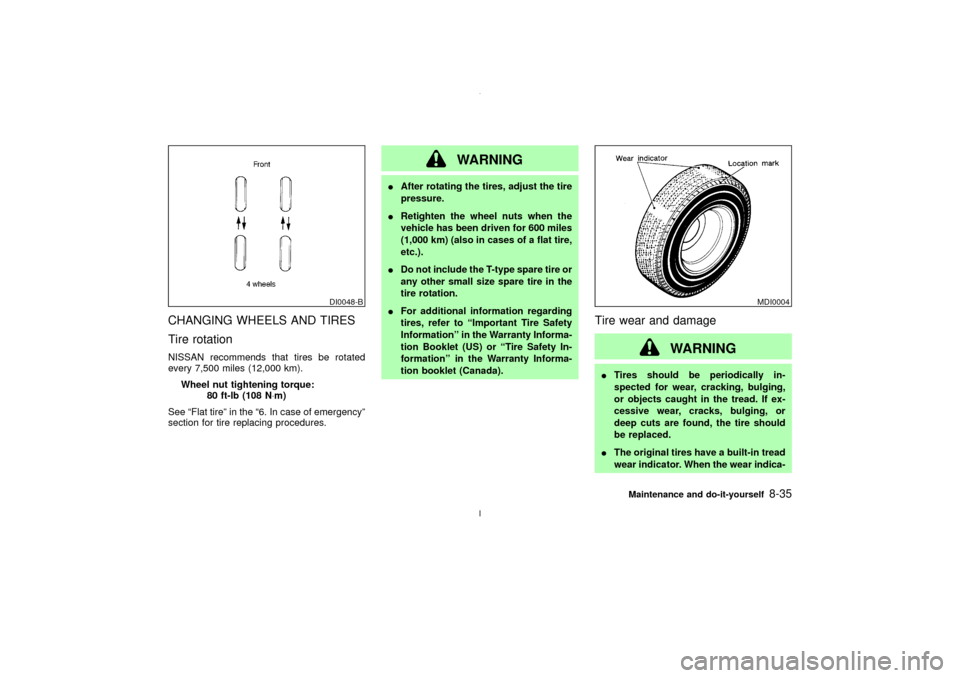
Tire rotationNISSAN recommends that tires be rotated
every 7,500 miles (12,000 km).
Wheel nut tightening torque:
80 ft-lb (108 N×m)
See ªFlat tireº in the ª6. In case of emergencyº
section for tire replacing procedures.
WARNING
IAfter rotating the tires, adjust the tire
pressure.
IRetighten the wheel nuts when the
vehicle has been driven for 600 miles
(1,000 km) (also in cases of a flat tire,
etc.).
IDo not include the T-type spare tire or
any other small size spare tire in the
tire rotation.
IFor additional information regarding
tires, refer to ªImportant Tire Safety
Informationº in the Warranty Informa-
tion Booklet (US) or ªTire Safety In-
formationº in the Warranty Informa-
tion booklet (Canada).
Tire wear and damage
WARNING
ITires should be periodically in-
spected for wear, cracking, bulging,
or objects caught in the tread. If ex-
cessive wear, cracks, bulging, or
deep cuts are found, the tire should
be replaced.
IThe original tires have a built-in tread
wear indicator. When the wear indica-
DI0048-B
MDI0004
Maintenance and do-it-yourself
8-35
Z
02.7.12/A33-D/V5.0
X
Page 212 of 247
Care of wheelsIWash the wheels when washing the vehicle
to maintain their appearance.
IClean the inner side of the wheels when the
wheel is changed or the underside of the
vehicle is washed.
IDo not use abrasive cleaners when wash-
ing the wheels.
IInspect wheel rims regularly for dents or
corrosion. Such damage may cause loss of
pressure or poor seal at the tire bead.
INISSAN recommends that the road wheels
be waxed to protect against road salt in
areas where it is used during winter.Spare tire (T-type spare tire)Observe the following precautions if the T-type
spare tire must be used, otherwise your ve-
hicle could be damaged or involved in an
accident.
CAUTION
IThe T-type spare tire should be used
only for emergency. It should be re-
placed by the standard tire at the firstopportunity.
IDrive carefully while the T-type spare
tire is installed.
Avoid sharp turns and abrupt braking
while driving.
IPeriodically check the T-type spare
tire inflation pressure, and always
keep it at 60 psi (420 kPa, 4.2 bar).
IAlways keep the pressure of the full
size spare tire (if so equipped) at the
recommended pressure for standard
tires, as indicated on the tire placard.
For tire placard location, see ªTire
placardº in the ª9. Technical and con-
sumer informationº.
IDo not drive your vehicle at speeds
faster than 50 MPH (80 km/h).
IDo not use tire chains on a T-type
spare tire. Tire chains will not fit prop-
erly on the T-type spare tire and may
cause damage to the vehicle.
IWhen driving on roads covered with
snow or ice, the T-type spare tireshould be used on the rear wheel and
the original tire used on the front
wheels (drive wheels). Use tire chains
only on the front two original tires.
ITire tread of the T-type spare tire will
wear at a faster rate than the original
tire. Replace the T-type spare tire as
soon as the tread wear indicators
appear.
IBecause the T-type spare tire is
smaller than the original tire, ground
clearance is reduced. To avoid dam-
age to the vehicle do not drive over
obstacles. Also do not drive the ve-
hicle through an automatic car wash
since it may get caught.
IDo not use the T-type spare tire on
other vehicles.
IDo not use more than one T-type
spare tire at the same time.
IDo not tow a trailer while the T-type
spare tire is installed.
Maintenance and do-it-yourself
8-37
Z
02.7.12/A33-D/V5.0
X
Page 227 of 247

TIRE PLACARDThe cold tire pressure is shown on the tire
placard affixed to the console box lid.
AIR CONDITIONER
SPECIFICATION LABELThe air conditioner specification label is affixed
inside of the hood as shown.
STI0206
STI0292
9-12
Technical and consumer information
Z
02.7.12/A33-D/V5.0
X