2003 NISSAN FRONTIER wheel
[x] Cancel search: wheelPage 67 of 272
illuminates for about 7 seconds and then turns
off. This means the system is operational.
If any of the following conditions occur, the
supplemental air bag and pre-tensioner seat belt
systems need servicing and your vehicle must be
taken to a NISSAN dealer:
cThe supplemental air bag warning light re-
mains on after approximately 7 seconds.
cThe supplemental air bag warning light flashes
intermittently.
cThe supplemental air bag warning light does
not come on at all.
Unless checked and repaired, the supplemental
restraint system (air bag system) and/or the pre-
tensioner seat belts may not function properly.
For additional details see “Supplemental restraint
system” in the “Seats, restraints and supplemen-
tal air bag systems” section of this manual.
WARNING
If the supplemental air bag warning light
is on, it could mean that the supplemental
front air bag or pre-tensioner seat belt
systems will not operate in an accident.
INDICATOR LIGHTS
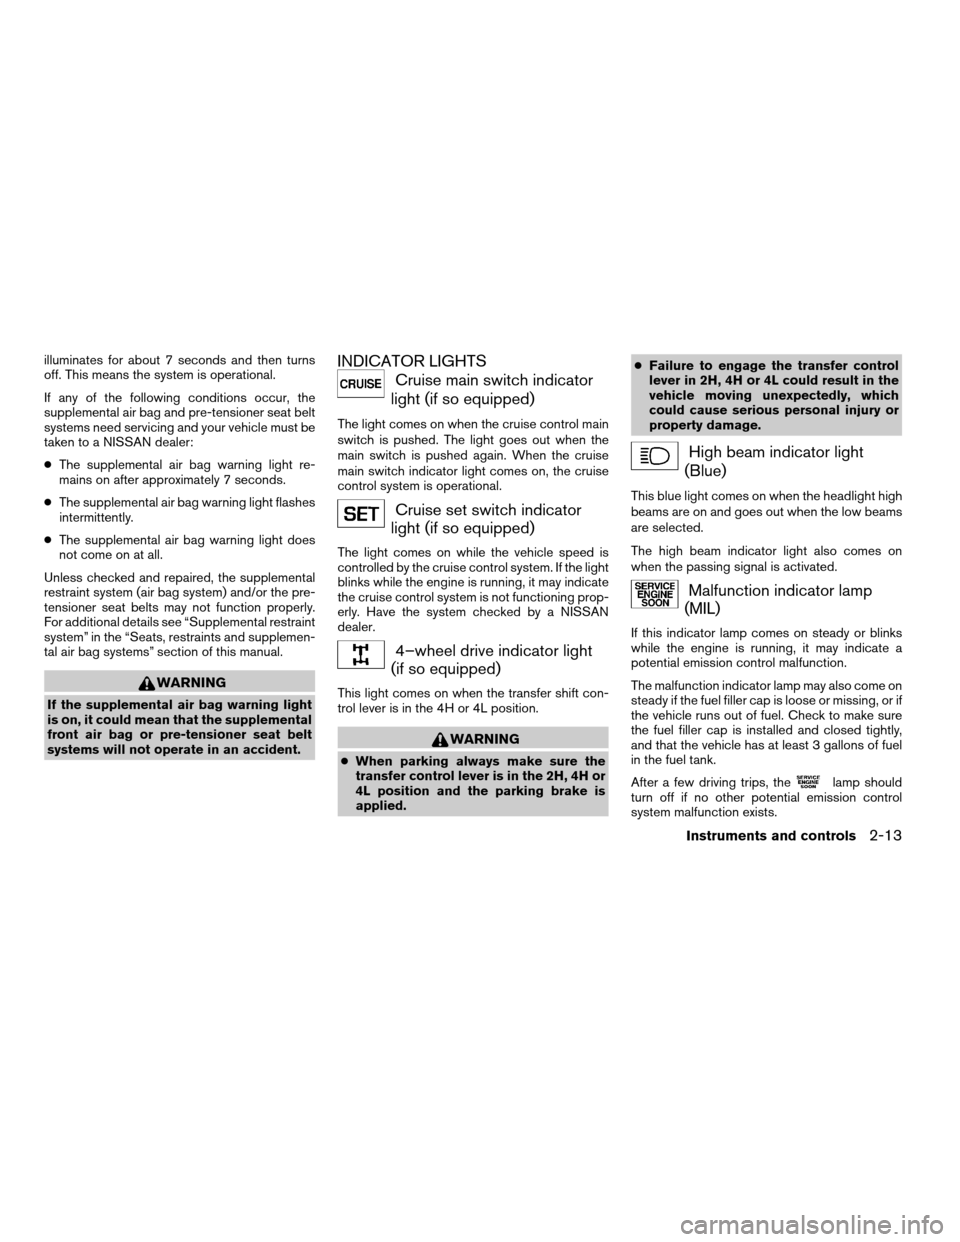
Cruise main switch indicator
light (if so equipped)
The light comes on when the cruise control main
switch is pushed. The light goes out when the
main switch is pushed again. When the cruise
main switch indicator light comes on, the cruise
control system is operational.
Cruise set switch indicator
light (if so equipped)
The light comes on while the vehicle speed is
controlled by the cruise control system. If the light
blinks while the engine is running, it may indicate
the cruise control system is not functioning prop-
erly. Have the system checked by a NISSAN
dealer.
4–wheel drive indicator light
(if so equipped)
This light comes on when the transfer shift con-
trol lever is in the 4H or 4L position.
WARNING
cWhen parking always make sure the
transfer control lever is in the 2H, 4H or
4L position and the parking brake is
applied.cFailure to engage the transfer control
lever in 2H, 4H or 4L could result in the
vehicle moving unexpectedly, which
could cause serious personal injury or
property damage.
High beam indicator light
(Blue)
This blue light comes on when the headlight high
beams are on and goes out when the low beams
are selected.
The high beam indicator light also comes on
when the passing signal is activated.
Malfunction indicator lamp
(MIL)
If this indicator lamp comes on steady or blinks
while the engine is running, it may indicate a
potential emission control malfunction.
The malfunction indicator lamp may also come on
steady if the fuel filler cap is loose or missing, or if
the vehicle runs out of fuel. Check to make sure
the fuel filler cap is installed and closed tightly,
and that the vehicle has at least 3 gallons of fuel
in the fuel tank.
After a few driving trips, the
lamp should
turn off if no other potential emission control
system malfunction exists.
Instruments and controls2-13
ZREVIEW COPY:Ð2003 Truck/Frontier(d22)
Owners Manual(owners)ÐUSA English(nna)
01/14/03Ðarosenma
X
Page 68 of 272
Operation
The malfunction indicator lamp will come on in
one of two ways:
cMalfunction indicator lamp on steady — An
emission control system malfunction has been
detected. Check the fuel filler cap. If the fuel
filler cap is loose or missing, tighten or install
the cap and continue to drive the vehicle.
The
lamp should turn off after a few
driving trips. If thelamp does not turn off
after a few driving trips, have the vehicle in-
spected by a NISSAN dealer. You do not need
to have your vehicle towed to the dealer.
c
Malfunction indicator lamp blinking — An en-
gine misfire has been detected which may dam-
age the emission control system. To reduce or
avoid emission control system damage:
– do not drive at speeds above 45 MPH
(72 km/h) .
– avoid hard acceleration or deceleration.
– avoid steep uphill grades.
– if possible, reduce the amount of cargo
being hauled or towed.
The malfunction indicator lamp may stop blinking
and come on steady. Have the vehicle inspected by
a NISSAN dealer. You do not need to have your
vehicle towed to the dealer.
CAUTION
Continued vehicle operation without hav-
ing the emission control system checked
and repaired as necessary could lead to
poor driveability, reduced fuel economy,
and possible damage to the emission con-
trol system.
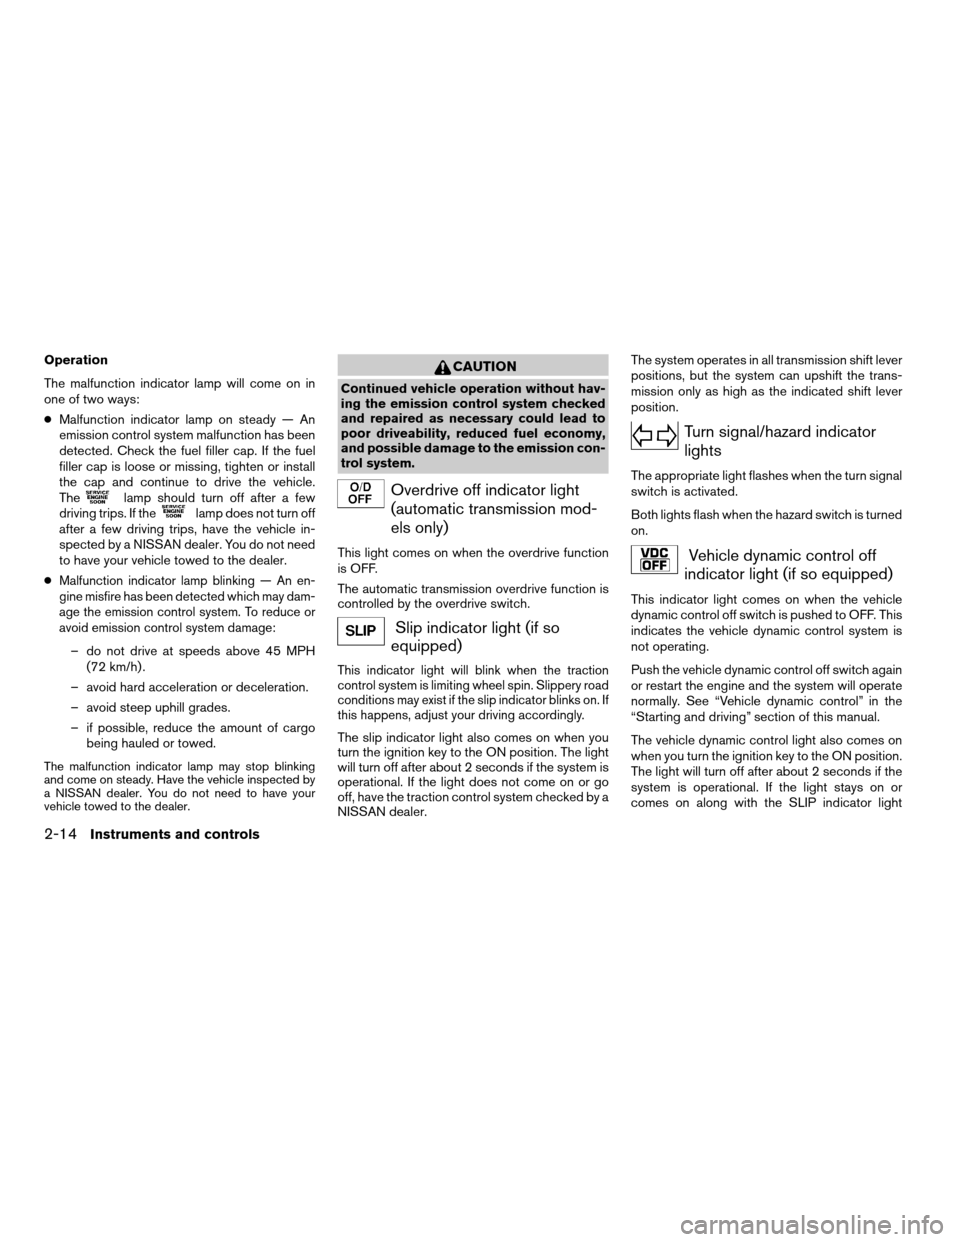
Overdrive off indicator light
(automatic transmission mod-
els only)
This light comes on when the overdrive function
is OFF.
The automatic transmission overdrive function is
controlled by the overdrive switch.
Slip indicator light (if so
equipped)
This indicator light will blink when the traction
control system is limiting wheel spin. Slippery road
conditions may exist if the slip indicator blinks on. If
this happens, adjust your driving accordingly.
The slip indicator light also comes on when you
turn the ignition key to the ON position. The light
will turn off after about 2 seconds if the system is
operational. If the light does not come on or go
off, have the traction control system checked by a
NISSAN dealer.The system operates in all transmission shift lever
positions, but the system can upshift the trans-
mission only as high as the indicated shift lever
position.
Turn signal/hazard indicator
lights
The appropriate light flashes when the turn signal
switch is activated.
Both lights flash when the hazard switch is turned
on.
Vehicle dynamic control off
indicator light (if so equipped)
This indicator light comes on when the vehicle
dynamic control off switch is pushed to OFF. This
indicates the vehicle dynamic control system is
not operating.
Push the vehicle dynamic control off switch again
or restart the engine and the system will operate
normally. See “Vehicle dynamic control” in the
“Starting and driving” section of this manual.
The vehicle dynamic control light also comes on
when you turn the ignition key to the ON position.
The light will turn off after about 2 seconds if the
system is operational. If the light stays on or
comes on along with the SLIP indicator light
2-14Instruments and controls
ZREVIEW COPY:Ð2003 Truck/Frontier(d22)
Owners Manual(owners)ÐUSA English(nna)
01/14/03Ðarosenma
X
Page 77 of 272
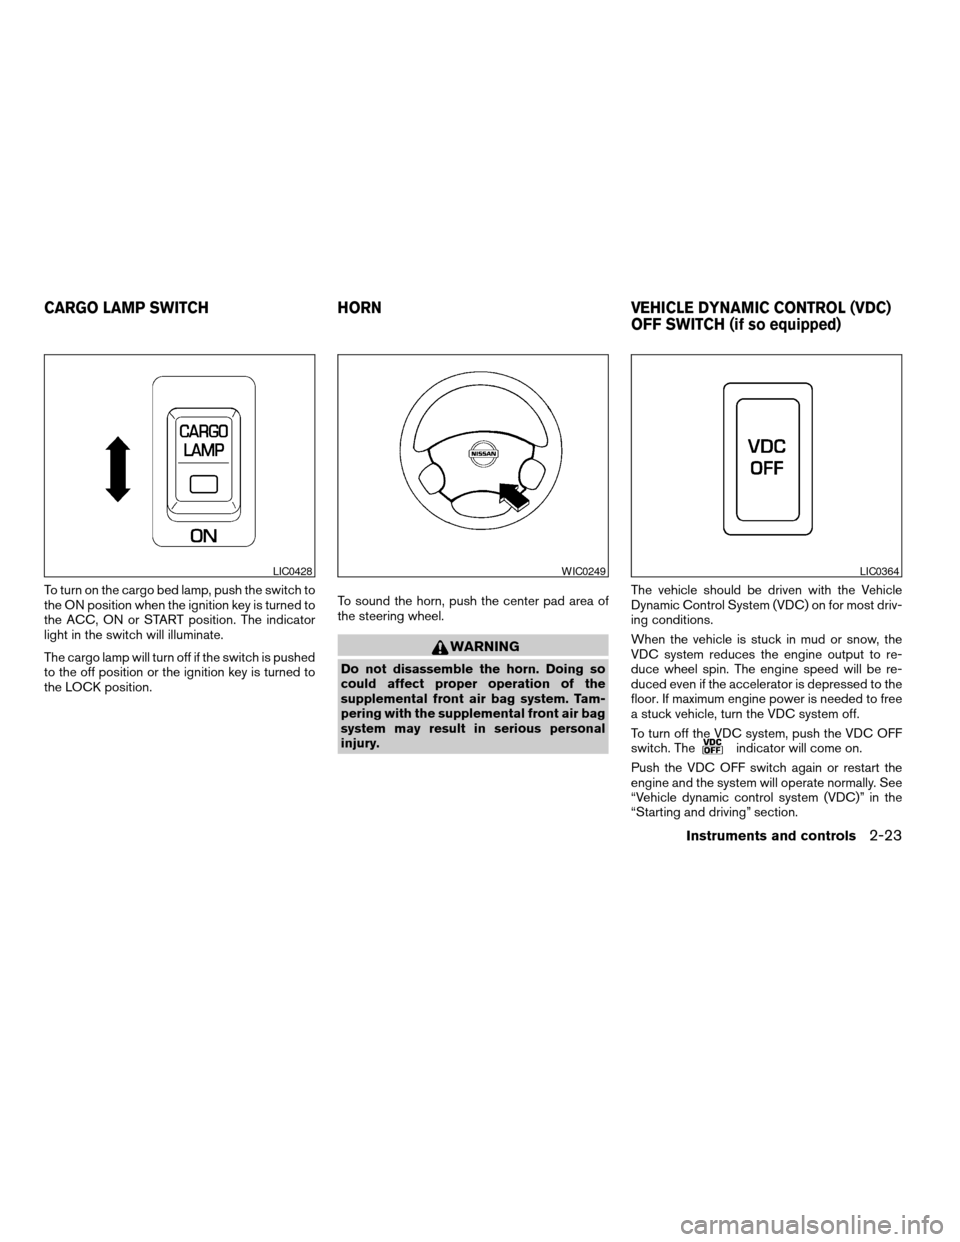
To turn on the cargo bed lamp, push the switch to
the ON position when the ignition key is turned to
the ACC, ON or START position. The indicator
light in the switch will illuminate.
The cargo lamp will turn off if the switch is pushed
to the off position or the ignition key is turned to
the LOCK position.To sound the horn, push the center pad area of
the steering wheel.
WARNING
Do not disassemble the horn. Doing so
could affect proper operation of the
supplemental front air bag system. Tam-
pering with the supplemental front air bag
system may result in serious personal
injury.The vehicle should be driven with the Vehicle
Dynamic Control System (VDC) on for most driv-
ing conditions.
When the vehicle is stuck in mud or snow, the
VDC system reduces the engine output to re-
duce wheel spin. The engine speed will be re-
duced even if the accelerator is depressed to the
floor. If maximum engine power is needed to free
a stuck vehicle, turn the VDC system off.
To turn off the VDC system, push the VDC OFF
switch. The
indicator will come on.
Push the VDC OFF switch again or restart the
engine and the system will operate normally. See
“Vehicle dynamic control system (VDC)” in the
“Starting and driving” section.
LIC0428WIC0249LIC0364
CARGO LAMP SWITCH HORN VEHICLE DYNAMIC CONTROL (VDC)
OFF SWITCH (if so equipped)
Instruments and controls2-23
ZREVIEW COPY:Ð2003 Truck/Frontier(d22)
Owners Manual(owners)ÐUSA English(nna)
01/15/03Ðarosenma
X
Page 87 of 272

3 Pre-driving checks and adjustments
Keys .............................................3-2
Doors............................................3-2
Locking with key................................3-2
Locking with inside lock knob....................3-3
Locking with power door lock switch
(if so equipped)................................3-3
Child safety rear door lock
(Crew Cab models only)........................3-4
Remote keyless entry system (if so equipped).........3-4
How to use remote keyless entry system..........3-4
Battery replacement............................3-7
Hood............................................3-8
Tubular roof rack (if so equipped)....................3-9
Tubular step rail (if so equipped)...................3-11Fuel filler lid......................................3-11
Fuel filler cap..................................3-11
Steering wheel...................................3-13
Tilt operation (if so equipped)...................3-13
Sun visors.......................................3-13
Vanity mirror (if so equipped)....................3-13
Mirrors..........................................3-13
Inside mirror..................................3-13
Outside mirrors...............................3-14
Outside mirror remote control
(if so equipped)...............................3-15
Truck box........................................3-15
Tailgate.......................................3-15
Tie down hooks...............................3-17
ZREVIEW COPY:Ð2003 Truck/Frontier(d22)
Owners Manual(owners)ÐUSA English(nna)
01/15/03Ðarosenma
X
Page 99 of 272
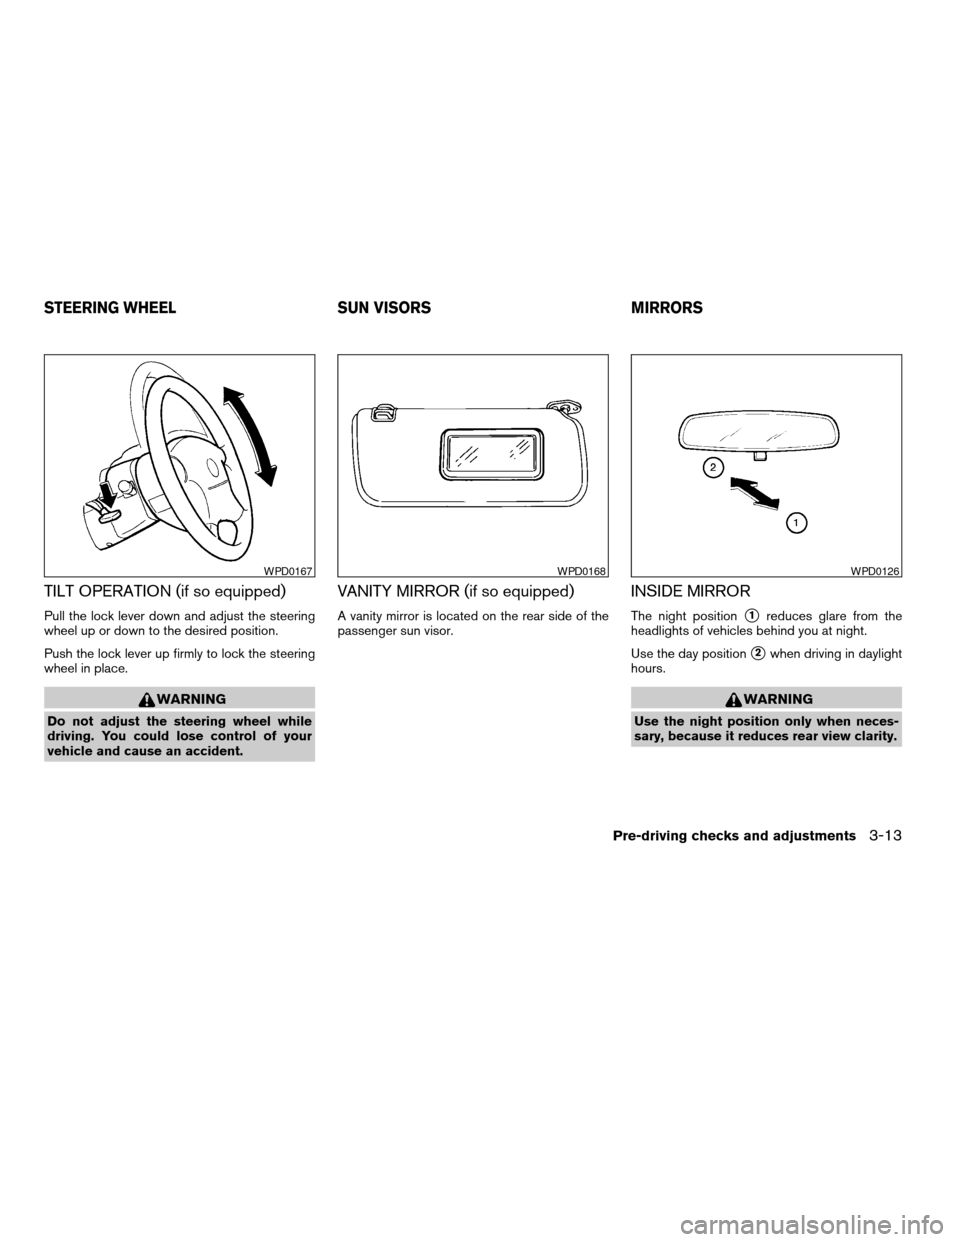
TILT OPERATION (if so equipped)
Pull the lock lever down and adjust the steering
wheel up or down to the desired position.
Push the lock lever up firmly to lock the steering
wheel in place.
WARNING
Do not adjust the steering wheel while
driving. You could lose control of your
vehicle and cause an accident.
VANITY MIRROR (if so equipped)
A vanity mirror is located on the rear side of the
passenger sun visor.
INSIDE MIRROR
The night positions1reduces glare from the
headlights of vehicles behind you at night.
Use the day position
s2when driving in daylight
hours.
WARNING
Use the night position only when neces-
sary, because it reduces rear view clarity.
WPD0167WPD0168WPD0126
STEERING WHEEL SUN VISORS MIRRORS
Pre-driving checks and adjustments3-13
ZREVIEW COPY:Ð2003 Truck/Frontier(d22)
Owners Manual(owners)ÐUSA English(nna)
01/15/03Ðarosenma
X
Page 105 of 272

4 Heater, air conditioner and audio
systems
Ventilators........................................4-2
Heater and air conditioner (manual)..................4-2
Controls.......................................4-3
Heater operation...............................4-4
Air conditioner operation (if so equipped).........4-5
Air flow charts..................................4-6
Servicing air conditioner............................4-9
Audio system....................................4-10
Radio........................................4-10
FM radio reception............................4-10
AM radio reception............................4-10Audio operation precautions....................4-11
FM-AM radio with compact disc (CD) player
(if so equipped)...............................4-12
FM-AM radio with compact disc (CD)
changer (if so equipped).......................4-16
CD care and cleaning..........................4-27
Steering wheel switch for audio control
(if so equipped)...............................4-28
Antenna......................................4-28
Car phone or CB radio............................4-29
ZREVIEW COPY:Ð2003 Truck/Frontier(d22)
Owners Manual(owners)ÐUSA English(nna)
01/15/03Ðarosenma
X
Page 132 of 272
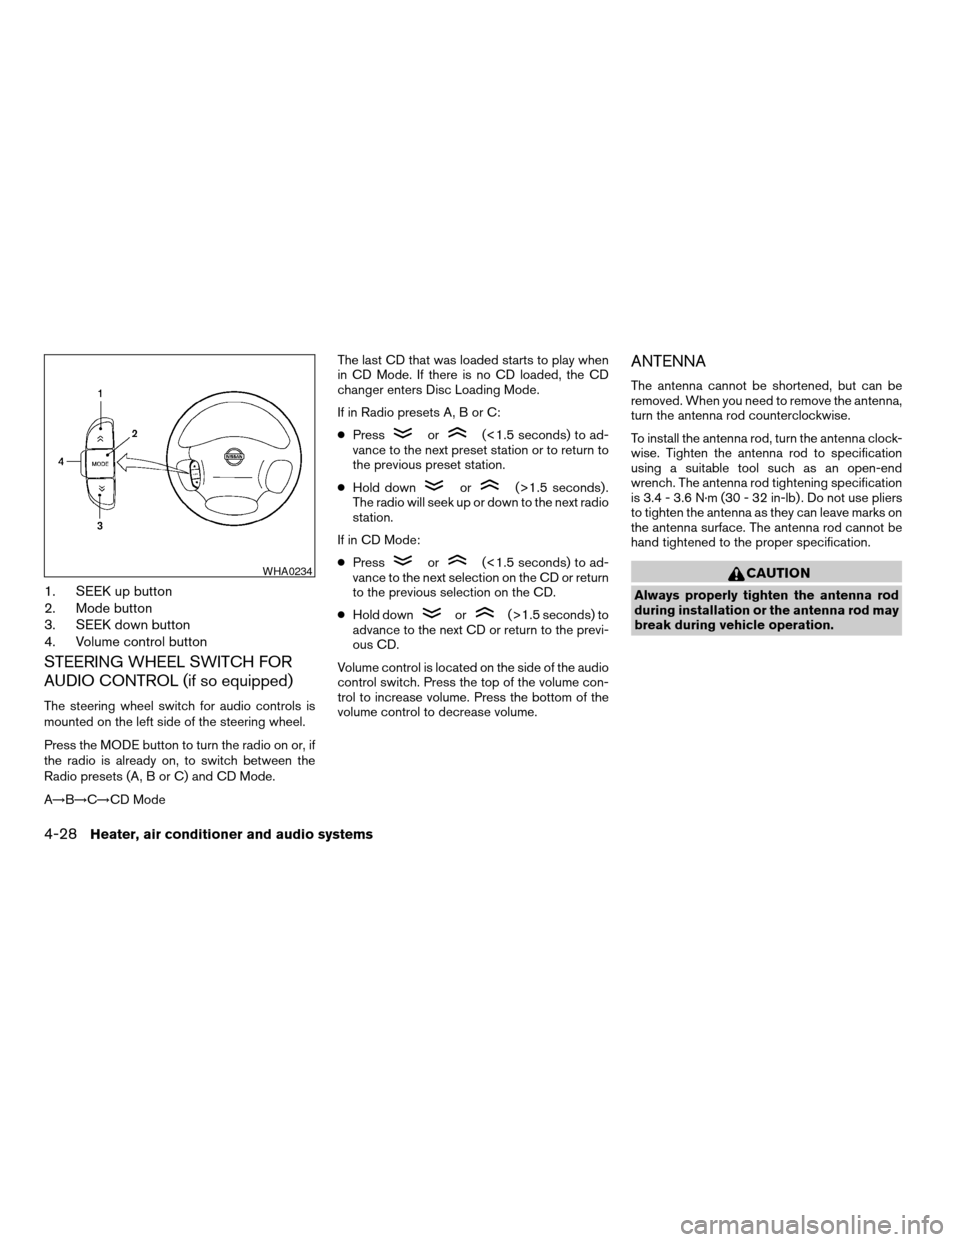
1. SEEK up button
2. Mode button
3. SEEK down button
4. Volume control button
STEERING WHEEL SWITCH FOR
AUDIO CONTROL (if so equipped)
The steering wheel switch for audio controls is
mounted on the left side of the steering wheel.
Press the MODE button to turn the radio on or, if
the radio is already on, to switch between the
Radio presets (A, B or C) and CD Mode.
A!B!C!CD ModeThe last CD that was loaded starts to play when
in CD Mode. If there is no CD loaded, the CD
changer enters Disc Loading Mode.
If in Radio presets A, B or C:
cPress
or(<1.5 seconds) to ad-
vance to the next preset station or to return to
the previous preset station.
cHold down
or(>1.5 seconds) .
The radio will seek up or down to the next radio
station.
If in CD Mode:
cPress
or(<1.5 seconds) to ad-
vance to the next selection on the CD or return
to the previous selection on the CD.
cHold down
or(>1.5 seconds) to
advance to the next CD or return to the previ-
ous CD.
Volume control is located on the side of the audio
control switch. Press the top of the volume con-
trol to increase volume. Press the bottom of the
volume control to decrease volume.
ANTENNA
The antenna cannot be shortened, but can be
removed. When you need to remove the antenna,
turn the antenna rod counterclockwise.
To install the antenna rod, turn the antenna clock-
wise. Tighten the antenna rod to specification
using a suitable tool such as an open-end
wrench. The antenna rod tightening specification
is 3.4 - 3.6 N·m (30 - 32 in-lb) . Do not use pliers
to tighten the antenna as they can leave marks on
the antenna surface. The antenna rod cannot be
hand tightened to the proper specification.
CAUTION
Always properly tighten the antenna rod
during installation or the antenna rod may
break during vehicle operation.
WHA0234
4-28Heater, air conditioner and audio systems
ZREVIEW COPY:Ð2003 Truck/Frontier(d22)
Owners Manual(owners)ÐUSA English(nna)
01/15/03Ðarosenma
X
Page 135 of 272

5 Starting and driving
Precautions when starting and driving................5-2
Exhaust gas (carbon monoxide)..................5-2
Three-way catalyst..............................5-2
Low tire pressure warning system
(if so equipped)................................5-3
On-pavement and off-road driving
precautions....................................5-4
Avoiding collision and rollover....................5-4
Drinking alcohol/drugs and driving................5-5
Driving safety precautions.......................5-5
Ignition switch.....................................5-7
Automatic transmission..........................5-7
Manual transmission............................5-8
Key positions..................................5-8
Before starting the engine..........................5-9
Starting the engine................................5-9
Driving the vehicle................................5-10
Automatic transmission (if so equipped)..........5-10
Manual transmission...........................5-16
Parking brake....................................5-18
Cruise control (if so equipped).....................5-19
Precautions on cruise control...................5-19Cruise control operations.......................5-19
Break-in schedule................................5-20
Increasing fuel economy...........................5-21
Using four wheel drive (4WD)......................5-21
Transfer case shifting procedures...............5-21
Auto-lock free-running hubs............5-22
Parking/parking on hills............................5-25
Power steering...................................5-26
Brake system....................................5-26
Brake precautions.............................5-26
Anti-lock Brake System (ABS)..................5-27
Vehicle dynamic control (VDC) system
(if so equipped)..................................5-28
Cold weather driving..............................5-30
Freeing a frozen door lock......................5-30
Anti-freeze....................................5-30
Battery.......................................5-30
Draining of coolant water.......................5-30
Tire equipment................................5-30
Special winter equipment.......................5-31
Driving on snow or ice.........................5-31
Engine block heater (if so equipped).............5-31
ZREVIEW COPY:Ð2003 Truck/Frontier(d22)
Owners Manual(owners)ÐUSA English(nna)
01/15/03Ðarosenma
X