2003 NISSAN ALTIMA stop start
[x] Cancel search: stop startPage 66 of 256
CAUTION
When cleaning the inner side of the rear
window, be careful not to scratch or dam-
age the rear window defroster.
NOTE:
The top few rows of wires on the rear win-
dow are not part of the rear window de-
froster system. These wires make up the
antenna for the audio system.
XENON HEADLIGHTS
WARNING
cHIGH VOLTAGE
cWhen xenon headlights are on, they
produce a high voltage. To prevent an
electric shock, never attempt to modify
or disassemble. Always have your xe-
non headlights replaced at a NISSAN
dealer.
cXenon headlights provide considerably
more light than conventional head-
lights. If they are not correctly aimed,
they might temporarily blind an oncom-
ing driver or the driver ahead of you and
cause a serious accident. If headlights
are not aimed correctly, immediately
take your vehicle to a NISSAN dealer
and have the headlights adjusted
correctly.
When the xenon headlight is initially turned on, its
brightness or color varies slightly. However, the
color and brightness will soon stabilize.cThe life of xenon headlights will be
shortened by frequent on-off opera-
tion. It is generally desirable not to turn
off the headlights for short intervals
(for example, when the vehicle stops at
a traffic signal) . Even when the daytime
running lights are active (Canada only) ,
the xenon headlights do not turn on.
This way the life of the xenon head-
lights is not reduced.
cIf the xenon headlight bulb is close to
burning out, the brightness will drasti-
cally decrease, the light will start blink-
ing, or the color of the light will be-
come reddish. If one or more of the
above signs appear, contact a NISSAN
dealer.
Type B
LIC0317
HEADLIGHT AND TURN SIGNAL
SWITCH
2-18Instruments and controls
ZREVIEW COPY:Ð2003 Altima(l30)
Owners Manual(owners)ÐUSA English(nna)
04/21/03Ðdebbie
X
Page 77 of 256
WARNING
The cup holder should not be used while
driving so full attention may be given to
vehicle operation.
CAUTION
cAvoid abrupt starting and braking when
the cup holder is being used to prevent
spilling the drink. If the liquid is hot, it
can scald you or your passenger.cUse only soft cups in the cup holder.
Hard objects can injure you in an
accident.
GLOVE BOX
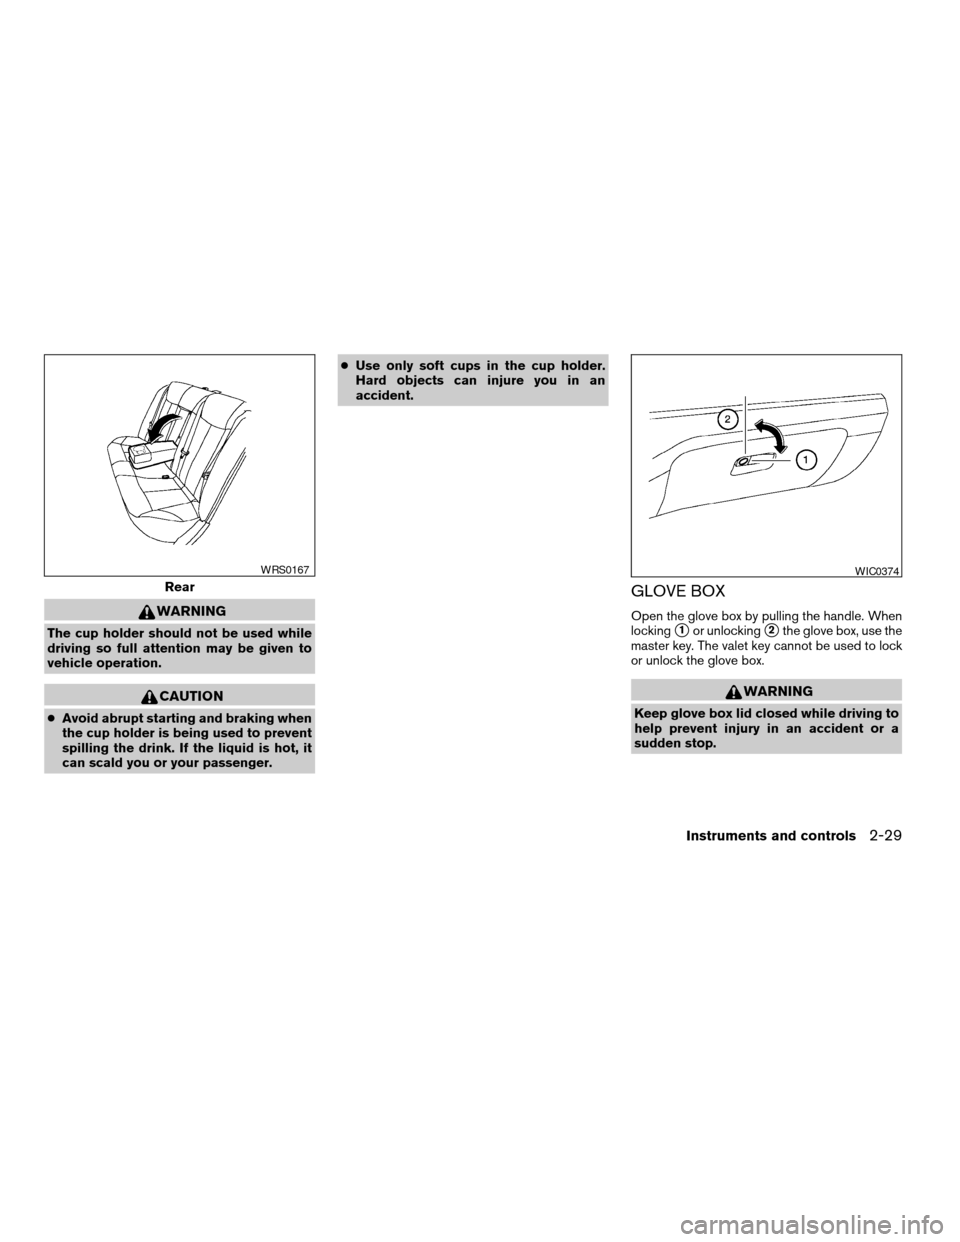
Open the glove box by pulling the handle. When
locking
s1or unlockings2the glove box, use the
master key. The valet key cannot be used to lock
or unlock the glove box.
WARNING
Keep glove box lid closed while driving to
help prevent injury in an accident or a
sudden stop.
Rear
WRS0167WIC0374
Instruments and controls2-29
ZREVIEW COPY:Ð2003 Altima(l30)
Owners Manual(owners)ÐUSA English(nna)
04/21/03Ðdebbie
X
Page 103 of 256
OPENER OPERATION
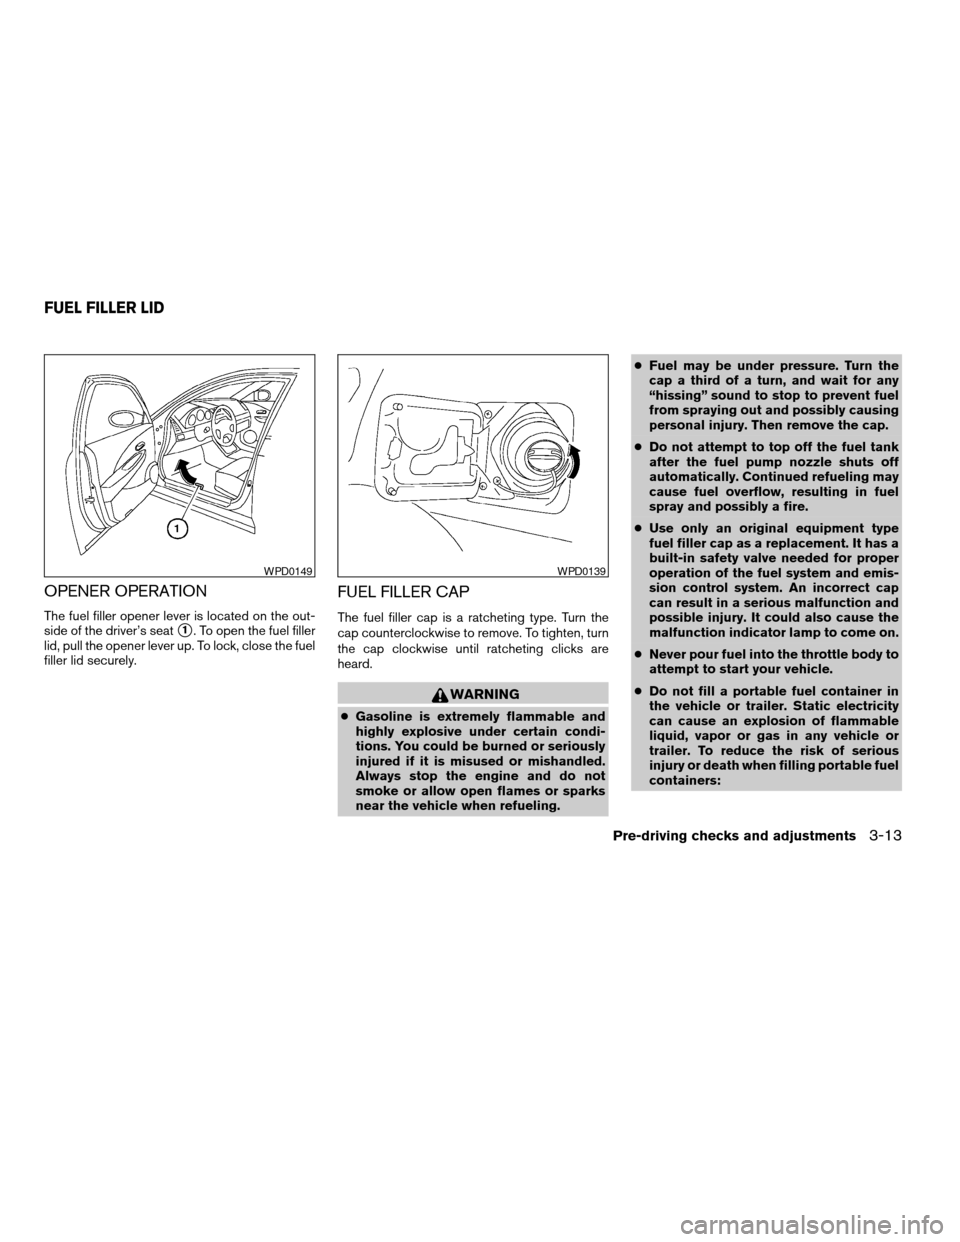
The fuel filler opener lever is located on the out-
side of the driver’s seat
s1. To open the fuel filler
lid, pull the opener lever up. To lock, close the fuel
filler lid securely.
FUEL FILLER CAP
The fuel filler cap is a ratcheting type. Turn the
cap counterclockwise to remove. To tighten, turn
the cap clockwise until ratcheting clicks are
heard.
WARNING
cGasoline is extremely flammable and
highly explosive under certain condi-
tions. You could be burned or seriously
injured if it is misused or mishandled.
Always stop the engine and do not
smoke or allow open flames or sparks
near the vehicle when refueling.cFuel may be under pressure. Turn the
cap a third of a turn, and wait for any
“hissing” sound to stop to prevent fuel
from spraying out and possibly causing
personal injury. Then remove the cap.
cDo not attempt to top off the fuel tank
after the fuel pump nozzle shuts off
automatically. Continued refueling may
cause fuel overflow, resulting in fuel
spray and possibly a fire.
cUse only an original equipment type
fuel filler cap as a replacement. It has a
built-in safety valve needed for proper
operation of the fuel system and emis-
sion control system. An incorrect cap
can result in a serious malfunction and
possible injury. It could also cause the
malfunction indicator lamp to come on.
cNever pour fuel into the throttle body to
attempt to start your vehicle.
cDo not fill a portable fuel container in
the vehicle or trailer. Static electricity
can cause an explosion of flammable
liquid, vapor or gas in any vehicle or
trailer. To reduce the risk of serious
injury or death when filling portable fuel
containers:
WPD0149WPD0139
FUEL FILLER LID
Pre-driving checks and adjustments3-13
ZREVIEW COPY:Ð2003 Altima(l30)
Owners Manual(owners)ÐUSA English(nna)
04/21/03Ðdebbie
X
Page 124 of 256
When no CD is loaded, the radio comes on.
Pushing the PWR/VOL control knob again turns
the system off.
Turn the PWR/VOL control knob to the right to
increase volume or to the left to decrease volume.
Adjusting tone quality and speaker balance
Press the AUDIO button to enter the audio adjust
mode:
Bass!Mid!Treb!Fade!Bal
Press the TUNE/FF-REV (
or)or
SEEK/TRACK (
or) to adjust to the
desired levels. The display will return to the regu-
lar radio display after 7 seconds, or you may
press the AUDIO button again to return to the
regular radio display.
Clock operation
Pressing the MENU or CLOCK button displays
the clock with the radio on or off. Press the MENU
or CLOCK button again to turn off the clock
display.
Clock set
1. Press and hold the MENU or CLOCK button
until it beeps (longer than 2 seconds) .2. The hours will start flashing. Press
TUNE/FF-REV (
or)or
SEEK/TRACK (
or) to adjust
the hours.
3. Press the MENU or CLOCK button to
switch to the minute adjustment.
4. Press TUNE/FF-REV (
or)or
SEEK/TRACK (
or) to adjust
the minutes.
5. Press the MENU or CLOCK button again to
exit the clock set mode.
The display will return to the regular clock display
after 7 seconds, or you may press the MENU or
CLOCK button again to return to the regular
clock display.
FM-AM radio operation
FM-AM band select
Push the AM or the FM button to change from AM
to FM reception.
The FM stereo indicator, ST, illuminates during
FM stereo reception. When the stereo broadcast
signal is weak, the radio automatically changes
from stereo to monaural reception.
TUNE/FF—REV
WARNING
The radio should not be tuned while driv-
ing so full attention may be given to ve-
hicle operation.
Use the
andbuttons for manual
tuning. To move quickly through the channels,
hold the tuning buttons down.
SEEK tuning
Push SEEK/TRACK (
or) . SEEK
tuning begins from low to high frequencies or
high to low frequencies, depending on which
button is pressed, and stops at the next broad-
casting station. If using the up button, once the
highest broadcasting station is reached, the ra-
dio continues in the SEEK mode at the lowest
broadcasting station. If using the down button,
once the lowest broadcasting station is reached,
the radio continues in the SEEK mode at the
highest broadcasting station.
SCAN tuning
Push the SCAN button. SCAN illuminates in the
display window. SCAN tuning begins from low to
high frequencies or high to low frequencies.
SCAN tuning stops for 5 seconds at each broad-
casting station that has sufficient signal strength.
4-16Heater, air conditioner and audio systems
ZREVIEW COPY:Ð2003 Altima(l30)
Owners Manual(owners)ÐUSA English(nna)
04/21/03Ðdebbie
X
Page 129 of 256
When no CD is loaded, the radio comes on.
Pushing the PWR/VOL control knob again turns
the system off.
Turn the PWR/VOL control knob to the right to
increase volume or to the left to decrease volume.
Adjusting tone quality and speaker balance
Press the AUDIO button to enter the audio adjust
mode:
Bass!Treb!Fade!Bal
Press the TUNE/FF-REV (
or)or
SEEK/TRACK (
or) to adjust to the
desired levels. The display will return to the regu-
lar radio display after 7 seconds, or you may
press the AUDIO button again to return to the
regular radio display.
Clock operation
Pressing the MENU button displays the clock
with the radio on or off. Press the MENU button
again to turn off the clock display.
Clock set
1. Press and hold the MENU button until it
beeps (>2 seconds) .2. The hours will start flashing. Press
TUNE/FF-REV (
or)or
SEEK/TRACK (
or) to adjust
the hours.
3. Press the MENU button to switch to the
minute adjustment.
4. Press TUNE/FF-REV (
or)or
SEEK/TRACK (
or) to adjust
the minutes.
5. Press the MENU button again to exit the
clock set mode.
The display will return to the regular clock display
after 7 seconds, or you may press the MENU
button again to return to the regular clock display.
FM-AM radio operation
FM-AM band select
Push the AM or the FM button to change from AM
to FM reception.
The FM stereo indicator, ST, illuminates during
FM stereo reception. When the stereo broadcast
signal is weak, the radio automatically changes
from stereo to monaural reception.
TUNE/FF—REV
WARNING
The radio should not be tuned while driv-
ing so full attention may be given to ve-
hicle operation.
Use the
andbuttons for manual
tuning. To move quickly through the channels,
hold the tuning buttons down.
SEEK tuning
Push SEEK/TRACK (
or) . SEEK
tuning begins from low to high frequencies or
high to low frequencies, depending on which
button is pressed, and stops at the next broad-
casting station. If using the up button, once the
highest broadcasting station is reached, the ra-
dio continues in the SEEK mode at the lowest
broadcasting station. If using the down button,
once the lowest broadcasting station is reached,
the radio continues in the SEEK mode at the
highest broadcasting station.
SCAN tuning
Push the SCAN button. SCAN illuminates in the
display window. SCAN tuning begins from low to
high frequencies or high to low frequencies.
SCAN tuning stops for 5 seconds at each broad-
casting station that has sufficient signal strength.
Heater, air conditioner and audio systems4-21
ZREVIEW COPY:Ð2003 Altima(l30)
Owners Manual(owners)ÐUSA English(nna)
04/21/03Ðdebbie
X
Page 130 of 256

When scanning, SCAN blinks in the display.
Pushing the SCAN button again during this 5
second period stops SCAN tuning and the radio
remains tuned to that station.
Station memory operation — Travel Preset
is OFF
Each preset mode (A, B or C) has 6 presets,
capable of storing any combination of AM, FM
and FM RDS stations.
Press the PRESET ABC button to change be-
tween the presets:
A!B!C
The radio displays icon A, B or C to indicate
which set of presets is active.
To store a radio station in a preset:
1. Select the desired preset by pressing PRE-
SET ABC.
2. Tune to the desired station.
3. Press the desired station select button (>2
seconds) .
4. When the indicator illuminates in the station
selection button, a beep will sound indicat-
ing memorization is complete. For FM sta-
tions, the indicator will turn green. For AM
stations, the indicator will turn amber.5. Other station select buttons can be set in
the same manner.
If the battery cable is disconnected, or if the radio
fuse opens, the radio memory is canceled. In that
case, reset the desired stations.
Turning ON Travel Preset
1. Press the TRAVEL preset button (<1.5 sec-
onds) . The TRAVEL icon shows in the dis-
play.
2. The radio selects the strongest stations in
the area and stores them in Travel Presets A,
B and C. 12 FM stations and 6 AM stations
are the default settings. To change the de-
fault settings, see “Editing Travel Preset”
later in this section.
3. When finished storing radio stations, the
radio tunes to the first stored preset of Travel
Preset A.
4. If the radio cannot find any stations, the radio
displays“NO STATION”and mutes the au-
dio.
5. If the radio cannot fill all the presets, the
remaining presets are stored with 87.9 for
FM and 600 for AM.
The TUNE, SCAN, SEEK and preset memory
functions are available while Travel Preset mode
is on.Canceling Travel Preset
Press the TRAVEL preset button (<1.5 seconds)
to clear the Travel Preset memory. This turns off
the Travel icon. The radio returns to the last used
preset of A, B or C in the permanent preset
memory.
Editing travel preset
1. Press and hold the TRAVEL preset button
(>3 seconds) until the radio beeps to start
the editing mode. The Travel icon will flash
while in TRAVEL PRESET EDIT mode.
2. The radio displays“TRAVEL EDIT”for 2
seconds and then changes to“SET A-*”.
3. Press TUNE/FF-REV (
or)to
select a mode.
4. Press the TRAVEL PRESET button to save
the mode.
5. Display is changed to“SET B-*”, repeat
steps 3 and 4.
6. Display is changed to“SET C-*”, repeat
step 3.
7. Press the TRAVEL PRESET button to exit
the edit mode and return to normal mode.
*: AM, FM, FM RDS, Rock, Classic Rock, Soft
Rock, Top 40, Country, Jazz, Classical, Oldies,
News, Sports, Talk.
4-22Heater, air conditioner and audio systems
ZREVIEW COPY:Ð2003 Altima(l30)
Owners Manual(owners)ÐUSA English(nna)
04/21/03Ðdebbie
X
Page 131 of 256

Storing Travel Preset stations in permanent
memory
1. While in Travel Preset mode, press and hold
the TRAVEL preset button until it beeps (>3
seconds) .
2. The presets are transferred from Travel Pre-
set memory to the permanent preset
memory for A, B, and C.“PRESETS
LOADED”is displayed.
3. The TRAVEL preset indicator turns off.
RDS (radio data system)
RDS stands for Radio Data System, and is a data
information service transmitted by some radio
stations on the FM band (not AM band) encoded
within a regular radio broadcast. Currently, most
RDS stations are in large cities, but many stations
are now considering broadcasting RDS data.
RDS can display:
cStation call sign, such as “WHFR 98.3”.
cStation name, such as “The Groove”.
cMusic or programming type, such as “Clas-
sical”, “Country”, or “Rock”.
cTraffic reports about delays or construction.
If the station broadcasts RDS information the
RDS icon is displayed. The RDS information willbe displayed according to the option chosen in
the RDS setup mode. (FM & RDS is the default.)
Press the RDS button again to display the fre-
quency for 3 seconds. The radio will then return
to the normal display. If the station does not
broadcast RDS information, the RDS icon will not
be displayed.
Setting RDS mode
Press and hold the MENU button (>2 seconds)
until the radio beeps to start the editing mode.
Press the MENU button until the display shows
“RDS TRAFFIC”. This display will last 2 sec-
onds and then change to“TRAFFIC-OFF”.
Press TUNE/FF-REV (or) to toggle
the RDS traffic mode from “OFF” to “ON”. Press
the RDS button again to set your RDS mode
selection.
The display changes to“RDS DISPLAY”. This
display will last 2 seconds and then change to
“SHOW”. Press TUNE/FF-REV (
or) to switch between the following RDS
display modes:
c“FM & RDS”: the radio display will show the
station’s broadcast frequency and the sta-
tion’s name.
c“RDS ONLY”: the radio display will show the
station’s name only.c“RDS TEMP”: the radio display will show the
station’s name for 5 seconds and then dis-
play only the radio station’s broadcast fre-
quency.
PTY (program type)
PTY can be used to search for a certain program
type. Certain areas have a limited number of
stations that transmit RDS. Many stations trans-
mit call letters and frequencies only. Searching or
scanning by program type may yield a limited
number of selections.
1. Press the MIX·PTY button. The display
changes from“RDS PTY SEARCH”to
“SELECT BY TUNE”.
2. Press TUNE/FF-REV (
or)
up/down button to choose a specific pro-
gram type:
ROCK, CLASSIC ROCK, SOFT ROCK,
TOP 40, COUNTRY, JAZZ, CLASSICAL,
OLDIES, NEWS, SPORTS, TALK, ANY
3. Press the SEEK (
or) or SCAN
button to search for the next station with the
selected PTY. The SCAN icon flashes when
the SCAN button is pressed. If SCAN is
selected, push the PTY or SCAN button to
stop on a station.
Heater, air conditioner and audio systems4-23
ZREVIEW COPY:Ð2003 Altima(l30)
Owners Manual(owners)ÐUSA English(nna)
04/21/03Ðdebbie
X
Page 132 of 256
If SEEK is selected, the radio automatically
stops on the next radio station matching the
selected program type.
4. Press the PTY button again to cancel the
PTY mode.
Speed Sensitive Control Volume (SCV)
Your vehicle has Speed Sensitive Control Vol-
ume (SCV) for audio. The audio volume changes
as the driving speed changes.
Press and hold the MENU button (>2 seconds)
until the radio beeps to start the editing mode.
Press the MENU button until the display shows
“Speed comp vol”.This display will last 2 sec-
onds and then change to“SCV-off”. Press
TUNE/FF-REV (
or) to change be-
tween:
Off!Low!Mid!High
Compact disc (CD) player operation
Turn the ignition key to the ACC or ON position.
CAUTION
cDo not force a compact disc into the CD
insert slot. This could damage the CD
and/or CD changer/player.cTrying to load a CD with the CD door
closed could damage the CD and/or CD
changer.
CD6 button
When the CD6 button is pressed with a compact
disc loaded and the radio playing, the radio turns
off and the last used compact disc starts to play.
CD loading
Press the LOAD button to start CD loading
mode.
The following sequence will occur:
1. Thegreenindicator on the lowest available
disc select button will start blinking. (Same
as preset memory button.) The display
shows“Please Wait”.
2. The display changes to“Insert Disc”for a
maximum of 15 seconds.
3. During the 15 second interval, insert the
disc. The display changes to“Loading
Disc”.
4. The CD will play after the disc is set to a play
position.5. The indicator changes fromblinking green
tosolid greenand the display changes to
show the Disc number icon, Disc number,
Track number and Elapsed time.
All disc loading
1. Press and hold the LOAD button until the
radio beeps (>1.5 seconds) .
2. Thegreenindicator on the lowest available
disc select button will start blinking. (Same
as preset memory button.) The display
shows“Please Wait”.
3. The display changes to“Insert Disc”for a
maximum of 15 seconds.
4. During the 15 second interval, insert the
disc. The display changes to“Loading
Disc”.
5. The indicator changes fromblinking green
tosolid green.
6. The disc number icon is turned on.
7. Repeat steps 2–5 until all discs are loaded,
then the last loaded disc will begin to play.
The display shows the Disc number, Track
number and Elapsed Time.
Selected disc loading
1. Press a disc select button whose indicator is
off. The display shows“Please Wait”.
4-24Heater, air conditioner and audio systems
ZREVIEW COPY:Ð2003 Altima(l30)
Owners Manual(owners)ÐUSA English(nna)
04/21/03Ðdebbie
X