2003 NISSAN ALMERA N16 oil type
[x] Cancel search: oil typePage 10 of 3189

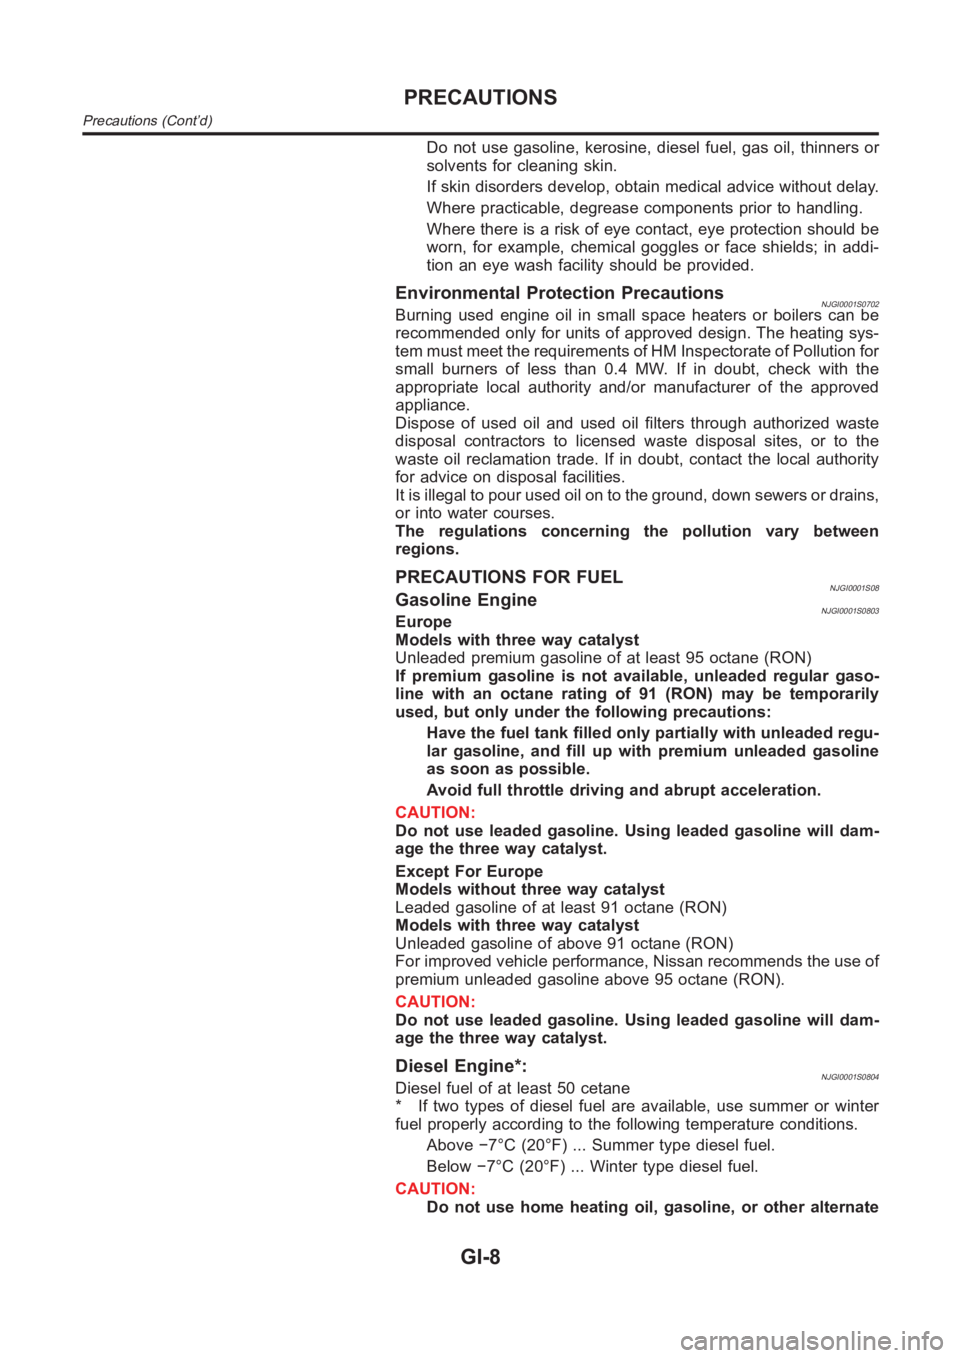
Do not use gasoline, kerosine, diesel fuel, gas oil, thinners or
solvents for cleaning skin.
If skin disorders develop, obtain medical advice without delay.
Where practicable, degrease components prior to handling.
Where there is a risk of eye contact, eye protection should be
worn, for example, chemical goggles or face shields; in addi-
tion an eye wash facility should be provided.
Environmental Protection PrecautionsNJGI0001S0702Burning used engine oil in small space heaters or boilers can be
recommended only for units of approved design. The heating sys-
tem must meet the requirements of HM Inspectorate of Pollution for
small burners of less than 0.4 MW. If in doubt, check with the
appropriate local authority and/or manufacturer of the approved
appliance.
Dispose of used oil and used oil filters through authorized waste
disposal contractors to licensed waste disposal sites, or to the
waste oil reclamation trade. If in doubt, contact the local authority
for advice on disposal facilities.
It is illegal to pour used oil on to the ground, down sewers or drains,
or into water courses.
The regulations concerning the pollution vary between
regions.
PRECAUTIONS FOR FUELNJGI0001S08Gasoline EngineNJGI0001S0803Europe
Models with three way catalyst
Unleaded premium gasoline of at least 95 octane (RON)
If premium gasoline is not available, unleaded regular gaso-
line with an octane rating of 91 (RON) may be temporarily
used, but only under the following precautions:
Have the fuel tank filled only partially with unleaded regu-
lar gasoline, and fill up with premium unleaded gasoline
as soon as possible.
Avoid full throttle driving and abrupt acceleration.
CAUTION:
Do not use leaded gasoline. Using leaded gasoline will dam-
age the three way catalyst.
Except For Europe
Models without three way catalyst
Leaded gasoline of at least 91 octane (RON)
Models with three way catalyst
Unleaded gasoline of above 91 octane (RON)
For improved vehicle performance, Nissan recommends the use of
premium unleaded gasoline above 95 octane (RON).
CAUTION:
Do not use leaded gasoline. Using leaded gasoline will dam-
age the three way catalyst.
Diesel Engine*:NJGI0001S0804Diesel fuel of at least 50 cetane
* If two types of diesel fuel are available, use summer or winter
fuel properly according to the following temperature conditions.
Above −7°C (20°F) ... Summer type diesel fuel.
Below −7°C (20°F) ... Winter type diesel fuel.
CAUTION:
Do not use home heating oil, gasoline, or other alternate
PRECAUTIONS
Precautions (Cont’d)
GI-8
Page 60 of 3189

NJMA0005
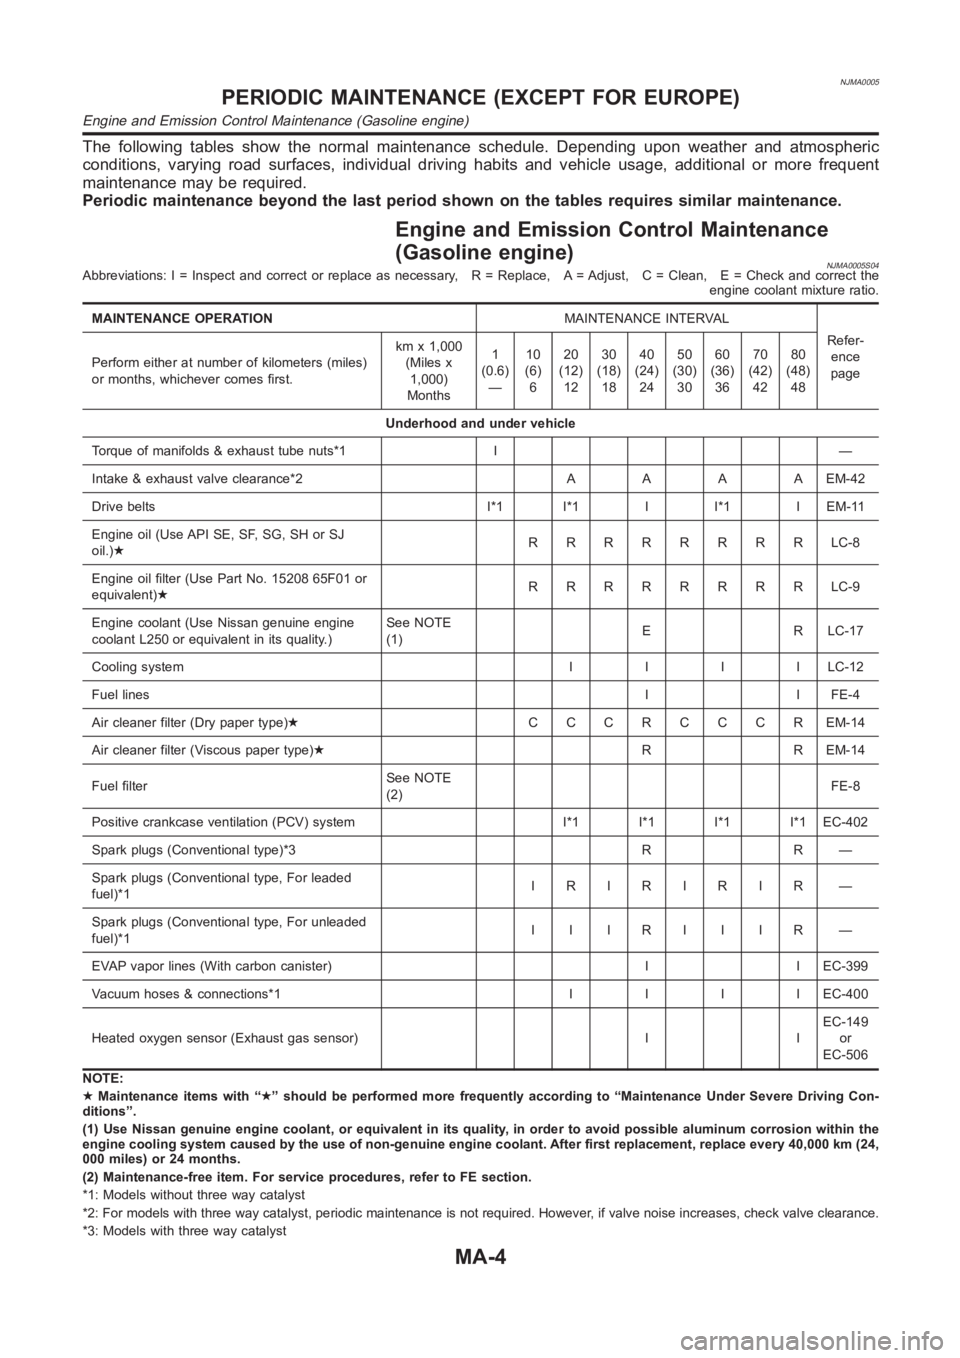
The following tables show the normal maintenance schedule. Depending upon weather and atmospheric
conditions, varying road surfaces, individual driving habits and vehicle usage, additional or more frequent
maintenance may be required.
Periodic maintenance beyond the last period shown on the tables requires similar maintenance.
Engine and Emission Control Maintenance
(Gasoline engine)
NJMA0005S04Abbreviations: I = Inspect and correct or replace as necessary, R = Replace, A = Adjust, C = Clean, E = Check and correct the
engine coolant mixture ratio.
MAINTENANCE OPERATIONMAINTENANCE INTERVAL
Refer-
ence
page Perform either at number of kilometers (miles)
or months, whichever comes first.kmx1,000
(Miles x
1,000)
Months1
(0.6)
—10
(6)
620
(12)
1230
(18)
1840
(24)
2450
(30)
3060
(36)
3670
(42)
4280
(48)
48
Underhood and under vehicle
Torque of manifolds & exhaust tube nuts*1 I —
Intake & exhaust valve clearance*2AAAAEM-42
Drive belts I*1 I*1 I I*1 I EM-11
Engine oil (Use API SE, SF, SG, SH or SJ
oil.)★RRRRRRRRLC-8
Engine oil filter (Use Part No. 15208 65F01 or
equivalent)★RRRRRRRRLC-9
Engine coolant (Use Nissan genuine engine
coolant L250 or equivalent in its quality.)See NOTE
(1)E R LC-17
Cooling systemIIIILC-12
Fuel linesI I FE-4
Air cleaner filter (Dry paper type)★CCCRCCCREM-14
Air cleaner filter (Viscous paper type)★R R EM-14
Fuel filterSee NOTE
(2)FE-8
Positive crankcase ventilation (PCV) system I*1 I*1 I*1 I*1 EC-402
Spark plugs (Conventional type)*3 R R —
Spark plugs (Conventional type, For leaded
fuel)*1IRIRIRIR —
Spark plugs (Conventional type, For unleaded
fuel)*1IIIRIIIR —
EVAP vapor lines (With carbon canister) I I EC-399
Vacuum hoses & connections*1IIIIEC-400
Heated oxygen sensor (Exhaust gas sensor) I IEC-149
or
EC-506
NOTE:
★Maintenance items with “★” should be performed more frequently according to “Maintenance Under Severe Driving Con-
ditions”.
(1) Use Nissan genuine engine coolant, or equivalent in its quality, in order to avoid possible aluminum corrosion within the
engine cooling system caused by the use of non-genuine engine coolant. After first replacement, replace every 40,000 km (24,
000 miles) or 24 months.
(2) Maintenance-free item. For service procedures, refer to FE section.
*1: Models without three way catalyst
*2: For models with three way catalyst, periodic maintenance is not requir
ed. However, if valve noise increases, check valve clearance.
*3: Models with three way catalyst
PERIODIC MAINTENANCE (EXCEPT FOR EUROPE)
Engine and Emission Control Maintenance (Gasoline engine)
MA-4
Page 75 of 3189

NJMA0006
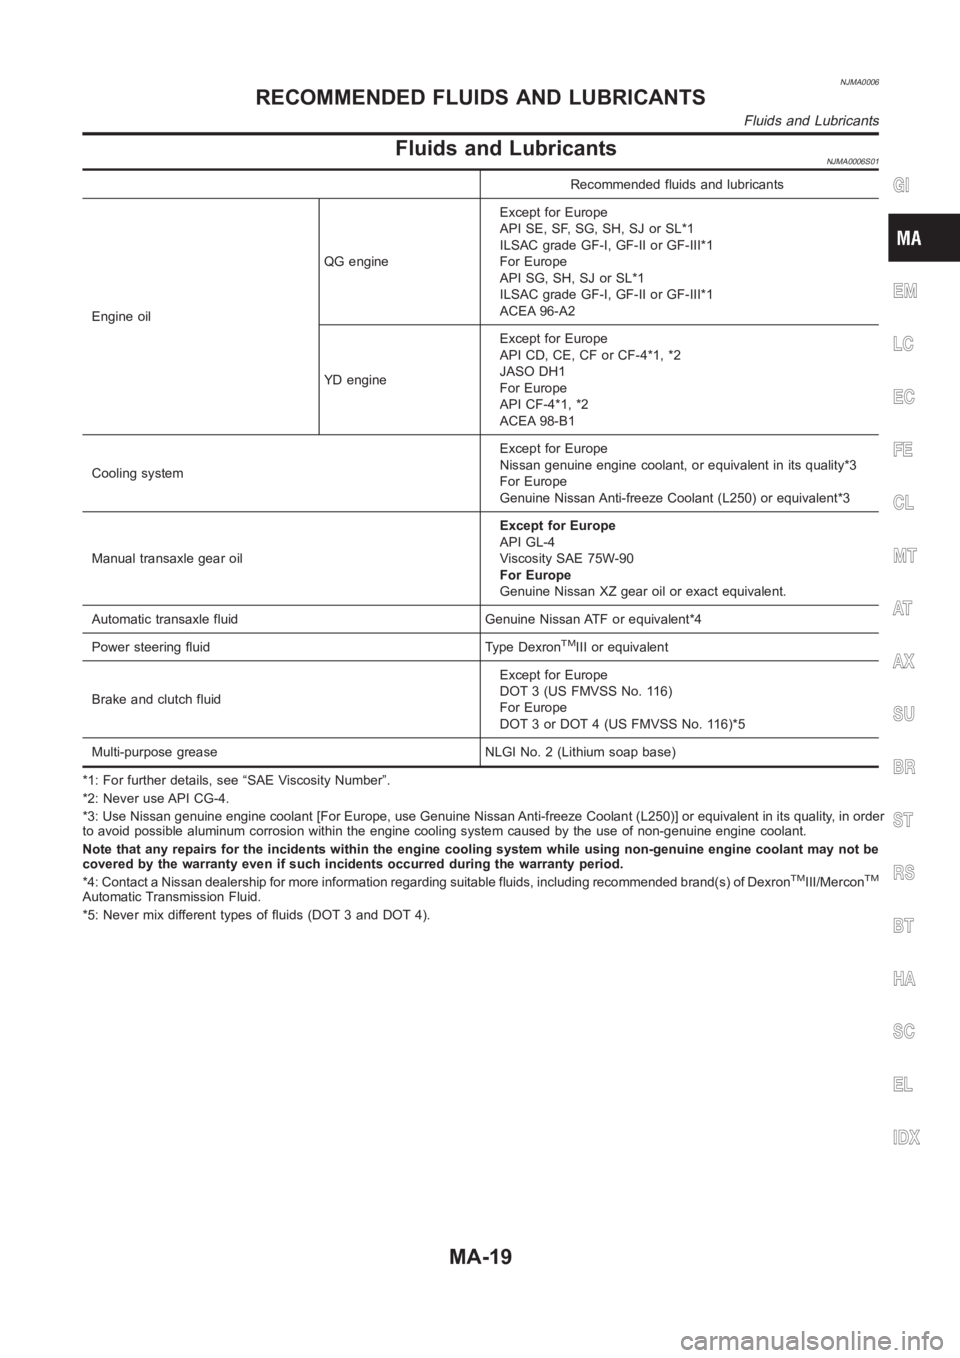
Fluids and LubricantsNJMA0006S01
Recommended fluids and lubricants
Engine oilQG engineExcept for Europe
API SE, SF, SG, SH, SJ or SL*1
ILSAC grade GF-I, GF-II or GF-III*1
For Europe
API SG, SH, SJ or SL*1
ILSAC grade GF-I, GF-II or GF-III*1
ACEA 96-A2
YD engineExcept for Europe
API CD, CE, CF or CF-4*1, *2
JASO DH1
For Europe
API CF-4*1, *2
ACEA 98-B1
Cooling systemExcept for Europe
Nissan genuine engine coolant, or equivalent in its quality*3
For Europe
Genuine Nissan Anti-freeze Coolant (L250) or equivalent*3
Manual transaxle gear oilExcept for Europe
API GL-4
Viscosity SAE 75W-90
For Europe
Genuine Nissan XZ gear oil or exact equivalent.
Automatic transaxle fluid Genuine Nissan ATF or equivalent*4
Power steering fluid Type Dexron
TMIII or equivalent
Brake and clutch fluidExcept for Europe
DOT 3 (US FMVSS No. 116)
For Europe
DOT 3 or DOT 4 (US FMVSS No. 116)*5
Multi-purpose grease NLGI No. 2 (Lithium soap base)
*1: For further details, see “SAE Viscosity Number”.
*2: Never use API CG-4.
*3: Use Nissan genuine engine coolant [For Europe, use Genuine Nissan Anti-freeze Coolant (L250)] or equivalent in its quality, in order
to avoid possible aluminum corrosion within the engine cooling system caused by the use of non-genuine engine coolant.
Note that any repairs for the incidents within the engine cooling system while using non-genuine engine coolant may not be
covered by the warranty even if such incidents occurred during the warranty period.
*4: Contact a Nissan dealership for more information regarding suitable fluids, including recommended brand(s) of Dexron
TMIII/MerconTM
Automatic Transmission Fluid.
*5: Never mix different types of fluids (DOT 3 and DOT 4).
GI
EM
LC
EC
FE
CL
MT
AT
AX
SU
BR
ST
RS
BT
HA
SC
EL
IDX
RECOMMENDED FLUIDS AND LUBRICANTS
Fluids and Lubricants
MA-19
Page 88 of 3189
![NISSAN ALMERA N16 2003 Electronic Repair Manual EM-10
[QG]
NOISE, VIBRATION, AND HARSHNESS (NVH) TROUBLESHOOTING
Use the Chart Below to Help You Find the Cause of the Symptom.
EBS00LPX
1. Locate the area where noise occurs.
2. Confirm the type of n NISSAN ALMERA N16 2003 Electronic Repair Manual EM-10
[QG]
NOISE, VIBRATION, AND HARSHNESS (NVH) TROUBLESHOOTING
Use the Chart Below to Help You Find the Cause of the Symptom.
EBS00LPX
1. Locate the area where noise occurs.
2. Confirm the type of n](/manual-img/5/57350/w960_57350-87.png)
EM-10
[QG]
NOISE, VIBRATION, AND HARSHNESS (NVH) TROUBLESHOOTING
Use the Chart Below to Help You Find the Cause of the Symptom.
EBS00LPX
1. Locate the area where noise occurs.
2. Confirm the type of noise.
3. Specify the operating condition of engine.
4. Check specified noise source.
If necessary, repair or replace these parts.
A: Closely related B: Related C: Sometimes related —: Not relatedLocation
of noiseTy p e o f
noiseOperating condition of engine
Source of
noiseCheck itemRefer-
ence page Before
warm-
upAfter
warm-
upWhen
start-
ingWhen
idlingWhen
racingWhile
driving
Top of
engine
Rocker
cover
Cylinder
headTick in g o r
clickingCA—AB—Tappet
noise
●Valve clearanceEM-42
Rattle C A — A B CCamshaft
bearing
noise
●Camshaft journal
clearance
●Camshaft runoutEM-39EM-39
Crank-
shaft pul-
ley
Cylinder
block
(Side of
engine)
Oil panSlap or
knock—A—B B—Piston pin
noise
●Piston and piston pin
clearance
●Connecting rod
bushing clearanceEM-84EM-87
Slap or
rapA——B B APiston
slap noise
●Piston-to-bore clear-
ance
●Piston ring side
clearance
●Piston ring end gap
●Connecting rod bend
and torsionEM-88
EM-85
EM-86
EM-86
Knock A B C B B BConnect-
ing rod
bearing
noise
●Connecting rod
bushing clearance
(Small end)
●Connecting rod bear-
ing clearance (Big
end)EM-87EM-87
Knock A B — A B CMain
bearing
noise
●Main bearing oil
clearance
●Crankshaft runoutEM-91EM-90
Front of
engine
Timing
chain
coverTapping or
tickingAA—BBBTiming
chain and
chain ten-
sioner
noise●Timing chain cracks
and wear
●Timing chain ten-
sioner operationEM-51EM-47
Front of
engineSqueak-
ing or fizz-
ingAB—B—CDrive belts
(Sticking
or slip-
ping)
●Drive belts deflection
EM-11
CreakingABABABDrive belts
(Slipping)●Idler pulley bearing
operation
Squall
CreakAB—BABWater
pump
noise
●Water pump opera-
tionLC-14
Page 103 of 3189
![NISSAN ALMERA N16 2003 Electronic Repair Manual SPARK PLUG (CONVENTIONAL)
EM-25
[QG]
C
D
E
F
G
H
I
J
K
L
MA
EM
SPARK PLUG (CONVENTIONAL)PFP:22401
Removal and InstallationEBS00LQ8
REMOVAL
1. Disconnect ignition coil harness connector from ignition c NISSAN ALMERA N16 2003 Electronic Repair Manual SPARK PLUG (CONVENTIONAL)
EM-25
[QG]
C
D
E
F
G
H
I
J
K
L
MA
EM
SPARK PLUG (CONVENTIONAL)PFP:22401
Removal and InstallationEBS00LQ8
REMOVAL
1. Disconnect ignition coil harness connector from ignition c](/manual-img/5/57350/w960_57350-102.png)
SPARK PLUG (CONVENTIONAL)
EM-25
[QG]
C
D
E
F
G
H
I
J
K
L
MA
EM
SPARK PLUG (CONVENTIONAL)PFP:22401
Removal and InstallationEBS00LQ8
REMOVAL
1. Disconnect ignition coil harness connector from ignition coil.
2. Remove ignition coil.
3. Remove spark plugs with a spark plug wrench (commercial ser-
vice tool).
Spark plug
INSPECTION AFTER REMOVAL
Check spark plug gap. Adjust or replace if necessary.
●Use a wire brush for cleaning, if necessary.
INSTALLATION
Install in the reverse order of removal, paying attention to the following.
Make NGK Champion
Standard type LFR5A-11 REC10YC4
Hot type LFR4A-11 —
Cold type LFR6A-11 —
SMA581C
Standard : 1.0 - 1.1 mm (0.039 - 0.043 in)
SMA476
Spark plug:
: 19.6 - 29.4 N·m (2.0 - 3.0 kg-m, 15 - 21 ft-lb)
Page 108 of 3189
![NISSAN ALMERA N16 2003 Electronic Repair Manual EM-30
[QG]
ROCKER COVER
6. Loosen bolts in reverse order shown in the figure.
7. If replacement is necessary, remove rocker cover oil seal using flat-head screwdriver.
CAUTION:
Be careful not to damag NISSAN ALMERA N16 2003 Electronic Repair Manual EM-30
[QG]
ROCKER COVER
6. Loosen bolts in reverse order shown in the figure.
7. If replacement is necessary, remove rocker cover oil seal using flat-head screwdriver.
CAUTION:
Be careful not to damag](/manual-img/5/57350/w960_57350-107.png)
EM-30
[QG]
ROCKER COVER
6. Loosen bolts in reverse order shown in the figure.
7. If replacement is necessary, remove rocker cover oil seal using flat-head screwdriver.
CAUTION:
Be careful not to damage rocker cover.
INSTALLATION
1. Install rocker cover oil seal.
●Using drift with outer diameter 97 mm (3.82 in) and inner
diameter 83 mm (3.27 in) to 88 mm (3.46 in) (commercial ser-
vice tool), press oil seal in.
NOTE:
There are 2 types of oil seal. If oil seal with flat bottom surface is
pressed in, drift with any inner diameter can be used.
●Press oil seal in until it is flush with installation surface.
2. Install rocker cover in following steps.
a. Install gasket on top of No. 1 camshaft bracket.
●Position gasket aligning its shape with camshaft bracket side.
Align positioning stopper pin with hole on gasket, and install.
b. Install gasket (for circumference, square type) to installation
groove of rocker cover.
c. Apply liquid gasket to positions shown in figure, then install
rocker cover.
KBIA1376E
KBIA1377E
KBIA1379E
PBIC0555E
Page 122 of 3189
![NISSAN ALMERA N16 2003 Electronic Repair Manual EM-44
[QG]
CAMSHAFT
●Thickness of a new valve lifter can be identified by stamp
marks on the reverse side (inside the cylinder).
Stamp mark 696 indicates 6.96 mm (0.2740 in) in thickness.
NISSAN ALMERA N16 2003 Electronic Repair Manual EM-44
[QG]
CAMSHAFT
●Thickness of a new valve lifter can be identified by stamp
marks on the reverse side (inside the cylinder).
Stamp mark 696 indicates 6.96 mm (0.2740 in) in thickness.](/manual-img/5/57350/w960_57350-121.png)
EM-44
[QG]
CAMSHAFT
●Thickness of a new valve lifter can be identified by stamp
marks on the reverse side (inside the cylinder).
Stamp mark 696 indicates 6.96 mm (0.2740 in) in thickness.
Available thickness of valve lifter: 26 sizes with range 6.96 to 7.46 mm (0.2740 to 0.2937 in) in steps of 0.02
mm (0.0008 in) (when manufactured at factory).
5. Install the selected valve lifter.
6. Install camshaft.
7. Manually turn crankshaft pulley a few turns.
8. Check that valve clearances for cold engine are within specifications by referring to the specified values.
9. After completing the repair, check valve clearances again with the specifications for warmed engine. Make
sure the values are within specifications.
Valve clearance:
Unit: mm (in)
*: Approximately 20°C (68°F)
ADJUSTMENT (SHIM TYPE)
●Remove adjusting shim for valves with incorrect valve clearance by following the procedure below:
1. Using a rag, completely wipe off engine oil from surroundings of adjusting shim.
2. When removing adjusting shim from a cam, turn crankshaft
clockwise (viewed from front) to make cam nose face straight
up.
3. Turn valve lifter and adjusting shim to removal direction.
●Using a slotted screwdriver with extra-thin tip, turn valve lifter
cutout in direction shown by the arrow.
4. Using camshaft pliers (special service tool), pinch camshaft.
Turn tool up in direction shown by the arrow with camshaft being
a fulcrum. This will push down adjusting shim to allow valve
spring to be compressed.
CAUTION:
●Be careful not to damage camshaft and cylinder head.
●Be careful not to damage surroundings of valve lifter.
PBIC1077E
Cold* (reference data) Hot
Intake 0.24 - 0.32 (0.009 - 0.013) 0.32 - 0.40 (0.013 - 0.016)
Exhaust 0.26 - 0.34 (0.010 - 0.013) 0.33 - 0.41 (0.013 - 0.016)
MBIB0226E
KBIA1391J
Page 135 of 3189
![NISSAN ALMERA N16 2003 Electronic Repair Manual CYLINDER HEAD
EM-57
[QG]
C
D
E
F
G
H
I
J
K
L
MA
EM
CYLINDER HEADPFP:11041
On-Vehicle ServiceEBS00LQH
CHECKING COMPRESSION PRESSURE
1. Warm up engine thoroughly. Then, stop it.
2. Release fuel pressu NISSAN ALMERA N16 2003 Electronic Repair Manual CYLINDER HEAD
EM-57
[QG]
C
D
E
F
G
H
I
J
K
L
MA
EM
CYLINDER HEADPFP:11041
On-Vehicle ServiceEBS00LQH
CHECKING COMPRESSION PRESSURE
1. Warm up engine thoroughly. Then, stop it.
2. Release fuel pressu](/manual-img/5/57350/w960_57350-134.png)
CYLINDER HEAD
EM-57
[QG]
C
D
E
F
G
H
I
J
K
L
MA
EM
CYLINDER HEADPFP:11041
On-Vehicle ServiceEBS00LQH
CHECKING COMPRESSION PRESSURE
1. Warm up engine thoroughly. Then, stop it.
2. Release fuel pressure. Refer to EC-34, "
FUEL PRESSURE RELEASE" (WITH EURO-OBD), EC-427,
"FUEL PRESSURE RELEASE" (WITHOUT EURO-OBD).
3. Remove ignition coil and spark plug from each cylinder.
Refer to IGNITION COIL EM-24, "
Removal and Installation" and SPARK PLUG EM-25, "Removal and
Installation" .
4. Connect engine tachometer (not required in use of CONSULT-II).
5. Disconnect fuel injector harness connector so that no fuel is injected.
6. Install compression tester with adapter onto spark plug hole.
●Use compression gauge whose picking up end inserted to spark
plug hole is smaller than 20 mm (0.79 in) in diameter. Otherwise,
it may be caught by cylinder head during removal.
7. With accelerator pedal fully depressed, turn ignition switch to
“START” for cranking. When the gauge pointer stabilizes, read
the compression pressure and engine rpm. Perform these steps
to check each cylinder.
Compression pressure
[kPa (bar, kg/cm2 , psi)/rpm]
CAUTION:
Always use a fully changed battery to obtain specified engine speed.
●If the engine speed is out of specified range, check battery liquid for proper gravity. Check engine speed
again with normal battery gravity.
●If compression pressure is below minimum value, check valve clearances and parts associated with com-
bustion chamber (Valve, valve seat, piston, piston ring, cylinder bore, cylinder head, cylinder head gas-
ket). After the checking, measure compression pressure again.
●If some cylinders have low compression pressure, pour small amount of engine oil into the spark plug hole
of the cylinder to re-check it for compression.
–If the added engine oil improves the compression, the piston rings may be worn out or damaged. Check
the piston rings and replace if necessary.
–If the compression pressure remains at low level despite the addition of engine oil, the valves may be mal-
functioning. Check the valves for damage. Replace the valve or valve seat accordingly.
●If two adjacent cylinders have respectively low compression pressure and their compression remains low
even after the addition of engine oil, the gaskets are leaking. In such a case, replace the cylinder head
gaskets.
KBIA1402E
Engine type QG15DE QG18DE
Standard1,372 (13.72, 13.99,
198.9)1,324 (13.24, 13.5, 192)
Limit 1,176 (11.76, 12.0, 170.5) 1,128 (11.28, 11.5, 164)
Difference limit among
cylinders98 (0.98, 1.0, 14) 98 (0.98, 1.0, 14)SEM387C