Page 57 of 232

brand. If there is difficulty locating the ªlearnº or ªsmartº button refer to
the device's owner manual or contact HomeLinktat1±800±355±3515or
on the Internet atwww.homelink.com.
2. Press and release the ªlearnº or ªsmartº button on the garage door
motor head unit.
Note:Following step 2, there are 30 seconds in which to initiate step 3.
3. Press and release the
programmed HomeLinktbutton.
Press and release the HomeLinkt
button asecond timeto complete
the training process. (Some garage
door openers may require this
procedure to be done athird time
to complete the training.)
The rolling code equipped device
should now recognize the
HomeLinktsignal and activate when
the HomeLink button is pressed. The remaining two buttons may now be
programmed if this has not previously been done. Refer to theªTrain
modeºin this section.
Transmit mode
1. Select the button for the desired
channel (for example, for the garage
door you wish to open).
2. Press the button. CHANNEL X
TRANSMIT is displayed.
3. The proper signal is transmitted
to the device being controlled.
4. Release the button.
Note:If more than one button is
pressed, priority will be given to the
lowest numbered channel.
Driver Controls
57
Page 58 of 232
Erase mode
To erase all three HomeLinktchannel codes:
1. Simultaneously press and hold
buttons 1 and 3 for 20 seconds.
2. CLEARING CHANNELS will be
displayed when the channel codes
are being erased.
3. CHANNELS CLEARED will be
displayed when the erase operation
is complete.
4. Release buttons 1 and 3.
HomeLinkTdefault code mode
HomeLinktuses default codes for testing and for optional home lighting
accessories. To load the default codes:
1. Simultaneously press and hold
buttons 1 and 3. CLEARING
CHANNELS is displayed.
Driver Controls
58
Page 59 of 232
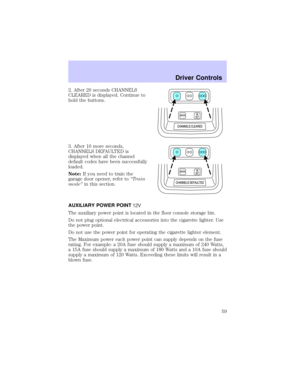
2. After 20 seconds CHANNELS
CLEARED is displayed. Continue to
hold the buttons.
3. After 10 more seconds,
CHANNELS DEFAULTED is
displayed when all the channel
default codes have been successfully
loaded.
Note:If you need to train the
garage door opener, refer toªTrain
modeºin this section.
AUXILIARY POWER POINT
The auxiliary power point is located in the floor console storage bin.
Do not plug optional electrical accessories into the cigarette lighter. Use
the power point.
Do not use the power point for operating the cigarette lighter element.
The Maximum power each power point can supply depends on the fuse
rating. For example: a 20A fuse should supply a maximum of 240 Watts,
a 15A fuse should supply a maximum of 180 Watts and a 10A fuse should
supply a maximum of 120 Watts. Exceeding these limits will result in a
blown fuse.
Driver Controls
59
Page 60 of 232
Always keep the power point caps closed when not being used.
Power outlets are designed for accessory plugs only. Do not hang
any type of accessory or accessory bracket from the plug.
Improper use of the power outlet can cause damage not covered
by your warranty.
POWER WINDOWS
Press and hold the rocker switches to open and close windows.
²Press the top portion of the
rocker switch to close.
²Press the bottom portion of the
rocker switch to open.
Driver Controls
60
Page 61 of 232
One touch down
²Press the bottom portion of the
rocker switch completely down
and release quickly. The driver's
window will open fully. Depress
again to stop window operation.
One touch down can be deactivated
during operation by pushing down
on the top part of the driver power
window control.
Window lock
The window lock feature allows only
the driver to operate the power
windows.
To lock out all the window controls
except for the driver's press the left
side of the control. Press the right
side to restore the window controls.
POWER SIDE VIEW MIRRORS
To adjust your mirrors:
1. Select
to adjust the left
mirror or
to adjust the right
mirror.
2. Move the control in the direction
you wish to tilt the mirror.
3. Return to the center position to
lock mirrors in place.
Driver Controls
61
Page 62 of 232

Heated outside mirrors
Both mirrors are heated
automatically to remove ice, mist
and fog when the rear window
defrost is activated.
Do not remove ice from the
mirrors with a scraper or
attempt to readjust the mirror
glass if it is frozen in place.
These actions could cause damage to the glass and mirrors.
Fold-away mirrors
Pull the side mirrors in carefully
when driving through a narrow
space, like an automatic car wash.
Automatic dimming inside rear view mirror
Your vehicle is equipped with an
inside rear view mirror which has an
auto-dimming function. The
electronic day/night mirror will
change from the normal state to the
non-glare state when bright lights
(glare) reach the mirror. When the mirror detects bright light from front
or behind, it will automatically adjust (darken) to minimize glare.
Do not block the sensor on the backside of the mirror since this may
impair proper mirror performance.
Press the control to turn the mirror OFF or AUTO.
The mirror will automatically return to the normal state whenever the
vehicle is placed in R (Reverse)(when the mirror is on) to ensure a
bright clear view when backing up.
OFF AUTO
Driver Controls
62
Page 63 of 232
POWER ADJUSTABLE FOOT PEDALS
The accelerator and brake pedal
should only be adjusted when the
vehicle is stopped and the gearshift
lever is in the P(Park) position.
Press and hold the rocker control to
adjust accelerator and brake pedal.
²Press the left side of the control to adjust the pedals toward you.
²Press the right side of the control to adjust the pedals away from you.
The adjustment allows for approximately 65 mm (2.5 inches) of
maximum travel.
Never adjust the accelerator and brake pedal with feet on the
pedals while the vehicle is moving.
SPEED CONTROL
To turn speed control on
²Press ON.
Vehicle speed cannot be controlled
until the vehicle is traveling at or
above 48 km/h (30 mph).
Do not shift the gearshift lever
into N (Neutral) with the speed
control on.
Do not use the speed control in heavy traffic or on roads that
are winding, slippery, or unpaved.
Driver Controls
63
Page 64 of 232

To turn speed control off
²Press OFF or
²Turn off the vehicle ignition.
Once speed control is switched off,
the previously programmed set
speed will be erased.
To set a speed
²Press SET ACCEL. For speed
control to operate, the speed
control must be ON and the
vehicle speed must be greater
than 48 km/h (30 mph).
If you drive up or down a steep hill, your vehicle speed may vary
momentarily slower or faster than the set speed. This is normal.
Speed control cannot reduce the vehicle speed if it increases above the
set speed on a downhill. If your vehicle speed is faster than the set
speed while driving on a downhill, you may want to shift to the next
lower gear or apply the brakes to reduce your vehicle speed.
If your vehicle slows down more than 16 km/h (10 mph) below your set
speed on an uphill, your speed control will disengage. This is normal.
Pressing RESUME will re-engage it.
Do not use the speed control in heavy traffic or on roads that
are winding, slippery, or unpaved.
Driver Controls
64