Page 185 of 376
185 Controls in detail
Driving systems
The following vehicle level settings can be
selected when the vehicle is stationary:
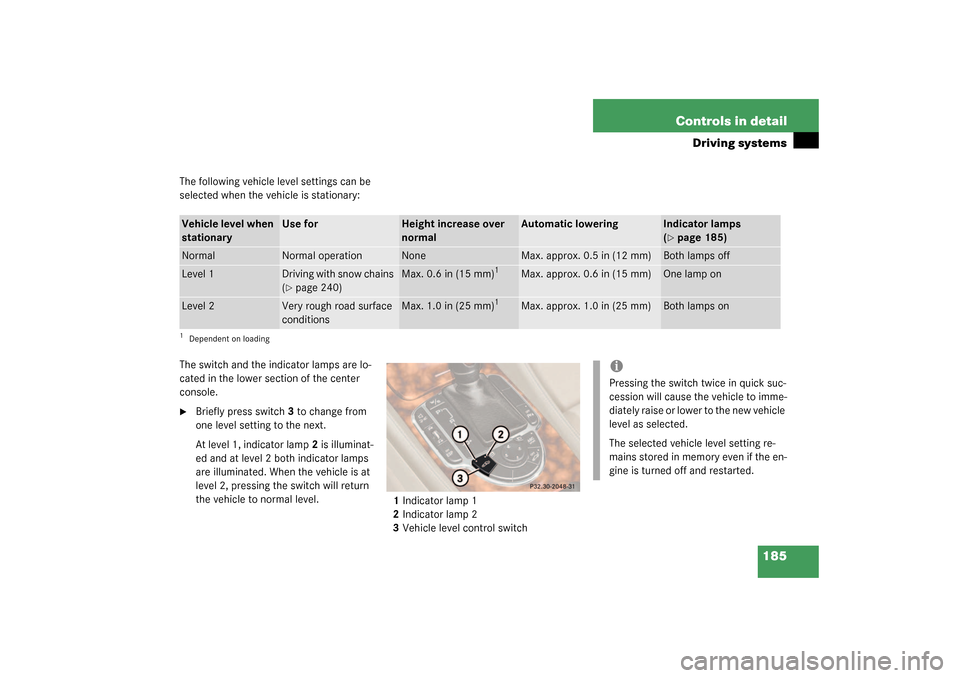
The switch and the indicator lamps are lo-
cated in the lower section of the center
console.�
Briefly press switch3 to change from
one level setting to the next.
At level 1, indicator lamp2 is illuminat-
ed and at level 2 both indicator lamps
are illuminated. When the vehicle is at
level 2, pressing the switch will return
the vehicle to normal level.
1Indicator lamp 1
2Indicator lamp 2
3Vehicle level control switch
Vehicle level when
stationary
Use for
Height increase over
normal
Automatic lowering
Indicator lamps
(�page 185)
Normal
Normal operation
None
Max. approx. 0.5 in (12 mm)
Both lamps off
Level 1
Driving with snow chains
(�page 240)
Max. 0.6 in (15 mm)
1
Max. approx. 0.6 in (15 mm)
One lamp on
Level 2
Very rough road surface
conditions
Max. 1.0 in (25 mm)
1
Max. approx. 1.0 in (25 mm)
Both lamps on
1Dependent on loading
iPressing the switch twice in quick suc-
cession will cause the vehicle to imme-
diately raise or lower to the new vehicle
level as selected.
The selected vehicle level setting re-
mains stored in memory even if the en-
gine is turned off and restarted.
Page 187 of 376
187 Controls in detail
Driving systems
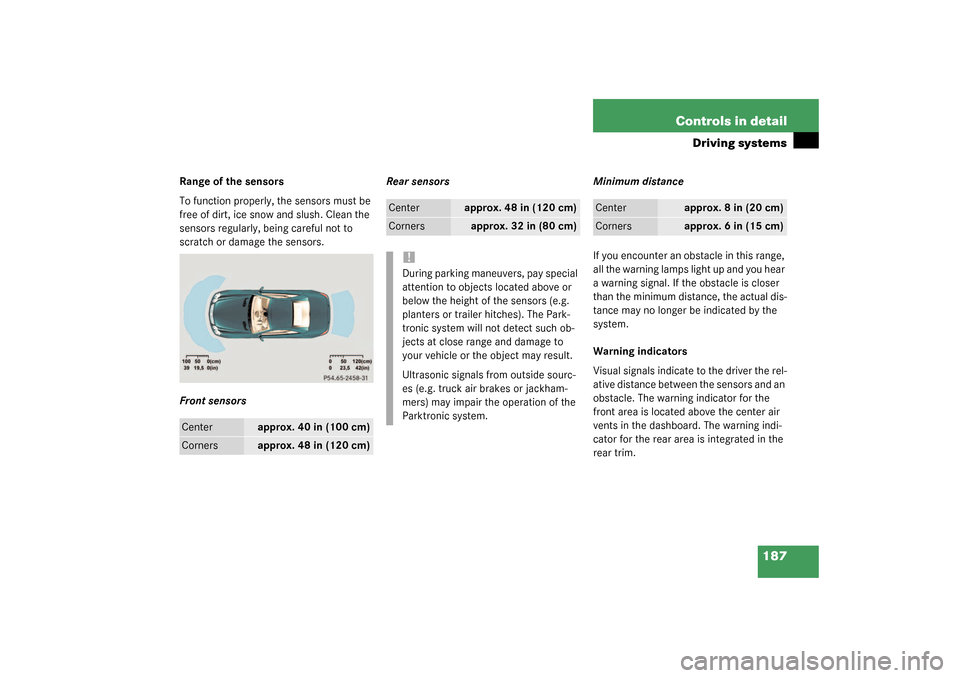
Range of the sensors
To function properly, the sensors must be
free of dirt, ice snow and slush. Clean the
sensors regularly, being careful not to
scratch or damage the sensors.
Front sensorsRear sensors Minimum distance
If you encounter an obstacle in this range,
all the warning lamps light up and you hear
a warning signal. If the obstacle is closer
than the minimum distance, the actual dis-
tance may no longer be indicated by the
system.
Warning indicators
Visual signals indicate to the driver the rel-
ative distance between the sensors and an
obstacle. The warning indicator for the
front area is located above the center air
vents in the dashboard. The warning indi-
cator for the rear area is integrated in the
rear trim.Center
approx. 40 in (100 cm)
Corners
approx. 48 in (120 cm)
Center
approx. 48 in (120 cm)
Corners
approx. 32 in (80 cm)
!During parking maneuvers, pay special
attention to objects located above or
below the height of the sensors (e.g.
planters or trailer hitches). The Park-
tronic system will not detect such ob-
jects at close range and damage to
your vehicle or the object may result.
Ultrasonic signals from outside sourc-
es (e.g. truck air brakes or jackham-
mers) may impair the operation of the
Parktronic system.
Center
approx. 8 in (20 cm)
Corners
approx. 6 in (15 cm)
Page 191 of 376
191 Controls in detail
Useful features
Auxiliary cup holder
You can fasten the auxiliary cup holder
onto the left front side of the passenger
seat.
Inserting the auxiliary cup holder
1Cover�
Pull up the cover and place it in a
storage compartment.2Auxiliary cup holder
3Insert
�
Press the auxiliary cup holder2 in the
direction of the arrow until it snaps in
place.
You can now place a larger container in
the holder. For even larger containers
you can take out the insert3. Make
sure that the container does not press
against the glove box.
Warning!
G
When not in use, keep the cup holder
closed. Place only containers that fit into the
cup holder to prevent spills. Use lids on
open containers and do not fill containers to
a height where the contents, especially hot
liquids, could spill during vehicle maneu-
vers.
Page 192 of 376
192 Controls in detailUseful features
Removing the auxiliary cup holder�
Pull the auxiliary cup holder2
(�page 191) up and out of the recep-
tacle and place it in a storage compart-
ment.
�
Replace the cover1 (
�page 191) on
the opening and press it down until it
snaps in place.
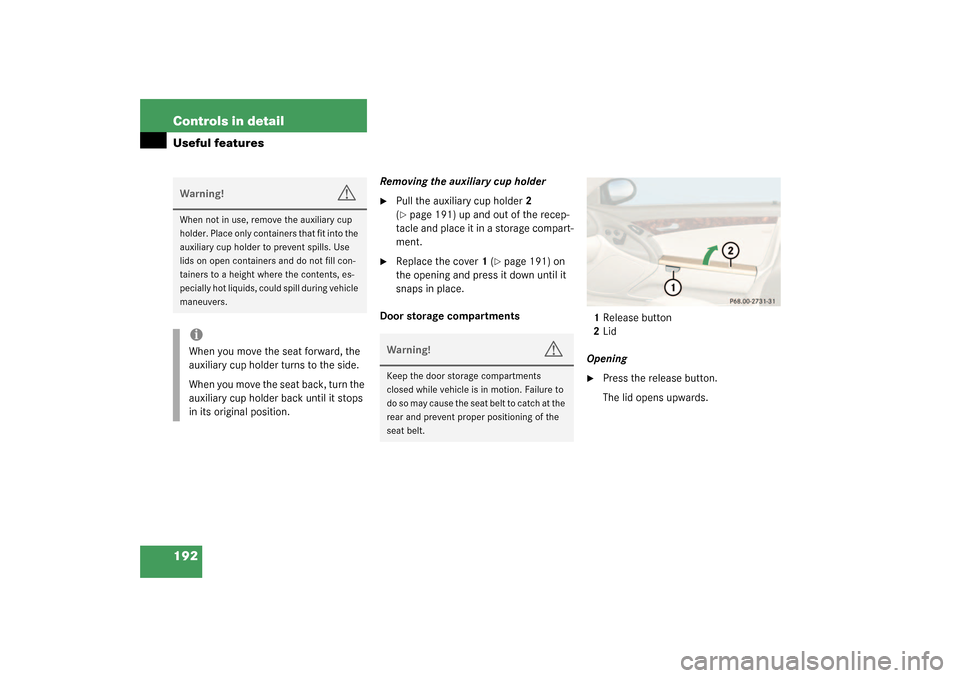
Door storage compartments
1Release button
2Lid
Opening
�
Press the release button.
The lid opens upwards.
Warning!
G
When not in use, remove the auxiliary cup
holder. Place only containers that fit into the
auxiliary cup holder to prevent spills. Use
lids on open containers and do not fill con-
tainers to a height where the contents, es-
pecially hot liquids, could spill during vehicle
maneuvers.iWhen you move the seat forward, the
auxiliary cup holder turns to the side.
When you move the seat back, turn the
auxiliary cup holder back until it stops
in its original position.
Warning!
G
Keep the door storage compartments
closed while vehicle is in motion. Failure to
d o s o m a y c a u s e t h e s e a t b e l t t o c a t c h a t t h e
rear and prevent proper positioning of the
seat belt.
Page 227 of 376
227 Operation
Engine compartment
Engine compartment
Hood
Opening
1Hood release
�
Pull lever1 downwards.
The hood is unlocked.
2Lever for opening the hood
�
Push lever2 on the hood upwards.
�
Pull up on the hood and then release it.
The hood will be automatically held
open at shoulder height by gas-filled
struts.
Warning!
G
Do not pull the release lever while the vehi-
cle is in motion. Otherwise the hood could
be forced open by passing air flow.
!To avoid damage to the windshield wip-
ers or hood, never open the hood if the
wiper arms are folded forward away
from the windshield.
Warning!
G
To help prevent personal injury, stay clear of
moving parts when the hood is open and the
engine is running. Make sure the hood is
properly closed before driving. When closing
the hood, use extreme caution not to catch
hands or fingers.
The radiator fan may continue to run for ap-
proximately 30 seconds or may even restart
after the engine has been turned off. Stay
clear of fan blades.
Page 228 of 376
228 OperationEngine compartment
Closing�
Let the hood drop from a height of ap-
proximately 1
1/2ft (50 cm).
The hood will lock audibly.
�
Check to make sure that the hood is
fully closed.
If you can raise the hood at a point
above the headlamps, then it is not
properly closed. Open it again and let it
drop with somewhat greater force.
Engine oil
The amount of oil your engine needs will
depend on a number of factors, including
driving style. Higher oil consumption can
occur when �
the vehicle is new
�
the vehicle is driven frequently at high-
er engine speeds
Engine oil consumption checks should only
be made after the vehicle break-in period.
Checking engine oil level
When checking the oil level the vehicle
must
�
be parked on level ground
�
be at normal operating temperature
�
have been stationary for at least five
minutes with the engine turned off
Warning!
G
If you see flames or smoke coming from the
engine compartment, or if the coolant tem-
perature gauge indicates that the engine is
overheated, do not open the hood. Move
away from the vehicle and do not open the
hood until the engine has cooled. If neces-
sary, call the fire department.Warning!
G
The engine is equipped with a transistorized
ignition system. Because of the high voltage
it is dangerous to touch any components (ig-
nition coils, spark plug sockets, diagnostic
socket) of the ignition system�
with the engine running
�
while starting the engine
�
if ignition is “on” and the engine is
turned manually
Warning!
G
Be careful that you do not close the hood on
anyone.
Page 340 of 376
340 Technical dataMain dimensions
Main dimensionsModel
SL 500
SL 55 AMG
Overall vehicle length
178.4 in (4 531 mm)
178.4 in (4 531 mm)
Overall vehicle length when opening/
closing hardtop
185.4 in (4 709 mm)
185.4 in (4 709 mm)
Overall vehicle width
71.9 in (1 827 mm)
71.9 in (1 827 mm)
Overall vehicle height
51.1 in (1 295 mm)
51.1 in (1 295 mm)
Overall vehicle height when opening/
closing hardtop
65.9 in (1 674 mm)
65.9 in (1 674 mm)
Wheelbase
100.8 in (2 560 mm)
100.8 in (2 560 mm)
Track, front
61.4 in (1 559 mm)
61.8 in (1 569 mm)
Track, rear
60.9 in (1 547 mm)
61.1 in (1 551 mm)
Page 357 of 376
357 Index
A
ABC 183, 351
Messages in display 258
Oil level 230
Setting vehicle level 184
ABC switch 24
ABS 68, 351
Malfunction indicator lamp 21, 251
Messages in display 259
Warning lamp 70, 251
ABS/ESP
Warning lamp 250
ABS/ESP warning lamp 21
Activating
Air circulation mode 152
Air conditioning (cooling) 155
Anti-theft alarm system 76
Central locking (control system) 128
Distance warning function* 180
Distronic* 175
Easy-entry/exit feature 129
Electric air pump 316
ESP 72
Exterior lamps 102
Hazard warning flasher 105
High beams 104Ignition 29
Immobilizer 48, 75
Parktronic* 189
Rear window defroster 153
Residual heat 154
Seat heater 97, 98
Seat ventilation* 96
Steering wheel gearshift control
(SL 55 AMG Kompressor) 143
Tow-away alarm 77
Windshield wipers 44
Active Body Control (ABC) switch 24
Adjusting
Air distribution 151
Air volume 150
Backrest tilt 33
Exterior rear view mirrors 35
Head restraint height 33
Head restraint tilt 34
Inside rear view mirror 35
Lumbar support 93
Mirrors 35
Multicontour backrest* 93
Seat cushion depth 33
Seat cushion tilt 33
Seat height 33Seat in the lumbar region 94
Seat in the shoulder region 94
Seats 32
Steering wheel 34
Air conditioner (cooling)
Turning off 155
Turning on 155
Air conditioner refrigerant 343
Air pressure see Tire inflation pressure
Air pump, electric 289
Turning on 316
Air recirculation mode 152
Air volume adjustment 150
Airbags 53
Children 54
Front 57
Head-thorax 57, 58
Kneebag 57
Passenger 57
Alarm
Audible 67, 75
Canceling 76
Visual 75
Alignment bolt 351
Alignment bolt (vehicle tool kit) 288, 314
Anticorrosion/antifreeze 342, 346