Page 53 of 376
 or
side")
53 Safety and Security
Occupant safety
AirbagsWarning!
G
Airbags are designed to reduce the potential
for injury resulting from certain frontal im-
pacts (front airbags, driver-side kneebag) or
side impacts (head-thorax airbags) which
may cause significant injuries. However, no
system available today can totally eliminate
injuries and fatalities.
The activation of the SRS temporarily releas-
es a small amount of dust from the airbags.
This dust, however, is neither injurious to
your health, nor does it indicate a fire in the
vehicle. The dust might cause some tempo-
rary breathing difficulty for people with asth-
ma or other breathing trouble. To avoid this,
you may wish to get out of the vehicle as
soon as it is safe to do so. If you have any
breathing difficulty but cannot get out of the
vehicle after the airbag inflates, then get
fresh air by opening a window or door.
Warning!
G
To reduce the risk of injury when the front
airbags inflate, it is very important for the
driver and passenger to always be in a prop-
erly seated position and to wear your seat
belts.
For maximum protection in the event of a
collision always be in normal seated position
with your back against the backrest. Fasten
your seat belt and ensure that it is properly
positioned on your body (
�page 37).
Since the airbag inflates with considerable
speed and force, a proper seating and hands
on steering wheel position will help to keep
you at a safe distance from the airbag. Oc-
cupants who are unbelted, out of position or
too close to the airbag can be seriously in-
jured by an airbag as it inflates with great
force in the blink of an eye:
�
Sit properly belted in an upright position
with your back against the seat back-
rest.
�
Adjust the driver seat as far as possible
rearward, still permitting proper opera-
tion of vehicle controls. The distance
from the center of the driver’s breast-
bone to the center of the airbag cover on
the steering wheel must be at least ten
inches (25 cm) or more. You should be
able to accomplish this by a combina-
tion of adjustments to the seat and
steering wheel. If you have any prob-
lems, please see your authorized
Mercedes-Benz Center.
�
Do not lean with your head or chest
close to the steering wheel or dash-
board.
�
Keep hands on the outside of steering
wheel rim. Placing hands and arms in-
side the rim can increase the risk and
potential severity of hand / arm injury
when driver front airbag inflates.
�
Adjust the passenger seat as far as pos-
sible rearward from the dashboard when
the seat is occupied.
Page 64 of 376

64 Safety and SecurityOccupant safety
BabySmart
TM airbag deactivation
system
Special BabySmart
TM compatible child
seats, designed for use with the
Mercedes-Benz system and available at
any authorized Mercedes-Benz Center, are
required for use with the BabySmart
TM air-
bag deactivation system. With the special
child seat properly installed, the passenger
front airbag will not deploy.
BabySmart
TM is a trademark of Siemens
Automotive Corp.
Infants and small children should never
share a seat belt with another occupant.
During an accident, they could be crushed
between the occupant and seat belt.
A child’s risk of serious or fatal injuries is
significantly increased if the child restraints
are not properly secured in the vehicle and
the child is not properly secured in the child
restraint.
Adjust the passenger seat as far as possible
rearward from the dashboard when the seat
is occupied.
Warning!
G
Children too big for child restraint systems
should use regular seat belts. Position the
shoulder belt across chest and shoulder, not
face or neck. A booster seat may be neces-
sary to achieve proper belt positioning for
children from 41 lbs. until they reach a
height where a lap/shoulder belt fits proper-
ly without a booster.
When the child restraint is not in use, re-
move it from the vehicle or secure it with the
seat belt to prevent the child restraint from
becoming a projectile in the event of an ac-
cident.
Do not leave children unattended in the ve-
hicle; even if the children are secured in a
child restraint system. Unsupervised chil-
dren in a child restraint system may use ve-
hicle equipment and may cause serious
personal injury.
Page 102 of 376
102 Controls in detailLighting
LightingFor notes on how to switch on the head-
lamps and use the turn signals, see the
“Getting started” section (
�page 43).
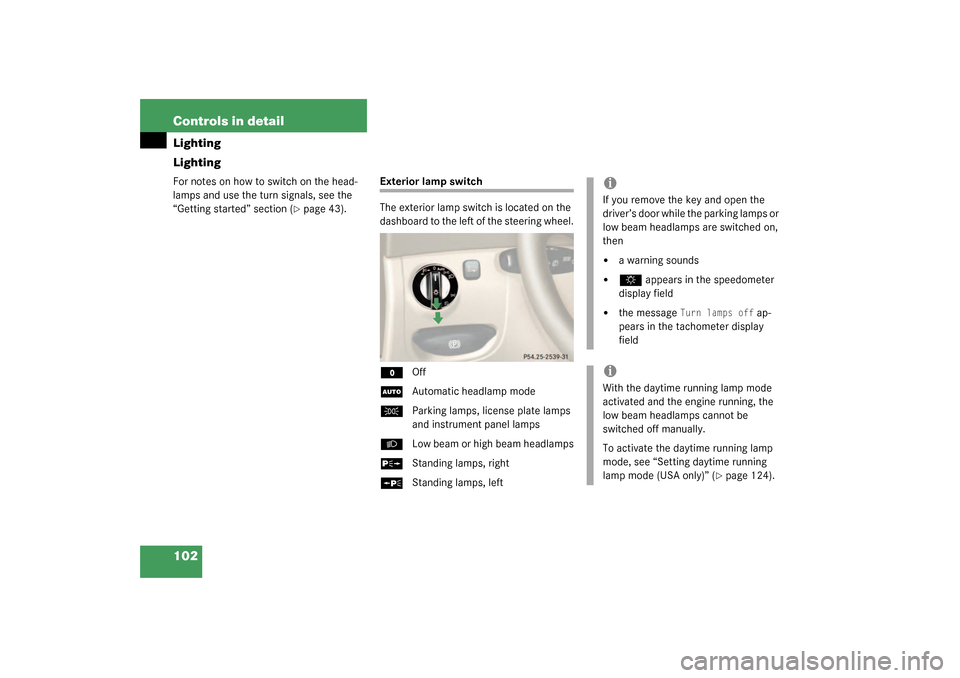
Exterior lamp switch
The exterior lamp switch is located on the
dashboard to the left of the steering wheel.M
Off
U
Automatic headlamp mode
C
Parking lamps, license plate lamps
and instrument panel lamps
B
Low beam or high beam headlamps
ˆ
Standing lamps, right
‚
Standing lamps, left
iIf you remove the key and open the
driver’s door while the parking lamps or
low beam headlamps are switched on,
then �
a warning sounds
�
$
appears in the speedometer
display field
�
the message
Turn lamps off
ap-
pears in the tachometer display
field
iWith the daytime running lamp mode
activated and the engine running, the
low beam headlamps cannot be
switched off manually.
To activate the daytime running lamp
mode, see “Setting daytime running
lamp mode (USA only)” (
�page 124).
Page 146 of 376
146 Controls in detailGood visibilityHeadlamp cleaning system
The switch is located on the left side of the
dashboard.
1Headlamp washer switch�
Switch on ignition.
�
Press switch1.
Rear window defroster
For information on the rear window de-
froster (
�page 153).
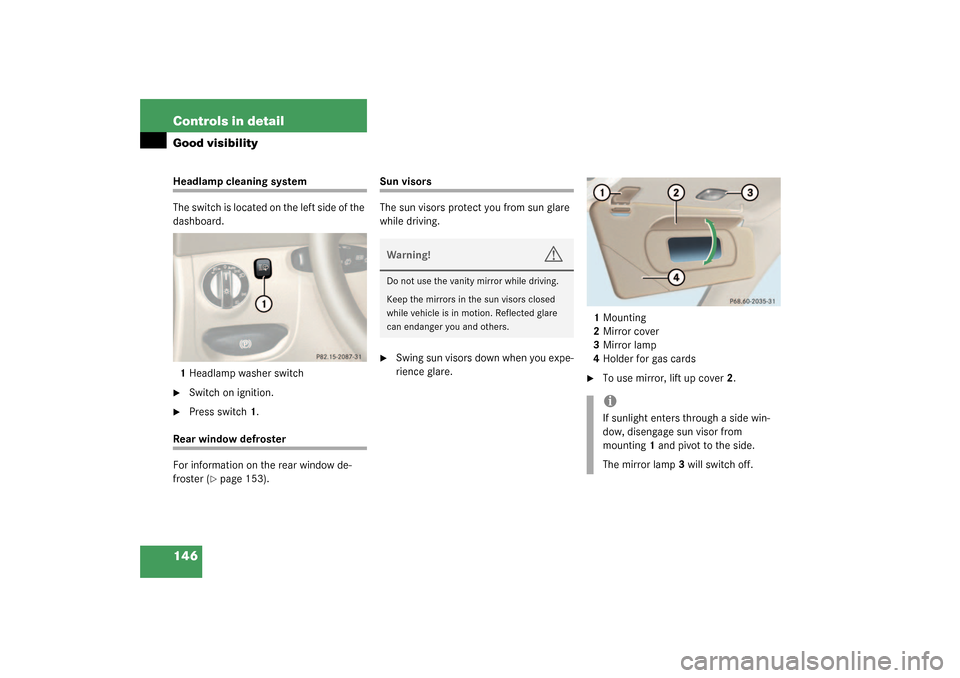
Sun visors
The sun visors protect you from sun glare
while driving.�
Swing sun visors down when you expe-
rience glare.1Mounting
2Mirror cover
3Mirror lamp
4Holder for gas cards
�
To use mirror, lift up cover2.
Warning!
G
Do not use the vanity mirror while driving.
Keep the mirrors in the sun visors closed
while vehicle is in motion. Reflected glare
can endanger you and others.
iIf sunlight enters through a side win-
dow, disengage sun visor from
mounting1 and pivot to the side.
The mirror lamp3 will switch off.
Page 187 of 376

187 Controls in detail
Driving systems
Range of the sensors
To function properly, the sensors must be
free of dirt, ice snow and slush. Clean the
sensors regularly, being careful not to
scratch or damage the sensors.
Front sensorsRear sensors Minimum distance
If you encounter an obstacle in this range,
all the warning lamps light up and you hear
a warning signal. If the obstacle is closer
than the minimum distance, the actual dis-
tance may no longer be indicated by the
system.
Warning indicators
Visual signals indicate to the driver the rel-
ative distance between the sensors and an
obstacle. The warning indicator for the
front area is located above the center air
vents in the dashboard. The warning indi-
cator for the rear area is integrated in the
rear trim.Center
approx. 40 in (100 cm)
Corners
approx. 48 in (120 cm)
Center
approx. 48 in (120 cm)
Corners
approx. 32 in (80 cm)
!During parking maneuvers, pay special
attention to objects located above or
below the height of the sensors (e.g.
planters or trailer hitches). The Park-
tronic system will not detect such ob-
jects at close range and damage to
your vehicle or the object may result.
Ultrasonic signals from outside sourc-
es (e.g. truck air brakes or jackham-
mers) may impair the operation of the
Parktronic system.
Center
approx. 8 in (20 cm)
Corners
approx. 6 in (15 cm)