Page 11 of 226

3 Introduction
Operating safety
� Operating safety
Warning
G
Any alterations made to electronic compo-
nents and the software can cause malfunc-
tions.
The radio, amplifier, CD changer, telepho-
ne* and voice control system* are intercon-
nected. Therefore, when one of the
components is not operational or has not
been removed/replaced properly, the func-
tion of other components may be impaired.
This condition might seriously impair the
operating safety of your vehicle.
We recommend that you have any service
work on electronic components carried out
by an authorized Mercedes-Benz Center.
Warning
G
In order to avoid distraction which could
lead to an accident, system settings should
be entered with the vehicle at a standstill
and system should be operated by the driver
only when road and traffic conditions per-
mit.Bear in mind that at a speed of just 30 mph
(approximately 50 km/h), your car is co-
vering a distance of 50 feet (approximately
14 m) every second.
COMAND supplies you with information to
help you select your route more easily and
guide you conveniently and safely to your
destination. For safety reasons, we encoura-
ge the driver to stop the vehicle in a safe
place before answering or placing a call, or
consulting the COMAND screen to read na-
vigational maps, instructions, or downloa-
ded information.
While the navigation system provides direc-
tional assistance, the driver must remain fo-
cused on safe driving behavior, including
attention to traffic and street signs, and
should utilize the system's audio cues while
driving.
The navigation system does not supply any
information on stop signs, yield signs, traffic
regulations or traffic safety rules. This al-
ways remains your personal responsibility
when you drive. CD maps do not cover all
areas nor all routes within an area.
Page 19 of 226
11 At a glance
Multifunction display
� Multifunction display
The starter switch is in position 1 or 2. Re-
fer to vehicle operating instructions.
You can operate the following systems
with steering wheel buttons 5 and 6:
�
Radio
�
CD (CD changer and CD drive)
�
Auxiliary audio source, e.g. tape player
(�page 200)
�
Telephone
For more detailed information, refer to
“Multifunction display” in the chapters dis-
cussing the radio, CD and telephone ope-
ration.
Function
1
Left display in speedometer
2
Right display in tachometer
Operating the control system
3
Adjusting the volume
I lowers the volume
J raises the volume
4
Making a call
K Accept incoming call or
starts dialing
L End a call or end Tele Aid
5
Switching from system to system
E next system
H previous system
6
Switching in the system
F next display
G previous displayFunction
Page 22 of 226
14 At a glanceQuick reference COMANDAt the multifunction steering wheel
To raise the volume�
Press J.
To lower the volume
�
Press I.
At the COMAND operating unit
�
Turn the the left-hand rotary/push-
button v.
For the audio sources
�
Radio
�
CD (CD drive and CD changer)
you can set the volume jointly.For the service sources
�
Voice output during route guidance
(navigation system)
and
�
Voice control system* (refer to separa-
te operating instruction)
you can set the volume jointly.
For the service source
�
Telephone*
you can alter the listening volume for the
telephone only.
Switching on
�
Press c.
The radio is switched on. The station
last tuned to will begin to play.
Changing the radio band
�
Press c to switch between FM-,
AM- and WB-Band.
Adjusting the volume
Radio operation
P82.85-6062-31
Page 23 of 226

15 At a glance
Quick reference COMAND
Selecting a station
Automatic seek tuning�
Press g or h on the rocker
switch briefly.
FM- and AM-Bands, Weather Band WB
The radio will tune in to the next recei-
vable station (FM/AM) or channel (WB)
with descending/ascending frequency.
Switching another system on
�
Press any system key, e.g. d.
COMAND will switch to CD mode.
You will find more information regarding
this topic in section “Radio operation” in
chapter “Audio” (
�page 28).Switching on
�
Press d.
The main CD menu will appear.
Playback will begin in�
CD drive with the first track on the
CD
�
CD changer with the first track on
the first CD detected in the magazi-
ne.Loading a CD into the CD drive and loading
CDs in the CD changer (
�page 45).
Track select
�
Press the rocker switch g/h.
You will hear the previous or next track.
If more than 9 seconds of playing time
has elapsed, the CD changes back to
the start of the track.
Selecting a CD
�
Press one of the number keys
Key 0 select the CD drive
Keys 1 - 6 select the corresponding
magazine slot of the
CD changer
The message “Loading CD ...” appears
on the display. Playback then will begin
with track 1.
CD operation
P82.85-9063-31
Page 51 of 226

43 Audio
CD operation
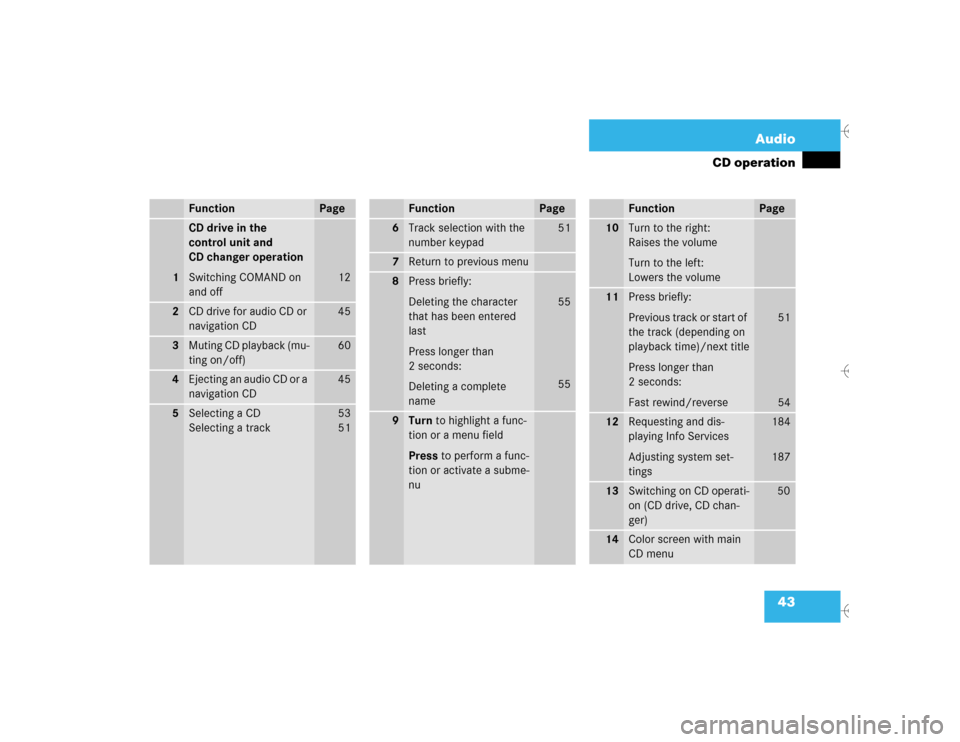
Function
Page
1
CD drive in the
control unit and
CD changer operation
Switching COMAND on
and off
12
2
CD drive for audio CD or
navigation CD
45
3
Muting CD playback (mu-
ting on/off)
60
4
Ejecting an audio CD or a
navigation CD
45
5
Selecting a CD
Selecting a track
53
5 1
6
Track selection with the
number keypad
51
7
Return to previous menu
8
Press briefly:
Deleting the character
that has been entered
last
Press longer than
2 seconds:
Deleting a complete
name
55
55
9
Turn to highlight a func-
tion or a menu field
Press to perform a func-
tion or activate a subme-
nuFunction
Page
10
Turn to the right:
Raises the volume
Turn to the left:
Lowers the volume
11
Press briefly:
Previous track or start of
the track (depending on
playback time)/next title
Press longer than
2 seconds:
Fast rewind/reverse
51
54
12
Requesting and dis-
playing Info Services
Adjusting system set-
tings
184
187
13
Switching on CD operati-
on (CD drive, CD chan-
ger)
50
14
Color screen with main
CD menuFunction
Page
Page 52 of 226

44 AudioCD operation
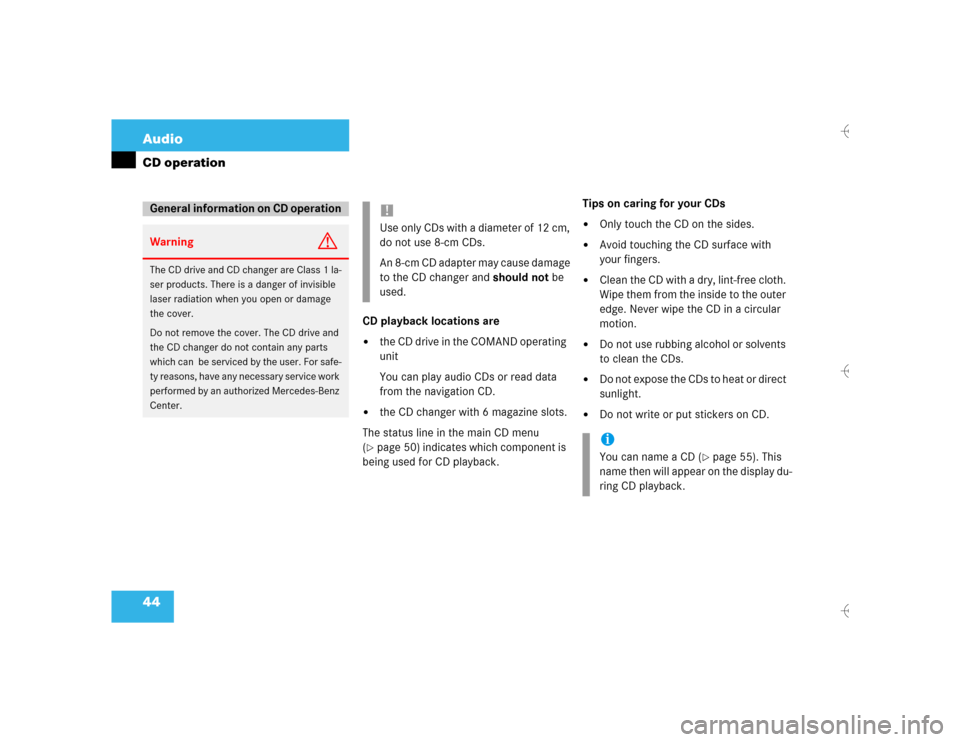
CD playback locations are�
the CD drive in the COMAND operating
unit
You can play audio CDs or read data
from the navigation CD.
�
the CD changer with 6 magazine slots.
The status line in the main CD menu
(
�page 50) indicates which component is
being used for CD playback.Tips on caring for your CDs
�
Only touch the CD on the sides.
�
Avoid touching the CD surface with
your fingers.
�
Clean the CD with a dry, lint-free cloth.
Wipe them from the inside to the outer
edge. Never wipe the CD in a circular
motion.
�
Do not use rubbing alcohol or solvents
to clean the CDs.
�
Do not expose the CDs to heat or direct
sunlight.
�
Do not write or put stickers on CD.
General information on CD operationWarning
G
The CD drive and CD changer are Class 1 la-
ser products. There is a danger of invisible
laser radiation when you open or damage
the cover.
Do not remove the cover. The CD drive and
the CD changer do not contain any parts
which can be serviced by the user. For safe-
ty reasons, have any necessary service work
performed by an authorized Mercedes-Benz
Center.
!Use only CDs with a diameter of 12 cm,
do not use 8-cm CDs.
An 8-cm CD adapter may cause damage
to the CD changer and should not be
used.
iYou can name a CD (
�page 55). This
name then will appear on the display du-
ring CD playback.
Page 53 of 226

45 Audio
CD operation
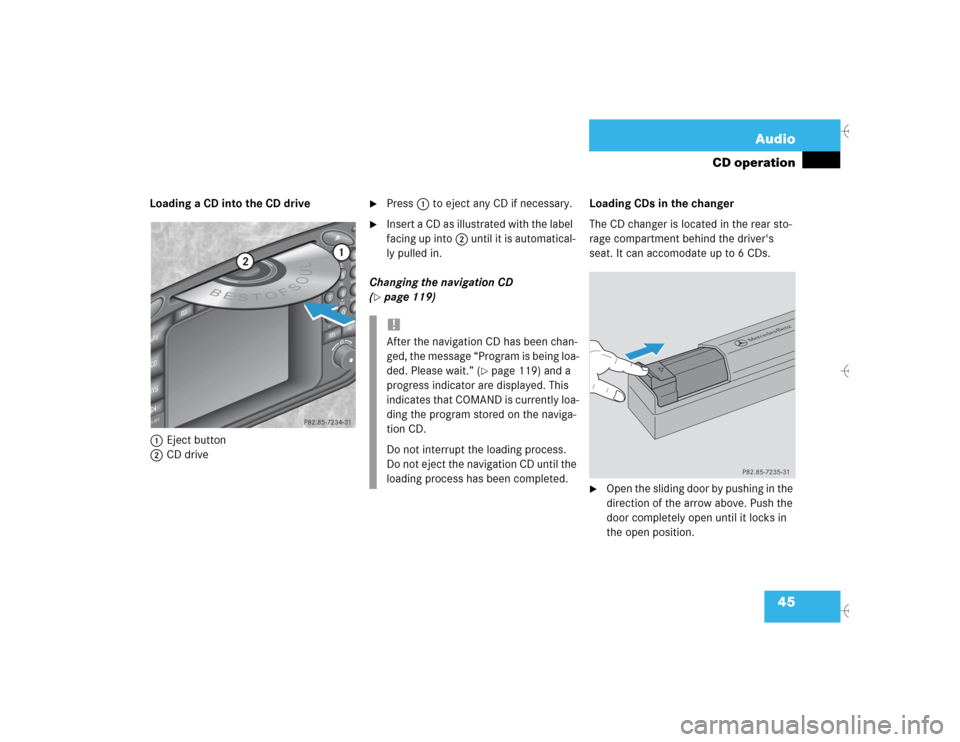
Loading a CD into the CD drive
1Eject button
2CD drive
�
Press 1 to eject any CD if necessary.
�
Insert a CD as illustrated with the label
facing up into 2 until it is automatical-
ly pulled in.
Changing the navigation CD
(
�page 119)Loading CDs in the changer
The CD changer is located in the rear sto-
rage compartment behind the driver's
seat. It can accomodate up to 6 CDs.
�
Open the sliding door by pushing in the
direction of the arrow above. Push the
door completely open until it locks in
the open position.
ABCJKLT
U
V
GHI
PQRS+
DEFMNOWXY
2
1
3
5
4
6
8
7
9
0
D
E
L
NA
V
MAP
CDSYSVOL-RPT
-
+
R
E
T
B
E
S
T
O
FSOUL
1
2
P82.85-7234-31
!After the navigation CD has been chan-
ged, the message “Program is being loa-
ded. Please wait.” (
�page 119) and a
progress indicator are displayed. This
indicates that COMAND is currently loa-
ding the program stored on the naviga-
tion CD.
Do not interrupt the loading process.
Do not eject the navigation CD until the
loading process has been completed.
P82.85-7235-31
Page 55 of 226
47 Audio
CD operation
�
Place a CD in the tray. The CD should
be inserted with the label side up.1Arrow tip on the rack wall
�
Push the CD tray into the magazine
completely.
�
Slide the magazine into the CD changer
until it clicks into place (listen for the
click).
�
Press the button 3 to close the maga-
zine compartment.
P82.85-7238-31
P82.85-7239-31
1
iMake sure that 1 is pointing in the di-
rection of the arrow 2.
P82.85-9057-31
2
3