Page 227 of 416
227 Controls in detail
Useful features
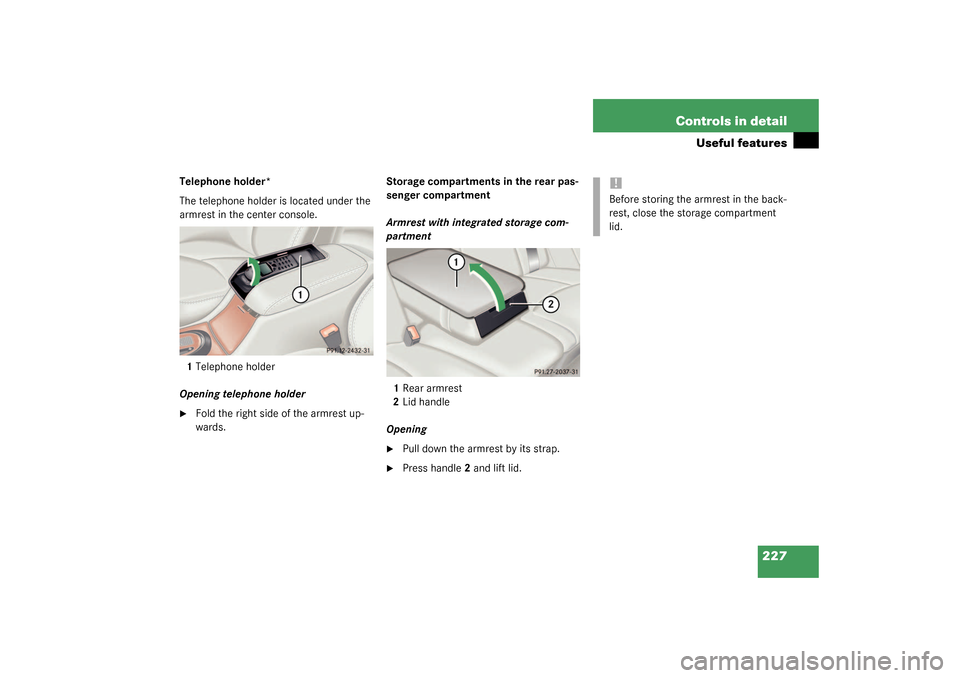
Telephone holder*
The telephone holder is located under the
armrest in the center console.
1Telephone holder
Opening telephone holder�
Fold the right side of the armrest up-
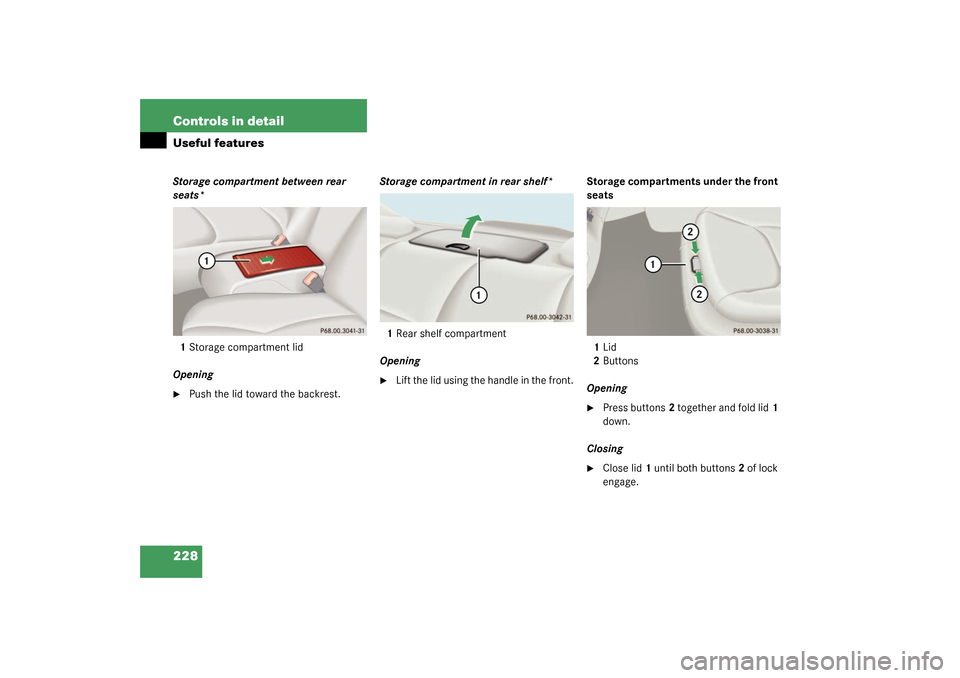
wards.Storage compartments in the rear pas-
senger compartment
Armrest with integrated storage com-
partment
1Rear armrest
2Lid handle
Opening
�
Pull down the armrest by its strap.
�
Press handle2 and lift lid.
!Before storing the armrest in the back-
rest, close the storage compartment
lid.
Page 228 of 416
228 Controls in detailUseful featuresStorage compartment between rear
seats*
1Storage compartment lid
Opening�
Push the lid toward the backrest.Storage compartment in rear shelf*
1Rear shelf compartment
Opening
�
Lift the lid using the handle in the front.Storage compartments under the front
seats
1Lid
2Buttons
Opening
�
Press buttons2 together and fold lid1
down.
Closing
�
Close lid1 until both buttons2 of lock
engage.
Page 229 of 416
229 Controls in detail
Useful features
Cup holder in front of seat armrestFolding out cup holder
The cup holder is located in the storage
compartment in front of the armrest.
1Button for folding out the cup holder
�
Open the storage compartment in front
of armrest (
�page 225).
�
Push button1.
The cup holder opens automatically.Folding in cup holder
1Cup holder
�
Swing cup holder1 back and press it
into the storage compartment until it
engages.
Warning!
G
When not in use, keep the cup holder closed
while traveling. Place only containers that fit
into the cup holder to prevent spills. Use lids
on open containers and do not fill containers
to a height where the contents, especially
hot liquids, could spill during vehicle maneu-
vers.
Page 230 of 416
230 Controls in detailUseful featuresCup holder in rear seat armrestOpening cup holder
�
Push front of sliding compartment1.
The cup holder slides out.
Closing cup holder
�
Push sliding compartment1 back until
it engages.Auxiliary cup holder
You can fasten the auxiliary cup holder
onto the left front side of the passenger
seat.
Inserting auxiliary cup holder
1Cover
�
Pull up cover1 and place it in a storage
compartment.
Warning!
G
When not in use, keep the cup holder
closed. Place only containers that fit into the
cup holder to prevent spills. Use lids on
open containers and do not fill containers to
a height where the contents, especially hot
liquids, could spill during vehicle maneu-
vers.
Page 231 of 416

231 Controls in detail
Useful features
2Insert
3Auxiliary cup holder�
Press auxiliary cup holder3 in direction
of the arrow until it snaps into place.
You can now place a larger container in
the holder. For even larger containers
you can take out insert2. Make sure
that the container does not press
against the glove box.Removing the auxiliary cup holder
�
Pull auxiliary cup holder3
(�page 230) up and out of the recep-
tacle and place it in a storage compart-
ment.
�
Install cover1 (
�page 230) on the
opening and press cover down until it
snaps into place.
Warning!
G
When not in use, remove the auxiliary cup
holder. Place only containers that fit into the
auxiliary cup holder to prevent spills. Use
lids on open containers and do not fill con-
tainers to a height where the contents, es-
pecially hot liquids, could spill during vehicle
maneuvers.iWhen you move the seat forward, the
auxiliary cup holder turns to the side.
When you move the seat backward,
turn the auxiliary cup holder back to its
original position.
Page 322 of 416
322 Practical hintsWhere will I find ...?
Where will I find ...?First aid kit
The first aid kit is located in the storage
space under the front passenger seat.
1Handle
2CoverRemoving the first aid kit
�
Pull handle 1 forward in the direction of
the arrow.
�
Fold cover2 downward.
Remove first aid kit.
Storing the first aid kit
�
Place first aid kit in the storage space.
�
Fold cover2 upward until it engages.Vehicle jack, vehicle tool kit, luggage
bowl, spare wheel
The spare wheel, the vehicle tools, and the
luggage bowl are stored in the compart-
ment underneath the trunk floor.
1Jack
2Storage tray with vehicle tool kit
3Luggage bowl
4Spare wheel�
Lift trunk floor cover and engage han-
dle in upper edge of trunk.
iCheck expiration dates and contents
for completeness at least once a year
and replace missing/expired items.
Page 323 of 416
323 Practical hints
Where will I find ...?
The vehicle tool kit includes:�
One pair of universal pliers
�
Two open-end wrenches
�
One hex-socket wrench
�
One interchangeable slot/Phillips
screwdriver
�
One towing eye bolt
�
One wheel wrench
�
One alignment bolt
�
One fuse extractor
�
One fuse chart for the main fuse box
�
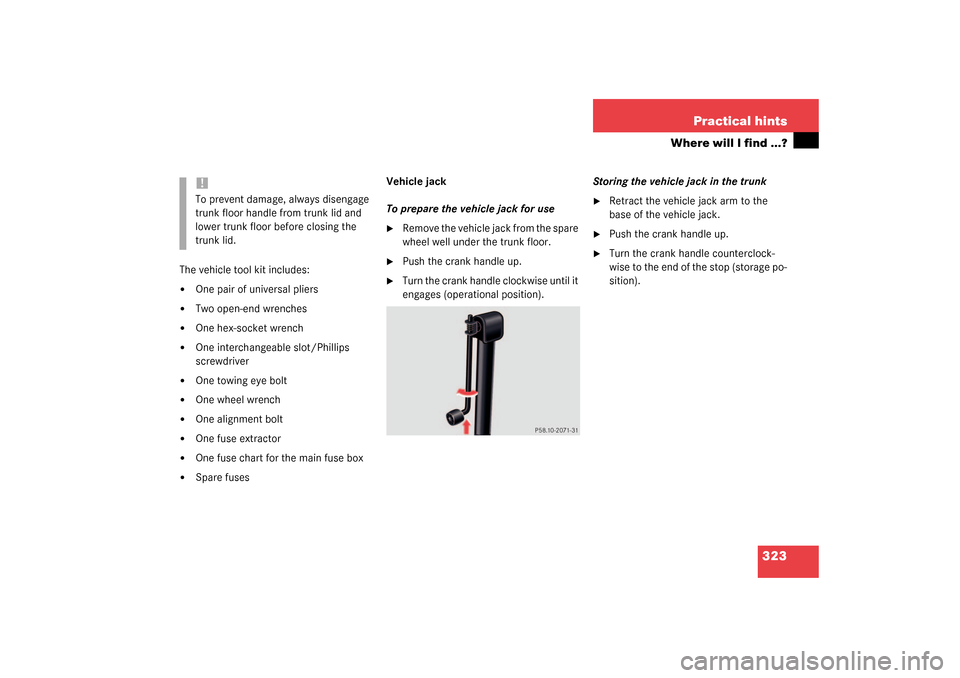
Spare fusesVehicle jack
To prepare the vehicle jack for use
�
Remove the vehicle jack from the spare
wheel well under the trunk floor.
�
Push the crank handle up.
�
Turn the crank handle clockwise until it
engages (operational position).Storing the vehicle jack in the trunk
�
Retract the vehicle jack arm to the
base of the vehicle jack.
�
Push the crank handle up.
�
Turn the crank handle counterclock-
wise to the end of the stop (storage po-
sition).
!To prevent damage, always disengage
trunk floor handle from trunk lid and
lower trunk floor before closing the
trunk lid.
Page 346 of 416
346 Practical hintsBattery
Batteries contain materials that can harm
the environment if disposed of improperly.
Large 12-volt storage batteries contain
lead. Recycling of batteries is the preferred
method of disposal. Many states require
sellers of batteries to accept old batteries
for recycling.
iThe following procedures must be car-
ried out following any interruption of
battery power (e.g. due to reconnect-
ing):�
Set the clock (see COMAND opera-
tor’s manual).
�
Resynchronize the ESP
(�page 310).
�
Resynchronize side windows
(�page 191).
�
Resynchronize sliding/pop-up roof
(�page 195).
�
Resynchronize rear seats if they
were adjusted five seconds or less
before the battery was disconnect-
ed .