Page 168 of 416

168 Controls in detailGood visibility
Good visibilityInformation on the windshield wipers
(�page 47) and for setting the rear view
mirrors (
�page 38) is found in the “Get-
ting started” section.
Rear view mirror
Automatic antiglare rear view mirror
The reflection brightness of the exterior
rear view mirror on the driver’s side and
the inside rear view mirror will respond au-
tomatically to glare when�
the ignition is switched on, and
�
incoming light from headlamps falls on
the sensor in the inside rear view
mirror.
The rear view mirror will not react if
�
reverse gear is engaged
�
the interior lighting is turned on
Warning!
G
The automatic antiglare function does not
react if incoming light is not aimed directly
at sensors in the inside rear view mirror.
The inside rear view mirror and the exterior
rear view mirror on the driver’s side do not
react, for example, if the rear window sun
shade* is in raised position.
Glare can endanger you and others.Warning!
G
In the case of an accident liquid electrolyte
may escape from the mirror housing if the
mirror glass breaks.
Electrolyte has an irritating effect. Do not al-
low the liquid to come into contact with
eyes, skin, clothing, or respiratory system.
In case it does, immediately flush affected
area with water, and seek medical help if
necessary.
Warning!
G
Exercise care when using the passen-
ger-side exterior rear view mirror. The mirror
surface is convex (outwardly curved surface
for a wider field of view). Objects in mirror
are closer than they appear. Check your in-
side rear view mirror or glance over your
shoulder before changing lanes.!Electrolyte drops coming into contact
with the vehicle paint finish can be
completely removed only while in the
liquid state by applying plenty of water.
Page 170 of 416
170 Controls in detailGood visibilityElectrically folding exterior rear view mirrors
Folding the exterior mirrors in and out
automatically
When the corresponding function in the
control system is activated (
�page 158):
�
The exterior rear view mirrors automat-
ically fold in as soon as the vehicle is
locked from the outside.
�
The exterior rear view mirrors automat-
ically fold out as soon as the vehicle is
unlocked and the driver’s or front pas-
senger door are subsequently opened.Folding the exterior mirrors in and out
manually
The exterior rear view mirrors can vibrate if
they are not completely folded out.
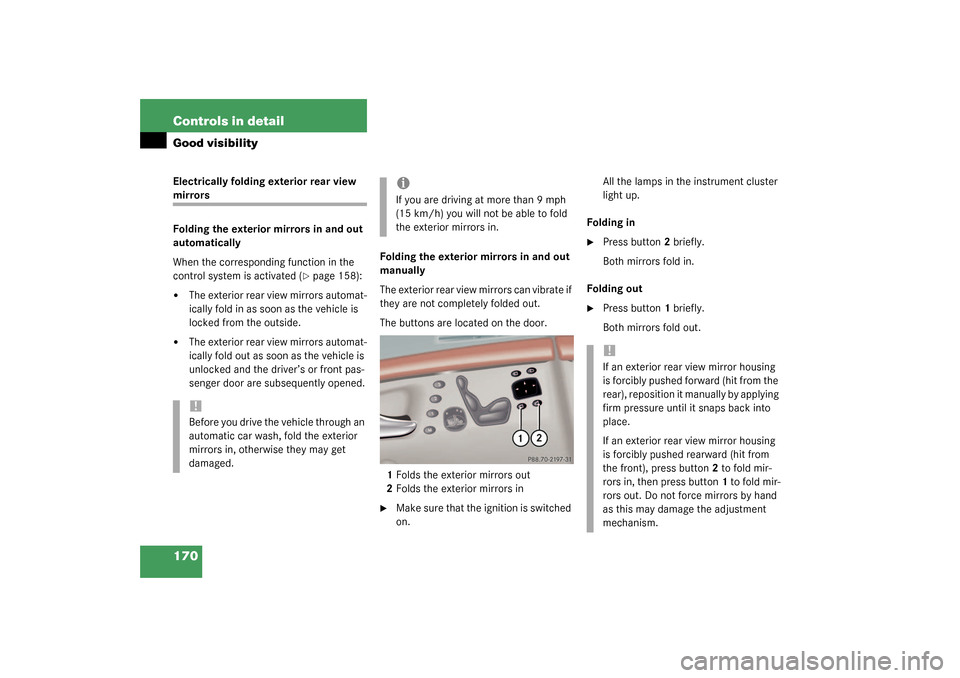
The buttons are located on the door.
1Folds the exterior mirrors out
2Folds the exterior mirrors in
�
Make sure that the ignition is switched
on.All the lamps in the instrument cluster
light up.
Folding in
�
Press button2 briefly.
Both mirrors fold in.
Folding out
�
Press button1 briefly.
Both mirrors fold out.
!Before you drive the vehicle through an
automatic car wash, fold the exterior
mirrors in, otherwise they may get
damaged.
iIf you are driving at more than 9 mph
(15 km/h) you will not be able to fold
the exterior mirrors in.
!If an exterior rear view mirror housing
is forcibly pushed forward (hit from the
rear), reposition it manually by applying
firm pressure until it snaps back into
place.
If an exterior rear view mirror housing
is forcibly pushed rearward (hit from
the front), press button2 to fold mir-
rors in, then press button1 to fold mir-
rors out. Do not force mirrors by hand
as this may damage the adjustment
mechanism.
Page 211 of 416

211 Controls in detail
Driving systems
AIRMATIC
AIRMATIC automatically selects the opti-
mum suspension tuning and ride height for
your vehicle. AIRMATIC consists of two
components:�
Adaptive Damping System (ADS)
�
Level control system
The ADS automatically selects the opti-
mum damping for the respective driving
conditions. At the same time the suspen-
sion is set to either sporty or regular.Suspension tuning
The suspension tuning is set according to:
�
Your driving style
�
Road surface conditions
�
Your choice of suspension style,
“sporty” or “regular”, which you select
using the damping switch.
The following suspension styles are avail-
able:
�
Regular
Both indicator lamps1 are off.
�
Sporty I
One indicator lamp1 is on.
�
Sporty II
Both indicator lamps1 are on.1Indicator lamps
2Damping switch
�
Start the engine.
�
Press the damping switch2 until the
desired suspension style is set.iThe selected suspension style is stored
in memory, even after the SmartKey is
removed from the starter switch.
Page 212 of 416
212 Controls in detailDriving systemsVehicle level control with AIRMATIC
Your vehicle automatically adjusts its ride
height to:�
reduce fuel consumption
�
increase vehicle safety
The vehicle chassis ride height is raised or
lowered according to the selected level
setting and to the vehicle speed:
�
With increasing speed, ride height is re-
duced by up to approximately
3/4inch
(20 mm).
�
With decreasing speed, the ride height
is again raised to the selected vehicle
level.The following vehicle level settings can be
selected when the vehicle is stationary:
Select the "Raised" level setting only when
required by current driving conditions.
Otherwise:
�
Fuel consumption may increase
�
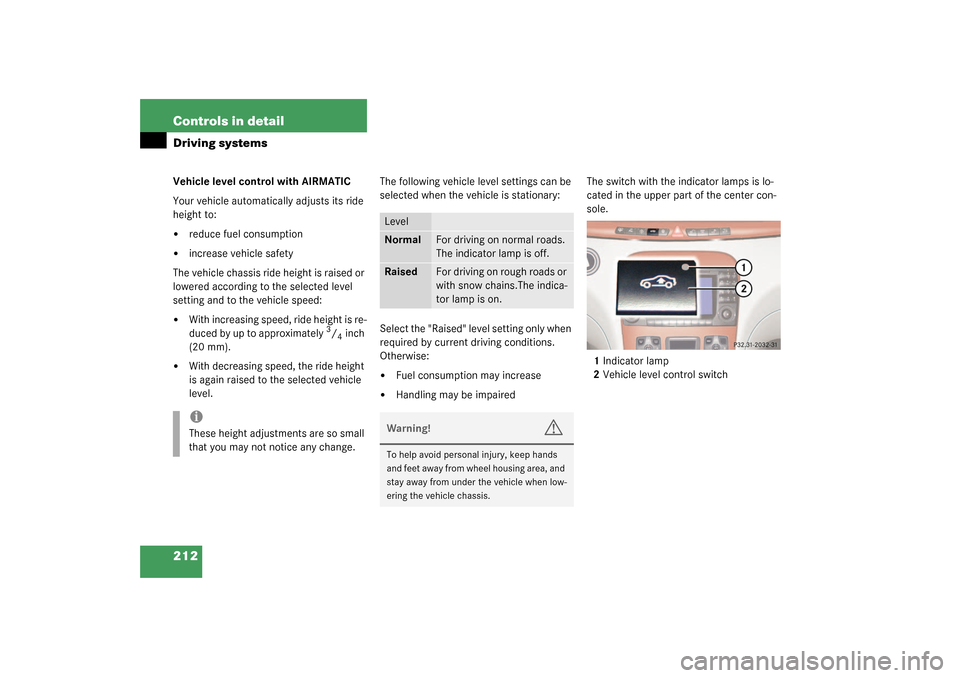
Handling may be impairedThe switch with the indicator lamps is lo-
cated in the upper part of the center con-
sole.
1Indicator lamp
2Vehicle level control switch
iThese height adjustments are so small
that you may not notice any change.
LevelNormal
For driving on normal roads.
The indicator lamp is off.
Raised
For driving on rough roads or
with snow chains.The indica-
tor lamp is on.
Warning!
G
To help avoid personal injury, keep hands
and feet away from wheel housing area, and
stay away from under the vehicle when low-
ering the vehicle chassis.
Page 214 of 416
214 Controls in detailDriving systemsThe ABC switch with the indicator lamps is
located in the upper part of the center con-
sole.
1Indicator lamp
2ABC switch�
Start the engine.Suspension for sporty driving style
The setting for sporty driving is selected
when indicator lamp1 is illuminated.
�
Press switch2 to change from regular
suspension to sporty suspension style.
Indicator lamp1 comes on.Suspension for regular driving style
The setting for regular driving is selected
when indicator lamp1 is off.
�
Press switch2 to change from sporty
suspension style to regular suspension
style.
Indicator lamp1 goes out.
Page 216 of 416
216 Controls in detailDriving systemsThe following vehicle level settings can be
selected when the vehicle is stationary:
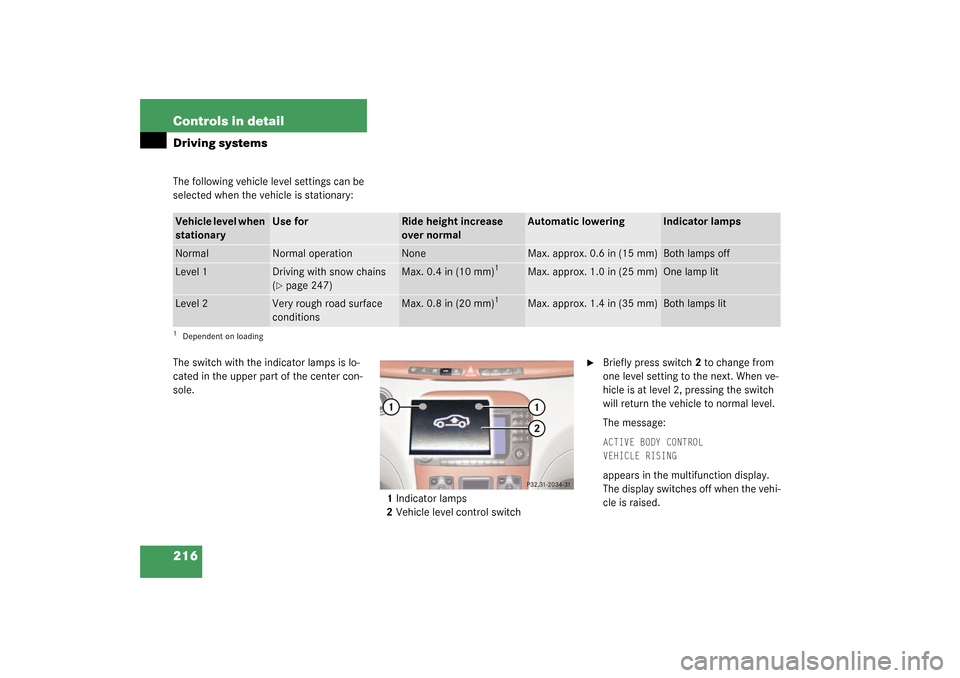
The switch with the indicator lamps is lo-
cated in the upper part of the center con-
sole.
1Indicator lamps
2Vehicle level control switch
�
Briefly press switch2 to change from
one level setting to the next. When ve-
hicle is at level 2, pressing the switch
will return the vehicle to normal level.
The message:ACTIVE BODY CONTROL
VEHICLE RISING appears in the multifunction display.
The display switches off when the vehi-
cle is raised.
Vehicle level when
stationary
Use for
Ride height increase
over normal
Automatic lowering
Indicator lamps
Normal
Normal operation
None
Max. approx. 0.6 in (15 mm)
Both lamps off
Level 1
Driving with snow chains
(�page 247)
Max. 0.4 in (10 mm)
1
1Dependent on loading
Max. approx. 1.0 in (25 mm)
One lamp lit
Level 2
Very rough road surface
conditions
Max. 0.8 in (20 mm)
1
Max. approx. 1.4 in (35 mm)
Both lamps lit
Page 219 of 416

219 Controls in detail
Driving systems
Range of the sensors
To function properly, the sensors must be
free of dirt, ice, snow and slush. Clean the
sensors regularly, being careful not to
scratch or damage the sensors.Front sensors
Rear sensorsMinimum distance
If the system detects an obstacle in this
range, all the warning lamps light up and
you hear a warning signal. If the obstacle is
closer than the minimum distance, the ac-
tual distance might no longer be indicated
by the system.
Center
approx. 40 in (100 cm)
Corners
approx. 24 in (60 cm)
Center
approx. 48 in (120 cm)
Corners
approx. 32 in (80 cm)
!During parking maneuvers, pay special
attention to objects located above or
below the height of the sensors (e.g.
planters or trailer hitches). The Park-
tronic system will not detect such ob-
jects at close range and damage to
your vehicle or the object may result.
Ultrasonic signals from outside sourc-
es (e.g. truck air brakes or jackham-
mers) may impair the operation of the
Parktronic system.
Center
approx. 8 in (20 cm)
Corners
approx. 6 in (15 cm)
Page 235 of 416
235 Controls in detail
Useful features
Heated steering wheel*
The steering wheel heating warms up the
leather area of the steering wheel.
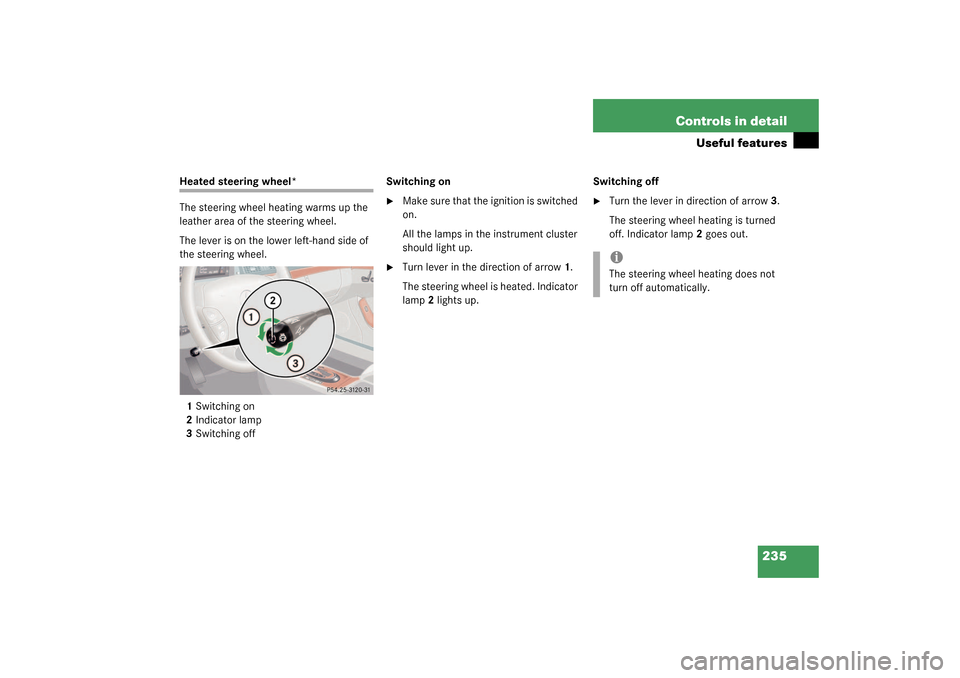
The lever is on the lower left-hand side of
the steering wheel.
1Switching on
2Indicator lamp
3Switching offSwitching on
�
Make sure that the ignition is switched
on.
All the lamps in the instrument cluster
should light up.
�
Turn lever in the direction of arrow1.
The steering wheel is heated. Indicator
lamp2 lights up.Switching off
�
Turn the lever in direction of arrow3.
The steering wheel heating is turned
off. Indicator lamp2 goes out.iThe steering wheel heating does not
turn off automatically.