Page 80 of 416
80 Safety and SecurityDriving safety systemsSwitching off the ESP
To improve the vehicle's traction, turn off
the ESP in driving situations where it would
be advantageous to have the drive wheels
spin and thus cut into surfaces for better
grip such as:�
starting out on slippery surfaces and in
deep snow in conjunction with snow
chains
�
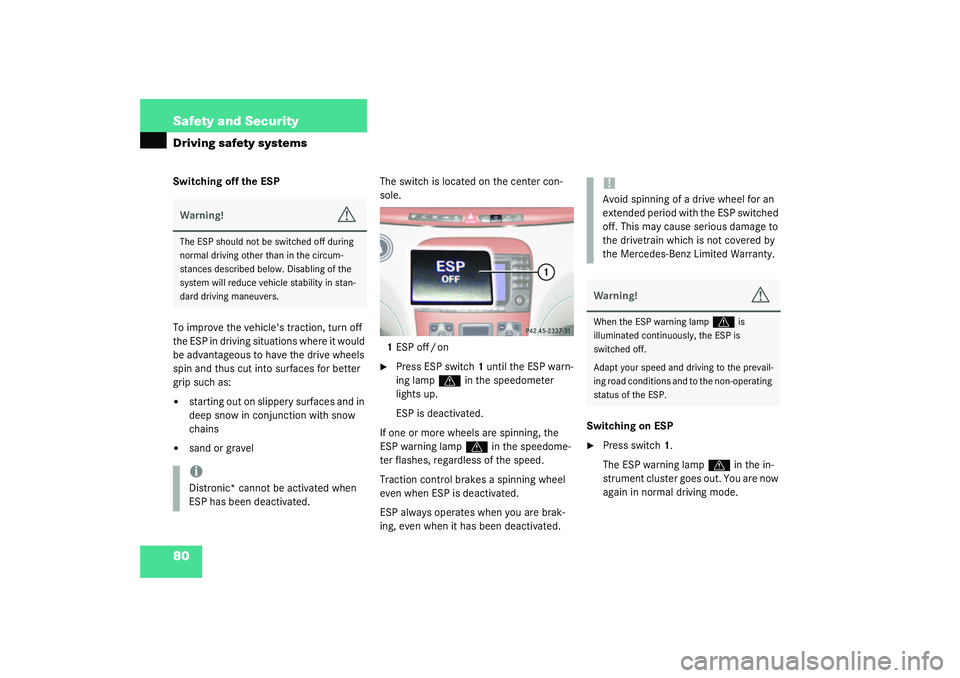
sand or gravelThe switch is located on the center con-
sole.
1ESP off / on
�
Press ESP switch1 until the ESP warn-
ing lamp
v
in the speedometer
lights up.
ESP is deactivated.
If one or more wheels are spinning, the
ESP warning lampv
in the speedome-
ter flashes, regardless of the speed.
Traction control brakes a spinning wheel
even when ESP is deactivated.
ESP always operates when you are brak-
ing, even when it has been deactivated.Switching on ESP
�
Press switch1.
The ESP warning lamp
v
in the in-
strument cluster goes out. You are now
again in normal driving mode.
Warning!
G
The ESP should not be switched off during
normal driving other than in the circum-
stances described below. Disabling of the
system will reduce vehicle stability in stan-
dard driving maneuvers.iDistronic* cannot be activated when
ESP has been deactivated.
!Avoid spinning of a drive wheel for an
extended period with the ESP switched
off. This may cause serious damage to
the drivetrain which is not covered by
the Mercedes-Benz Limited Warranty.Warning!
G
When the ESP warning lamp
v
is
illuminated continuously, the ESP is
switched off.
Adapt your speed and driving to the prevail-
ing road conditions and to the non-operating
status of the ESP.
Page 88 of 416
88 Controls in detailLocking and unlockingRestoring to factory setting�
Press and hold buttons
Œ
and
‹
simultaneously for about six seconds
until battery check lamp5 blinks twice.Checking the batteries
�
Press button
‹
or
Œ
.
Battery check lamp5 lights up briefly
to indicate that the SmartKey batteries
are in order.
Warning!
G
When leaving the vehicle, always remove the
SmartKey from the starter switch, take the
KEYLESS-GO* card (if so equipped) with you
and lock the vehicle. Do not leave children
unattended in the vehicle, or with access to
an unlocked vehicle. It is possible for chil-
dren to open a locked door from the inside,
which could result in an accident and/or se-
rious injury.
!If you can no longer lock or unlock the
vehicle with the SmartKey, then either
the batteries in the SmartKey are dis-
charged or the SmartKey is malfunc-
tioning.�
Check the batteries in the
SmartKey and replace them if nec-
essary (
�page 328).
or
�
Use the mechanical key to unlock
the doors (
�page 326) and trunk
(
�page 327) as required. Lock the
vehicle using the mechanical key
(�page 327).
If the SmartKey is malfunctioning, con-
tact an authorized Mercedes-Benz Cen-
ter.
!If battery check lamp5 does not light
up briefly during check, the SmartKey
batteries are discharged.
Replace the batteries (
�page 328).
You can obtain the required batteries
at any authorized Mercedes-Benz Cen-
ter.
Page 93 of 416

93 Controls in detail
Locking and unlocking
Checking vehicle lock status
If you cannot remember whether you have
locked the vehicle, you can check the lock
status using the KEYLESS-GO card.�
Briefly press programming button1.
The indicator lamp for “Driver’s door”2
or “Central unlock”3 lights up in red or
green.
Vehicle lock status:
Red: Vehicle is locked
Green: Vehicle is unlockedLocking the vehicle
1Trunk lock button
�
Press the lock button at door
(�page 53) or trunk1.Closing the side windows and
sliding/pop-up roof
�
Press and hold lock button at the door
(�page 53) until the side windows and
the sliding/pop-up roof are closed.
iWhen the vehicle is unlocked and the
anti-theft alarm system is switched off,
the turn signals illuminate briefly. If it is
dark, the locator lighting also switches
on (
�page 122).
When the vehicle is locked and the an-
ti-theft alarm system is activated, the
turn signals flash three times.
Warning!
G
When closing the windows and the slid-
ing/pop-up roof, be sure that there is no
danger of anyone being harmed by the clos-
ing procedure.
If potential danger exists, proceed as fol-
lows:�
Release the lock button.
�
Pull on the door handle and hold firmly.
The side windows and the slid-
ing/pop-up roof will open for as long as
the door handle is held but the door is
not opened.
Page 120 of 416
120 Controls in detailLighting
LightingFor notes on how to switch on the head-
lamps and use the turn signals, see the
“Getting started” section (
�page 46).
Exterior lamp switch
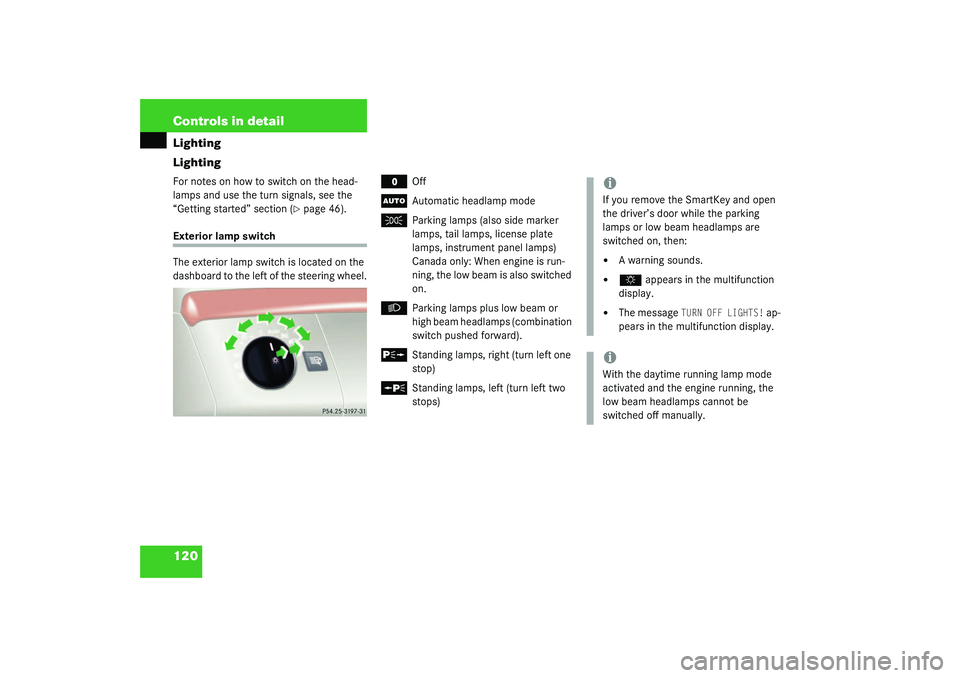
The exterior lamp switch is located on the
dashboard to the left of the steering wheel.
M
Off
U
Automatic headlamp mode
C
Parking lamps (also side marker
lamps, tail lamps, license plate
lamps, instrument panel lamps)
Canada only: When engine is run-
ning, the low beam is also switched
on.
B
Parking lamps plus low beam or
high beam headlamps (combination
switch pushed forward).
ˆ
Standing lamps, right (turn left one
stop)
‚
Standing lamps, left (turn left two
stops)
iIf you remove the SmartKey and open
the driver’s door while the parking
lamps or low beam headlamps are
switched on, then: �
A warning sounds.
�
$
appears in the multifunction
display.
�
The message
TURN OFF LIGHTS!
ap-
pears in the multifunction display.
iWith the daytime running lamp mode
activated and the engine running, the
low beam headlamps cannot be
switched off manually.
Page 121 of 416
121 Controls in detail
Lighting
Manual headlamp mode
The low beam headlamps and parking
lamps can be switched on and off with the
exterior lamp switch. For exterior lamp
switch, see (
�page 120).
Automatic headlamp mode
The parking lamps, low beam headlamps
and license plate lamps switch on and off
automatically depending on the brightness
of the ambient light.
�
Turn the exterior lamp switch to
U
.
iWith the daytime running lamp mode
activated, the low beam headlamps will
not switch off automatically.
iFront fog lamps and rear fog lamp can
not be switched on manually with exte-
rior lamp switch in position
U
. To
activate the fog lamps, turn exterior
lamp switch to position
B
and pull
the exterior lamp switch to first or
second stop (
�page 122).
Warning!
G
In automatic headlamp mode, the head-
lamps will not be automatically switched on
under foggy conditions. To minimize risk to
you and to others, activate headlamps by
turning exterior lamp switch to
B
.
The driver is responsible for the operation of
the vehicle’s lights at all times. The automat-
ic headlamp feature is only an aid to the driv-
er. Switch on the vehicle lights manually
when driving or when traffic conditions re-
quire you to do so.
iIf you drive in countries where vehicles
drive on the other side of the road than
the country where the vehicle is regis-
tered, you must have the headlamps
modified for symmetrical low beams.
Relevant information can be obtained
at your authorized Mercedes-Benz Cen-
ter.
Page 124 of 416
124 Controls in detailLightingHazard warning flasher
The hazard warning flasher can be activat-
ed with the starter switched on or off. It is
activated automatically when an airbag is
deployed.
The switch is located on the center con-
sole.
1Hazard warning flasher switchSwitching on the hazard warning
flasher
�
Press the hazard warning flasher
switch.
All turn signals will blink.
Switching off the hazard warning
flasher
�
Press hazard warning flasher switch
again.
Interior lighting
The controls are located in the overhead
control panel.
1Left front reading lamp
2Rear interior lights
3Right front reading lamp
4Rocker switch for automatic control
system
iWith the hazard warning flasher acti-
vated and the combination switch set
for either left or right turn, only the re-
spective left or right turn signals will
operate when the SmartKey in the
starter switch is in position1 or2.iIf the hazard warning flasher was acti-
vated automatically, press switch1
twice.
Page 180 of 416
180 Controls in detailAutomatic climate controlDefrosting
Activating�
Press button
P
(�page 175).
The indicator lamp on the button lights
up.
�
Switch off air recirculation, if selected.
�
Press button
O
(�page 175).
The indicator lamp on the button goes
out.
�
Close center air vents.
�
Adjust side air vents upwards.
Deactivating
�
Press button
P
(�page 175).
The indicator lamp on the button goes
out. Defrosting is turned off.
Air recirculation mode
Switch to air recirculation mode to prevent
unpleasant odors from entering the vehicle
from the outside. This setting cuts off the
intake of outside air and recirculates the
air in the passenger compartment.
Activating�
Press button
O
(�page 175).
The indicator lamp on the button lights
up.
iThese settings should only be selected
for a short time.
Warning!
G
When the outside temperature is below
41°F (5°C), only switch to air recirculation
mode for short periods to prevent window
fogging.iIf you keep button
O
pressed, the
side windows and the sliding/pop-up
roof will be closed.
Warning!
G
Never operate the side windows and the
sliding pop/pop-up roof if there is the possi-
bility of anyone being harmed by the closing
procedure.
In the event that the procedure causes po-
tential danger, the closing of the side win-
dows can be immediately halted by pressing
the respective window switch. The closing of
the sliding/pop-up roof can be immediately
halted by moving the sliding/pop-up roof
switch in the overhead control panel in any
direction.
Page 182 of 416
182 Controls in detailAutomatic climate controlCharcoal filter
An activated charcoal filter markedly re-
duces bad odors and removes pollutants
from air entering the passenger compart-
ment.
Activating�
Press button
e
(�page 175).
The indicator lamp on the button lights
up.
Deactivating
�
Press button
e
(�page 175).
The indicator lamp on the button goes
out.The system automatically switches to the
air recirculation mode if the carbon
monoxide (CO) or nitrogen oxide (NO
X)
concentration of the outside air increases
beyond a predetermined level.
The automatic air recirculation mode does
not function if economy mode AC
OFF
is se-
lected or if the outside temperature has
fallen below 41°F (5°C).
The activated charcoal filter should be
switched off when windows fog up on the
inside, or if the passenger compartment
needs to be quickly heated or cooled
down.
iIf you keep button
e
pressed, the
side windows and the sliding/pop-up
roof will be closed.
Warning!
G
Never operate the side windows and the
sliding pop/pop-up roof if there is the possi-
bility of anyone being harmed by the closing
procedure.
In the event that the procedure causes po-
tential danger, the closing of the side win-
dows can be immediately halted by pressing
the respective window switch. The closing of
the sliding/pop-up roof can be immediately
halted by moving the sliding/pop-up roof
switch in the overhead control panel in any
direction.
iIf you keep button
e
pressed, the
side windows and the sliding/pop-up
roof will be returned to their previous
position.