Page 99 of 321

99 Controls in detail
Memory function*
Memory function*
With the memory button you can store up
to three different settings for the driver-
and passenger seat.
Together with the driver’s seat you can
store the exterior rear view mirrors.
For the front passenger seat you can store
the seat position.
1Position buttons
2Memory button
!Prior to operating the vehicle the driver
should check and adjust the seat
height, seat position fore and aft, and
seat backrest angle if necessary, to en-
sure adequate control, reach and com-
fort. The head restraint should also be
adjusted for proper height. Also see air-
bag section (
�page 55) for proper seat
positioning.
In addition, adjust the steering wheel to
ensure adequate control, reach, opera-
tion and comfort. Both the inside and
outside rear view mirrors should be ad-
justed for adequate rear vision.
Fasten seat belts. Infants and small
children should be seated in a properly
secured restraint system that complies
with U.S. Federal Motor Vehicle Safety
Standard 213 and 225 and Canadian
Motor Vehicle Safety Standard 213 and
210.2.
Warning!
G
Do not activate the memory function while
driving. Activating the memory function
while driving could cause the driver to lose
control of the vehicle.
Page 100 of 321
100 Controls in detailMemory function*Storing positions in memory�
Adjust the seat (
�page 36) and exteri-
or rear view mirrors (�page 38) to the
desired position.
�
Push memory button2.
�
Release memory button and press one
of the position buttons1 within three
seconds.
All the settings are stored at the select-
ed position.
Recalling positions from memory�
Press and hold one of the position
buttons1 until seat and rear view mir-
rors have fully moved to the stored po-
sitions.Exterior rear view mirror parking posi-
tion (passenger side)
For easier parking, you can adjust the pas-
senger exterior rear view mirror so that you
can see the right rear wheel as soon as you
engage reverse gearR.
!Do not operate the power seats using
the memory button if the seat backrest
is in an excessively reclined position.
Doing so could cause damage to front
or rear seats.iReleasing the button immediately
stops movement to the stored posi-
tions.
Page 101 of 321

101 Controls in detail
Memory function*
Activating parking position
The buttons are on the lower part of the
center console.
1Deactivating parking position
2Activating parking position
3Adjustment button�
Switch ignition on (if not already on).
�
Press button2.
The passenger side exterior rear view
mirror is selected.
�
Engage reverse gearR.
The passenger side exterior rear view
mirror moves automatically to the
stored parking position. The exterior rear view mirror returns to its
stored driving position:
�
10 seconds after you put the gear se-
lector lever in positionD
�
immediately once you exceed a speed
of approx. 6 mph (10 km/h)
�
immediately when you press the
button1 for driver’s side mirrorStoring parking position
�
Stop the vehicle.
�
Switch ignition on (if not already on).
�
Press button2.
The passenger side exterior rear view
mirror is selected.
�
Adjust the exterior rear view mirror
with button3 so that you see the rear
wheel and the curb.
�
Press memory button2 (
�page 99).
�
Within three seconds, press bottom of
adjustment button3.
The parking position is stored if the
mirror does not move.
iIf the button1 is pressed, the automat-
ic passenger side exterior rear view
parking position is deactivated.
iIf the mirror does move, repeat the
above steps. After the setting is stored
you can move the mirror again.
The selected position will be stored rel-
ative to the position button1
(�page 99) pressed.
Page 105 of 321

105 Controls in detail
Lighting
Locator lighting
During darkness, the following lamps will
come on when the vehicle is unlocked by
remote control:�
Parking lamps
�
Tail lamps
�
License plate lamps
�
Front fog lamps
The combination switch must be set to
position
U
(�page 102).
The locator lighting switches off when the
driver’s door is opened. It switches off au-
tomatically after a period of approximately
40 seconds.
Fog lamps
The switch is located on the upper center
console.
1Front fog lamps
2Indicator lamp
3Front fog lamps and rear fog lampSwitching on front fog lamps
�
Check that the low beam headlamps
are switched on.
�
Press upper part1 of switch.
The green indicator lamp
‡
in the
instrument cluster lights up.
Switching on front fog lamps and rear
fog lamp
�
Check that the low beam headlamps
are switched on.
�
Press lower part3 of switch.
The green indicator lamp
‡
in the
instrument cluster lights up in addition
to the yellow indicator lamp2 in the
switch.
Switching off front fog lamps and rear
fog lamp
�
Press lower part3 of switch.
The green indicator lamp
‡
in the
instrument cluster and the yellow indi-
cator lamp2 in the switch go out.
iThe fog lamps can be switched on with
combination switch in position
õ
or U. Consult your state Motor Regula-
tions regarding allowable lamp opera-
tion.
Page 106 of 321
106 Controls in detailLightingSwitching off rear fog lamp�
Press upper part1 of switch.
The yellow indicator lamp2 in the
switch goes out.
Switching off front fog lamps
�
Press upper part1 of switch.
The green indicator lamp
‡
in the
instrument cluster goes out.
Hazard warning flasher
The hazard warning flasher can be activat-
ed with the ignition switched on or off. It is
activated automatically when an airbag is
deployed.
The switch is located on top of the steering
column.Hazard warning flasher switch
Switching on hazard warning flasher�
Press the hazard warning flasher
switch.
All the turn signals will blink.
Switching off hazard warning flasher
�
Press hazard warning flasher switch
again.iIf the hazard warning flasher was acti-
vated automatically, press the hazard
warning flasher switch twice to deacti-
vate.
Page 107 of 321

107 Controls in detail
Lighting
Interior lighting
1Left front interior lamp
2Right front interior lamp
3Automatic function off
4Automatic function on
5Rear interior lightingAutomatic control
Activating
�
Bring the rocker switch in center
position4.
Interior lamps (except cargo compart-
ment lamp) are switched on in dark-
ness when you�
unlock the vehicle
�
open a door
�
remove the key from the steering
lock
In addition, the entry/exit lamps in the
d oor tra ys wi ll com e on when y ou ope n
a door.
When all doors are closed and no key is
inserted in the steering lock, the interi-
or lamps are switched off after a brief
delay.Deactivating
�
Press lower part3 of rocker switch .
The interior lighting and the entry/exit
lamps remain switched off in darkness,
even when you�
unlock the vehicle
�
open a door
�
remove the key from the steering
lock
iIf the door remains open, the interior
lamps (except cargo compartment
lamp) switch off automatically after ap-
proximately 30 minutes.
Page 108 of 321
108 Controls in detailLightingManual control
Switching on front interior lamps�
Press on lamp lens1 or2.
The respective lamp switches on.
Switching off front interior lamps
�
Press on lamp lens1 or2 again.
The respective lamp switches off.
Operating rear interior lighting with
rocker switch
�
Press on upper part5 of rocker switch.
The rear interior lighting goes on.
�
Press on upper part5 of rocker switch
again.
The rear interior lighting goes off.
If the switch is pressed while the rear
interior lighting is on, the function is re-
versed.
Operating rear interior lighting with
lamp lens
Rear interior lighting�
Push on lamp lens (arrow) to switch
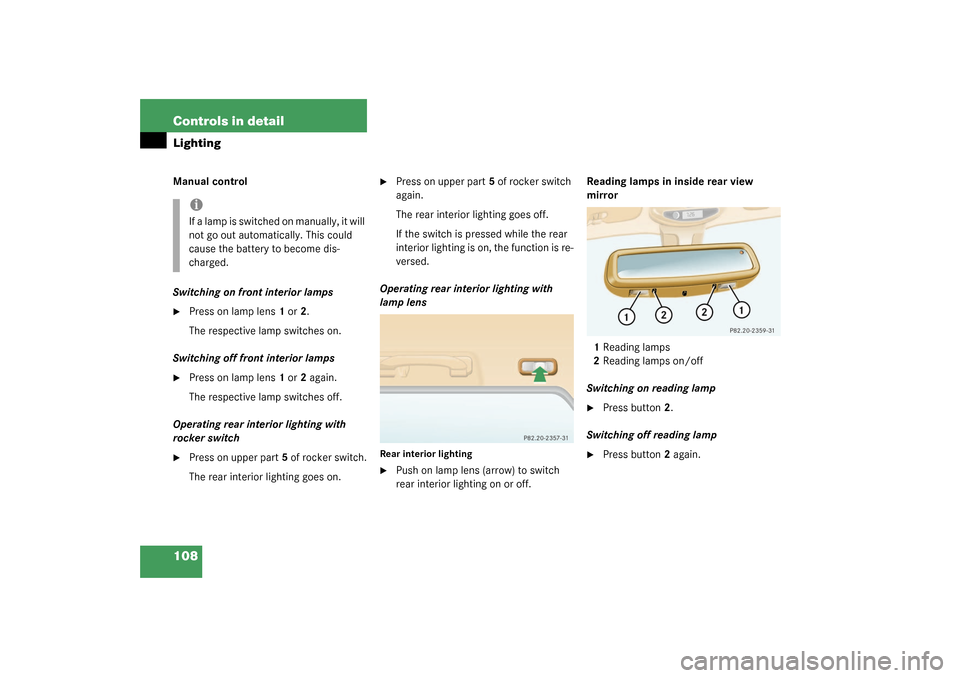
rear interior lighting on or off.Reading lamps in inside rear view
mirror
1Reading lamps
2Reading lamps on/off
Switching on reading lamp
�
Press button2.
Switching off reading lamp
�
Press button2 again.
iIf a lamp is switched on manually, it will
not go out automatically. This could
cause the battery to become dis-
charged.
Page 119 of 321
 and for adjusting the rear view
mirrors (
�page 38) is found in the “Get-
ting started” sec")
119 Controls in detail
Good visibility
Good visibility
Information on the windshield wipers
(�page 47) and for adjusting the rear view
mirrors (
�page 38) is found in the “Get-
ting started” section.
Rear view mirror
Manually dimming inside rear view mir-
ror
1Lever�
Press lever1 backward.
The interior rear view mirror is dimmed.Automatic antiglare rear view mirror*
The reflection brightness of the exterior
rear view mirror on the driver’s side and
the inside rear view mirror will respond au-
tomatically to glare when:
�
the automatic antiglare function is acti-
vated (
�page 120)
�
the ignition is switched on
�
incoming light from headlamps falls on
the sensor in the inside rear view mir-
ror
The rear view mirror will not react if
�
reverse gear is engaged
�
the interior light is turned on
Warning!
G
The automatic antiglare function does not
react if incoming light is not aimed directly
at sensors in the inside rear view mirror.
The inside rear view mirror and the exterior
rear view mirror on the driver’s side do not
react, for example, if the cargo area is fully
loaded.
Glare can endanger you and others.Warning!
G
Exercise care when using the passenger
side exterior rear view mirror. The mirror
surface is convex (outwardly curved surface
for a wider field of view). Objects in mirror
are closer than they appear. Check your in-
side rear view mirror or glance over your
shoulder before changing lanes.