Page 131 of 321

131 Controls in detail
Automatic climate control
Rear window defroster
The rear window defroster uses a large
amount of power. To keep the battery
drain to a minimum, switch off the defrost-
er as soon as the rear window is clear. The
defroster is automatically deactivated af-
ter approximately 6 to 17 minutes of oper-
ation depending on the outside
temperature.
Activating�
Switch ignition on.
�
Press button
F
(�page 125).
The indicator lamp on the button lights
up.
Deactivating
�
Press button
F
again.
The indicator lamp on the button goes
out.Rear passenger compartment ventila-
tion and rear automatic climate control
Deactivating
For an improved cooling or heating output
in the front passenger compartment, you
can switch off the rear passenger compart-
ment ventilation.�
Press button
§
(�page 125).
The indicator lamp on the button lights
up.
The operation of the rear automatic cli-
mate control and the fresh air supply to
the rear compartment is shut off.
Activating
�
Press button
§
again.
The indicator lamp on the button goes
out.
The rear automatic climate control
switches to automatic mode and fresh
air enters the rear compartment.
Warning!
G
Any accumulation of snow and ice should be
removed from the rear window before driv-
ing. Visibility could otherwise be impaired,
endangering you and others.!If the rear window defroster switches
off too soon and the indicator lamp
starts blinking, this means that too
many electrical consumers are operat-
ing simultaneously and there is insuffi-
cient voltage in the battery. The system
responds automatically by deactivating
the rear window defroster.
As soon as the battery has sufficient
voltage, the rear window defroster au-
tomatically turns itself back on.
Page 136 of 321

136 Controls in detailPower windowsSynchronizing power windows
The side power windows must be resyn-
chronized�
after the battery has been disconnect-
ed
�
if the windows cannot be fully opened
or closed
�
Switch ignition on.
�
Press switch
j
until the window is
completely closed and hold down for
approximately 1 second. Repeat proce-
dure for each window.
Rear quarter windows*
The switches are on the upper part of the
center console.
1Left side
2Right side
To operate the power windows, turn key to
position2 (
�page 33) in the steering lock.Opening the windows
�
Press and hold the upper part of
switches1 or2.
The window will open.
Closing the windows
�
Press and hold the lower part of
switches1 or2.
The window will close.Warning!
G
When closing the windows, make sure that
there is no danger of anyone being harmed
by the closing procedure.
When leaving the vehicle, always remove the
key from the steering lock, and lock the ve-
hicle. Do not leave children unattended in
the vehicle, or with access to an unlocked
vehicle. Unsupervised use of vehicle equip-
ment may cause an accident and/or serious
personal injury.
Page 151 of 321

151 Controls in detail
Driving systems
The selector lever position determines
which warning indicator is activated.
As soon as the sensors detect an obstacle,
one or more segments light up, depending
on the distance. An intermittent acoustic
warning will also sound as the seventh seg-
ment lights up and a constant acoustic
warning lasting a maximum of 3 seconds
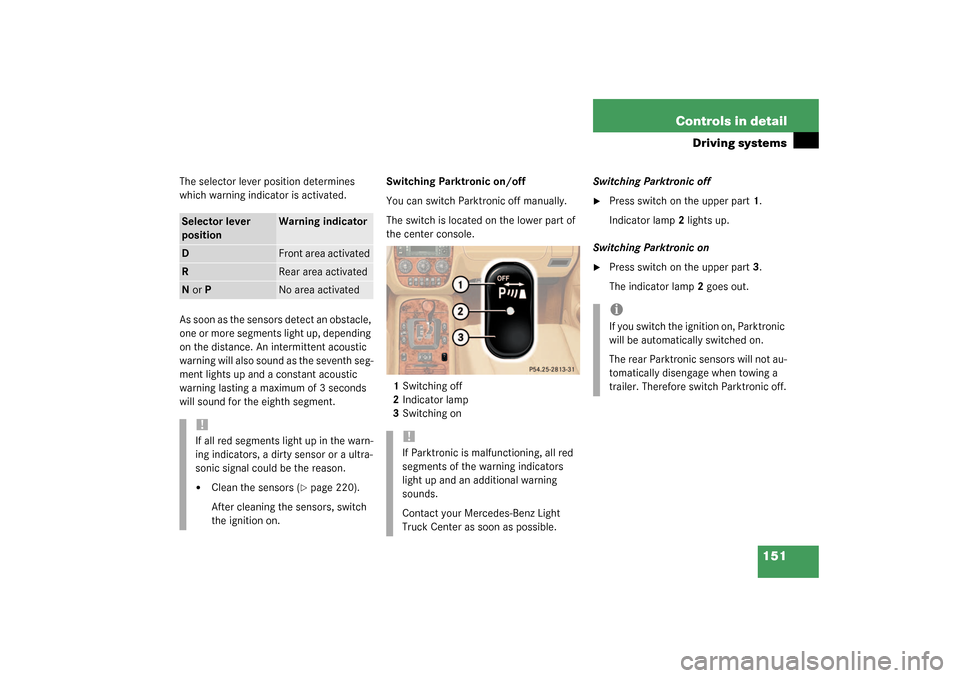
will sound for the eighth segment.Switching Parktronic on/off
You can switch Parktronic off manually.
The switch is located on the lower part of
the center console.
1Switching off
2Indicator lamp
3Switching onSwitching Parktronic off
�
Press switch on the upper part1.
Indicator lamp2 lights up.
Switching Parktronic on
�
Press switch on the upper part3.
The indicator lamp2 goes out.
Selector lever
position
Warning indicator
D
Front area activated
R
Rear area activated
N or P
No area activated
!If all red segments light up in the warn-
ing indicators, a dirty sensor or a ultra-
sonic signal could be the reason.�
Clean the sensors (
�page 220).
After cleaning the sensors, switch
the ignition on.
!If Parktronic is malfunctioning, all red
segments of the warning indicators
light up and an additional warning
sounds.
Contact your Mercedes-Benz Light
Truck Center as soon as possible.
iIf you switch the ignition on, Parktronic
will be automatically switched on.
The rear Parktronic sensors will not au-
tomatically disengage when towing a
trailer. Therefore switch Parktronic off.
Page 157 of 321
157 Controls in detail
Useful features
Cigarette lighter�
Switch on the ignition.
�
Push in cigarette lighter2
(�page 156).
The cigarette lighter will pop out auto-
matically when hot.
Ashtray and cigarette lighter in the rear
center console
1Ashtray
2Cigarette lighter
3Cover plate
Opening the ashtray
�
Briefly touch cover plate3.
The ashtray opens automatically.
Removing ashtray insert
�
Grip the insert on the sides and pull it
out upwards.Reinstalling ashtray insert
�
Install ashtray insert.
�
Close the ashtray.
Cigarette lighter
�
Switch on the ignition.
�
Push in cigarette lighter2.
The cigarette lighter will pop out auto-
matically when hot.
!Close the ashtray in the rear center
console before folding the rear seat
bench.
Page 172 of 321

172 Controls in detailUseful featuresTrip computer*
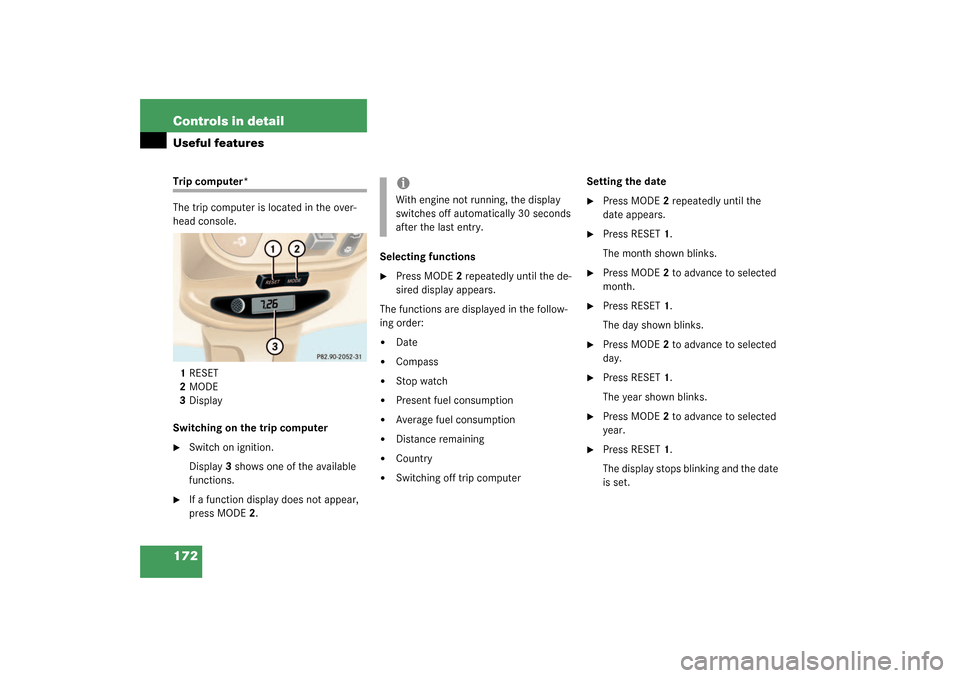
The trip computer is located in the over-
head console.
1RESET
2MODE
3Display
Switching on the trip computer�
Switch on ignition.
Display3 shows one of the available
functions.
�
If a function display does not appear,
press MODE2.Selecting functions
�
Press MODE2 repeatedly until the de-
sired display appears.
The functions are displayed in the follow-
ing order:
�
Date
�
Compass
�
Stop watch
�
Present fuel consumption
�
Average fuel consumption
�
Distance remaining
�
Country
�
Switching off trip computerSetting the date
�
Press MODE2 repeatedly until the
date appears.
�
Press RESET1.
The month shown blinks.
�
Press MODE2 to advance to selected
month.
�
Press RESET1.
The day shown blinks.
�
Press MODE2 to advance to selected
day.
�
Press RESET1.
The year shown blinks.
�
Press MODE2 to advance to selected
year.
�
Press RESET1.
The display stops blinking and the date
is set.
iWith engine not running, the display
switches off automatically 30 seconds
after the last entry.
Page 174 of 321

174 Controls in detailUseful featuresSetting the compass zone�
Determine the geographical point of
the vehicle with the aid of the zone
maps.
�
Switch on the ignition.
�
Press MODE2 (
�page 172) repeated-
ly until the compass display appears in
the trip computer display3.
�
Press RESET1 (
�page 172) to select
the compass zone mode.
The zone selected last is shown in the
display.
�
Press RESET1 repeatedly until the cor-
rect compass zone, as determined
from the zone map, is shown in the dis-
play.
�
Press MODE2 twice.
The new compass zone is activated and
the compass display will be shown.Calibrating the compass
If the vehicle was exposed to a significant
magnetic zone, such as high voltage power
lines, the compass may have to be calibrat-
ed.
To calibrate the compass correctly, ob-
serve the following:
�
Calibrate the compass in an area free
of steel superstructures and power
lines.
�
Switch off all electrical consumers (e.g.
exterior lamps, climate control, rear
window defroster etc.).
�
Do not open or close the slid-
ing/pop-up roof.
�
Close doors and liftgate.
�
Start and run the engine.
�
Press MODE2 (
�page 172) repeated-
ly until the compass display appears in
the trip computer display3.
�
Press RESET1 and afterwards press
MODE2.
In the display appears
CAL–
.
�
Press and hold RESET1 for approxi-
mately two seconds.
The calibration mode is activated and
the display shows
CAL
.
�
Drive without interruption two full cir-
cles at a speed between 3 mph
(5 km / h) and 7 mph (10 km / h).
The message
CAL
goes out after a short
time. The calibration is now complete.
iAn open liftgate triggers the
display
---
.
Page 204 of 321

204 OperationEngine compartmentEngine oil level display
1Knob
2Display in speedometer�
Switch on the ignition and wait until the
display
- - - - - -
appears in the
speedometer display2.
�
Within one second press knob1 twice.
One of the following messages will subse-
quently appear in the display:
�
OIL i.OThe oil level is correct. Engine oil does
not to be added.
�
– 1.0 L�
Add 1 liter of engine oil.
�
– 1.5 L�
Add 1.5 liters of engine oil.
�
– 2.0 L�
Add 2 liters of engine oil.
�
OIL HIThe oil level is too high.�
Have excess oil siphoned.The display
- - - - - -
flashes in the
speedometer display if a proper oil level
check cannot be performed.
�
Repeat the engine oil level check after
a few minutes.
!Excessive oil must be siphoned or
drained off. It could cause damage to
the engine and catalytic converter not
covered by the Mercedes-Benz Limited
Warranty.
iIf the engine oil level check cannot be
performed again via the display field,
use the dipstick to perform the engine
oil level check (
�page 205).
In this case we recommend that you
have the system checked at a
Mercedes-Benz Light Truck Center.
Page 215 of 321

215 Operation
Maintenance
Maintenance
We strongly recommend that you have
your vehicle serviced by your authorized
Mercedes-Benz Light Truck Center, in ac-
cordance with the Service Booklet at the
times called for by the FSS (Flexible Ser-
vice System).
Failure to have the vehicle maintained in
accordance with the Service Booklet at the
designated times /mileage called for by
the FSS may result in vehicle damage not
covered by the Mercedes-Benz Limited
Warranty.
FSS will notify you when your next service
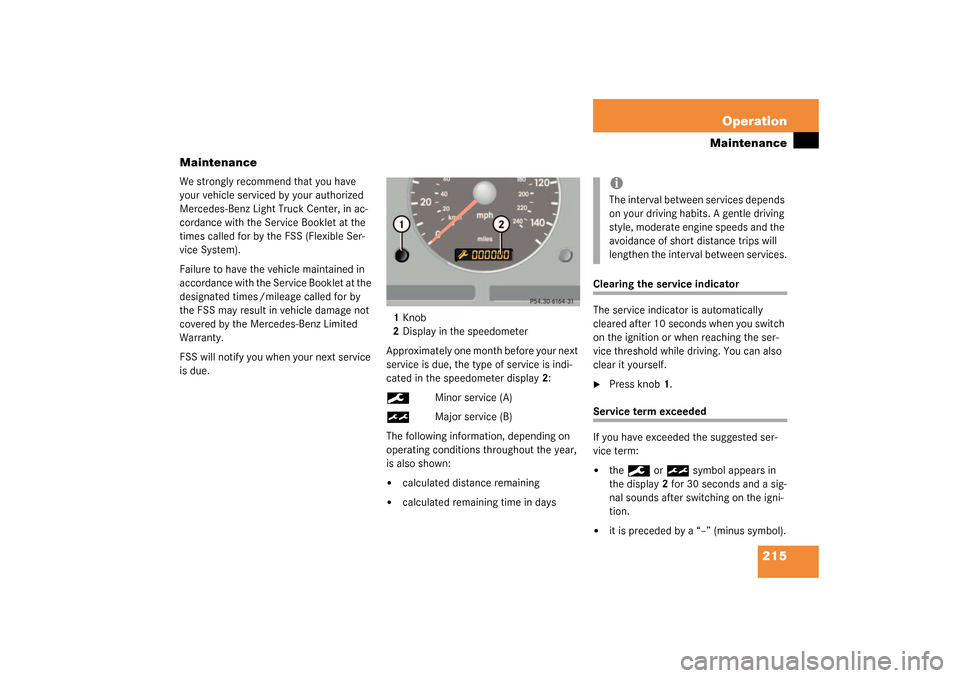
is due.1Knob
2Display in the speedometer
Approximately one month before your next
service is due, the type of service is indi-
cated in the speedometer display2:
9
Minor service (A)
½
Major service (B)
The following information, depending on
operating conditions throughout the year,
is also shown:
�
calculated distance remaining
�
calculated remaining time in days
Clearing the service indicator
The service indicator is automatically
cleared after 10 seconds when you switch
on the ignition or when reaching the ser-
vice threshold while driving. You can also
clear it yourself.�
Press knob1.
Service term exceeded
If you have exceeded the suggested ser-
vice term:�
the
9
or
½
symbol appears in
the display2 for 30 seconds and a sig-
nal sounds after switching on the igni-
tion.
�
it is preceded by a “–” (minus symbol).iThe interval between services depends
on your driving habits. A gentle driving
style, moderate engine speeds and the
avoidance of short distance trips will
lengthen the interval between services.