Page 259 of 360
259 Practical hints
What to do if …
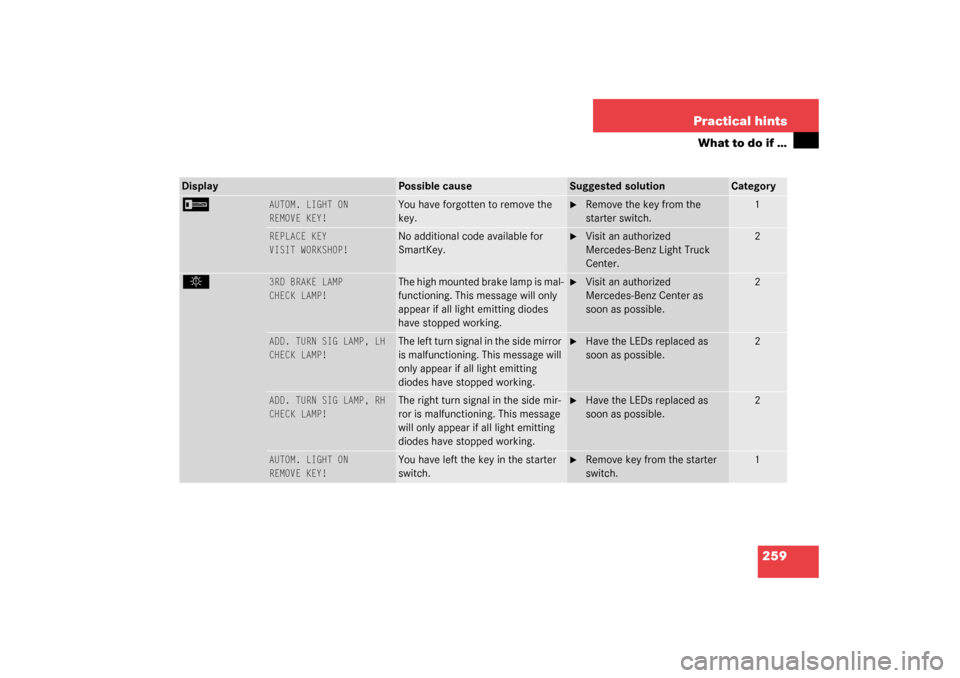
Display
Possible cause
Suggested solution
Category
I
AUTOM. LIGHT ON
REMOVE KEY!
You have forgotten to remove the
key.
�
Remove the key from the
starter switch.
1
REPLACE KEY
VISIT WORKSHOP!
No additional code available for
SmartKey.
�
Visit an authorized
Mercedes-Benz Light Truck
Center.
2
.
3RD BRAKE LAMP
CHECK LAMP!
The high mounted brake lamp is mal-
functioning. This message will only
appear if all light emitting diodes
have stopped working.
�
Visit an authorized
Mercedes-Benz Center as
soon as possible.
2
ADD. TURN SIG LAMP, LH
CHECK LAMP!
The left turn signal in the side mirror
is malfunctioning. This message will
only appear if all light emitting
diodes have stopped working.
�
Have the LEDs replaced as
soon as possible.
2
ADD. TURN SIG LAMP, RH
CHECK LAMP!
The right turn signal in the side mir-
ror is malfunctioning. This message
will only appear if all light emitting
diodes have stopped working.
�
Have the LEDs replaced as
soon as possible.
2
AUTOM. LIGHT ON
REMOVE KEY!
You have left the key in the starter
switch.
�
Remove key from the starter
switch.
1
Page 260 of 360
260 Practical hintsWhat to do if …Display
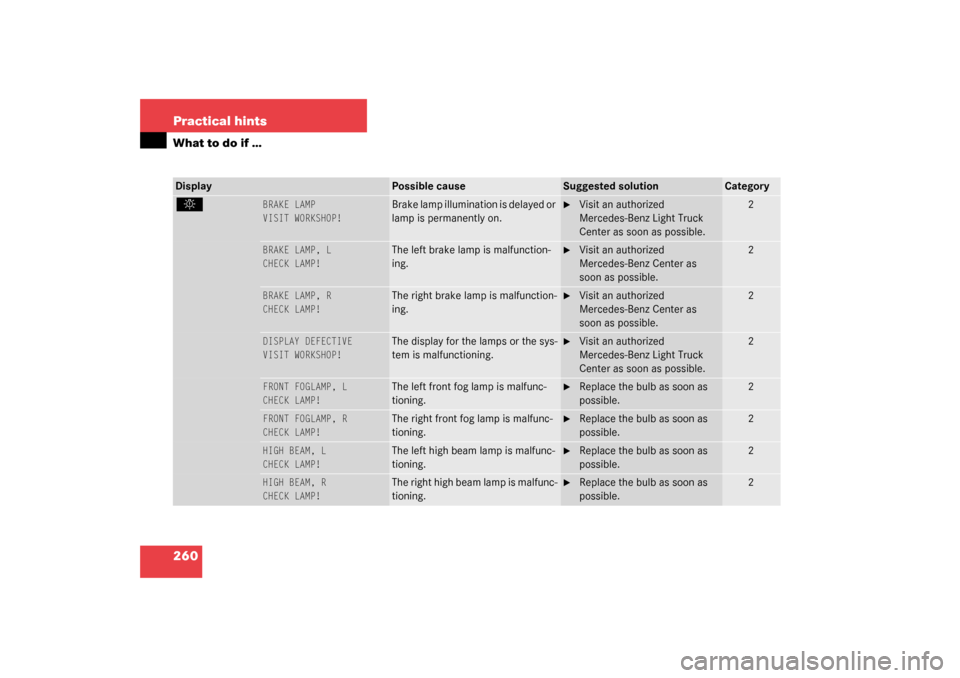
Possible cause
Suggested solution
Category
.
BRAKE LAMP
VISIT WORKSHOP!
Brake lamp illumination is delayed or
lamp is permanently on.
�
Visit an authorized
Mercedes-Benz Light Truck
Center as soon as possible.
2
BRAKE LAMP, L
CHECK LAMP!
The left brake lamp is malfunction-
ing.
�
Visit an authorized
Mercedes-Benz Center as
soon as possible.
2
BRAKE LAMP, R
CHECK LAMP!
The right brake lamp is malfunction-
ing.
�
Visit an authorized
Mercedes-Benz Center as
soon as possible.
2
DISPLAY DEFECTIVE
VISIT WORKSHOP!
The display for the lamps or the sys-
tem is malfunctioning.
�
Visit an authorized
Mercedes-Benz Light Truck
Center as soon as possible.
2
FRONT FOGLAMP, L
CHECK LAMP!
The left front fog lamp is malfunc-
tioning.
�
Replace the bulb as soon as
possible.
2
FRONT FOGLAMP, R
CHECK LAMP!
The right front fog lamp is malfunc-
tioning.
�
Replace the bulb as soon as
possible.
2
HIGH BEAM, L
CHECK LAMP!
The left high beam lamp is malfunc-
tioning.
�
Replace the bulb as soon as
possible.
2
HIGH BEAM, R
CHECK LAMP!
The right high beam lamp is malfunc-
tioning.
�
Replace the bulb as soon as
possible.
2
Page 263 of 360
263 Practical hints
What to do if …
.
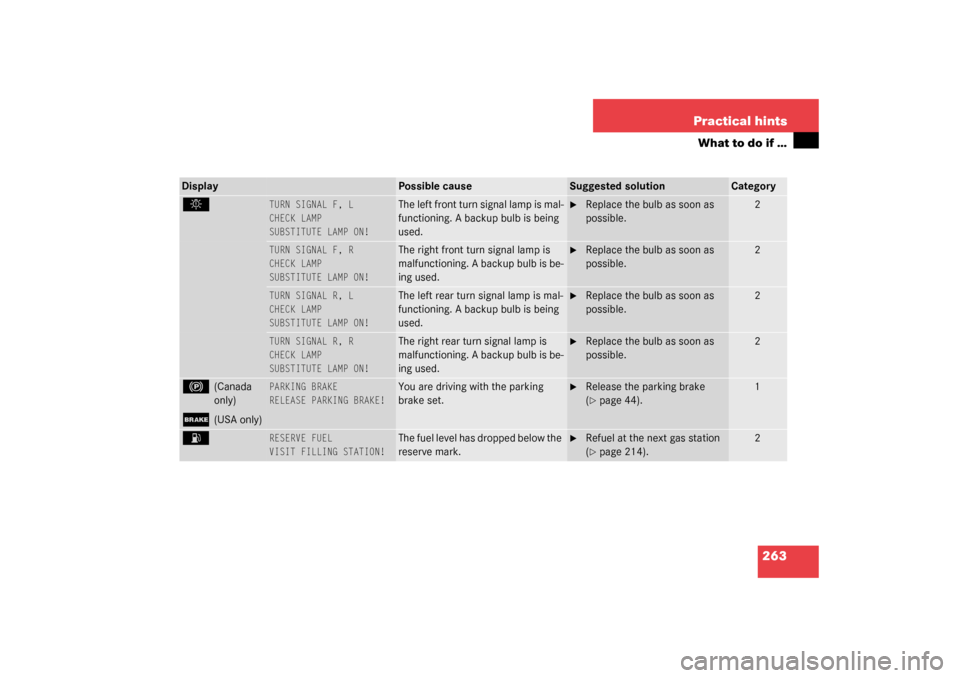
TURN SIGNAL F, L
CHECK LAMP
SUBSTITUTE LAMP ON!
The left front turn signal lamp is mal-
functioning. A backup bulb is being
used.
�
Replace the bulb as soon as
possible.
2
TURN SIGNAL F, R
CHECK LAMP
SUBSTITUTE LAMP ON!
The right front turn signal lamp is
malfunctioning. A backup bulb is be-
ing used.
�
Replace the bulb as soon as
possible.
2
TURN SIGNAL R, L
CHECK LAMP
SUBSTITUTE LAMP ON!
The left rear turn signal lamp is mal-
functioning. A backup bulb is being
used.
�
Replace the bulb as soon as
possible.
2
TURN SIGNAL R, R
CHECK LAMP
SUBSTITUTE LAMP ON!
The right rear turn signal lamp is
malfunctioning. A backup bulb is be-
ing used.
�
Replace the bulb as soon as
possible.
2
!
(Canada
only)
;
(USA only)
PARKING BRAKE
RELEASE PARKING BRAKE!
You are driving with the parking
brake set.
�
Release the parking brake
(�page 44).
1
A
RESERVE FUEL
VISIT FILLING STATION!
The fuel level has dropped below the
reserve mark.
�
Refuel at the next gas station
(�page 214).
2
Display
Possible cause
Suggested solution
Category
Page 265 of 360
265 Practical hints
What to do if …
Display
Possible cause
Suggested solution
Category
<
SEAT BELT SYSTEM
VISIT WORKSHOP!
The seat belt system is malfunction-
ing.
�
Visit an authorized
Mercedes-Benz Light Truck
Center as soon as possible.
1
FRT. PASS. SEAT BELT
FASTEN SEAT BELT!
The display reminds you and your
passengers to fasten seat belts.
�
Fasten the seat belts.
2
DRIVER’S SEAT BELT
FASTEN SEAT BELT!
The display reminds you and your
passengers to fasten seat belts.
�
Fasten the seat belts.
2
§
TC IN NEUTRAL
No gear has been selected in the
transfer case, it is in NEUTRAL.
�
Engage transfer case to gear
position HIGH or LOW
(�page 141).
3
Warning!
G
If the transfer case is in NEUTRAL, the
Pposition of transmission will not hold vehi-
cle. The parking brake must be applied to
hold vehicle in place.
Page 269 of 360
269 Practical hints
Where will I find ...?
Vehicle jack
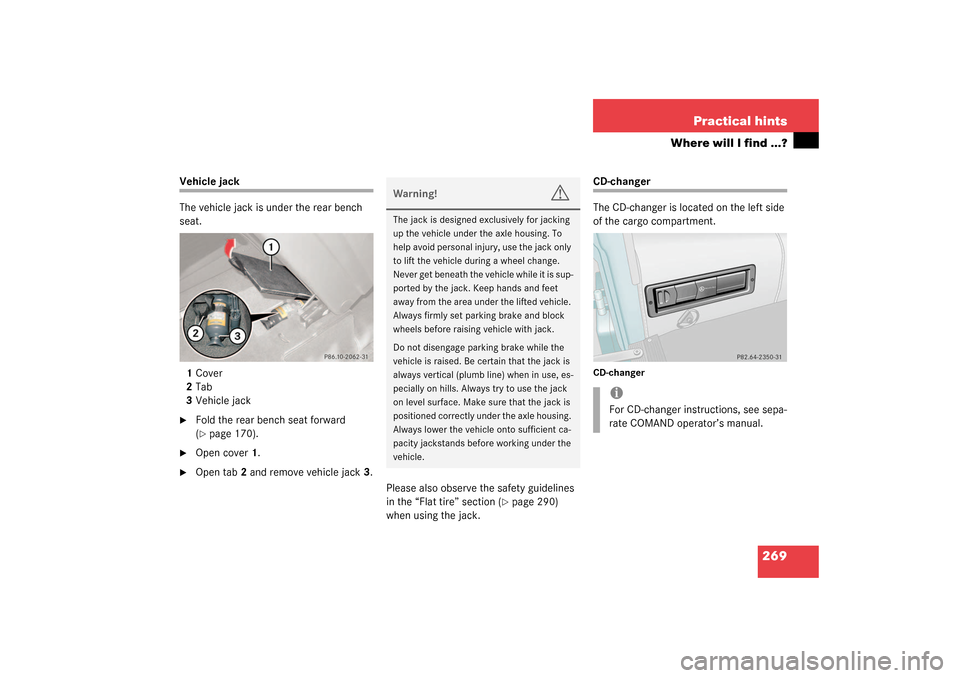
The vehicle jack is under the rear bench
seat.
1Cover
2Tab
3Vehicle jack�
Fold the rear bench seat forward
(�page 170).
�
Open cover1.
�
Open tab2 and remove vehicle jack3.
Please also observe the safety guidelines
in the “Flat tire” section (
�page 290)
when using the jack.
CD-changer
The CD-changer is located on the left side
of the cargo compartment.CD-changer
Warning!
G
The jack is designed exclusively for jacking
up the vehicle under the axle housing. To
help avoid personal injury, use the jack only
to lift the vehicle during a wheel change.
Never get beneath the vehicle while it is sup-
ported by the jack. Keep hands and feet
away from the area under the lifted vehicle.
Always firmly set parking brake and block
wheels before raising vehicle with jack.
Do not disengage parking brake while the
vehicle is raised. Be certain that the jack is
always vertical (plumb line) when in use, es-
pecially on hills. Always try to use the jack
on level surface. Make sure that the jack is
positioned correctly under the axle housing.
Always lower the vehicle onto sufficient ca-
pacity jackstands before working under the
vehicle.
iFor CD-changer instructions, see sepa-
rate COMAND operator’s manual.
Page 280 of 360
280 Practical hintsReplacing bulbsRear lamps Notes on bulb replacement
�
Use only 12-volt bulbs of the same type
and with the specified watt rating.
�
Switch lights off before changing a bulb
to prevent short circuits.
�
Always use a clean lint-free cloth when
handling bulbs.
�
Your hands should be dry and free of oil
and grease.
�
If the newly installed bulb does not light
up, visit an authorized Mercedes-Benz
Light Truck Center.
�
Have the LEDs for the following lamps
replaced by an authorized Mer-
cedes-Benz Light Truck Center.�
The additional turn signals in the ex-
terior rear view mirrors
�
The high mounted brake lamp
Lamp
Type
7
High mounted brake
lamp
LED
8
Turn signal lamp
PY 21 W
Brake lamp
P 21 W
Tail, parking and
standing lamps
R 5 W
9
Backup lamp
P 21 W
10
License plate lamps
C 5 W
11
Side marker lamp
T 4 W
12
Rear fog lamp
P 21 W
Warning!
G
Keep bulbs out of reach of children.
Bulbs and bulb sockets can be very hot. Al-
low the lamp to cool down before changing
a bulb.
Halogen lamps contain pressurized gas. A
bulb can explode if you:�
touch or move it when hot
�
drop the bulb
�
scratch the bulb
Wear eye and hand protection.
iHave the headlamp settings checked
regularly by a Mercedes-Benz Light
Truck Center.
Do not turn the headlamp adjusting
screws. If the adjusting screws are
turned, the headlamp setting must be
checked by a Mercedes-Benz Light
Truck Center.
Page 290 of 360
290 Practical hintsFlat tire
Flat tirePreparing the vehicle�
Park the vehicle as far as possible from
moving traffic on a hard surface.
�
Turn on the hazard warning flashers.
�
Engage the steering wheel lock in the
straight ahead position and set the
parking brake.
�
Move the selector lever toP.
�
Have any passenger exit the vehicle at
a safe distance from the roadway.
�
Remove the vehicle tool kit
(�page 268) and the jack
(�page 269).
�
Remove the spare wheel from the
spare wheel mounting bracket
(�page 270).Information on spare wheel
When you replace the vehicle’s tires, you
can use the spare wheel as a regular wheel
if:
�
it is not more than six years old
�
rim and tire are the same model as the
regular wheels
Warning!
G
For your safety, remove spare wheel from
the spare wheel mounting bracket before
undertaking any further steps.
Warning!
G
If the spare tire is more than six years old or
is not the same model as the regular tires,
have the spare tire replaced with a new tire
at the nearest Mercedes-Benz Light Truck
Center.
Never operate the vehicle with more than
one spare tire.
Vehicles with different tire dimensions on
the front and rear axle: rim and tire size of
spare wheel and normal wheel differ. Han-
dling will be adversely affected when the
spare wheel is used.
Do not exceed the maximum speed of
50 mph (80 km/h).
Page 291 of 360
291 Practical hints
Flat tire
Mounting the spare wheel�
Prepare the vehicle (
�page 290).
Lifting the vehicle
�
Prevent the vehicle from rolling away
by blocking wheels with wheel chocks
(not included) or other sizable objects.
When changing wheel on a level surface:
�
Place one chock in front of and one be-
hind the wheel that is diagonally oppo-
site to the wheel being changed.
When changing wheel on a hill:
�
Place chocks on the downhill side
blocking both wheels of the other axle.
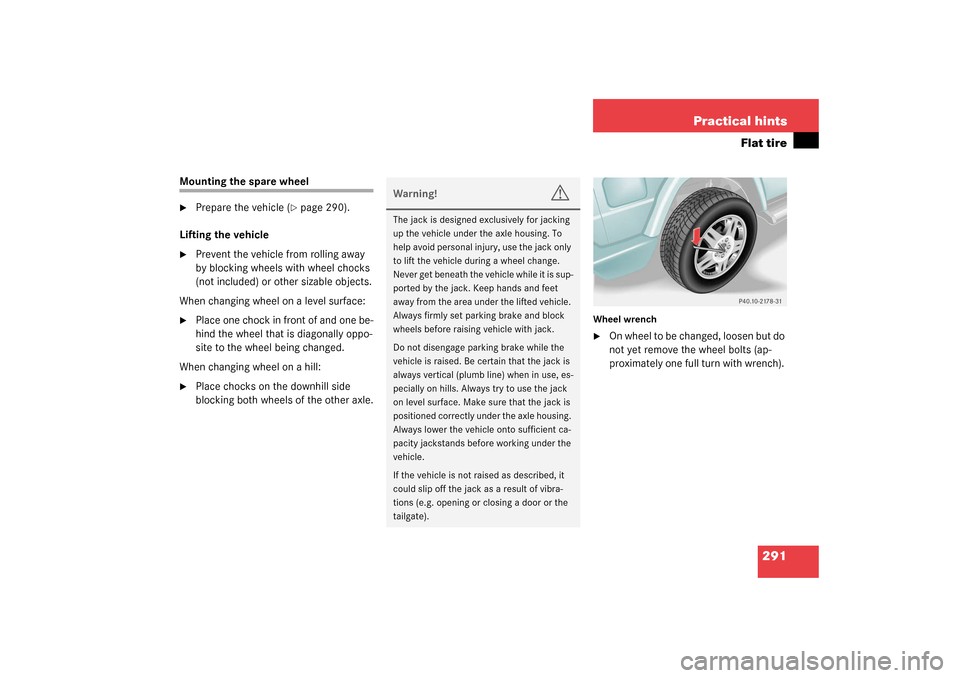
Wheel wrench�
On wheel to be changed, loosen but do
not yet remove the wheel bolts (ap-
proximately one full turn with wrench).
Warning!
G
The jack is designed exclusively for jacking
up the vehicle under the axle housing. To
help avoid personal injury, use the jack only
to lift the vehicle during a wheel change.
Never get beneath the vehicle while it is sup-
ported by the jack. Keep hands and feet
away from the area under the lifted vehicle.
Always firmly set parking brake and block
wheels before raising vehicle with jack.
Do not disengage parking brake while the
vehicle is raised. Be certain that the jack is
always vertical (plumb line) when in use, es-
pecially on hills. Always try to use the jack
on level surface. Make sure that the jack is
positioned correctly under the axle housing.
Always lower the vehicle onto sufficient ca-
pacity jackstands before working under the
vehicle.
If the vehicle is not raised as described, it
could slip off the jack as a result of vibra-
tions (e.g. opening or closing a door or the
tailgate).