173 Controls in detail
Loading
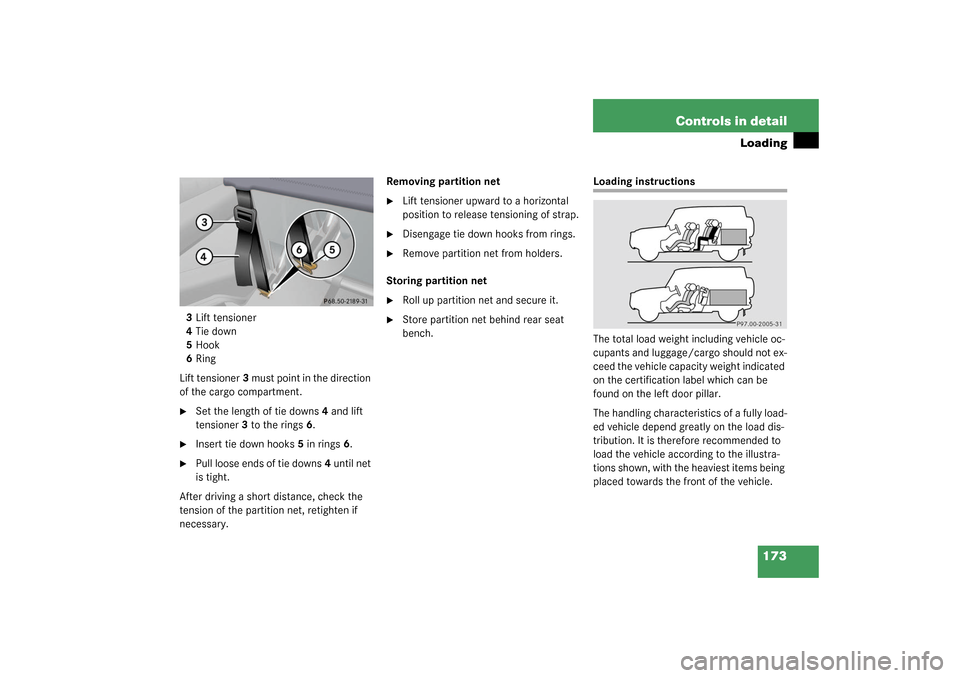
3Lift tensioner
4Tie down
5Hook
6Ring
Lift tensioner3 must point in the direction
of the cargo compartment.�
Set the length of tie downs4 and lift
tensioner3 to the rings6.
�
Insert tie down hooks5 in rings6.
�
Pull loose ends of tie downs4 until net
is tight.
After driving a short distance, check the
tension of the partition net, retighten if
necessary.Removing partition net
�
Lift tensioner upward to a horizontal
position to release tensioning of strap.
�
Disengage tie down hooks from rings.
�
Remove partition net from holders.
Storing partition net
�
Roll up partition net and secure it.
�
Store partition net behind rear seat
bench.
Loading instructions
The total load weight including vehicle oc-
cupants and luggage/cargo should not ex-
ceed the vehicle capacity weight indicated
on the certification label which can be
found on the left door pillar.
The handling characteristics of a fully load-
ed vehicle depend greatly on the load dis-
tribution. It is therefore recommended to
load the vehicle according to the illustra-
tions shown, with the heaviest items being
placed towards the front of the vehicle.
226 OperationTires and wheelsTire pressure changes by approximately
1.5 psi (0.1 bar) per 18°F (10°C) of air
temperature change. Keep this in mind
when checking tire pressure where the
temperature is different from the outside
temperature.
Tire temperature and tire pressure are also
increased while driving, depending on the
driving speed and the tire load.Check the spare tire periodically for condi-
tion and inflation. Spare tire will age and
b e c o m e w o r n o v e r t i m e e v e n i f n e v e r u s e d ,
and thus should be inspected and replaced
when necessary.
Rotating wheels
The wheels can be rotated every 3000 to
6 000 miles (5000 to 10 000 km) or sooner
if necessary, according to the degree of
tire wear. The same direction of tire rota-
tion must be retained.
Rotate the wheels before the characteris-
tic tire wear pattern becomes visible
(shoulder wear on front wheels and tread
center wear on rear wheels).
Thoroughly clean the inner side of the
wheels after each rotation. Check and en-
sure proper tire inflation pressure.
iThe pressures listed for light loads are
minimum values offering high driving
comfort.
Increased inflation pressures listed for
heavier loads may also be used for light
loads. These higher pressures produce
favorable handling characteristics. The
ride of the vehicle, however, will be
somewhat harder. Never exceed the
max. values or inflate tires below the
min. values listed in the fuel filler flap.
Warning!
G
Follow recommended inflation pressures.
Do not overinflate tires. Overinflated tires
can result in sudden deflation (blowout) be-
cause they are more likely to become punc-
tured or damaged by road debris, potholes
etc.
Do not underinflate tires. Underinflated tires
wear unevenly, adversely affect handling
and fuel economy, and are more likely to fail
from being overheated.
Do not overload the tires by exceeding the
specified vehicle capacity weight (as indicat-
ed by the label on the pillar in the driver’s
door opening). Overloading the tires can
overheat them, possibly causing a blowout.
Warning!
G
Rotate front and rear wheels only if there are
of the same size.
 per 18°F (10°C) of air
temperature change. Keep this in mind
when checking tire pressure where the
temperatu")