Page 38 of 360
38 Getting startedAdjustingMirrors
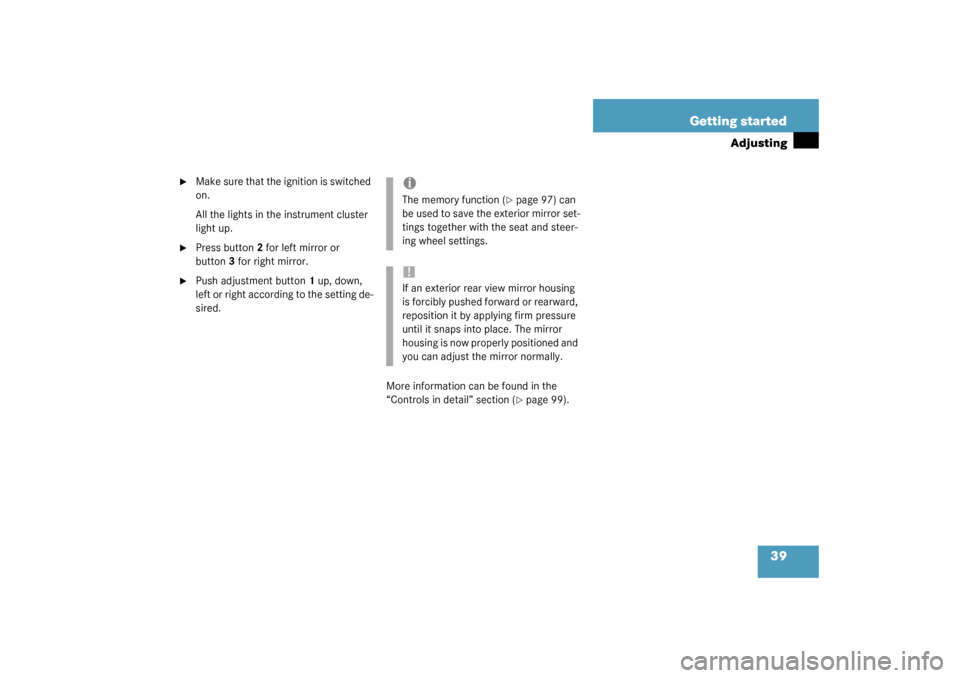
Adjust the inside and exterior rear view
mirrors before driving so that you have a
good view of the road and traffic condi-
tions.Inside rear view mirror
�
Manually adjust the inside rear view
mirror.
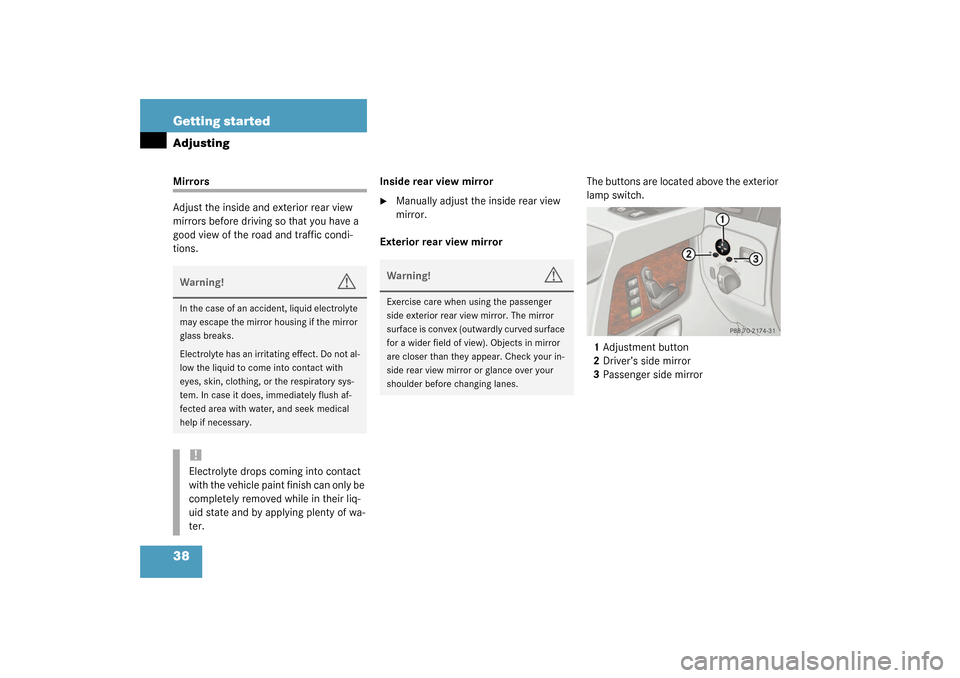
Exterior rear view mirrorThe buttons are located above the exterior
lamp switch.
1Adjustment button
2Driver’s side mirror
3Passenger side mirror
Warning!
G
In the case of an accident, liquid electrolyte
may escape the mirror housing if the mirror
glass breaks.
Electrolyte has an irritating effect. Do not al-
low the liquid to come into contact with
eyes, skin, clothing, or the respiratory sys-
tem. In case it does, immediately flush af-
fected area with water, and seek medical
help if necessary.!Electrolyte drops coming into contact
with the vehicle paint finish can only be
completely removed while in their liq-
uid state and by applying plenty of wa-
ter.
Warning!
G
Exercise care when using the passenger
side exterior rear view mirror. The mirror
surface is convex (outwardly curved surface
for a wider field of view). Objects in mirror
are closer than they appear. Check your in-
side rear view mirror or glance over your
shoulder before changing lanes.
Page 39 of 360
39 Getting started
Adjusting
�
Make sure that the ignition is switched
on.
All the lights in the instrument cluster
light up.
�
Press button2 for left mirror or
button3 for right mirror.
�
Push adjustment button1 up, down,
left or right according to the setting de-
sired.
More information can be found in the
“Controls in detail” section (
�page 99).
iThe memory function (
�page 97) can
be used to save the exterior mirror set-
tings together with the seat and steer-
ing wheel settings.
!If an exterior rear view mirror housing
is forcibly pushed forward or rearward,
reposition it by applying firm pressure
until it snaps into place. The mirror
housing is now properly positioned and
you can adjust the mirror normally.
Page 97 of 360
97 Controls in detail
Memory function
Memory function
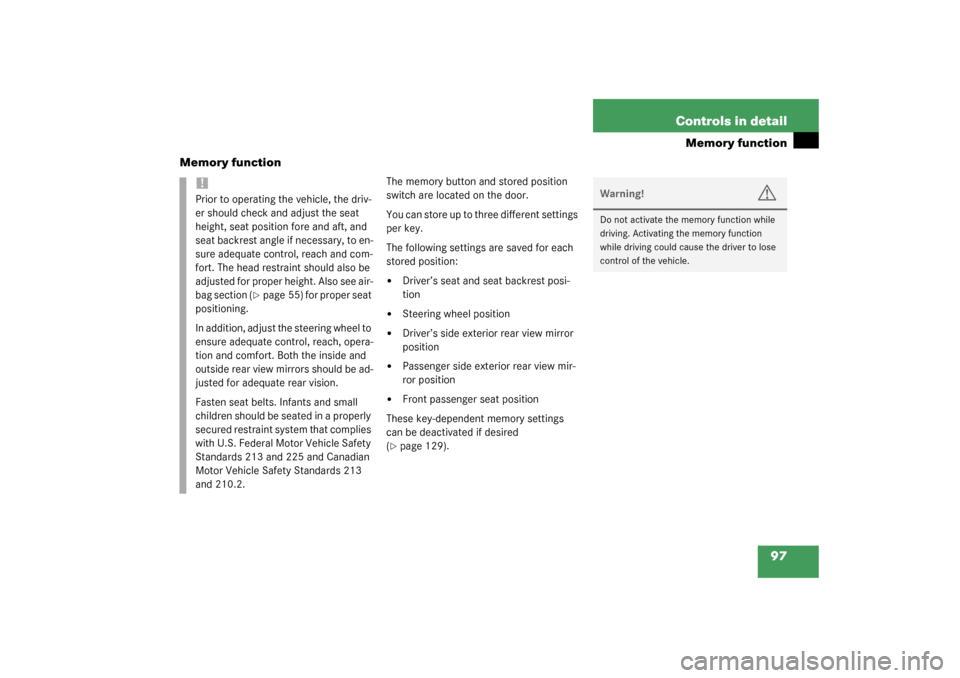
The memory button and stored position
switch are located on the door.
You can store up to three different settings
per key.
The following settings are saved for each
stored position:�
Driver’s seat and seat backrest posi-
tion
�
Steering wheel position
�
Driver’s side exterior rear view mirror
position
�
Passenger side exterior rear view mir-
ror position
�
Front passenger seat position
These key-dependent memory settings
can be deactivated if desired
(
�page 129).
!Prior to operating the vehicle, the driv-
er should check and adjust the seat
height, seat position fore and aft, and
seat backrest angle if necessary, to en-
sure adequate control, reach and com-
fort. The head restraint should also be
adjusted for proper height. Also see air-
bag section (
�page 55) for proper seat
positioning.
In addition, adjust the steering wheel to
ensure adequate control, reach, opera-
tion and comfort. Both the inside and
outside rear view mirrors should be ad-
justed for adequate rear vision.
Fasten seat belts. Infants and small
children should be seated in a properly
secured restraint system that complies
with U.S. Federal Motor Vehicle Safety
Standards 213 and 225 and Canadian
Motor Vehicle Safety Standards 213
and 210.2.
Warning!
G
Do not activate the memory function while
driving. Activating the memory function
while driving could cause the driver to lose
control of the vehicle.
Page 98 of 360
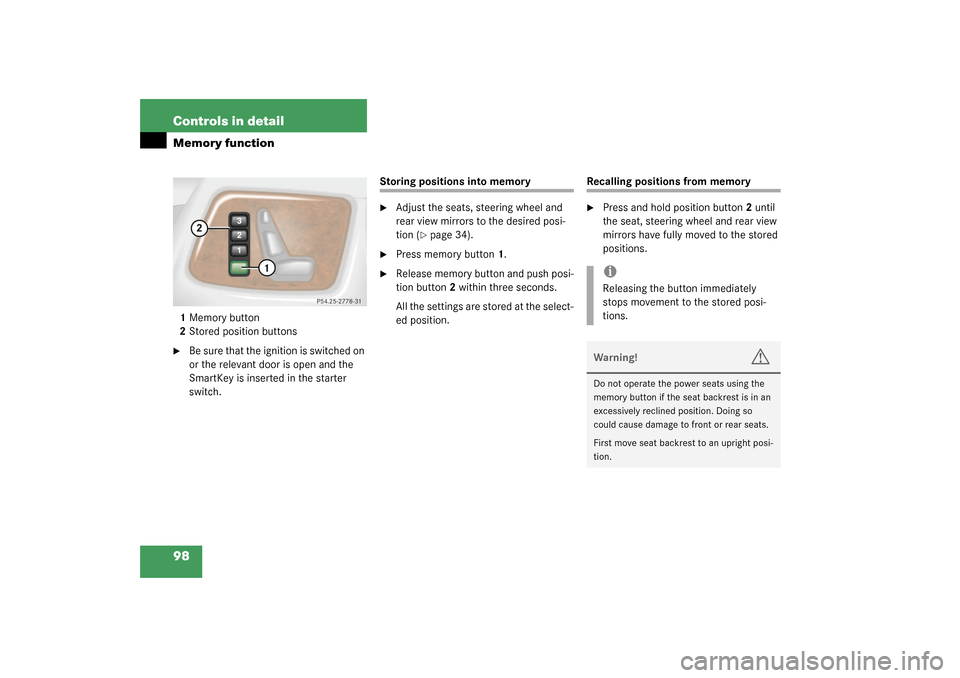
98 Controls in detailMemory function1Memory button
2Stored position buttons�
Be sure that the ignition is switched on
or the relevant door is open and the
SmartKey is inserted in the starter
switch.
Storing positions into memory�
Adjust the seats, steering wheel and
rear view mirrors to the desired posi-
tion (
�page 34).
�
Press memory button1.
�
Release memory button and push posi-
tion button2 within three seconds.
All the settings are stored at the select-
ed position.
Recalling positions from memory�
Press and hold position button2 until
the seat, steering wheel and rear view
mirrors have fully moved to the stored
positions.iReleasing the button immediately
stops movement to the stored posi-
tions.Warning!
G
Do not operate the power seats using the
memory button if the seat backrest is in an
excessively reclined position. Doing so
could cause damage to front or rear seats.
First move seat backrest to an upright posi-
tion.
Page 99 of 360
99 Controls in detail
Memory function
Storing exterior rear view mirror park-ing position
For easier parking, you can adjust the pas-
senger-side exterior rear view mirror so
that you can see the right rear wheel as
soon as you engage reverse gearR.
You can store a parking position for the
passenger exterior rear view mirror for
each key using the memory switch.
For information about activating the park-
ing position see “Activating exterior rear
view mirror parking position”
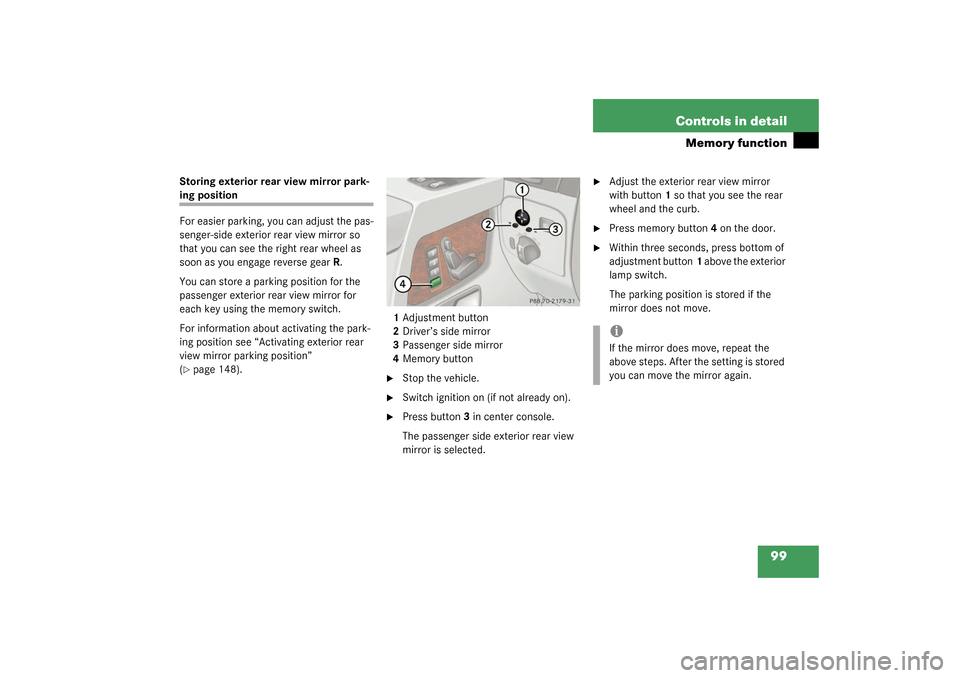
(�page 148).1Adjustment button
2Driver’s side mirror
3Passenger side mirror
4Memory button
�
Stop the vehicle.
�
Switch ignition on (if not already on).
�
Press button3 in center console.
The passenger side exterior rear view
mirror is selected.
�
Adjust the exterior rear view mirror
with button1 so that you see the rear
wheel and the curb.
�
Press memory button4 on the door.
�
Within three seconds, press bottom of
adjustment button1 above the exterior
lamp switch.
The parking position is stored if the
mirror does not move.iIf the mirror does move, repeat the
above steps. After the setting is stored
you can move the mirror again.
Page 102 of 360
102 Controls in detailLightingDaytime running lamp mode�
Turn exterior lamp switch to
position
M
or
U
.
When the engine is running, the low beam
headlamps are automatically switched on.
In low ambient light conditions the parking
lamps will also switch on.
Canada only
When you shift from a driving position to
positionN orP, the low beam switches off
(three minutes delay).
For nighttime driving, you should turn the
exterior lamp switch to position
B
to
permit activation of the high beam head-
lamps.
USA only
The high beam headlamps can also be ac-
tivated when driving with the daytime run-
ning lamp mode activated and exterior
lamp switch in position
M
.To activate the daytime running lamp
mode, see “Setting daytime running lamp
mode” (
�page 124).
Locator lighting and night security illu-
mination
Locator lighting and night security illumi-
nation are described in the control system
section under “Setting locator lighting”
(
�page 125) and “Setting night security il-
lumination” (
�page 125).
Exterior rear view mirror lamps
If the vehicle is centrally unlocked in the
darkness, the lamps in the exterior rear
view mirrors light up.If a door is opened, the lamp on this side
goes out. If no doors are opened, the
lamps go out:
�
when the ignition is switched on
�
after a maximum of 40 seconds
Switching on front fog lamps
�
Check that the low beam headlamps
are switched on.
�
Pull out exterior lamp switch to first
stop.
The green indicator lamp
‡
in the
lamp switch lights up.
iSee notes on the exterior lamp switch
(�page 100).
iFog lamps will operate with the parking
lamps and/or the low beam headlamps
on. Fog lamps should only be used in
conjunction with low beam headlamps.
Consult your State or Province Motor
Vehicle Regulations regarding allow-
able lamp operation.
Page 121 of 360
121 Controls in detail
Control system
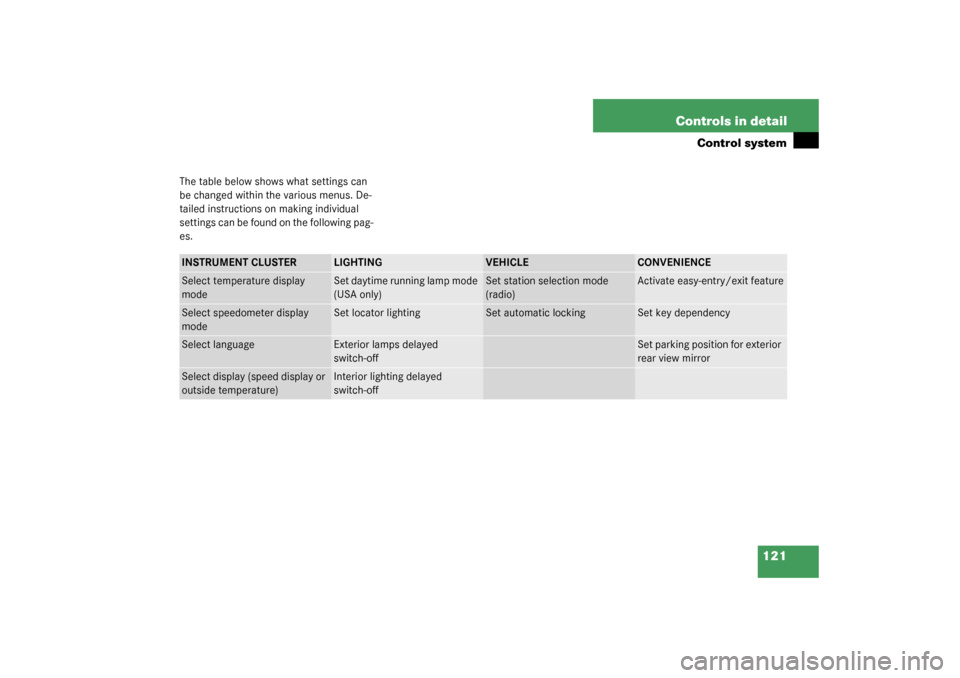
The table below shows what settings can
be changed within the various menus. De-
tailed instructions on making individual
settings can be found on the following pag-
es.INSTRUMENT CLUSTER
LIGHTING
VEHICLE
CONVENIENCE
Select temperature display
mode
Set daytime running lamp mode
(USA only)
Set station selection mode
(radio)
Activate easy-entry/exit feature
Select speedometer display
mode
Set locator lighting
Set automatic locking
Set key dependency
Select language
Exterior lamps delayed
switch-off
Set parking position for exterior
rear view mirror
Select display (speed display or
outside temperature)
Interior lighting delayed
switch-off
Page 128 of 360
128 Controls in detailControl systemSetting automatic locking
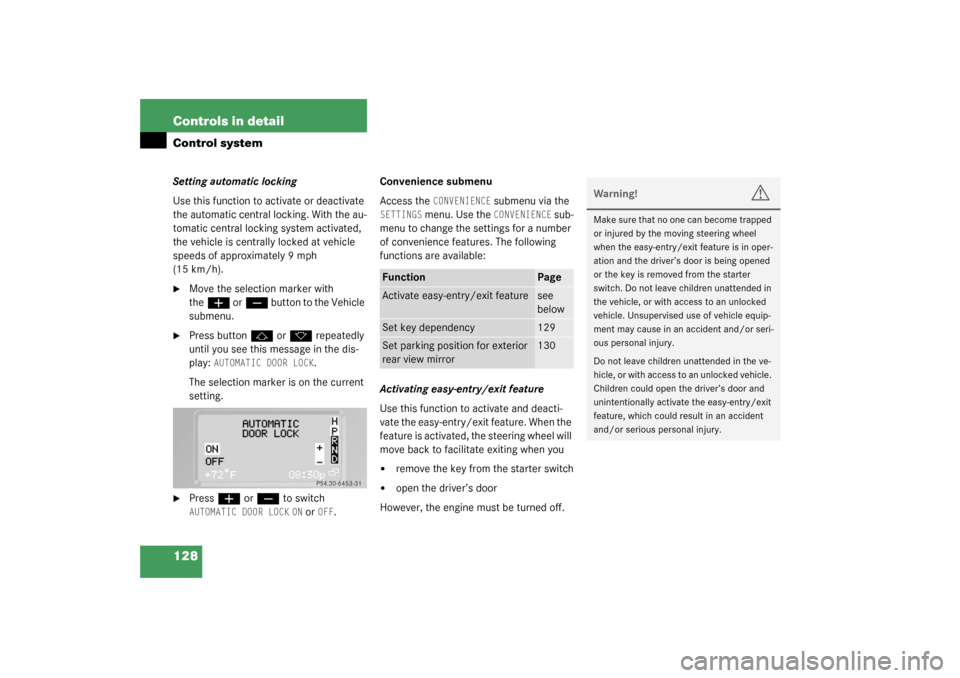
Use this function to activate or deactivate
the automatic central locking. With the au-
tomatic central locking system activated,
the vehicle is centrally locked at vehicle
speeds of approximately 9 mph
(15 km/h).�
Move the selection marker with
the
æ
or
ç
button to the Vehicle
submenu.
�
Press button
j
or
k
repeatedly
until you see this message in the dis-
play:
AUTOMATIC DOOR LOCK
.
The selection marker is on the current
setting.
�
Press
æ
or
ç
to switch
AUTOMATIC DOOR LOCK
ON or
OFF
.Convenience submenu
Access the
CONVENIENCE
submenu via the
SETTINGS
menu. Use the
CONVENIENCE
sub-
menu to change the settings for a number
of convenience features. The following
functions are available:
Activating easy-entry/exit feature
Use this function to activate and deacti-
vate the easy-entry/exit feature. When the
feature is activated, the steering wheel will
move back to facilitate exiting when you
�
remove the key from the starter switch
�
open the driver’s door
However, the engine must be turned off.
Function
Page
Activate easy-entry/exit feature
see
below
Set key dependency
129
Set parking position for exterior
rear view mirror
130
Warning!
G
Make sure that no one can become trapped
or injured by the moving steering wheel
when the easy-entry/exit feature is in oper-
ation and the driver’s door is being opened
or the key is removed from the starter
switch. Do not leave children unattended in
the vehicle, or with access to an unlocked
vehicle. Unsupervised use of vehicle equip-
ment may cause in an accident and/or seri-
ous personal injury.
Do not leave children unattended in the ve-
hicle, or with access to an unlocked vehicle.
Children could open the driver’s door and
unintentionally activate the easy-entry/exit
feature, which could result in an accident
and/or serious personal injury.