Page 158 of 399

158 Controls in detailGood visibilityParking position*
For easier parking you can store a parking
position for the passenger exterior rear
view mirror (
�page 111).
To activate the automatic mirror setting,
see "Setting parking position for exterior
rear view mirror" (
�page 144).
If the passenger side mirror is selected
(
�page 111) the exterior rear view mirror
will be turned downward in the stored po-
sition as soon as you engage reverse
gearR.
The exterior rear view mirror returns to its
previously stored driving position
�
10 seconds after you put the gear se-
lector lever out of positionR
�
immediately once you exceed a speed
of approx. 6 mph (10 km/h)
�
immediately when you press the button
for driver’s side mirror (
�page 39)
Headlamp cleaning system*
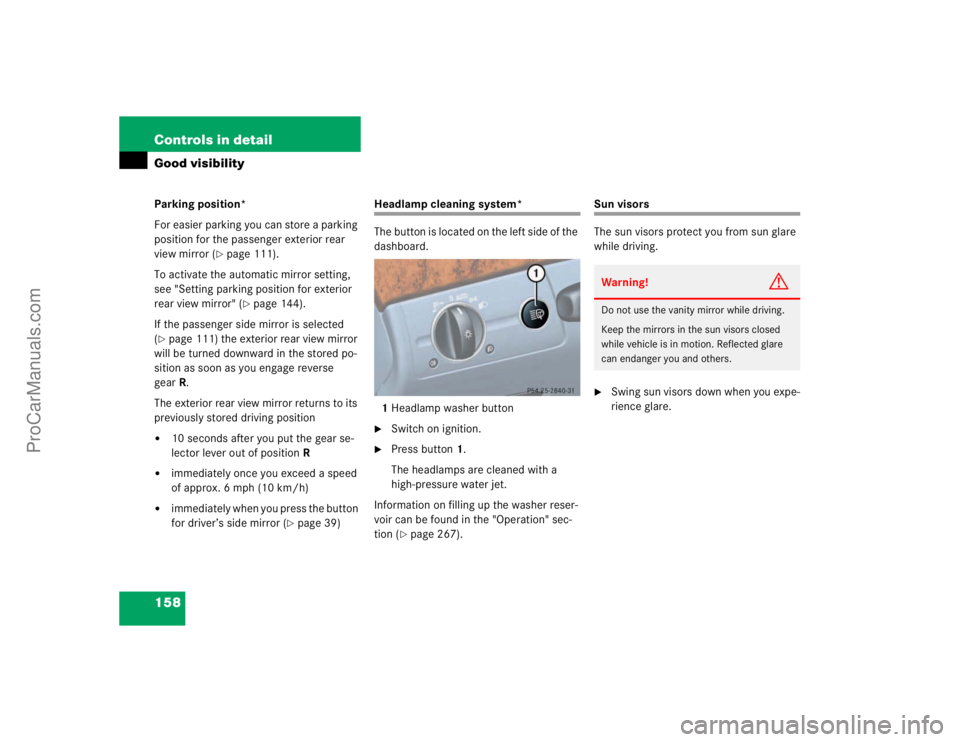
The button is located on the left side of the
dashboard.
1Headlamp washer button�
Switch on ignition.
�
Press button1.
The headlamps are cleaned with a
high-pressure water jet.
Information on filling up the washer reser-
voir can be found in the "Operation" sec-
tion (�page 267).
Sun visors
The sun visors protect you from sun glare
while driving.�
Swing sun visors down when you expe-
rience glare.Warning!
G
Do not use the vanity mirror while driving.
Keep the mirrors in the sun visors closed
while vehicle is in motion. Reflected glare
can endanger you and others.
ProCarManuals.com
Page 171 of 399
171 Controls in detail
Climate control
Residual heat and ventilation*
With the engine switched off, it is possible
to continue to heat or ventilate the interior
for up to 30 minutes. This feature makes
use of the residual heat produced by the
engine.
Activating�
Turn the key in the starter switch to
position1 or remove it from the starter
switch.
�
Press buttonT (
�page 164).
The indicator lamp on buttonT
comes on.Deactivating
�
Press buttonT (
�page 164).
The indicator lamp on buttonT
goes out.
The residual heat is automatically turned
off:
�
when the ignition is switched on
�
after about 30 minutes
�
if the battery voltage drops
iHow long the system will provide heat-
ing depends on the coolant tempera-
ture and the temperature set by the
operator. The blower will run at speed
setting1 regardless of the air distribu-
tion control setting.
ProCarManuals.com
Page 182 of 399

182 Controls in detailAutomatic climate control*Residual heat and ventilation
With the engine switched off, it is possible
to continue to heat or ventilate the interior
for up to 30 minutes. This feature makes
use of the residual heat produced by the
engine.
Activating�
Turn the key in the starter switch to
position1 o r r e m o ve i t f r o m t h e s t a r t e r
switch.
�
Press buttonT.
The indicator lamp on buttonT
comes on.
Deactivating
�
Press buttonT.
The indicator lamp on buttonT
goes out.The residual heat is automatically turned
off
�
when the ignition is switched on
�
after about 30 minutes
�
if the battery voltage drops
Rear air conditioning
1Swiveling left rear center air outlet
2Swiveling right rear center air outlet
3Thumbwheel, left rear center air outlet
4Temperature rocker switch, left
5Display
6Temperature rocker switch, right
7Thumbwheel, right rear center air out-
let
iHow long the system will provide heat-
ing depends on the coolant tempera-
ture and the temperature set by the
operator. The blower will run at speed
setting1 regardless of the air distribu-
tion control setting.
ProCarManuals.com
Page 191 of 399

191 Controls in detail
Panorama sliding/pop-up roof*
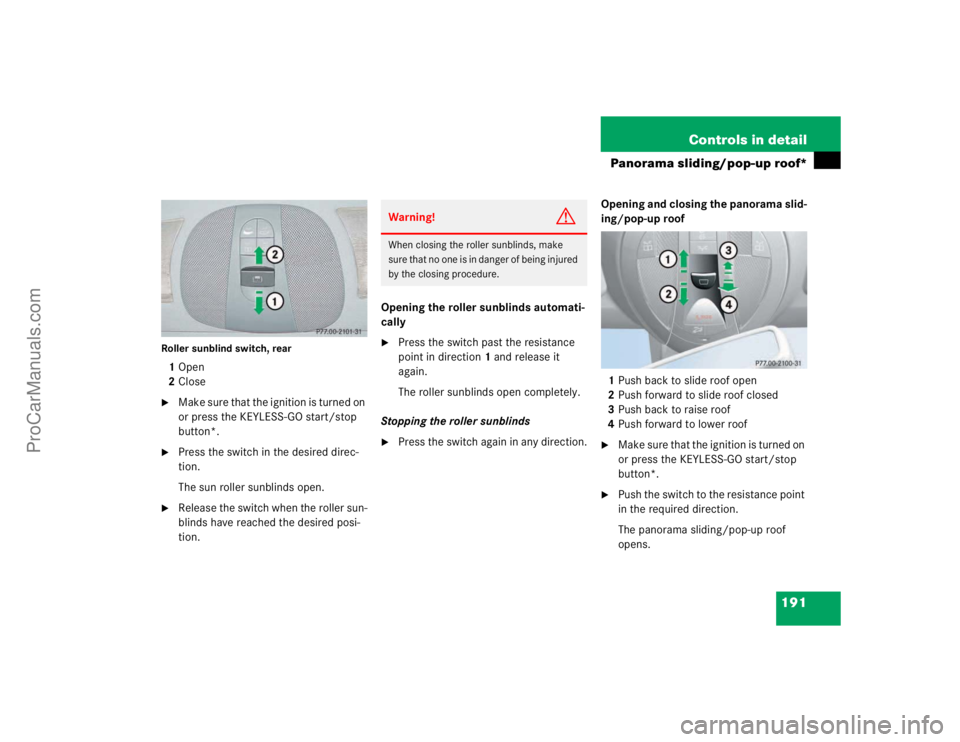
Roller sunblind switch, rear 1Open
2Close�
Make sure that the ignition is turned on
or press the KEYLESS-GO start/stop
button*.
�
Press the switch in the desired direc-
tion.
The sun roller sunblinds open.
�
Release the switch when the roller sun-
blinds have reached the desired posi-
tion.Opening the roller sunblinds automati-
cally
�
Press the switch past the resistance
point in direction1 and release it
again.
The roller sunblinds open completely.
Stopping the roller sunblinds
�
Press the switch again in any direction.Opening and closing the panorama slid-
ing/pop-up roof
1Push back to slide roof open
2Push forward to slide roof closed
3Push back to raise roof
4Push forward to lower roof
�
Make sure that the ignition is turned on
or press the KEYLESS-GO start/stop
button*.
�
Push the switch to the resistance point
in the required direction.
The panorama sliding/pop-up roof
opens.
Warning!
G
When closing the roller sunblinds, make
sure that no one is in danger of being injured
by the closing procedure.
ProCarManuals.com
Page 193 of 399

193 Controls in detail
Panorama sliding/pop-up roof*
Closing (Convenience feature)�
Press and hold button‹ after lock-
ing the vehicle.
The windows and panorama slid-
ing/pop-up roof begin to close after
approximately one second.
�
Press and hold buttonΠagain.
The roller blinds close.
�
Release transmit button to interrupt
procedure.
Ensure that all side windows and the pan-
orama sliding/pop-up roof are properly
closed before leaving the vehicle.Synchronizing the panorama slid-
ing/pop-up roof
It is necessary to resynchronize the pan-
orama sliding/pop-up roof after:
�
voltage supply interruption due to a
disconnected or discharged battery
�
the roof has been closed manually
�
the roof has been opened with an
abrupt movement
�
a malfunction
�
Remove the fuse from the main fuse
box.
�
Replace the fuse in the main fuse box.
�
Turn the ignition on.
�
Press the switch in direction 3.
�
Wait until the panorama sliding/pop-up
roof is raised and then keep the switch
pressed for approximately 1 second.
Solar panel*
Combined with the panorama slid-
ing/pop-up roof a solar panel is available.
The solar cells convert natural light into
electrical energy. When the engine is
switched off, the energy generated auto-
matically switches on the ventilation fan.
The constant air flow creates a cooler tem-
perature for cars parked in the sunlight.
The air flow depends on the intensity of the
solar radiation. The ventilation starts 2
minutes after switching off the engine.
ProCarManuals.com
Page 210 of 399

210 Controls in detailDriving systemsThe following vehicle level settings can be
selected when the vehicle is stationary and
the engine is running:
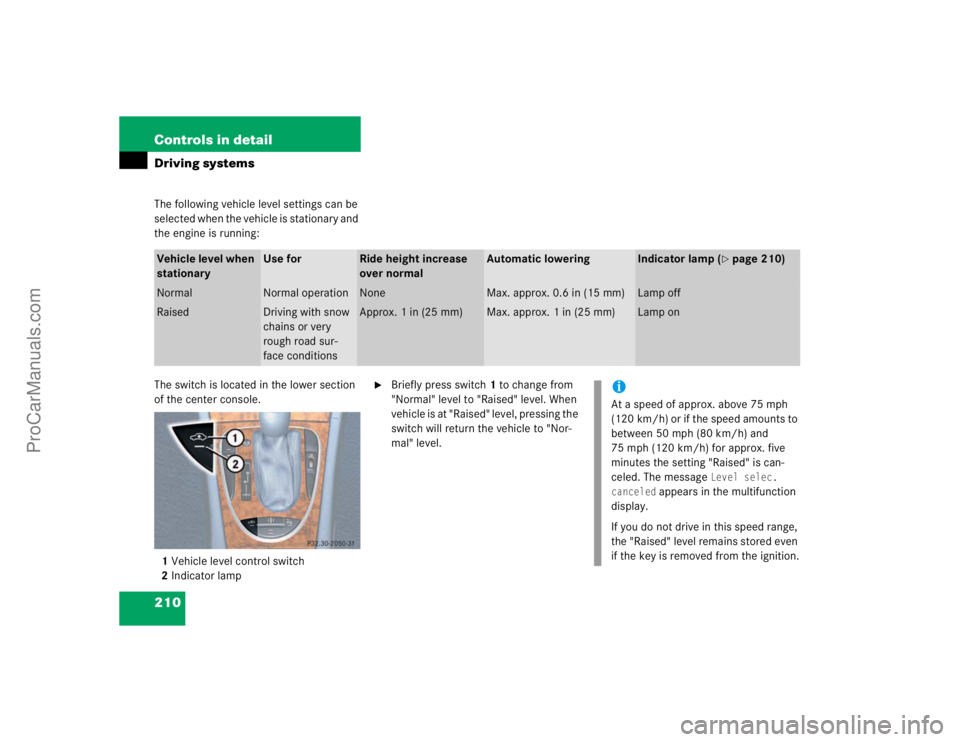
The switch is located in the lower section
of the center console.
1Vehicle level control switch
2Indicator lamp
�
Briefly press switch1 to change from
"Normal" level to "Raised" level. When
vehicle is at "Raised" level, pressing the
switch will return the vehicle to "Nor-
mal" level.
Vehicle level when
stationary
Use for
Ride height increase
over normal
Automatic lowering
Indicator lamp (
�page 210)
Normal
Normal operation
None
Max. approx. 0.6 in (15 mm)
Lamp off
Raised
Driving with snow
chains or very
rough road sur-
face conditions
Approx. 1 in (25 mm)
Max. approx. 1 in (25 mm)
Lamp on
iAt a speed of approx. above 75 mph
(120 km/h) or if the speed amounts to
between 50 mph (80 km/h) and
75 mph (120 km/h) for approx. five
minutes the setting "Raised" is can-
celed. The message
Level selec.
canceled
appears in the multifunction
display.
If you do not drive in this speed range,
the "Raised" level remains stored even
if the key is removed from the ignition.
ProCarManuals.com
Page 212 of 399

212 Controls in detailDriving systemsSuspension for sporty driving style I
The setting for sporty driving I is selected
when one indicator lamp2 is illuminated.�
Press button1.
One indicator lamp2 comes on.
Suspension for sporty driving style II
The setting for sporty driving II is selected
when two indicator lamps2 are illuminat-
ed.
�
Press button1 twice.
Two indicator lamps2 come on.
Suspension for regular driving style
The setting for regular driving is selected
when the two indicator lamps2 are off.
�
Press button1 repeatedly until all indi-
cator lamps go out.
The indicator lamps2 go out.
PARKTRONIC system*
The Parktronic system is an electronic aid
designed to assist the driver during park-
ing maneuvers. It visually and audibly indi-
cates the relative distance between the
vehicle and an obstacle.
The Parktronic system is automatically ac-
tivated when you switch on the ignition
and release the parking brake. The Park-
tronic system deactivates at speeds over
11 mph (18 km/h). At lower speeds the
Parktronic system turns on again.Warning!
G
Parktronic is a supplemental system. It is
not intended to, nor does it replace, the
need for extreme care. The responsibility
during parking and other critical maneuvers
always rests with the driver.
Special attention must be paid to objects
having smooth surfaces or low silhouettes
(e.g. trailer couplings, painted posts, or
street curbs). Such objects may not be de-
tected by the system and can damage the
vehicle.
The operational function of the Parktronic
can be affected by dirty sensors, especially
at times of snow and ice. See "Cleaning the
Parktronic system sensors" (
�page 284).
Interference caused by other ultrasonic sig-
nals (e.g. working jackhammers or the air
brakes of trucks) can cause the system to
send erratic indications, and should be tak-
en into consideration.
Warning!
G
Be sure that no persons or animals are in the
area in which you are maneuvering. You
could otherwise injure them.
ProCarManuals.com
Page 233 of 399

233 Controls in detail
Useful features
Heated steering wheel*
The control lever for the steering wheel
heating is on the lower left-hand side of the
steering wheel.
1Indicator lamp
2Heated steering wheel off
3Heated steering wheel onSwitching on
�
Check that the ignition is switched on.
All lamps in the instrument cluster light
up.
�
Turn the control lever in direction of
arrow3.
The steering wheel gets warm. The indi-
cator lamp1 lights up.
Switching off
�
Turn the control lever in direction of
arrow2.
The heated steering wheel is switched
off. The indicator lamp1 switched off.
Telephone*
Radio transmitters, such as a portable tele-
phone or a citizens band unit, should only
be used inside the vehicle if they are con-
nected to an antenna that is installed on
the outside of the vehicle.
The external antenna must be approved by
Mercedes-Benz. Please contact an autho-
rized Mercedes-Benz Center for informa-
tion on the installation of an approved
external antenna. Refer to the radio trans-
mitter operation instructions regarding use
of an external antenna.
iThe heated steering wheel do not
switch off automatically.
Warning!
G
Never operate radio transmitters equipped
with a built-in or attached antenna (i.e. with-
out being connected to an external antenna)
from inside the vehicle while the engine is
running. Doing so could lead to a malfunc-
tion of the vehicle’s electronic system, pos-
sibly resulting in an accident and personal
injury.
ProCarManuals.com