Page 104 of 399
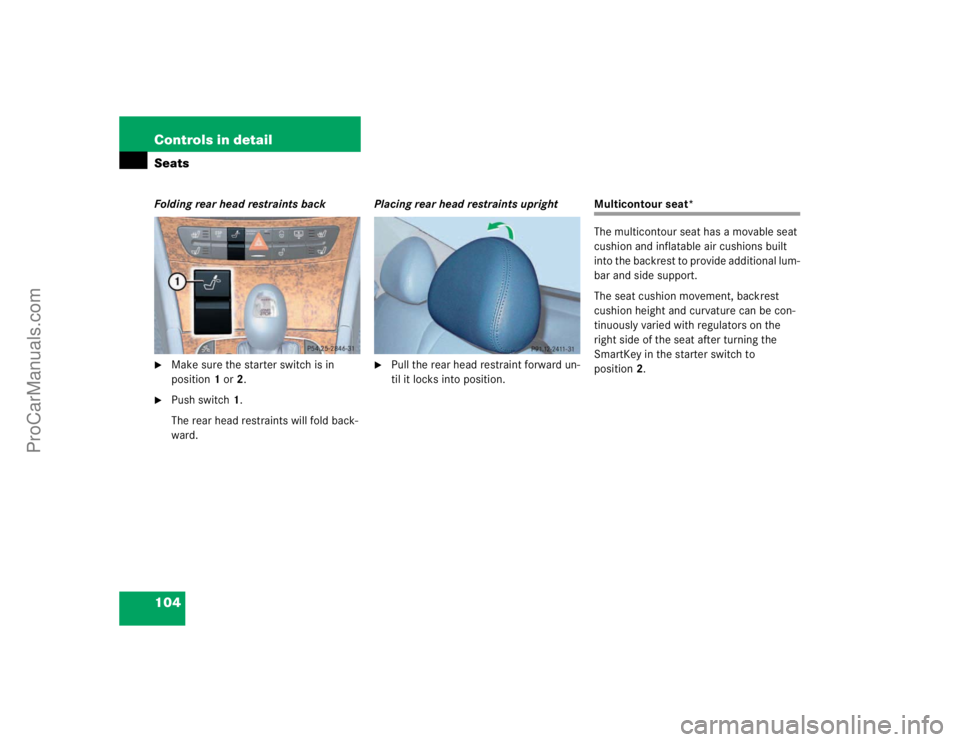
104 Controls in detailSeatsFolding rear head restraints back�
Make sure the starter switch is in
position1 or2.
�
Push switch1.
The rear head restraints will fold back-
ward.Placing rear head restraints upright
�
Pull the rear head restraint forward un-
til it locks into position.
Multicontour seat*
The multicontour seat has a movable seat
cushion and inflatable air cushions built
into the backrest to provide additional lum-
bar and side support.
The seat cushion movement, backrest
cushion height and curvature can be con-
tinuously varied with regulators on the
right side of the seat after turning the
SmartKey in the starter switch to
position2.
ProCarManuals.com
Page 109 of 399

109 Controls in detail
Memory function
Memory function
You can store up to three different settings
per key.
The following settings are saved for each
stored position:�
Driver’s seat and backrest position
�
Steering wheel position
�
Driver’s side exterior rear view mirror
position
�
Passenger side exterior rear view mir-
ror position
�
Front passenger seat position
These key-dependent memory settings
can be deactivated if desired
(
�page 110).
!Prior to operating the vehicle, the driv-
er should check and adjust the seat
height, seat position fore and aft, and
backrest angle if necessary, to ensure
adequate control, reach and comfort.
The head restraint should also be ad-
justed for proper height. Also see the
section on airbags (
�page 57) for
more information on proper seat posi-
tioning.
In addition, adjust the steering wheel to
ensure adequate control, reach, opera-
tion and comfort. Both the inside and
outside rear view mirrors should be ad-
justed for adequate rear vision.
Fasten seat belts. Infants and small
children should be seated in a properly
secured restraint system that complies
with U.S. Federal Motor Vehicle Safety
Standard 213 and Canadian Motor Ve-
hicle Safety Standard 213.
Warning!
G
Do not activate the memory function while
driving. Activating the memory function
while driving could cause the driver to lose
control of the vehicle.
ProCarManuals.com
Page 209 of 399
*
Vehicle level control
Your vehicle automatically adjusts its ride
height to�
reduce fuel consumption
�
increase vehicle safety
The f")
209 Controls in detail
Driving systems
AIRMATIC DC (Dual Control)*
Vehicle level control
Your vehicle automatically adjusts its ride
height to�
reduce fuel consumption
�
increase vehicle safety
The following vehicle chassis ride heights
are possible:
�
Normal
�
Raised
�
Lowered
The vehicle chassis ride height is raised or
lowered according to the selected level
setting and to the vehicle speed:
�
With increasing speed, ride height is re-
duced automatically by up to approxi-
mately 0.6 inch (15 mm) "Lowered"
level.
�
With decreasing speed, the ride height
is again raised to the "Normal" level.
Select the "Raised" level only when re-
quired by current driving conditions. Oth-
erwise
�
fuel consumption may increase
�
handling may be impairediThese height adjustments are so small
that you may not notice any change.
Warning!
G
To help avoid personal injury, keep hands
and feet away from wheel housing area, and
stay away from under the vehicle when low-
ering the vehicle chassis.
ProCarManuals.com
Page 210 of 399

210 Controls in detailDriving systemsThe following vehicle level settings can be
selected when the vehicle is stationary and
the engine is running:
The switch is located in the lower section
of the center console.
1Vehicle level control switch
2Indicator lamp
�
Briefly press switch1 to change from
"Normal" level to "Raised" level. When
vehicle is at "Raised" level, pressing the
switch will return the vehicle to "Nor-
mal" level.
Vehicle level when
stationary
Use for
Ride height increase
over normal
Automatic lowering
Indicator lamp (
�page 210)
Normal
Normal operation
None
Max. approx. 0.6 in (15 mm)
Lamp off
Raised
Driving with snow
chains or very
rough road sur-
face conditions
Approx. 1 in (25 mm)
Max. approx. 1 in (25 mm)
Lamp on
iAt a speed of approx. above 75 mph
(120 km/h) or if the speed amounts to
between 50 mph (80 km/h) and
75 mph (120 km/h) for approx. five
minutes the setting "Raised" is can-
celed. The message
Level selec.
canceled
appears in the multifunction
display.
If you do not drive in this speed range,
the "Raised" level remains stored even
if the key is removed from the ignition.
ProCarManuals.com
Page 213 of 399

213 Controls in detail
Driving systems
The Parktronic system monitors the sur-
roundings of your vehicle with six sensors
in the front bumper and four sensors in the
rear bumper.
1Sensors in the front bumperRange of the sensors
To function properly, the sensors must be
free of dirt, ice, snow and slush. Clean the
sensors regularly, being careful not to
scratch or damage the sensors.
Front sensors
Rear sensorsMinimum distance
If the system encounters an obstacle in
this range, all the warning lamps light up
and you hear a warning signal. If the obsta-
cle is closer than the minimum distance,
the actual distance may no longer be indi-
cated by the system.
Center
approx. 40 in (100 cm)
Corners
approx. 23 in (60 cm)
Center
approx. 48 in (120 cm)
Corners
approx. 32 in (80 cm)
!During parking maneuvers, pay special
attention to objects located above or
below the height of the sensors (e.g.
planters or trailer hitches). The Park-
tronic system will not detect such ob-
jects at close range and damage to
your vehicle or the object may result.
Ultrasonic signals from outside sourc-
es (e.g. truck air brakes or jackham-
mers) may impair the operation of the
Parktronic system.
Center
approx. 8 in (20 cm)
Corners
approx. 6 in (15 cm)
ProCarManuals.com
Page 228 of 399
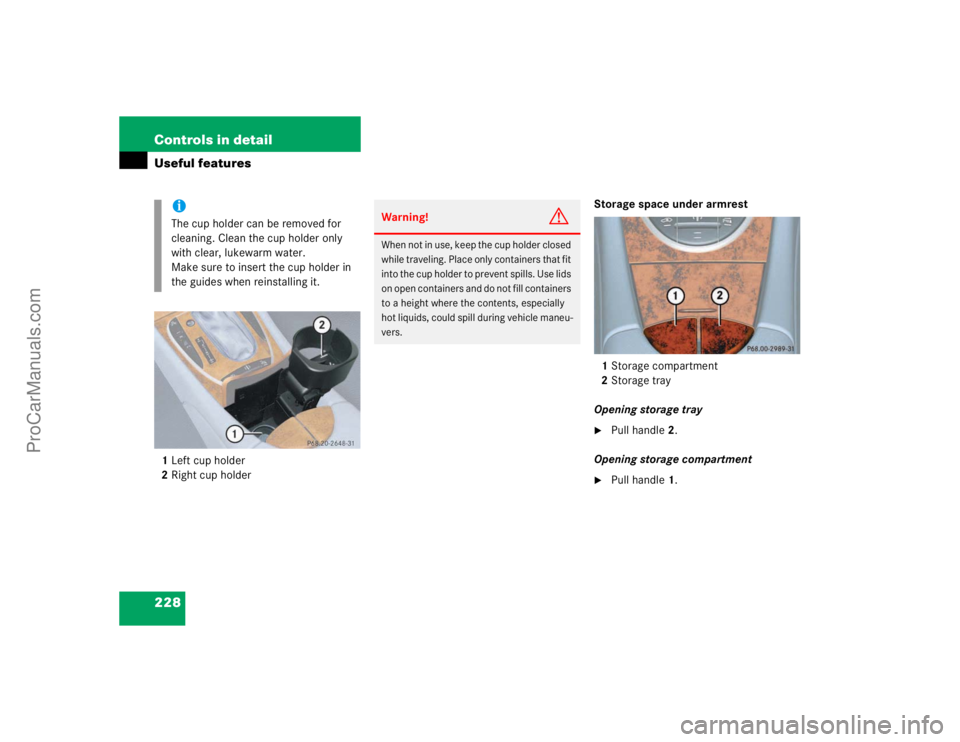
228 Controls in detailUseful features1Left cup holder
2Right cup holderStorage space under armrest
1Storage compartment
2Storage tray
Opening storage tray
�
Pull handle2.
Opening storage compartment
�
Pull handle1.
iThe cup holder can be removed for
cleaning. Clean the cup holder only
with clear, lukewarm water.
Make sure to insert the cup holder in
the guides when reinstalling it.
Warning!
G
When not in use, keep the cup holder closed
while traveling. Place only containers that fit
into the cup holder to prevent spills. Use lids
on open containers and do not fill containers
to a height where the contents, especially
hot liquids, could spill during vehicle maneu-
vers.
ProCarManuals.com
Page 230 of 399
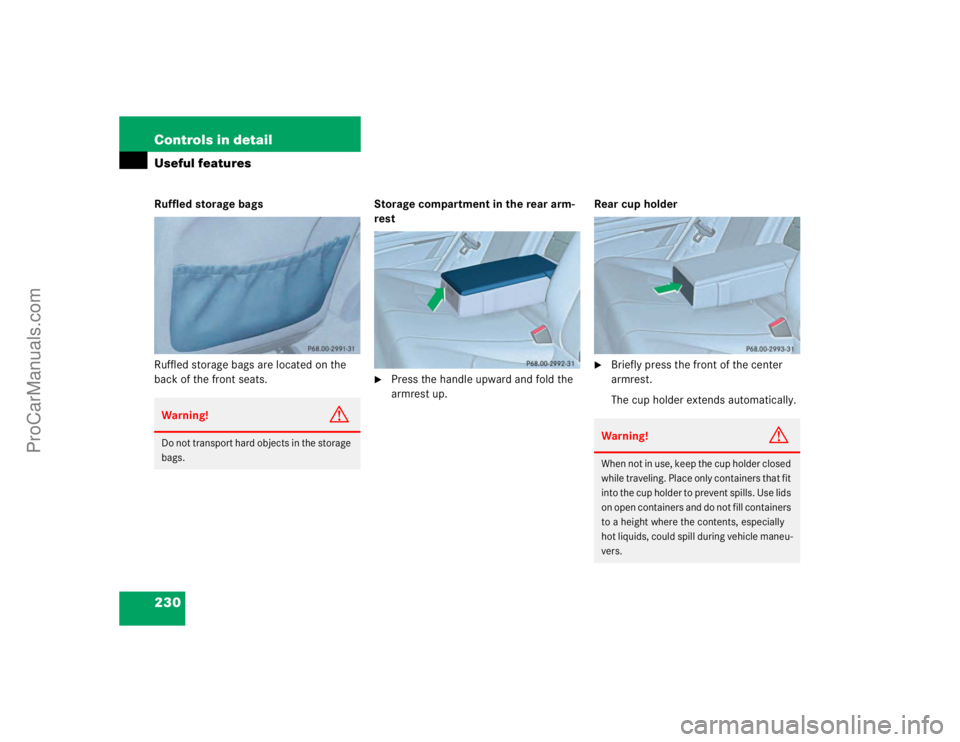
230 Controls in detailUseful featuresRuffled storage bags
Ruffled storage bags are located on the
back of the front seats.Storage compartment in the rear arm-
rest
�
Press the handle upward and fold the
armrest up.Rear cup holder
�
Briefly press the front of the center
armrest.
The cup holder extends automatically.
Warning!
G
Do not transport hard objects in the storage
bags.
Warning!
G
When not in use, keep the cup holder closed
while traveling. Place only containers that fit
into the cup holder to prevent spills. Use lids
on open containers and do not fill containers
to a height where the contents, especially
hot liquids, could spill during vehicle maneu-
vers.
ProCarManuals.com
Page 261 of 399

261 Operation
Engine compartment
Engine compartment
Hood
Opening
1Hood release
�
Pull lever1 downwards.
The hood is unlocked and handle2 will
extend out of the radiator grille.
2Handle for opening the hood
�
Pull handle2 to its stop out of radiator
grille.
�
Pull up on the hood (do not pull up on
the handle) and then release it.
The hood will be automatically held
open at shoulder height by gas-filled
struts.
Warning!
G
Do not pull the release lever while the vehi-
cle is in motion. Otherwise the hood could
be forced open by passing air flow.
!To avoid damage to the windshield wip-
ers or hood, never open the hood if the
wiper arms are folded forward away
from the windshield.
Warning!
G
To help prevent personal injury, stay clear of
moving parts when the hood is open and the
engine is running. Be sure the hood is prop-
erly closed before driving. When closing the
hood, use extreme caution not to catch
hands or fingers.
The radiator fan may continue to run for ap-
proximately 30 seconds or even restart af-
ter the engine has been turned off. Stay
clear from fan blades.
ProCarManuals.com