Page 330 of 399
330 Practical hintsUnlocking/locking in an emergencyManually unlocking the transmission selector lever
In the case of power failure, the transmis-
sion selector lever can be manually un-
locked, e.g. to tow the vehicle.
1Pin
The selector lever can be manually un-
locked from position P in the event of an
electrical failure, e.g. to tow the vehicle.
�
Open the storage compartment in the
center console (
�page 229).
�
Take out the cup holder*.
Using two fingers in the horizontal slot
at the upper rear side of the cup holder,
lift cup holder upwards to remove.
�
Hold the cover at a 45° angle.
�
Insert a suitable object 1 (e.g. a pin)
through the hole and press the pin
downward.
�
Remove pin 1.
iThe selector lever is locked again when
moving it to positionP.
ProCarManuals.com
Page 331 of 399
331 Practical hints
Opening/closing in an emergency
Opening/closing in an emergency
Sliding/pop-up roof* or panorama sliding/pop-up roof*
You can open or close the sliding/pop-up
roof manually should an electrical malfunc-
tion occur.
The sliding/pop-up roof drive is located
behind lens1 of the interior overhead
light.
1Screen�
Fold screen1 down.
�
Obtain crank2.
�
Insert crank2 through hole1.
�
Turn crank2 clockwise to:�
Slide roof closed
�
Raise roof at the rear
�
Turn crank2 counterclockwise to:�
slide roof open
�
lower roof at the rearThe sliding/pop-up roof must be resyn-
chronized after being operated manually
(
�page 189).
iDo not disconnect the electrical con-
nectors.
ProCarManuals.com
Page 334 of 399
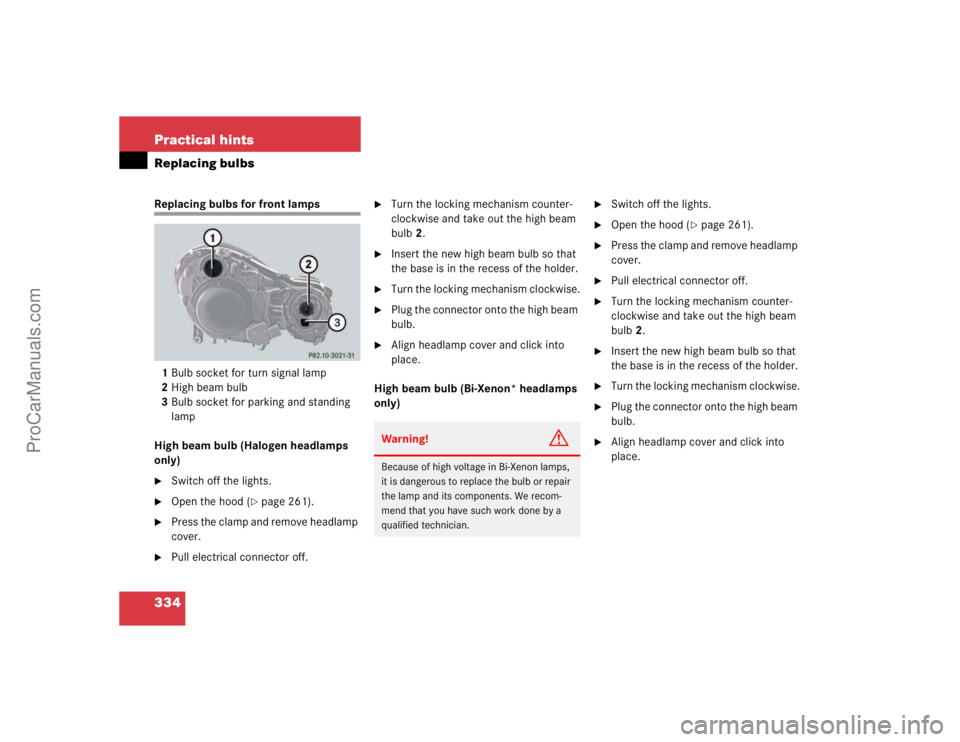
334 Practical hintsReplacing bulbsReplacing bulbs for front lamps
1Bulb socket for turn signal lamp
2High beam bulb
3Bulb socket for parking and standing
lamp
High beam bulb (Halogen headlamps
only)�
Switch off the lights.
�
Open the hood (
�page 261).
�
Press the clamp and remove headlamp
cover.
�
Pull electrical connector off.
�
Turn the locking mechanism counter-
clockwise and take out the high beam
bulb2.
�
Insert the new high beam bulb so that
the base is in the recess of the holder.
�
Turn the locking mechanism clockwise.
�
Plug the connector onto the high beam
bulb.
�
Align headlamp cover and click into
place.
High beam bulb (Bi-Xenon* headlamps
only)
�
Switch off the lights.
�
Open the hood (
�page 261).
�
Press the clamp and remove headlamp
cover.
�
Pull electrical connector off.
�
Turn the locking mechanism counter-
clockwise and take out the high beam
bulb2.
�
Insert the new high beam bulb so that
the base is in the recess of the holder.
�
Turn the locking mechanism clockwise.
�
Plug the connector onto the high beam
bulb.
�
Align headlamp cover and click into
place.
Warning!
G
Because of high voltage in Bi-Xenon lamps,
it is dangerous to replace the bulb or repair
the lamp and its components. We recom-
mend that you have such work done by a
qualified technician.
ProCarManuals.com
Page 335 of 399
335 Practical hints
Replacing bulbs
Front turn signal lamp bulb�
Switch off the lights.
�
Open the hood (
�page 261).
�
Twist bulb socket1 counterclockwise
and pull out.
�
Push bulb into socket, turn counter-
clockwise and remove.
�
Insert new bulb in socket, push in and
twist clockwise.
�
Reinsert bulb socket in lamp and twist
clockwise.Parking and standing lamp bulb
�
Switch off the lights.
�
Open the hood (
�page 261).
�
Press the clamp and remove headlamp
cover.
�
Pull out the bulb socket3 with the
bulb.
�
Pull the bulb out of the bulb socket.
�
Insert a new bulb in the socket.
�
Reinstall the bulb socket.
�
Align headlamp cover and click into
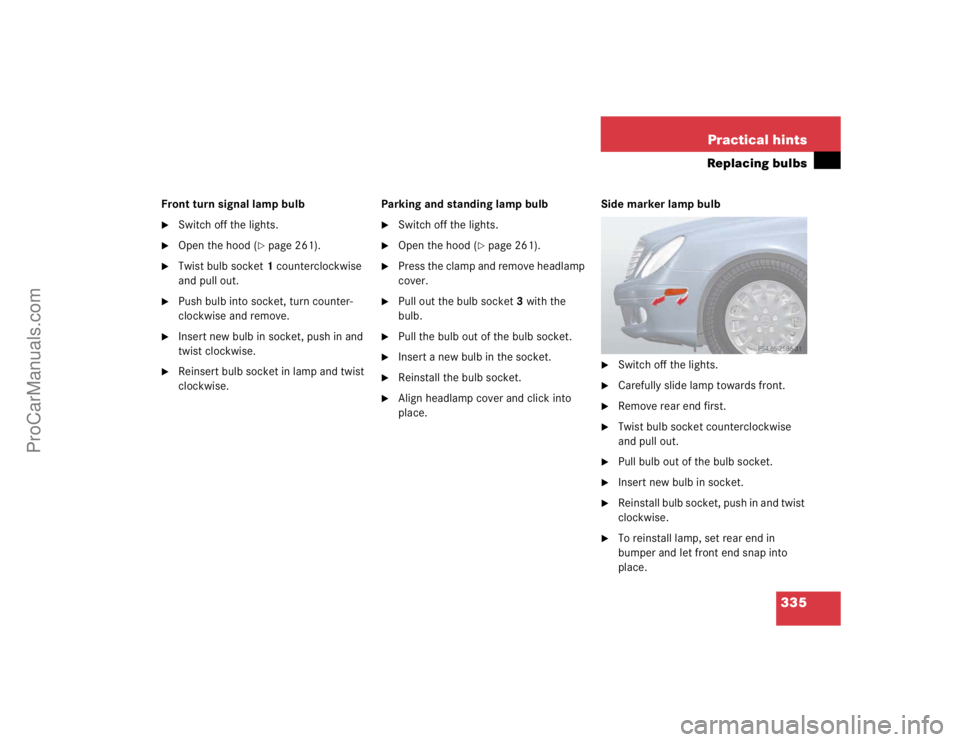
place.Side marker lamp bulb
�
Switch off the lights.
�
Carefully slide lamp towards front.
�
Remove rear end first.
�
Twist bulb socket counterclockwise
and pull out.
�
Pull bulb out of the bulb socket.
�
Insert new bulb in socket.
�
Reinstall bulb socket, push in and twist
clockwise.
�
To reinstall lamp, set rear end in
bumper and let front end snap into
place.
ProCarManuals.com
Page 337 of 399
337 Practical hints
Replacing wiper blades
Replacing wiper blades
Replacing wiper blades
Removal �
Turn key in starter switch to position1.
�
Turn combination switch to wiper
settingII (
�page 47).
�
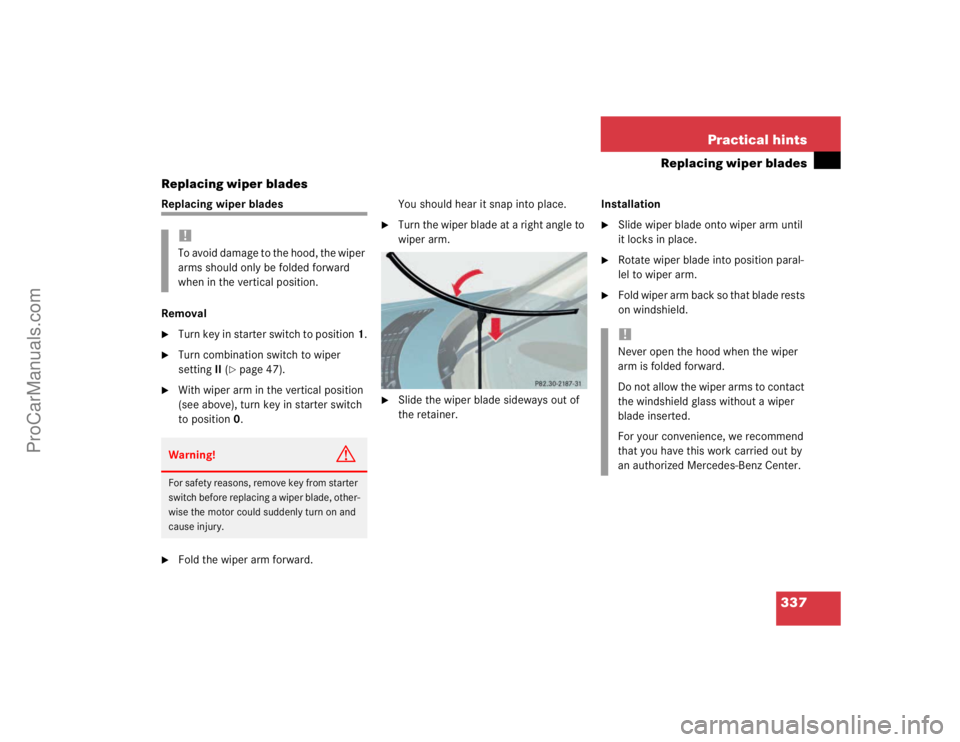
With wiper arm in the vertical position
(see above), turn key in starter switch
to position0.
�
Fold the wiper arm forward.You should hear it snap into place.
�
Turn the wiper blade at a right angle to
wiper arm.
�
Slide the wiper blade sideways out of
the retainer.Installation
�
Slide wiper blade onto wiper arm until
it locks in place.
�
Rotate wiper blade into position paral-
lel to wiper arm.
�
Fold wiper arm back so that blade rests
on windshield.
!To avoid damage to the hood, the wiper
arms should only be folded forward
when in the vertical position.Warning!
G
For safety reasons, remove key from starter
switch before replacing a wiper blade, other-
wise the motor could suddenly turn on and
cause injury.
!Never open the hood when the wiper
arm is folded forward.
Do not allow the wiper arms to contact
the windshield glass without a wiper
blade inserted.
For your convenience, we recommend
that you have this work carried out by
an authorized Mercedes-Benz Center.
ProCarManuals.com
Page 338 of 399
338 Practical hintsFlat tire
Flat tirePreparing the vehicle�
Park the vehicle as far as possible from
moving traffic on a hard surface.
�
Turn on the hazard warning flashers.
�
Engage the steering wheel lock in the
straight-ahead position and set the
parking brake.
�
Move the selector lever toP.
�
Have any passenger exit the vehicle at
a safe distance from the roadway.
Mounting the spare wheel
Preparing the vehicle
Prepare the vehicle as described under
"Preparing the vehicle" on this page.�
Take the spare wheel out of the trunk
(�page 324).
Lifting the vehicle
�
Prevent the vehicle from rolling away
by blocking wheels with wheel chocks
(not included) or other sizable objects.
When changing wheel on a level surface:
�
Place one chock in front of and one be-
hind the wheel that is diagonally oppo-
site to the wheel being changed.When changing wheel on a hill:
�
Place chocks on the downhill side
blocking both wheels of the other axle.
�
Take the two-piece wheel wrench and
the jack out of the trunk (
�page 326).
Assemble wheel wrench.
Warning!
G
The jack is designed exclusively for jacking
up the vehicle at the jack take-up brackets
built into either side of the vehicle. To help
avoid personal injury, use the jack only to lift
the vehicle during a wheel change. Never
get beneath the vehicle while it is supported
by the jack. Keep hands and feet away from
the area under the lifted vehicle. Always
firmly set parking brake and block wheels
before raising vehicle with jack.
Do not disengage parking brake while the
vehicle is raised. Be certain that the jack is
ProCarManuals.com
Page 342 of 399
342 Practical hintsFlat tireLowering the vehicle�
Lower vehicle by turning crank coun-
terclockwise until vehicle is resting ful-
ly on its own weight.
�
Remove the jack.
1-5 Wheel bolts
�
Tighten the five wheel bolts evenly, fol-
lowing the diagonal sequence illustrat-
ed (1 to 5), until all bolts are tight.
Observe a tightening torque of 96 ft lb
(130 Nm).
�
Before storing the jack in the trunk, it
should be fully collapsed.Warning!
G
Have the tightening torque checked after
changing a wheel. The wheels could come
loose if they are not tightened to a torque of
96 ft lb (130 Nm).iWrap the faulty wheel in the protective
film that comes with the spare wheel
and put the wheel in the trunk.
You can also place the faulty wheel
down into the spare wheel well. In this
case, you must stow the holder from
the spare wheel well in the trunk.
Do not activate the tire inflation pres-
sure monitor until the depressurized
tire is no longer in the vehicle.
ProCarManuals.com
Page 344 of 399
344 Practical hintsBatteries
Disconnecting the battery�
Depress the parking brake firmly or
move the gear selector lever to
positionP.
�
Open the trunk (
�page 261).
�
Disconnect battery negative lead1.
�
Remove cover2 from the positive ter-
minal.
�
Disconnect the battery positive lead.
Removing the battery�
Remove the screw-nuts securing the
battery.
�
Remove the battery bracket.
�
Take out the battery.
Charging and reinstalling the battery�
Charge battery in accordance with the
instructions of the battery charger
manufacturer.
�
Reinstall the charged battery. Follow
the previously described steps in re-
verse order.
!Never loosen or detach battery termi-
nal clamps while the engine is running
or the key is in the starter switch. Oth-
erwise the alternator and other elec-
tronic components could be severely
damaged.
Have the battery checked regularly by
an authorized Mercedes-Benz Center.
Contact your authorized
Mercedes-Benz Center for further infor-
mation.Warning!
G
Do not place metal objects on the battery as
this could result in a short circuit.
Use leak-proof battery only to avoid the risk
of acid burns in the event of an accident.
Warning!
G
With a disconnected battery�
the brake boosting effect is not avail-
able.
You need more power to brake and
brake pedal travel is increased. If neces-
sary, you must depress the brake pedal
with full power.
�
you can no longer turn the ignition key
or, in cars with KEYLESS-GO*, pressing
the KEY-LESS-GO button* on the gear
selector lever has no effect.
�
the gear selector lever is locked in
position P.
ProCarManuals.com