Page 23 of 394
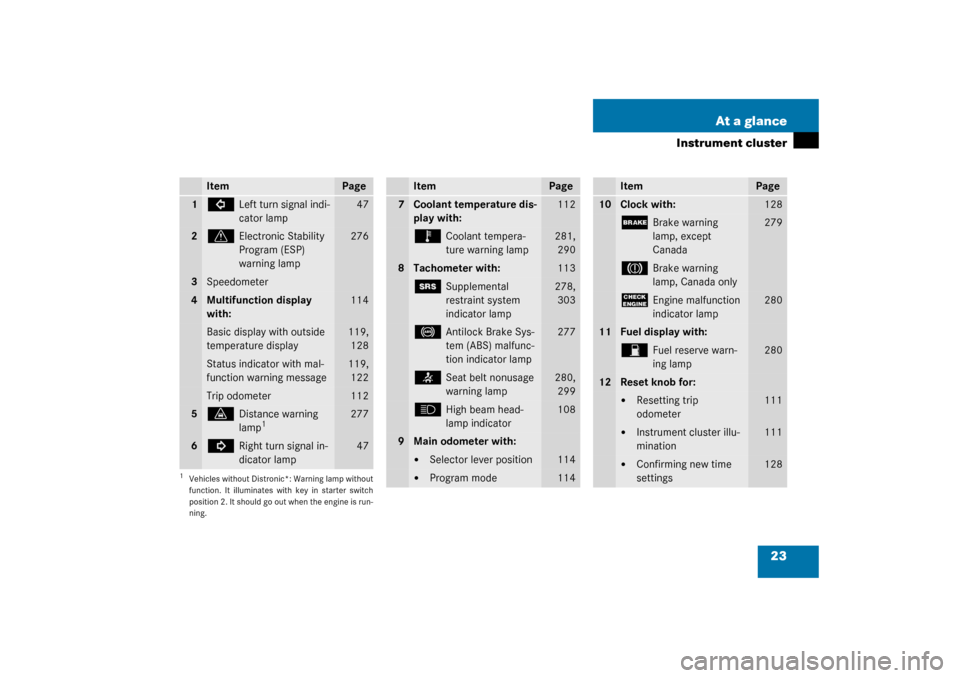
23 At a glance
Instrument cluster
Item
Page
1
L
Left turn signal indi-
cator lamp
47
2
v
Electronic Stability
Program (ESP)
warning lamp
276
3
Speedometer
4
Multifunction display
with:
114
Basic display with outside
temperature display
119,
128
Status indicator with mal-
function warning message
119,
122
Trip odometer
112
5
l
Distance warning
lamp
1
1Vehicles without Distronic*: Warning lamp without
function. It illuminates with key in starter switch
position 2. It should go out when the engine is run-
ning.
277
6
K
Right turn signal in-
dicator lamp
47
Item
Page
7
Coolant temperature dis-
play with:
112
Ï
Coolant tempera-
ture warning lamp
281,
290
8
Tachometer with:
113
1
Supplemental
restraint system
indicator lamp
278,
303
-
Antilock Brake Sys-
tem (ABS) malfunc-
tion indicator lamp
277
<
Seat belt nonusage
warning lamp
280,
299
A
High beam head-
lamp indicator
108
9
Main odometer with:�
Selector lever position
114
�
Program mode
114
Item
Page
10
Clock with:
128
;
Brake warning
lamp, except
Canada
279
3
Brake warning
lamp, Canada only
?
Engine malfunction
indicator lamp
280
11
Fuel display with:W
Fuel reserve warn-
ing lamp
280
12
Reset knob for:�
Resetting trip
odometer
111
�
Instrument cluster illu-
mination
111
�
Confirming new time
settings
128
Page 45 of 394
45 Getting started
Driving
If the engine does not start after several
starting attempts, there could be a mal-
function in the engine electronics or in the
fuel supply system.�
Notify an authorized Mercedes-Benz
Center.
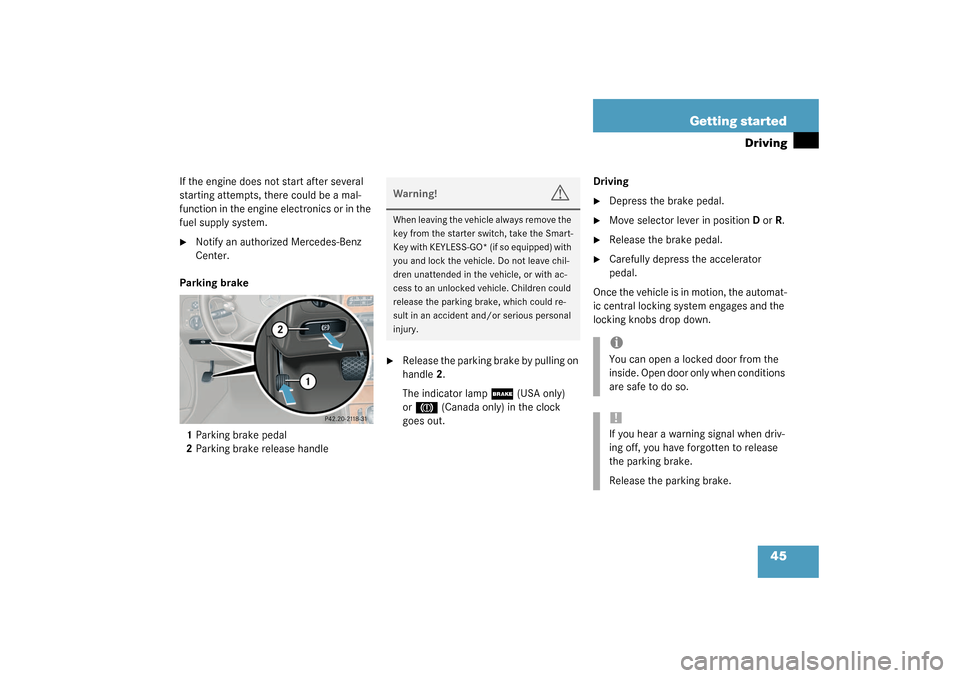
Parking brake
1Parking brake pedal
2Parking brake release handle
�
Release the parking brake by pulling on
handle2.
The indicator lamp
;
(USA only)
or
3
(Canada only) in the clock
goes out.Driving
�
Depress the brake pedal.
�
Move selector lever in positionDorR.
�
Release the brake pedal.
�
Carefully depress the accelerator
pedal.
Once the vehicle is in motion, the automat-
ic central locking system engages and the
locking knobs drop down.
Warning!
G
When leaving the vehicle always remove the
key from the starter switch, take the Smart-
Key with KEYLESS-GO* (if so equipped) with
you and lock the vehicle. Do not leave chil-
dren unattended in the vehicle, or with ac-
cess to an unlocked vehicle. Children could
release the parking brake, which could re-
sult in an accident and/or serious personal
injury.
iYou can open a locked door from the
inside. Open door only when conditions
are safe to do so.!If you hear a warning signal when driv-
ing off, you have forgotten to release
the parking brake.
Release the parking brake.
Page 111 of 394
111 Controls in detail
Instrument cluster
Instrument cluster
A full view illustration of the instrument
cluster can be found in the “At a glance”
section of this manual (
�page 22).
The instrument cluster is activated when
you
�
open a door
�
turn on the ignition
�
press the reset knob, see below
�
switch on the exterior lamps
You can change the instrument cluster set-
tings in the Instrument cluster submenu of
the control system (
�Seite 126).
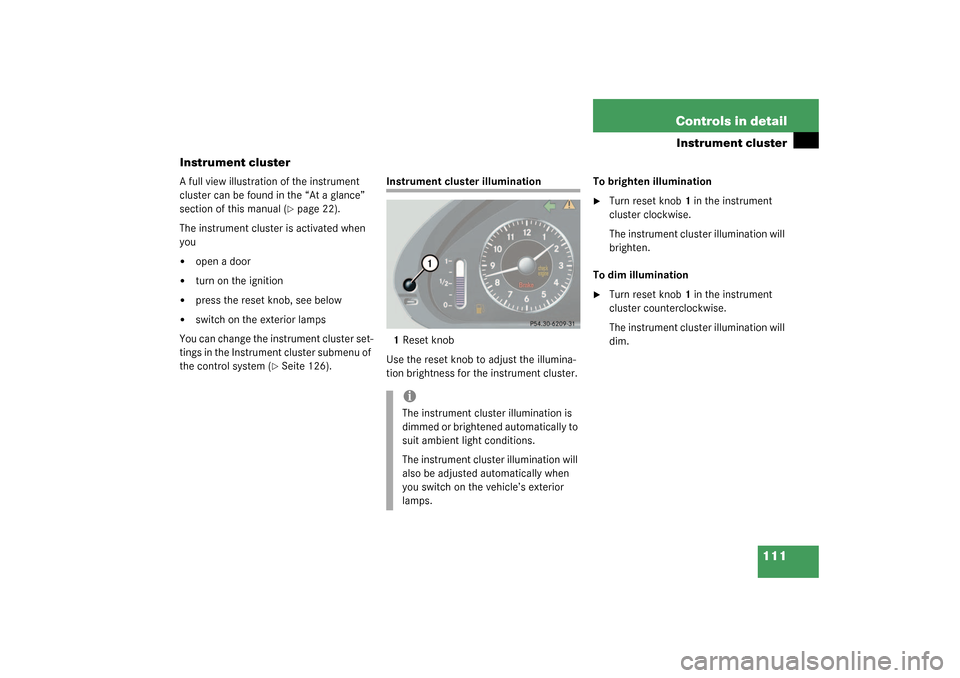
Instrument cluster illumination
1Reset knob
Use the reset knob to adjust the illumina-
tion brightness for the instrument cluster.To brighten illumination
�
Turn reset knob1 in the instrument
cluster clockwise.
The instrument cluster illumination will
brighten.
To dim illumination
�
Turn reset knob1 in the instrument
cluster counterclockwise.
The instrument cluster illumination will
dim.
iThe instrument cluster illumination is
dimmed or brightened automatically to
suit ambient light conditions.
The instrument cluster illumination will
also be adjusted automatically when
you switch on the vehicle’s exterior
lamps.
Page 128 of 394
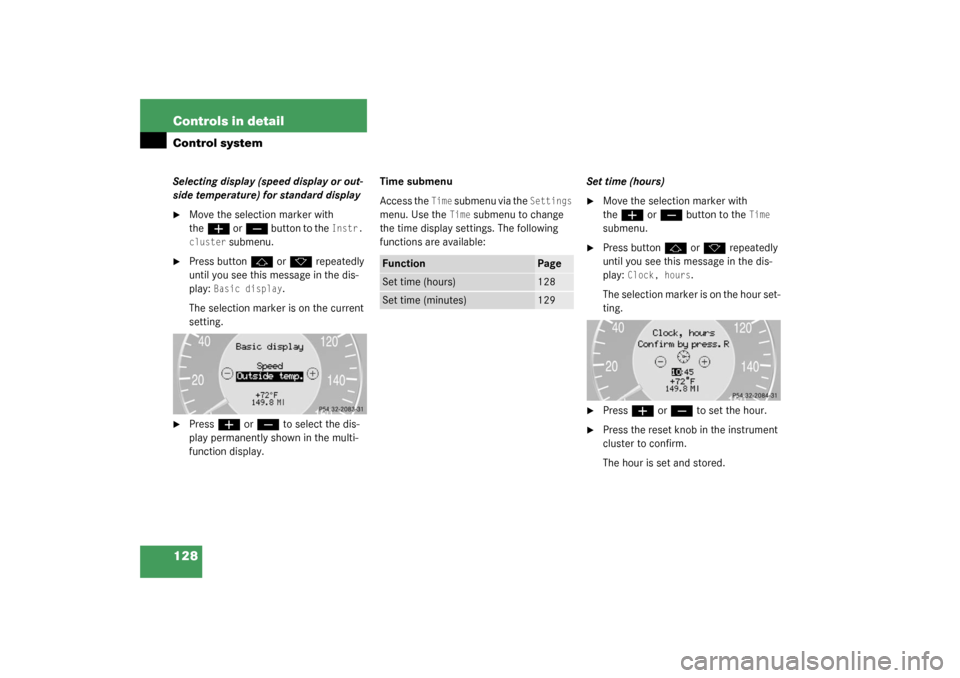
128 Controls in detailControl systemSelecting display (speed display or out-
side temperature) for standard display�
Move the selection marker with
the
æ
or
ç
button to the
Instr.
cluster
submenu.
�
Press button
j
or
k
repeatedly
until you see this message in the dis-
play:
Basic display
.
The selection marker is on the current
setting.
�
Press
æ
or
ç
to select the dis-
play permanently shown in the multi-
function display.Time submenu
Access the
Time
submenu via the
Settings
menu. Use the
Time
submenu to change
the time display settings. The following
functions are available:Set time (hours)
�
Move the selection marker with
the
æ
or
ç
button to the
Time
submenu.
�
Press button
j
or
k
repeatedly
until you see this message in the dis-
play:
Clock, hours
.
The selection marker is on the hour set-
ting.
�
Press
æ
or
ç
to set the hour.
�
Press the reset knob in the instrument
cluster to confirm.
The hour is set and stored.
Function
Page
Set time (hours)
128
Set time (minutes)
129
Page 129 of 394
129 Controls in detail
Control system
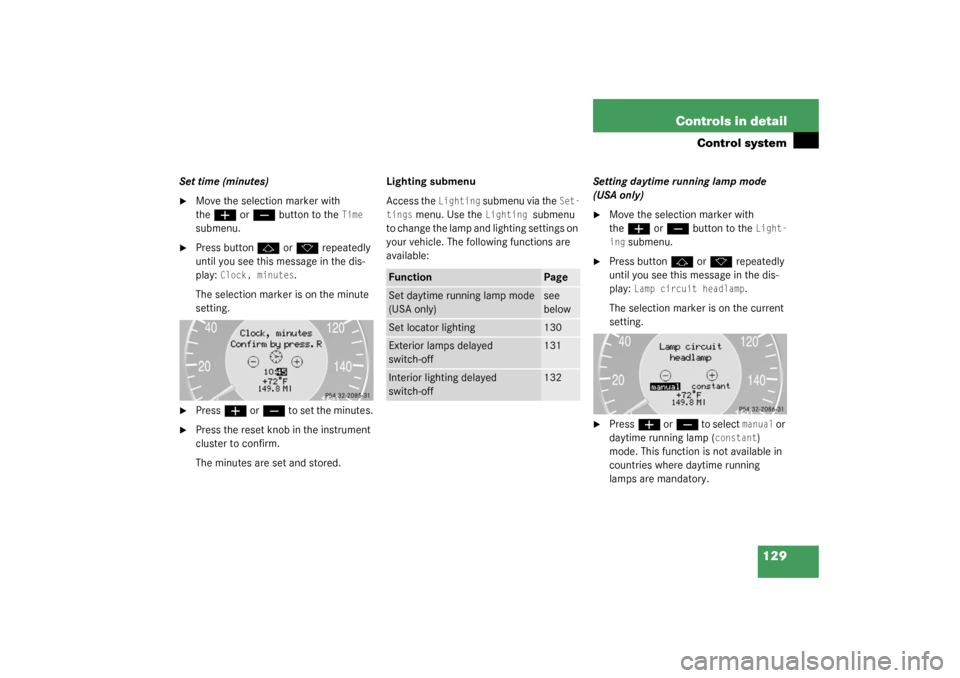
Set time (minutes)�
Move the selection marker with
the
æ
or
ç
button to the
Time
submenu.
�
Press button
j
or
k
repeatedly
until you see this message in the dis-
play:
Clock, minutes
.
The selection marker is on the minute
setting.
�
Press
æ
or
ç
to set the minutes.
�
Press the reset knob in the instrument
cluster to confirm.
The minutes are set and stored.Lighting submenu
Access the
Lighting
submenu via the
Set-
tings
menu. Use the
Lighting
submenu
to change the lamp and lighting settings on
your vehicle. The following functions are
available:Setting daytime running lamp mode
(USA only)
�
Move the selection marker with
the
æ
or
ç
button to the
Light-
ing
submenu.
�
Press button
j
or
k
repeatedly
until you see this message in the dis-
play:
Lamp circuit headlamp
.
The selection marker is on the current
setting.
�
Press
æ
or
ç
to select
manual
or
daytime running lamp (
constant
)
mode. This function is not available in
countries where daytime running
lamps are mandatory.
Function
Page
Set daytime running lamp mode
(USA only)
see
below
Set locator lighting
130
Exterior lamps delayed
switch-off
131
Interior lighting delayed
switch-off
132
Page 307 of 394
307 Practical hints
Where will I find...?
�
Turn the crank handle clockwise until it
engages (operational position).
Before storing the vehicle jack in its com-
partment:
�
It should be fully collapsed
�
The handle must be folded in (storage
position)
Minispare wheel
The Minispare wheel is located in the com-
partment underneath the trunk floor.
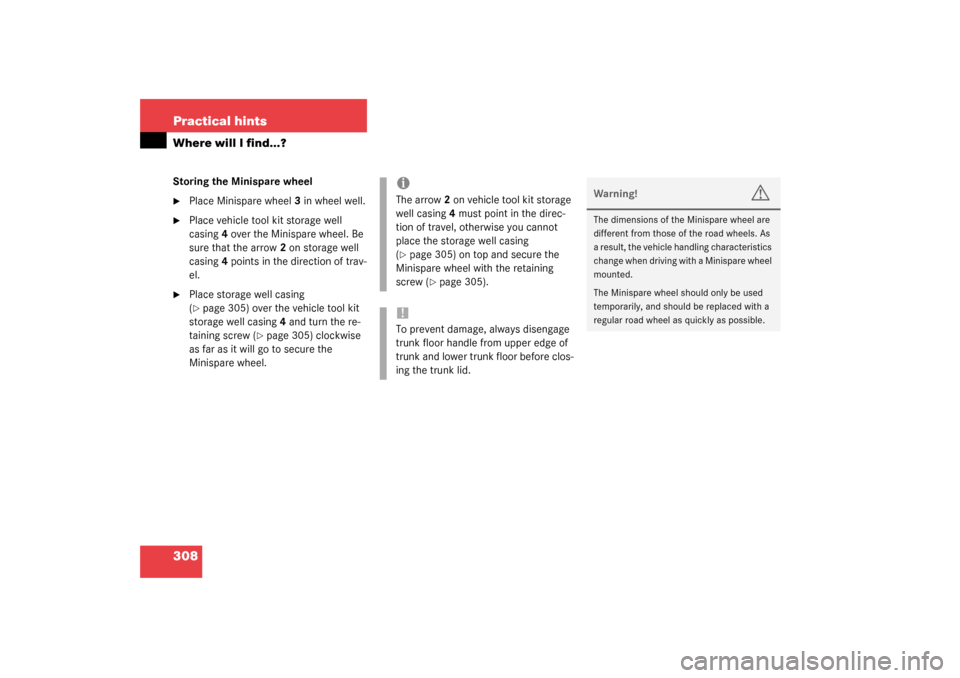
1Vehicle tool kit
Wheel wrench
Jack
2Arrow
3Minispare wheel
4Vehicle tool kit storage well casingRemoving the Minispare wheel
�
Lift trunk floor cover and engage trunk
floor handle in upper edge of trunk.
�
Loosen the retaining screw
(�page 305) in the middle of storage
well casing. Remove the storage well
casing.
�
Remove vehicle tool kit storage well
casing4.
�
Remove Minispare wheel3.
Page 308 of 394
308 Practical hintsWhere will I find...?Storing the Minispare wheel�
Place Minispare wheel3 in wheel well.
�
Place vehicle tool kit storage well
casing4 over the Minispare wheel. Be
sure that the arrow 2 on storage well
casing4 points in the direction of trav-
el.
�
Place storage well casing
(�page 305) over the vehicle tool kit
storage well casing 4 and turn the re-
taining screw (
�page 305) clockwise
as far as it will go to secure the
Minispare wheel.
iThe arrow 2 on vehicle tool kit storage
well casing4 must point in the direc-
tion of travel, otherwise you cannot
place the storage well casing
(�page 305) on top and secure the
Minispare wheel with the retaining
screw (
�page 305).
!To prevent damage, always disengage
trunk floor handle from upper edge of
trunk and lower trunk floor before clos-
ing the trunk lid.
Warning!
G
The dimensions of the Minispare wheel are
different from those of the road wheels. As
a result, the vehicle handling characteristics
change when driving with a Minispare wheel
mounted.
The Minispare wheel should only be used
temporarily, and should be replaced with a
regular road wheel as quickly as possible.
Page 311 of 394
311 Practical hints
Unlocking/locking in an emergency
Unlocking the trunk
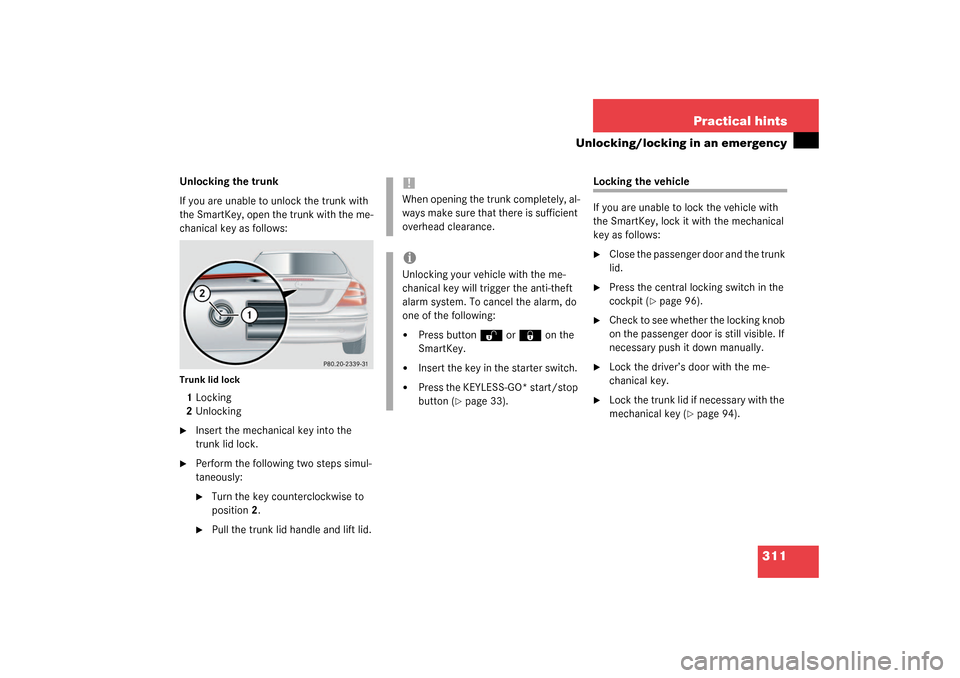
If you are unable to unlock the trunk with
the SmartKey, open the trunk with the me-
chanical key as follows:Trunk lid lock1Locking
2Unlocking�
Insert the mechanical key into the
trunk lid lock.
�
Perform the following two steps simul-
taneously:�
Turn the key counterclockwise to
position2.
�
Pull the trunk lid handle and lift lid.
Locking the vehicle
If you are unable to lock the vehicle with
the SmartKey, lock it with the mechanical
key as follows:�
Close the passenger door and the trunk
lid.
�
Press the central locking switch in the
cockpit (
�page 96).
�
Check to see whether the locking knob
on the passenger door is still visible. If
necessary push it down manually.
�
Lock the driver’s door with the me-
chanical key.
�
Lock the trunk lid if necessary with the
mechanical key (
�page 94).
!When opening the trunk completely, al-
ways make sure that there is sufficient
overhead clearance.iUnlocking your vehicle with the me-
chanical key will trigger the anti-theft
alarm system. To cancel the alarm, do
one of the following:�
Press button
Œ
or
‹
on the
SmartKey.
�
Insert the key in the starter switch.
�
Press the KEYLESS-GO* start/stop
button (
�page 33).