Page 171 of 394

171 Controls in detail
Audio system
�
SP: The tone level is set for
“Speech”, optimizing the sound for
spoken language.
�
AMB
: The tone level is set for “Ambi-
ence”, producing a three-dimen-
sional sound.
�
OFF
: The audio system sound selec-
tion is turned off.
Telephone* muting
If a telephone has been installed in the ve-
hicle, the radio will switch to telephone
mode when a call is received. The current
audio source is muted.
Radio mode
Selecting radio mode�
Press the
b
button.
Selecting the band
You can select from among FM, AM or WB
frequency bands.
FM frequency band:
FM (ultra-short wave) 87.9......107.9 MHz
AM frequency bands:
MW (medium wave) 530......1710 KHz
WB (long wave) approx. 162 KHzSelecting FM band
�
Press the
FM function button.
FM appears in the upper right-hand cor-
ner of the display.
Selecting AM band
�
Press the
AM function button.
AM appears in the upper right-hand cor-
ner of the display.
Selecting a station
The following options are available for se-
lecting a station:
�
Direct frequency band input
�
Manual tuning
�
Automatic seek tuning
�
Scan tuning
�
Station buttons
�
Automatic station memory (Autostore)
Page 172 of 394
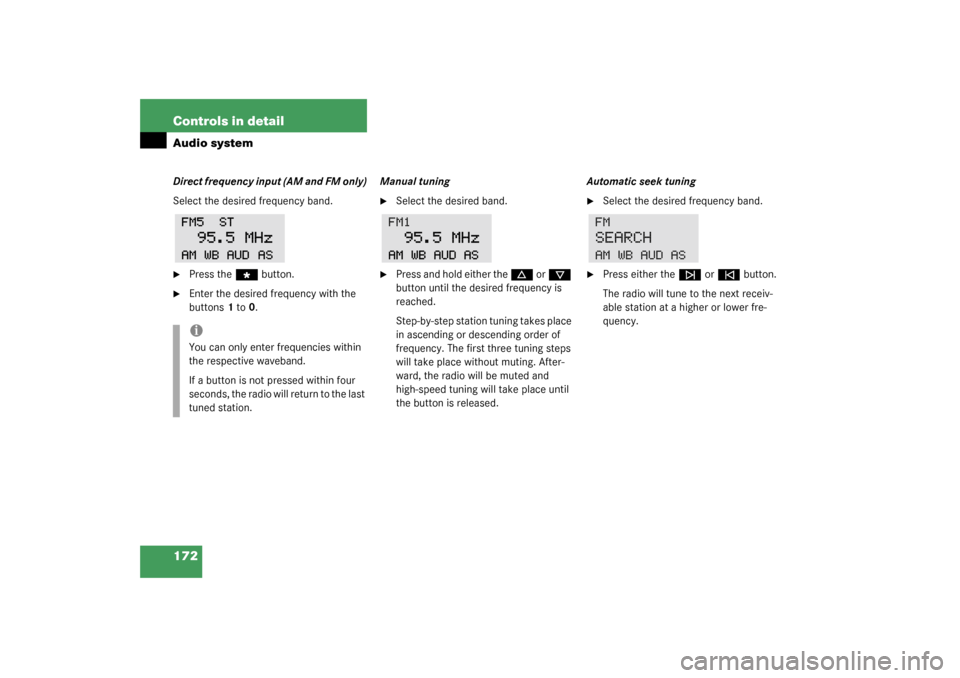
172 Controls in detailAudio systemDirect frequency input (AM and FM only)
Select the desired frequency band.�
Press the
“
button.
�
Enter the desired frequency with the
buttons 1 to 0.Manual tuning
�
Select the desired band.
�
Press and hold either the
d
or
c
button until the desired frequency is
reached.
Step-by-step station tuning takes place
in ascending or descending order of
frequency. The first three tuning steps
will take place without muting. After-
ward, the radio will be muted and
high-speed tuning will take place until
the button is released.Automatic seek tuning
�
Select the desired frequency band.
�
Press either the
f
or
e
button.
The radio will tune to the next receiv-
able station at a higher or lower fre-
quency.
iYou can only enter frequencies within
the respective waveband.
If a button is not pressed within four
seconds, the radio will return to the last
tuned station.
Page 173 of 394

173 Controls in detail
Audio system
Scan tuning�
Starting scan tuning�
Select the desired frequency band.
�
Press the
2
button.
SC will appear on the display. The
radio briefly tunes into all receiv-
able stations on the band selected.
The first scan will tune only the sta-
tions with a strong signal. The sec-
ond scan will tune every receivable
station.
�
Ending scan tuning�
Press the
2
button or the
d
,
c
, f
or
e
button.
SC disappears from the display.Station memory
You can store 10 AM and 10 FM stations.
�
Storing stations�
Tune in the desired station.
�
Press and hold the desired station
button 1 to 0 until a brief signal
tone is heard.
The frequency is stored on the se-
lected station button.
�
Retrieving a station from memory�
Press the desired station button 1
to 0.
Storing stations automatically
(Autostore)
The Autostore memory function provides
an additional memory level. The station
m e m o r y f o r m a n u a l l y s t o r e d s t a t i o n s i s n o t
erased.
�
Calling up the Autostore memory level�
Briefly press the
AS key.
AS appears on the display in in-
versed-color format.
The radio finds the 10 stations with
the strongest signals. These sta-
tions are stored on the station but-
tons 1 to 0 in the order of signal
strength.
�
Retrieving a station from memory�
Press the desired station button 1
to 0.
�
Leaving the Autostore memory level�
Press the
AS key.
AS appears on the display in in-
versed-color format.
Page 174 of 394

174 Controls in detailAudio systemWeather band�
Press the
WB key.
The last weather band station is tuned
in.
�
Select the desired weather band sta-
tion with buttons 1 to 7.
If a station cannot be tuned in, a scan
is automatically started.
�
Press the
f
or
e
button. The
next receivable weather band station is
tuned in.
Cassette mode
Playing cassettes�
Press the
3
button.
The display folds down and the cas-
sette slot becomes visible.
�
Press the cassette into the slot until it
engages and tap it gently.
The cassette will be pulled in automati-
cally. The system switches to cassette
mode (
TAPE
). Track 1 will be played and
SIDE 1
appears in the display. Track 1
is the side of the cassette which is fac-
ing upward. The cassette deck will au-
tomatically detect the type of tape.
�
Fold the display back up and press gen-
tly on the display frame to lock in place.
or
�
If a cassette is already in the mecha-
nism, press the
j
button.
Track selection
�
Press the
TRK
key.
Upon selection of the track, the display
shows
SIDE 1
or
SIDE 2
corresponding-
ly.
�
You can switch track sides at any time.
The track side will be changed auto-
matically at the end of the tape.
iDo not press directly on the display
face.
iA warning signal will sound after
20 seconds if the display is left in the
down position. If the display is not
closed, a warning signal will sound and
the radio will be muted.
Page 175 of 394
175 Controls in detail
Audio system
Cassette eject�
Press the eject button
3
.
The display will fold down and the cas-
sette will be ejected. The system will
switch back to radio mode
automatically.
�
Fold the display back up.Track search
Track search forward
�
Press the
f
button.
SEEK FWD
will appear in the display. The
track search will run the tape forward
to the start of the next track and switch
to play.Track search backward
�
Press the
e
button.
SEEK RWD
will appear on the display.
The track search will run the tape back-
ward to the start of the track currently
playing and switch to play.
Stopping track search
�
Press the
d
, c
, f
or
e
button.
The cassette will switch over to Play.
iThe cassette will not be ejected when
the system is switched off or switched
to another operating mode.
iThe cassette will not be ejected when
the system is switched off or switched
to another operating mode.
Page 178 of 394

178 Controls in detailAudio systemCD changer* operating mode
General notes
Should excessively high temperatures oc-
cur while in CD mode,
CD TEMP HIGH
will
appear on the display and muting will take
pl ace . The uni t wil l then s witch ba ck to the
last operating mode used until the temper-
ature has decreased to a safe operating
level.
Should excessively low temperatures oc-
cur while in CD mode,
CD TEMP LOW
will ap-
pear on the display, but the CD will
continue to play.
Handle CDs carefully to prevent interfer-
ence during playback. Avoid fingerprints
and dust on CDs. Do not write on CDs or
apply any label or other material to them.
Only use original CDs. Using copied CDs
may create problems during playback.Clean CDs from time to time with a com-
mercially available cleaning cloth. No sol-
vents, anti-static sprays, etc. should be
used for cleaning. Replace the CD in its
case after use. Protect CDs from heat and
direct sunlight.
Only use CDs, which bear the label shown
and that conform to the compact disc dig-
ital audio standard (IEC 60908).
Use of CDs which do not meet this stan-
dard may cause damage to the CD chang-
er. Do not play single-CDs (80 mm) with an
adapter.Operational readiness of CD changer
If a CD changer has been installed in the
system, it can be operated from the front
control panel of the radio. A loaded maga-
zine must be installed for CD playing.
Loading/unloading the CD magazine
�
Slide the changer door to the right and
press the eject button
3
.
�
The magazine will be ejected.Warning!
G
The CD changer* is a Class 1 laser product.
There is a danger of invisible laser radiation
if the cover is opened or damaged.
Do not remove the cover. The CD changer*
does not contain any parts which can be ser-
viced by the user. For safety reasons, have
any service work which may be necessary
performed only by qualified personnel.
��
Page 182 of 394

182 Controls in detailAudio systemTelephone* operation
Various car telephone functions and oper-
ating steps for the car telephone can be
performed and displayed via the audio sys-
tem.
Further operating instructions not covered
here can be found in the operating instruc-
tions for the multifunction steering wheel,
voice control system* and car telephone.
Switching on the telephone�
Press the
h
button.
�
If you have programmed an unlock
code for the telephone, you must input
the code now.
�
Press the
OK key.
The telephone is unlocked. If you enter
the wrong code, you must re-enter the
correct code.Switching off the telephone
�
Press the
h
button repeatedly until
PHONE OFF
appears in the display.
The receiving symbol in the display dis-
appears.
Adjusting the volume
�
Turn control knob
a
during tele-
phone operation.
The volume increases or decreases de-
pending on the direction in which the
knob is turned.Placing a call
Entering a telephone number and start-
ing the dialing process
�
Enter the desired telephone number
using buttons 1 to 0.
The number can have up to 32 digits,
but only 17 of these are visible on the
display.
�
If necessary, correct the number en-
tered with the
CLR
key. Press the key
briefly to delete the last digit entered,
press the key and hold to delete the
complete number.
�
After the correct telephone number
has been entered, press the
SND
key.
iThe volume can be adjusted separately
for the telephone, voice control sys-
tem* and radio.
Page 186 of 394

186 Controls in detailAudio systemAccepting an incoming call
Accepting an incoming call in telephone
mode
With an incoming call, a ringing tone can
be heard and the caller’s telephone num-
ber, or the name under which this tele-
phone number has been saved in the
telephone book, appear on the display. If
the caller’s number is not transmitted, CALL
will appear in the display.
�
Press the
SND
key to accept the call.Accepting an incoming call in cassette,
CD or radio mode
If the telephone is activated in the back-
ground (receiving symbol
S visible on dis-
play), the audio source is muted when a
call is received. The ringing tone is heard
and the caller’s telephone number or the
name under which this telephone number
has been saved in the telephone book ap-
pear on the display. If the caller’s number
is not transmitted,
CALL
appears in the dis-
play.
�
Press the
SND
key to accept the call.
Muting a call
It is possible to silence a call, the caller is
then no longer able to hear you.
Muting
�
Press the
MUT
key.
Unmuting
�
Press the
MUT
key again.Terminating a call
�
Press the
END
key.
�
The current call is disconnected.
Call waiting
If you receive another call during an al-
ready active call, you can accept the sec-
ond call and switch between the two.
Accepting a second call
�
Press the
SND
key.
You are connected with the second
caller, the first call is muted.
Switching between the calls
�
Press the
SND
key again.
Terminating the second call
�
Press the
END
key.
The current call will be terminated. You
are connected with the muted call
again.