Page 125 of 394
125 Controls in detail
Control system
The table below shows what settings can
be changed within the various menus. De-
tailed instructions on making individual
settings can be found on the following pag-
es.INSTRUMENT CLUSTER
TIME
LIGHTING
VEHICLE
CONVENIENCE
Select temperature dis-
play mode
Set time (hours)
Set daytime running lamp
mode (USA only)
Set station selection
mode (radio)
Activate easy-entry/exit
feature
Select speedometer dis-
play mode
Set time (minutes)
Set locator lighting
Set automatic locking
Set key dependency
Select language
Exterior lamps delayed
shut-off
Set parking position for
exterior rear view mirror
Select display (speed dis-
play or outside tempera-
ture) for status display
Interior lighting delayed
shut-off
Select display (speed dis-
play or outside tempera-
ture) for standard display
Page 132 of 394

132 Controls in detailControl systemInterior lighting delayed shut-off
Use this function to set whether and for
how long you would like the interior light-
ing to remain lit during darkness after the
key is removed from the starter switch.�
Move the selection marker with
the
æ
or
ç
button to the
Light-
ing
submenu.
�
Press button
j
or
k
repeatedly
until you see this message in the dis-
play:
Interior lamp delayed
shut-off
.
The selection marker is on the current
setting.
�
Press
æ
or
ç
to select the de-
sired lamp-on time period. You can se-
lect:
�
0 s
, the delayed shut-off feature is
deactivated.
�
5 s
, 10 s
, 15 s
or
20 s
, the delayed
shut-off feature is activated.
Vehicle submenu
Access the
Vehicle
submenu via the
Set-
tings
menu. Use the
Vehicle
submenu to
make general vehicle settings. The follow-
ing functions are available:Setting station selection mode
Use the
Audio Search function
to select
the manual or memory station selection
mode for the radio (
�page 120).
�
Move the selection marker with
the
æ
or
ç
button to the
Vehi-
cle
submenu.
�
Press button
j
or
k
repeatedly
until you see this message in the dis-
play:
Audio Search function
.
The selection marker is on the current
setting.
Function
Page
Set station selection mode
(radio)
see
below
Set automatic locking
see
below
Page 138 of 394

138 Controls in detailControl systemTEL menu*
You can use the functions in the
Tel
menu
to operate your telephone, provided it is
connected to a hands-free system and
switched on.
�
Switch on the telephone and Audio or
COMAND*.
�
Press button
ÿ
or
è
on the
steering wheel repeatedly until you see
the
Tel
menu in the display.Which messages will appear in the display
field depends on whether your telephone is
switched on or off:
�
If the telephone is off, the message in
the multifunction display is:
Tel off
.
�
If the telephone is on:
The telephone will then search for a
network. During this time the display is
empty.
As soon as the telephone has found a
network,
READY
is indicated in the dis-
play.
1Signal strength
This standby message indicates that your
telephone is ready for use and you can op-
erate it using the control system.
Warning!
G
A driver’s attention to the road must always
be his/her primary focus when driving. For
your safety and the safety of others, we rec-
o m m e n d t h a t y o u p u l l o v e r t o a s a f e l o c a t i o n
and stop before placing or taking a tele-
phone call. If you choose to use the tele-
phone while driving, please use the
hands-free device and only use the tele-
phone when weather, road, and traffic con-
ditions permit.
Some jurisdictions prohibit the driver from
using a cellular telephone while driving a ve-
hicle.
Bear in mind that at a speed of just 30 mph
(approximately 50 km/h), your vehicle is
covering a distance of approximately
44 feet (approximately 13.5 m) every sec-
ond.
Never operate radio transmitters equipped
with a built-in or attached antenna (i.e. with-
out being connected to an external antenna)
from inside the vehicle while the engine is
running. Doing so could lead to a malfunc-
tion of the vehicle’s electronic system, pos-
sibly resulting in an accident and ⁄or
personal injury.
Page 165 of 394

165 Controls in detail
Audio system
Audio system
Audio and telephone, operation
These instructions are intended to help
you become acquainted with your
Mercedes-Benz car radio. They contain
useful tips and a detailed description of the
user functions.
Operating safety
Warning!
G
In order to avoid distraction which could
lead to an accident, system settings should
be entered with the vehicle at standstill and
systems should be operated by the driver
only when traffic conditions permit. Always
pay full attention to traffic conditions first
before operating system controls while driv-
ing.
Bear in mind that at a speed of just 30 mph
(approximately 50 km / h), your car is cover-
ing a distance of approximately 44 feet (ap-
proximately 13.5 m) every second.
1
1The right to correct errors and make technical
amendments is reserved.
Warning!
G
Any alternations made to electronic compo-
nents can cause malfunctions.
The radio, cassette deck, CD changer
1 and
telephone* are interconnected. Therefore,
when one of the components is defective or
has not been removed / replaced properly
this may impair the function of other compo-
nents.
These malfunctions might seriously impair
the operating safety of your vehicle.
We recommend that you have any service
work or alternations on electronic compo-
nents done in an authorized Mercedes-Benz
Center.
1Optional equipment
Dolby and the double-D symbol
Ù
are trade-
marks of Dolby Laboratories Licensing Corpora-
tion. The Dolby noise reduction system is
manufactured under licence from Dolby Laborato-
ries Licensing Corporation.
Page 167 of 394
167 Controls in detail
Audio system
Item
Page
1
CD mode selector
178
2
Manual tuning
(radio)
172
Fast forward/reverse
(cassette, CD)
176,
180
Speed dialing memory
(telephone*)
185
3
Radio mode selector
171
4
Display
Item
Page
5
Alpha-numeric keypadBand selection,
station buttons (radio)
171
CD selection (CD)
179
Telephone number entry,
retrieving speed dialing
memory (telephone*)
182
6
Scanning (radio, cas-
sette, CD)
173,
176,
180
7
Function button
172
8
Soft keys
168
Item
Page
9
Cassette eject
175
10
Cassette mode selector
174
11
Telephone* mode selec-
tor
182
12
Seek tuning (radio)
172
Track search (cassette,
CD)
175,
180
Speed dialing memory
(telephone*)
185
13
On /off
168
Volume
168
Page 168 of 394
 and the
function buttons (left side of the radio
face) are")
168 Controls in detailAudio systemButton and soft key operation
In these instructions, the alpha-numeric
keypad (right side of radio face) and the
function buttons (left side of the radio
face) are referred to as “buttons” and the
four keys under the display are referred to
as “soft keys”.Operation
Switching on/off
Switching on:�
Turn the key to position 1 or 2 in the
starter switch.
or
�
Turn control knob
a
.Switching off:
�
Remove the key from the starter
switch.
or
�
Turn control knob
a
.
Adjusting the volume
�
Turn control knob
a
.
The volume will increase or decrease
according to the direction turned.Adjusting audio functions
In radio, cassette and CD mode, press the
AUD key to call up the bass, treble, bal-
ance and fader functions.
Settings for bass and treble are stored sep-
arately for the AM (medium wave, long
wave, short wave) and FM (ultra-short
wave) frequency bands, cassette mode
and CD mode.
iDo not press directly on the radio dis-
play face.
iIf the radio is turned on without the key
in the ignition, it will automatically turn
off again after approx. 30 minutes.
iIf your vehicle was equipped with a
telephone* and voice control system*,
and both are connected to the car ra-
dio, their volume can be adjusted sepa-
rately while the telephone* is being
used or the voice control system* is ac-
tivated.
Page 169 of 394
169 Controls in detail
Audio system
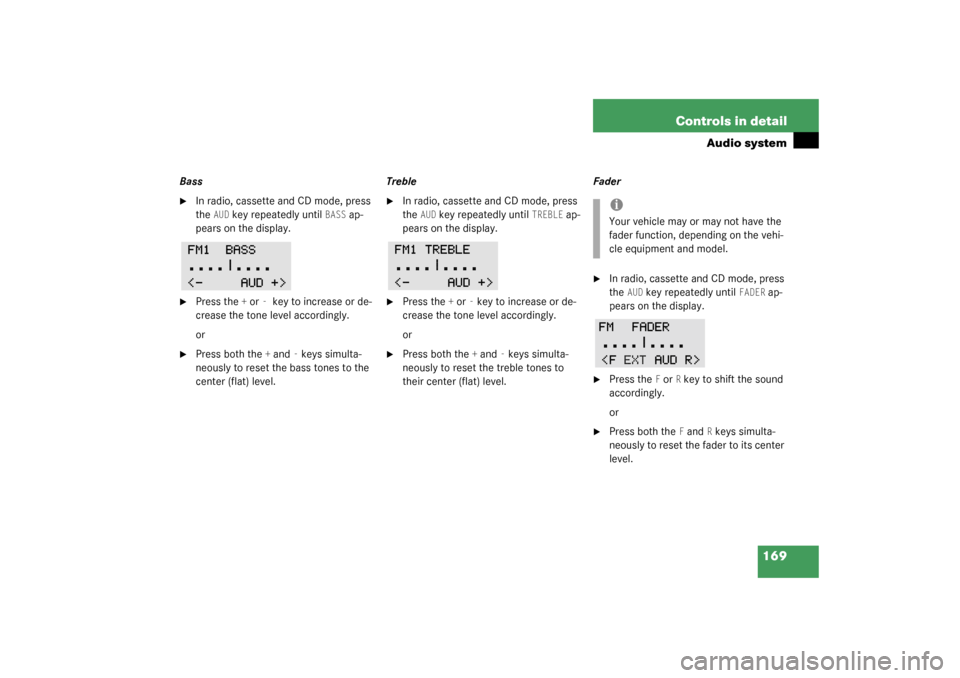
Bass�
In radio, cassette and CD mode, press
the
AUD
key repeatedly until
BASS
ap-
pears on the display.
�
Press the
+ or
- key to increase or de-
crease the tone level accordingly.
or
�
Press both the
+ and
- keys simulta-
neously to reset the bass tones to the
center (flat) level.Treble
�
In radio, cassette and CD mode, press
the
AUD
key repeatedly until
TREBLE
ap-
pears on the display.
�
Press the
+ or
- key to increase or de-
crease the tone level accordingly.
or
�
Press both the
+ and
- keys simulta-
neously to reset the treble tones to
their center (flat) level.Fader
�
In radio, cassette and CD mode, press
the
AUD
key repeatedly until
FADER
ap-
pears on the display.
�
Press the
F or
R key to shift the sound
accordingly.
or
�
Press both the
F and
R keys simulta-
neously to reset the fader to its center
level.
iYour vehicle may or may not have the
fader function, depending on the vehi-
cle equipment and model.
Page 170 of 394
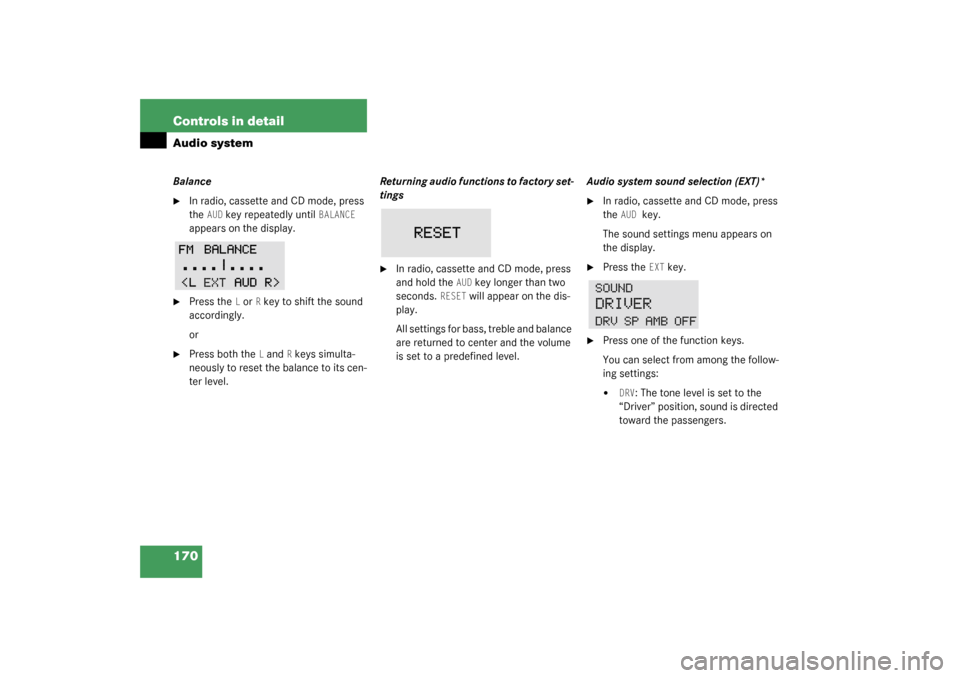
170 Controls in detailAudio systemBalance�
In radio, cassette and CD mode, press
the
AUD
key repeatedly until
BALANCE
appears on the display.
�
Press the
L or
R key to shift the sound
accordingly.
or
�
Press both the
L and
R keys simulta-
neously to reset the balance to its cen-
ter level.Returning audio functions to factory set-
tings
�
In radio, cassette and CD mode, press
and hold the
AUD
key longer than two
seconds.
RESET
will appear on the dis-
play.
All settings for bass, treble and balance
are returned to center and the volume
is set to a predefined level.Audio system sound selection (EXT)*
�
In radio, cassette and CD mode, press
the
AUD
key.
The sound settings menu appears on
the display.
�
Press the
EXT
key.
�
Press one of the function keys.
You can select from among the follow-
ing settings:�
DRV
: The tone level is set to the
“Driver” position, sound is directed
toward the passengers.


172
Fast forward/reverse
(cassette, CD)
176,
180
Speed dialing memory
(telephone*)
185
3
Radio mode selec")