Page 93 of 394
93 Controls in detail
Locking and unlocking
If the trunk lid does not open, it is still
locked separately (
�page 95).
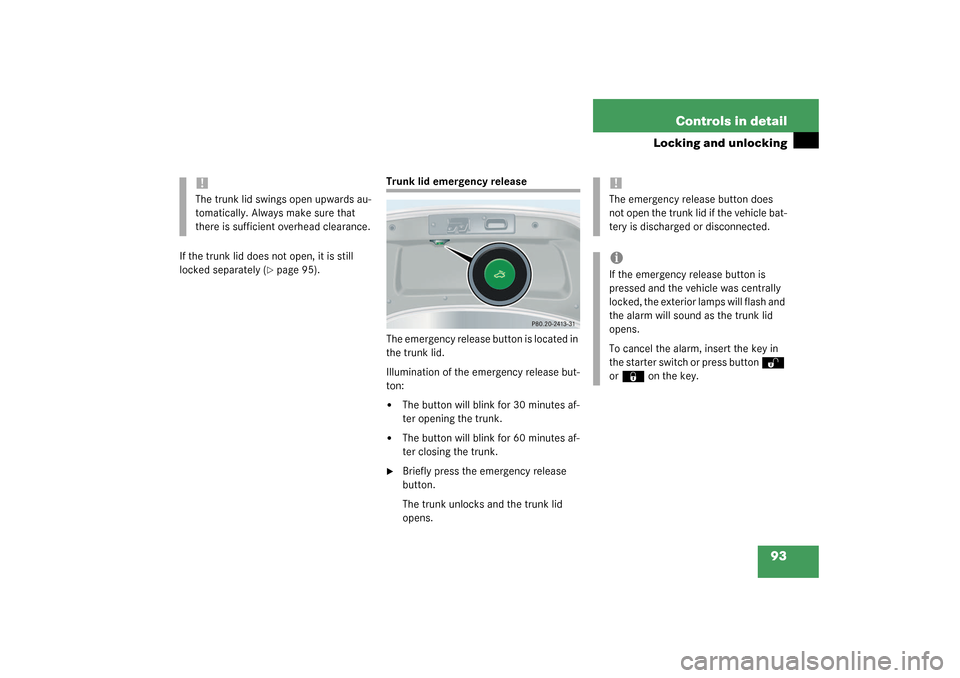
Trunk lid emergency release
The emergency release button is located in
the trunk lid.
Illumination of the emergency release but-
ton:�
The button will blink for 30 minutes af-
ter opening the trunk.
�
The button will blink for 60 minutes af-
ter closing the trunk.
�
Briefly press the emergency release
button.
The trunk unlocks and the trunk lid
opens.
!The trunk lid swings open upwards au-
tomatically. Always make sure that
there is sufficient overhead clearance.
!The emergency release button does
not open the trunk lid if the vehicle bat-
tery is discharged or disconnected.iIf the emergency release button is
pressed and the vehicle was centrally
locked, the exterior lamps will flash and
the alarm will sound as the trunk lid
opens.
To cancel the alarm, insert the key in
the starter switch or press button
Œ
or
‹
on the key.
Page 94 of 394
")
94 Controls in detailLocking and unlockingClosing the trunk lid
1Handle�
Lower trunk lid by pulling firmly on
handle1.
Separately locking the trunk
1Locked
2Unlocked�
Close the trunk lid (
�page 94)
�
Pull the mechanical key out of the
SmartKey (
�page 310).
�
Insert the mechanical key into the
trunk lid lock.
�
Turn the key completely to the right to
position 1.
The trunk remains locked even when the
vehicle is centrally unlocked.
Warning!
G
To prevent possible personal injury, always
keep hands and fingers away from the trunk
lid opening when closing the trunk. Be espe-
cially careful when small children are
around.
Warning!
G
Only drive with the trunk closed as, among
other dangers such as visibility blockage,
exhaust fumes may enter the vehicle interi-
or.iTo prevent an inadvertent lockout, do
not place the key in the trunk.
Vehicles with KEYLESS-GO:
To prevent a possible inadvertent lock-
out, the trunk lid will open automatical-
ly if a SmartKey with KEYLESS-GO* is
recognized in the area of the rear shelf
or inside the trunk.
Page 95 of 394

95 Controls in detail
Locking and unlocking
Separately unlocking the trunk�
Turn the key completely to the left to
position 2.
You can now open the trunk.
Automatic central locking
The doors and the trunk automatically lock
when the ignition is switched on and the
wheels are turning at vehicle speeds of ap-
proximately 9 mph (15 km/h) or more.
You can open a locked door from the in-
side. Open door only when conditions are
safe to do so.You can deactivate the automatic locking
using the control system (
�page 133).
Locking and unlocking from the inside
You can lock or unlock the doors and the
trunk from inside using the central locking
switch. This can be useful, for example, if
you want to lock the vehicle before starting
to drive.
The fuel filler flap cannot be locked or un-
locked with the central locking switch.
iYou can only cancel the separate trunk
locking mode by means of the mechan-
ical key.
iThe doors unlock automatically after an
accident if the force of the impact ex-
ceeds a preset threshold.
The vehicle automatically locks when
the ignition is switched on and the
wheels are turning at vehicle speeds of
approximately 9 mph (15 km/h) or
more. You could therefore lock yourself
out when the vehicle�
is pushed
�
is on a test stand
Warning!
G
When leaving the vehicle, always remove the
key from the starter switch, take the Smart-
Key with KEYLESS-GO* (if so equipped) with
you and lock the vehicle. Do not leave chil-
dren unattended in the vehicle, or with ac-
cess to an unlocked vehicle. Unsupervised
use of vehicle equipment may cause an ac-
cident and/or serious personal injury.
Page 212 of 394
212 Controls in detailLoading
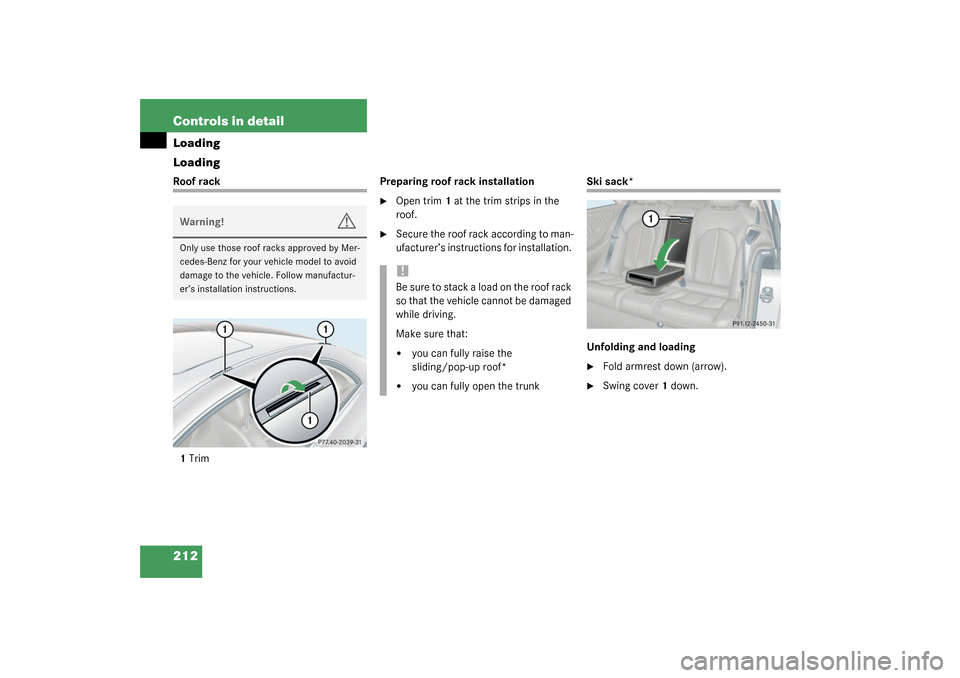
LoadingRoof rack
1TrimPreparing roof rack installation
�
Open trim1 at the trim strips in the
roof.
�
Secure the roof rack according to man-
ufacturer’s instructions for installation.
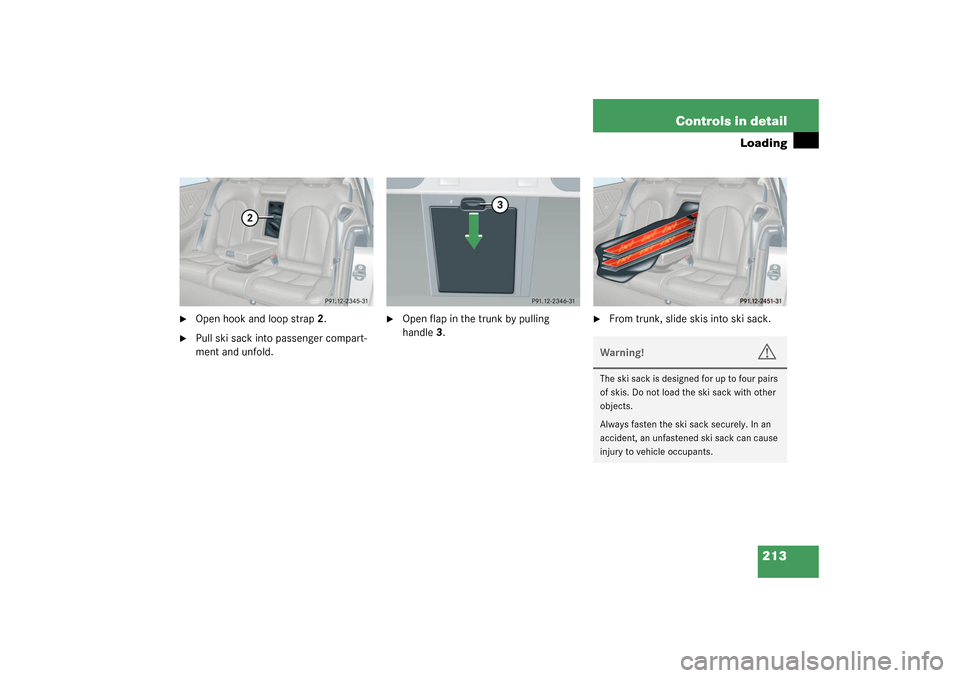
Ski sack*
Unfolding and loading�
Fold armrest down (arrow).
�
Swing cover1 down.
Warning!
G
Only use those roof racks approved by Mer-
cedes-Benz for your vehicle model to avoid
damage to the vehicle. Follow manufactur-
er’s installation instructions.
!Be sure to stack a load on the roof rack
so that the vehicle cannot be damaged
while driving.
Make sure that:�
you can fully raise the
sliding/pop-up roof*
�
you can fully open the trunk
Page 213 of 394
213 Controls in detail
Loading
�
Open hook and loop strap2.
�
Pull ski sack into passenger compart-
ment and unfold.
�
Open flap in the trunk by pulling
handle3.
�
From trunk, slide skis into ski sack.Warning!
G
The ski sack is designed for up to four pairs
of skis. Do not load the ski sack with other
objects.
Always fasten the ski sack securely. In an
accident, an unfastened ski sack can cause
injury to vehicle occupants.
Page 214 of 394
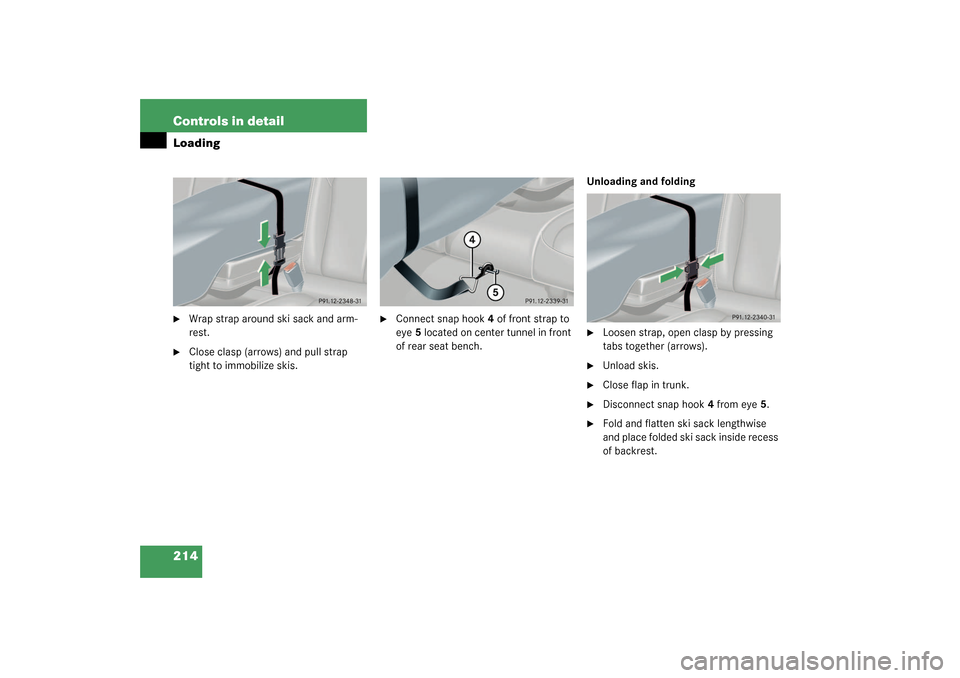
214 Controls in detailLoading�
Wrap strap around ski sack and arm-
rest.
�
Close clasp (arrows) and pull strap
tight to immobilize skis.
�
Connect snap hook4 of front strap to
eye5 located on center tunnel in front
of rear seat bench.Unloading and folding
�
Loosen strap, open clasp by pressing
tabs together (arrows).
�
Unload skis.
�
Close flap in trunk.
�
Disconnect snap hook4 from eye5.
�
Fold and flatten ski sack lengthwise
and place folded ski sack inside recess
of backrest.
Page 215 of 394

215 Controls in detail
Loading
�
Close ski sack compartment cover.Removal of ski sack
For removal of the ski sack we recommend
that you contact an authorized
Mercedes-Benz Center.
Split rear bench seat
To expand the trunk, you can fold down the
left and right rear seat backrests.
The two sections can be folded down sep-
arately to enlarge the trunk.
Warning!
G
Never drive vehicle with trunk open while
the ski sack is removed. Deadly carbon
monoxide (CO) gases may enter vehicle in-
terior, resulting in unconsciousness and
death.iTo prevent unauthorized persons from
access to the trunk, always close the
cover.
Warning!
G
When expanding the luggage compartment,
always fold the seat cushions fully forward.
Unless you are transporting cargo, the back-
rests must remain properly locked in the up-
right position.
In an accident, during hard braking or sud-
den maneuvers, loose items will be thrown
around inside the vehicle, and cause injury
to vehicle occupants unless the items are
securely fastened in the vehicle.
Always use the cargo tie down rings
(�page 218).
Page 216 of 394
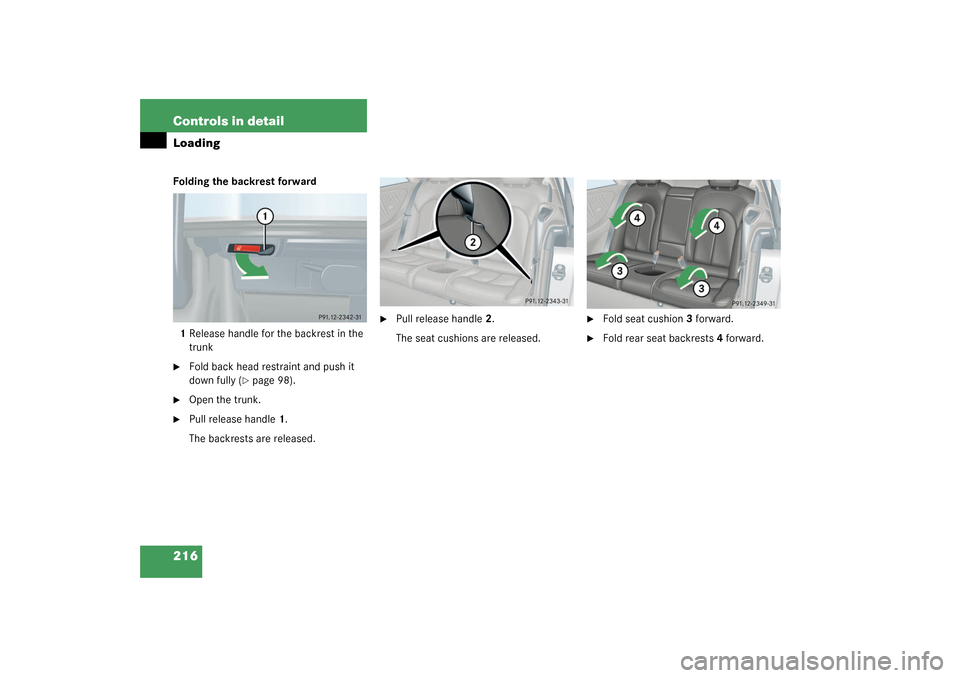
216 Controls in detailLoadingFolding the backrest forward
1Release handle for the backrest in the
trunk�
Fold back head restraint and push it
down fully (
�page 98).
�
Open the trunk.
�
Pull release handle1.
The backrests are released.
�
Pull release handle2.
The seat cushions are released.
�
Fold seat cushion3 forward.
�
Fold rear seat backrests 4 forward.