Page 98 of 384

98 Controls in detailSeats�
Press switch1.
The rear head restraints will fold back-
ward.
Placing rear head restraints upright
�
Pull the rear head restraint upright until
it locks into position.Head restraint tilt
The rear head restraint angle can be ad-
justed manually.
Power head restraints, rear*
You can fold the rear head restraints back-
ward or upright using the head restraint
folding switch. The switch is located:
�
on the front center console:�
Make sure the ignition is switched
on.
All the lamps in the instrument clus-
ter should light up
�
Press switch1 briefly.
The rear head restraints will fold
backward.
�
Press switch1 and hold.
The rear head restraints will fold up-
right.
�
on the rear center console:�
Make sure the ignition is switched
on.
All the lamps in the instrument clus-
ter should light up
�
Push upper half1 of switch.
The rear head restraints will fold up-
right.
�
Push lower half2 of switch.
The rear head restraints will fold
down.
!Make sure that the head restraints en-
gage when adjusting them manually.
Otherwise, their protective function
cannot be assured.
Page 113 of 384

113 Controls in detail
Lighting
Manual control
Switching lamps on�
Press the
ð
symbol on rocker
switch 4.
The front interior lighting switches on.
Switching lamps off
�
Press the
ñ
symbol on rocker
switch 4.
The interior lighting switches off. The
automatic control function is switched
on.
Switching rear interior lights on
�
Press switch2.
The rear compartment lighting is
switched on.Switching rear interior lights off
�
Press switch2.
The rear compartment lighting is
switched off.
Front reading lamps
Switching on
�
Press switch 1 or 3.
The corresponding reading lamp is
switched on.
Switching off
�
Press switch 1 or 3.
The corresponding reading lamp is
switched off.
Courtesy lighting
For better orientation in the dark, courtesy
lamps will illuminate the interior of your ve-
hicle as follows:
With parking lamps switched on:�
the door entry lamps
�
the driver and passenger footwells
With key in starter switch position1:
�
the door entry lamps
�
the center consoleiIf you turn the key in the starter switch
to position0 and switch off the exterior
headlamps, the door entry lamps will
remain lit for approximately five min-
utes.
Page 156 of 384
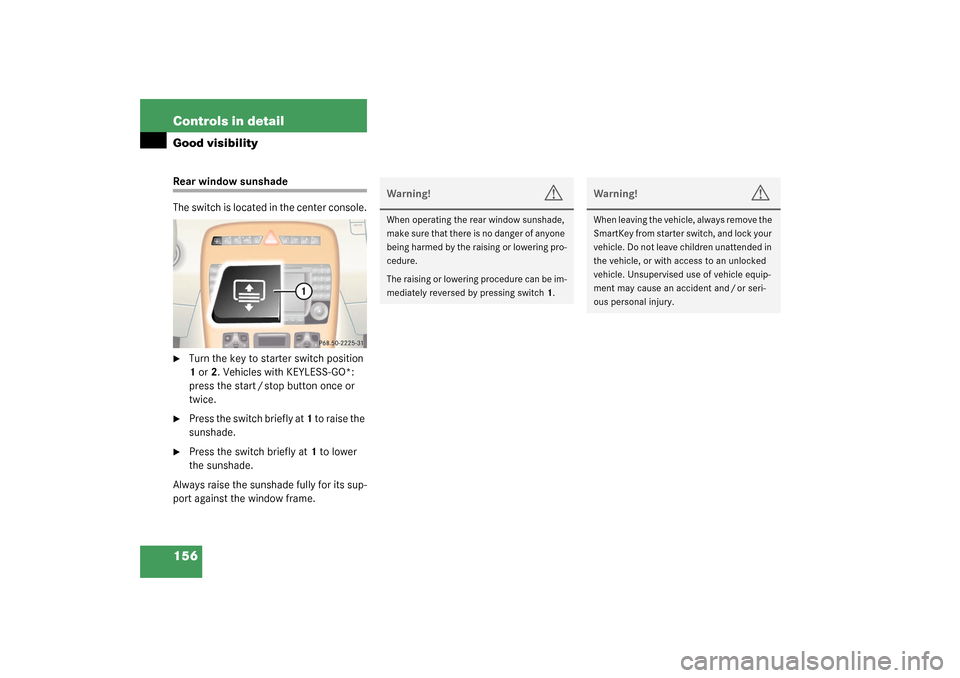
156 Controls in detailGood visibilityRear window sunshade
The switch is located in the center console.�
Turn the key to starter switch position
1 or 2. Vehicles with KEYLESS-GO*:
press the start / stop button once or
twice.
�
Press the switch briefly at 1 to raise the
sunshade.
�
Press the switch briefly at 1 to lower
the sunshade.
Always raise the sunshade fully for its sup-
port against the window frame.
Warning!
G
When operating the rear window sunshade,
ma ke s ur e th at t h ere is no dan ge r o f an y on e
being harmed by the raising or lowering pro-
cedure.
The raising or lowering procedure can be im-
mediately reversed by pressing switch1.
Warning!
G
When leaving the vehicle, always remove the
SmartKey from starter switch, and lock your
vehicle. Do not leave children unattended in
the vehicle, or with access to an unlocked
vehicle. Unsupervised use of vehicle equip-
ment may cause an accident and / or seri-
ous personal injury.
Page 169 of 384

169 Controls in detail
Power windows
Power windows
Opening and closing the windows
The side windows can be opened and
closed electrically. The switches for all the
side windows are on the driver’s door. The
switches for the respective windows are
on the passenger door and on the rear cen-
ter console.
1Left front window
2Right front window
3Right rear window
4Left rear windowAdditional switches for the rear windows
are located on the rear center console.
1Left rear window
2Right rear window
Warning!
G
When closing the windows, make sure that
there is no danger of anyone being harmed
by the closing procedure.
The closing of the door windows can be im-
mediately halted by releasing the switch or,
if switch was pressed past the resistance
point and released, by pressing the respec-
tive switch.
If the window encounters an obstruction
t h a t b l o c k s i t s p a t h i n a c i r c u m s t a n c e w h e r e
you pressed the switch past the resistance
point and released it to close the window,
the automatic reversal function will stop the
window and open it slightly.
If the window encounters an obstruction
t h a t b l o c k s i t s p a t h i n a c i r c u m s t a n c e w h e r e
you are closing the window by pressing and
holding the switch, by pressing and holding
button
‹
on the SmartKey, or by press-
ing and holding the lock button
(vehicles with KEYLESS-GO*) on the door
handle, the automatic reversal function will
not operate.
When leaving the vehicle, always remove the
key from starter switch, take the SmartKey
with KEYLESS-GO* with you, and lock your
vehicle. Do not leave children unattended in
the vehicle, or with access to an unlocked
vehicle. Unsupervised use of vehicle equip-
ment can cause an accident and/or serious
personal injury.
Page 186 of 384
.")
186 Controls in detailDriving systemsDeactivating Distronic
There are several ways to deactivate the
Distronic system:�
Briefly tip the cruise control lever in the
direction of arrow3 (
�page 183).
or
�
Step on the brake pedal.
Distronic will be deactivated. The last
speed set will be stored into memory.Distronic deactivates automatically when:
�
You set the parking brake.
�
You drive slower than 25 mph
(40 km/h).
�
The ESP is active (
�page 73) or you
deactivate the ESP.
�
You move the transmission selector le-
ver into positionN.
A signal will sound. The
DISTRONIC OFF
message appears in the multifunction
display for approximately five seconds.Setting the following distance in
Distronic
You can set the specified following dis-
tance for Distronic by varying the time set-
ting between 1.0 and 2.0 seconds. Using
this time setting and the current speed of
your vehicle, Distronic calculates and sets
the required following distance to the vehi-
cle ahead. The set distance will be shown
in the multifunction display field.
The thumbwheel for making the time set-
ting is located on the lower section of the
center console.
iThe following message will appear in
the multifunction display for approxi-
mately five seconds:
DISTRONIC OFF
.
The last stored speed is deleted when
you turn off the engine.
Warning!
G
Distronic switches off and releases the
brakes when the vehicle decelerates below
the minimum speed of approx. 25 mph
(40 km/h) by operation of the system. At
that time the driver must apply the brakes in
order to reduce vehicle speed further or
bring it to a stop.
Warning!
G
It is up to the driver to exercise discretion to
select the appropriate setting given road
conditions, traffic, driver’s preferred driving
style and applicable laws and driving recom-
mendations for safe following distance.
Page 196 of 384

196 Controls in detailDriving systemsThe position of the gear selector lever de-
termines which warning indicators will be
activated.
As your vehicle approaches an object, one
or more segments will light up, depending
on the distance between your vehicle and
the object. When the eighth segment lights
up, you have reached the minimum dis-
tance.�
Front area: An intermittent acoustic
warning will sound as the first red seg-
ment lights up and a constant acoustic
warning, both lasting a maximum of
three seconds, will sound for the eighth
segment, i.e. the second red segment.
The signal is canceled when the gear
selector lever is placed in position P.
�
Rear area: An intermittent acoustic
warning will sound as the first red seg-
ment lights up and a constant acoustic
warning, both lasting a maximum of
three seconds, will sound for the eighth
segment, i.e. the second red segment.
The signal is canceled when the gear
selector lever is placed in position D
orP.
Switching the Parktronic system
on / off
You can switch off the Parktronic system
manually.The Parktronic switch is located in the up-
per section of the center console.
1Parktronic on / off
2Indicator lamp
Switching off the Parktronic system
�
Press switch 1.
Indicator lamp 2 comes on.
Switching on the Parktronic system
�
Press switch 1 again.
Indicator lamp 2 goes out.
Selector lever
position
Warning indicator
D
Front area activated
R or N
Rear and front area
activated
P
Neither activated
Page 206 of 384
.�
Hang the parc")
206 Controls in detailUseful featuresParcel net in trunk
You can hang a parcel net in the trunk. The
hooks and the parcel net in the trunk can
hold a load of up to 29.8 lbs (13.5 kg).�
Hang the parcel net on hooks1 on the
left and right sides of the trunk.
Ashtrays
Center console ashtray
Opening ashtray�
Briefly touch cover plate.
The ashtray opens automatically.Removing ashtray insert
�
Prevent vehicle from moving by setting
the parking brake. Move the selector
lever to positionN.
Now you have more room to remove
the insert.
�
Push sliding button1 to the right.
The ashtray is disengaged and slides
out a short way out.
�
Remove insert from ashtray frame.
Reinstalling the ashtray insert
�
Install insert by pushing back into
frame until it engages again.
!The parcel net cannot protect or suffi-
ciently secure goods in the event of an
accident.
Warning!
G
Remove front ashtray only with vehicle
standing still. Set the parking brake to se-
cure vehicle from movement. Move gear se-
lector lever to positionN. With gear selector
lever in positionN, turn off the engine.
Page 269 of 384
269 Practical hints
What to do if …?
Lamp in center consoleProblem
Possible cause
Suggested solution
The PASSENGER AIRBAG OFF indicator
lamp lights up.
A BabySmart
TM child seat is installed on the
front passenger seat. Therefore the front
passenger airbag is switched off.
The system is malfunctioning if there is no
BabySmart
TM child seat installed on the front
passenger seat.
�
Have the system checked as soon as
possible by an authorized
Mercedes-Benz Center.
The PASSENGER AIRBAG OFF indicator
lamp does not light up with a BabySmart
TM
child seat properly installed on the front
passenger seat.The system is malfunctioning.
�
Make sure that there is nothing be-
tween seat cushion and child seat and
check installation of the child seat.
�
If the light remains out, have the sys-
tem checked as soon as possible by
an authorized Mercedes-Benz Center.
Do not use the BabySmart
TM restraint
to transport children on the front pas-
senger seat until the system has been
repaired.