Page 298 of 384

298 Practical hintsUnlocking/locking in an emergencyUnlocking the trunk
If you are unable to unlock the trunk with
the SmartKey, open the trunk with the me-
chanical key as follows:Trunk lock�
Insert the mechanical key into the
trunk lid lock.
�
Turn the key counterclockwise to
position1.
�
Press trunk lid lock2.
The trunk lid swings open.
Locking the vehicle
If you are unable to lock the vehicle with
the SmartKey, lock it with the mechanical
key as follows:�
Close the passenger door and the trunk
lid.
�
Press the central locking switch in the
center console (
�page 95).
�
Check to see whether the locking knob
on the passenger door is still visible. If
necessary push it down manually.
�
Lock the driver’s door with the me-
chanical key.
�
Lock the trunk lid if necessary with the
mechanical key (
�page 90).
!The trunk lid swings open automatical-
ly. Always make sure that there is suffi-
cient overhead clearance. A minimum
height clearance of 6.1 ft (1.90 m) is re-
quired to open the trunk lid. iUnlocking your vehicle with the me-
chanical key will trigger the anti-theft
alarm system. To cancel the alarm, do
one of the following:�
Press button
Œ
or
‹
on the
SmartKey.
�
Insert the key in the starter switch.
�
If KEYLESS-GO* card present,
press the KEYLESS-GO* start/stop
button (
�page 33).
Page 299 of 384

299 Practical hints
Unlocking/locking in an emergency
Changing batteries
If the batteries in the SmartKey or the KEY-
LESS-GO* card are discharged, the vehicle
can no longer be locked or unlocked. It is
recommended to have the batteries re-
placed at an authorized Mercedes-Benz
Center.
Batteries contain materials that can harm
the environment if disposed of improperly.
Recycling of batteries is the preferred
method of disposal. Many states require
sellers of batteries to accept old batteries
for recycling.SmartKey
1Mechanical key
2Battery compartment
Replacement batteries: Lithium, type
CR 2025 or equivalent.
�
Remove mechanical key1
(�page 297).
�
Insert the mechanical key1 in side
opening and push gray slide2.
The battery compartment is unlatched.
�
Pull the battery compartment out of the
key housing in direction of arrow.
�
Remove the batteries.
3Battery
4Contact spring
�
Using a lint-free cloth, insert new
batteries3 under the contact spring4
with the plus (+) side facing up.
�
Return battery compartment into hous-
ing until it locks into place.
Warning!
G
Keep the batteries out of reach of children.
If a battery is swallowed, seek medical help
immediately.
iWhen changing batteries, always re-
place both batteries.
The required replacement batteries are
available at any Mercedes-Benz
Center.
Page 300 of 384
300 Practical hintsUnlocking/locking in an emergencyKEYLESS-GO* card
1Battery cover
Replacement batteries: Lithium, type
CR 2025 or equivalent.�
Pry open cover 1 (e.g. by using a nar-
row blade screw driver).
�
Remove the batteries.
�
Install new batteries as indicated by
the “+” and “–” markings in the KEY-
LESS-GO card.
�
Replace battery cover 1.
Fuel filler flap
In an emergency, the fuel filler flap can
only be opened from the trunk. The release
knob is located on the right-hand side in
the trunk.
1Release knob
�
Open the trunk with the mechanical
key (
�page 298).
�
Remove the battery cover and the trim
inside the trunk on the right-hand side.
�
Pull release knob 1 (arrow) flap.
The fuel filler flap can be opened.
Page 301 of 384
301 Practical hints
Opening/closing in an emergency
Opening/closing in an emergency
Sliding/pop-up roof
The sliding/pop-up roof drive is located
behind the lens of the interior overhead
light.
You can open or close the sliding/pop-up
roof manually should an electrical malfunc-
tion occur.
1Lens�
Pry off lens1 using a srewdriver.
�
Turn the key in the starter switch to
position1 or2.
�
Remove the crank from the Operator’s
Manual pouch.
2Crank
�
Insert crank2 through hole.
�
Turn crank2 clockwise to:�
slide roof closed
�
raise roof at the rear
�
Turn crank2 counterclockwise to:�
slide roof open
�
lower roof at the rear
The sliding/pop-up roof must be resyn-
chronized after being operated manually
(
�page 175).
Page 304 of 384

304 Practical hintsReplacing bulbsReplacing bulbs for front lamps
1Housing cover for high beam flasher
bulb, parking and standing lamp2Electrical connector for high beam
flasher housing bulb
3Parking and standing lamp
4Bulb socket for turn signal lamp
5Low beam and high beam (Bi-Xenon)
housing cover
High beam flasher bulb
�
Switch off the lights.
�
Open the hood (
�page 237).
�
Press ends of housing cover1 tab to-
gether and remove cover.
�
Press connector2 downward.
�
Remove connector2 with the bulb.
�
Insert the new bulb so that the base lo-
cates in the recess on the holder.
�
From below, press connector2 with
bulb upward onto the reflector.
�
Align housing cover1 and click into
place.
Front turn signal bulb
�
Switch off the lights.
�
Open the hood (
�page 237).
�
Twist bulb socket4 counterclockwise
and pull out.
�
Push bulb into socket, turn counter-
clockwise and remove.
�
Insert new bulb in socket, push in and
twist clockwise.
�
Reinsert bulb socket in lamp and twist
clockwise.
Warning!
G
Do not remove the cover for the Bi-Xenon
headlamp. Because of high voltage in xenon
lamps, it is dangerous to replace the bulb or
repair the lamp and its components. We rec-
ommend that you have such work done by a
qualified technician at an authorized Mer-
cedes-Benz Center.
Page 305 of 384
.
�
Press ends of housing cover1 tab to-
gether and remove cover.
�
Pull out the")
305 Practical hints
Replacing bulbs
Parking and standing lamp bulb�
Switch off the lights.
�
Open the hood (
�page 237).
�
Press ends of housing cover1 tab to-
gether and remove cover.
�
Pull out the bulb socket with the bulb.
�
Pull the bulb out of the bulb socket.
�
Insert a new bulb in the socket.
�
Reinstall the bulb socket.
�
Align housing cover and click into
place.Side marker lamp bulb
�
Switch off the lights.
�
Carefully slide lamp towards rear.
�
Remove front end first.
�
Twist bulb socket counterclockwise
and pull out.
�
Pull bulb out of the bulb socket.
�
Insert new bulb in socket.
�
Reinstall bulb socket, push in and twist
clockwise.
�
To reinstall lamp, set rear end in
bumper and let front end snap into
place.
Replacing bulbs for rear lamps
Tail lamp assemblies
1Backup lamp (black socket)
2Turn signal lamp (white socket)
3Tail, standing and parking lamp (red
socket)
4Driver’s side: tail, parking and rear fog
lamp
Passenger’s side: tail and parking lamp
(red socket)
Page 306 of 384
306 Practical hintsReplacing bulbs�
Switch off the lights.
�
Open trunk.
�
Turn lock counterclockwise and move
the trim to the side.
�
Turn bulb socket counterclockwise and
pull out.
�
Gently twist bulb counterclockwise and
pull out of bulb holder.
�
Insert new bulb into the holder and turn
it clockwise.
�
Reinstall bulb socket.
The bulb socket should audibly click.
�
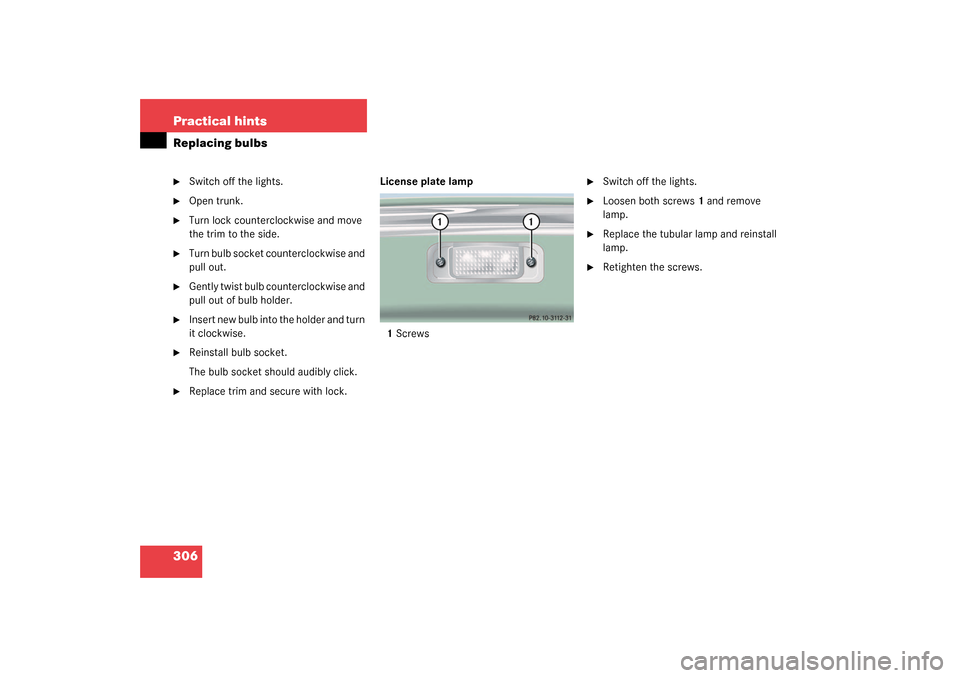
Replace trim and secure with lock. License plate lamp
1Screws
�
Switch off the lights.
�
Loosen both screws1 and remove
lamp.
�
Replace the tubular lamp and reinstall
lamp.
�
Retighten the screws.
Page 308 of 384

308 Practical hintsFlat tire
Flat tirePreparing the vehicle�
Park the vehicle as far as possible from
moving traffic on a hard surface.
�
Turn on the hazard warning flashers.
�
Engage the steering wheel lock in the
straight ahead position and set the
parking brake.
�
Move the selector lever toP.
�
Have any passenger exit the vehicle at
a safe distance from the roadway.
Mounting the spare wheel
Spare wheel
Spare wheel CL 500 and CL 600 (except
Sport Package*)
The spare wheel rim is mounted with a full
sized tire of the same type as on the vehi-
cle, and it is fully functional.However, that spare wheel rim is weight
optimized and has a limited service life of
12 000 miles (20 000 km) use before a
standard wheel rim must replace it.
More information can be found in the
“Technical data” section (
�page 333).Spare wheel CL 55 AMG and
Sport Package*
Warning!
G
The spare wheel rim is for temporary use
only. Use for over a total of 12 000 miles
(20 000 km) (aggregate of all uses) may
cause wheel rim failure leading to an acci-
dent and possible injuries.
Drive to the nearest Mercedes-Benz-Center
as soon as possible to have the spare wheel
replaced with a regular road wheel.
Never operate the vehicle with more than
one spare wheel mounted.
Warning!
G
The dimensions of the spare wheel are dif-
ferent from those of the road wheels. As a
result, the vehicle handling characteristics
change when driving with a mounted spare
wheel. Adapt your driving style accordingly.
The spare wheel rim is for temporary use
only. Use for over a total of 12 000 miles
(20 000 km) (aggregate of all uses) may
cause wheel rim failure leading to an acci-
dent and possible injuries.
Never operate the vehicle with more than
one spare wheel mounted.
When driving with spare wheel mounted, en-
sure proper tire pressure and do not exceed
vehicle speed of 50 mph (80 km).
Drive to the nearest Mercedes-Benz-Center
as soon as possible to have the spare wheel
replaced with a regular road wheel.