Page 3 of 280
Cleaning 208
Maintenance and Specifications 216
Engine compartment 218
Engine oil 221
Battery 225
Fuel information 233
Air filter(s) 250
Part numbers 255
Refill capacities 256
Lubricant specifications 259
Accessories 269
Index 273
All rights reserved. Reproduction by any means, electronic or mechanical
including photocopying, recording or by any information storage and retrieval
system or translation in whole or part is not permitted without written
authorization from Ford Motor Company. Ford may change the contents without
notice and without incurring obligation.
Copyright © 2002 Ford Motor Company
Table of Contents
3
Page 5 of 280

SAFETY AND ENVIRONMENT PROTECTION
Warning symbols in this guide
How can you reduce the risk of personal injury and prevent possible
damage to others, your vehicle and its equipment? In this guide, answers
to such questions are contained in comments highlighted by the warning
triangle symbol. These comments should be read and observed.
Warning symbols on your vehicle
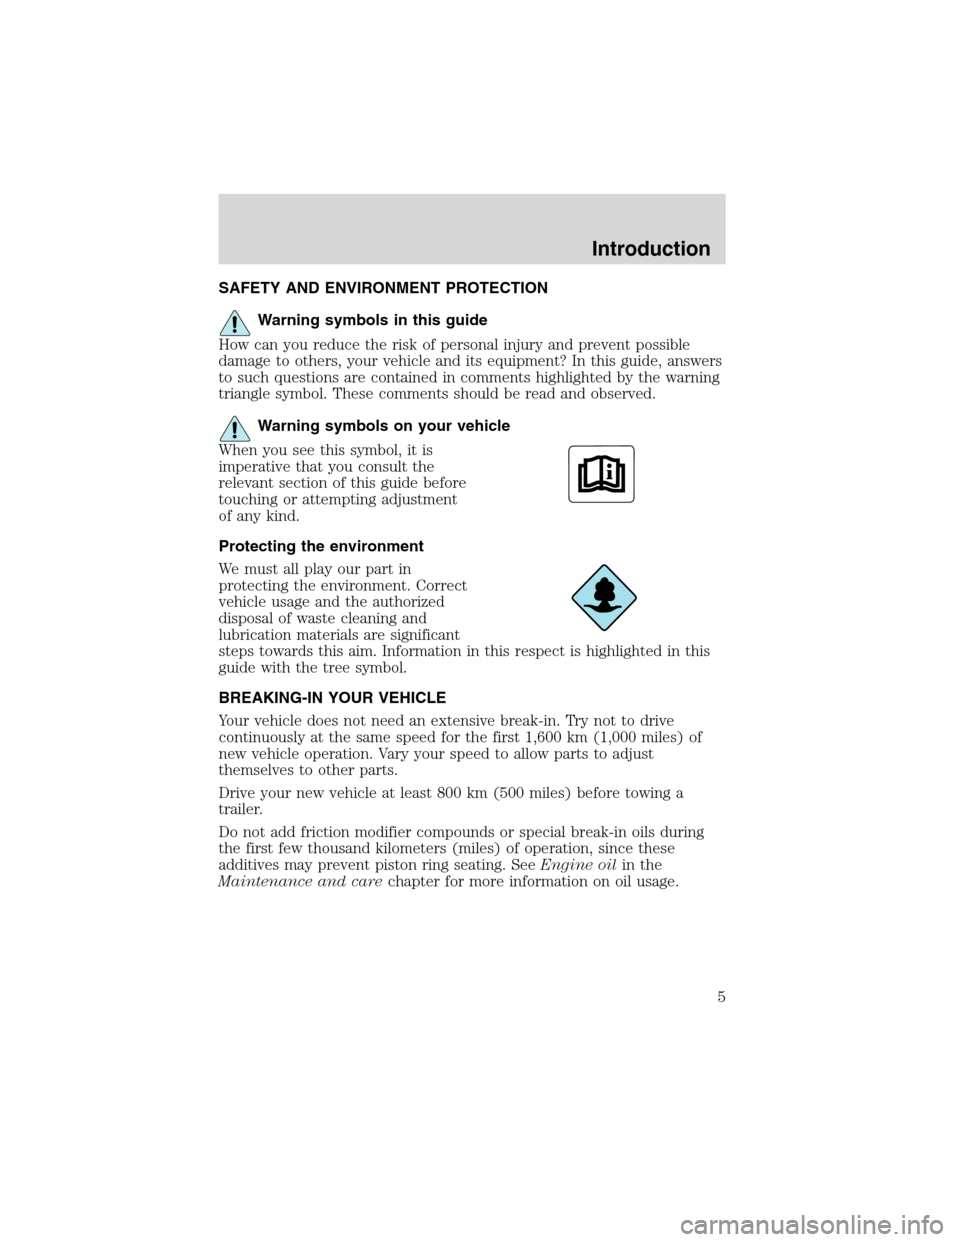
When you see this symbol, it is
imperative that you consult the
relevant section of this guide before
touching or attempting adjustment
of any kind.
Protecting the environment
We must all play our part in
protecting the environment. Correct
vehicle usage and the authorized
disposal of waste cleaning and
lubrication materials are significant
steps towards this aim. Information in this respect is highlighted in this
guide with the tree symbol.
BREAKING-IN YOUR VEHICLE
Your vehicle does not need an extensive break-in. Try not to drive
continuously at the same speed for the first 1,600 km (1,000 miles) of
new vehicle operation. Vary your speed to allow parts to adjust
themselves to other parts.
Drive your new vehicle at least 800 km (500 miles) before towing a
trailer.
Do not add friction modifier compounds or special break-in oils during
the first few thousand kilometers (miles) of operation, since these
additives may prevent piston ring seating. SeeEngine oilin the
Maintenance and carechapter for more information on oil usage.
Introduction
5
Page 11 of 280
Vehicle Symbol Glossary
Power Windows
Front/Rear
Power Window Lockout
Child Safety Door
Lock/UnlockInterior Luggage
Compartment Release
Symbol
Panic AlarmEngine Oil
Engine CoolantEngine Coolant
Temperature
Do Not Open When HotBattery
Avoid Smoking, Flames,
or SparksBattery Acid
Explosive GasFan Warning
Power Steering FluidMaintain Correct Fluid
LevelMAX
MIN
Emission SystemEngine Air Filter
Passenger Compartment
Air FilterJack
Check fuel capLow tire warning
Introduction
11
Page 14 of 280
Air bag readiness:If this light fails
to illuminate when ignition is turned
to ON, continues to flash or remains
on, have the system serviced
immediately. A chime will also
sound when a malfunction in the supplemental restraint system has been
detected.
Safety belt:Reminds you to fasten
your safety belt. A chime will also
sound to remind you to fasten your
safety belt.
Charging system:Illuminates when
the battery is not charging properly.
Oil pressure/Engine coolant:
Illuminates when any of the
following conditions has occurred:
•The engine coolant temperature
is high.
•The engine oil pressure is low.
Low fuel:Illuminates when the fuel
level in the fuel tank is at, or near
empty (refer toFuel gaugein this
chapter).
Low washer fluid:Illuminates
when the windshield washer fluid is
low.
Speed control:Illuminates when
the speed control is activated. Turns
off when the speed control system
is deactivated.
LOW
FUEL
CRUISE
Instrument Cluster
14
Page 18 of 280
Battery voltage gauge:Indicates
the battery voltage when the
ignition is in the ON position. If the
pointer moves and stays outside the
normal operating range (as
indicated by arrows), have the
vehicle’s electrical system checked
as soon as possible.
Engine oil pressure gauge:
Indicates engine oil pressure. The
needle should stay in the normal
operating range (between“L”and
“H”). If the needle falls below the
normal range, stop the vehicle, turn
off the engine and check the engine
oil level. Add oil if needed. If the oil
level is correct, have your vehicle
checked at your dealership or by a
qualified technician.
Fuel gauge:Indicates
approximately how much fuel is left
in the fuel tank (when the ignition
is in the ON position).
L
H
L
H
E
F
Instrument Cluster
18
Page 50 of 280
4. Remove bulb retainer ring by
turning it counterclockwise, then
slide the ring off the plastic base.
5. Carefully pull bulb assembly out
of headlamp assembly and replace.
Handle a halogen headlamp bulb carefully and keep out of
children’s reach. Grasp the bulb only by its plastic base and do
not touch the glass. The oil from your hand could cause the bulb to
break the next time the headlamps are operated.
Install the new bulb in reverse order.
Replacing front parking lamp/turn signal bulbs
1. Make sure the headlamp control
is in the OFF position and open the
hood.
2. Remove screw from the lamp
assembly and disengage lamp
assembly by pulling straight forward,
to disengage two hidden snap-in
retainers.
Lights
50
Page 180 of 280

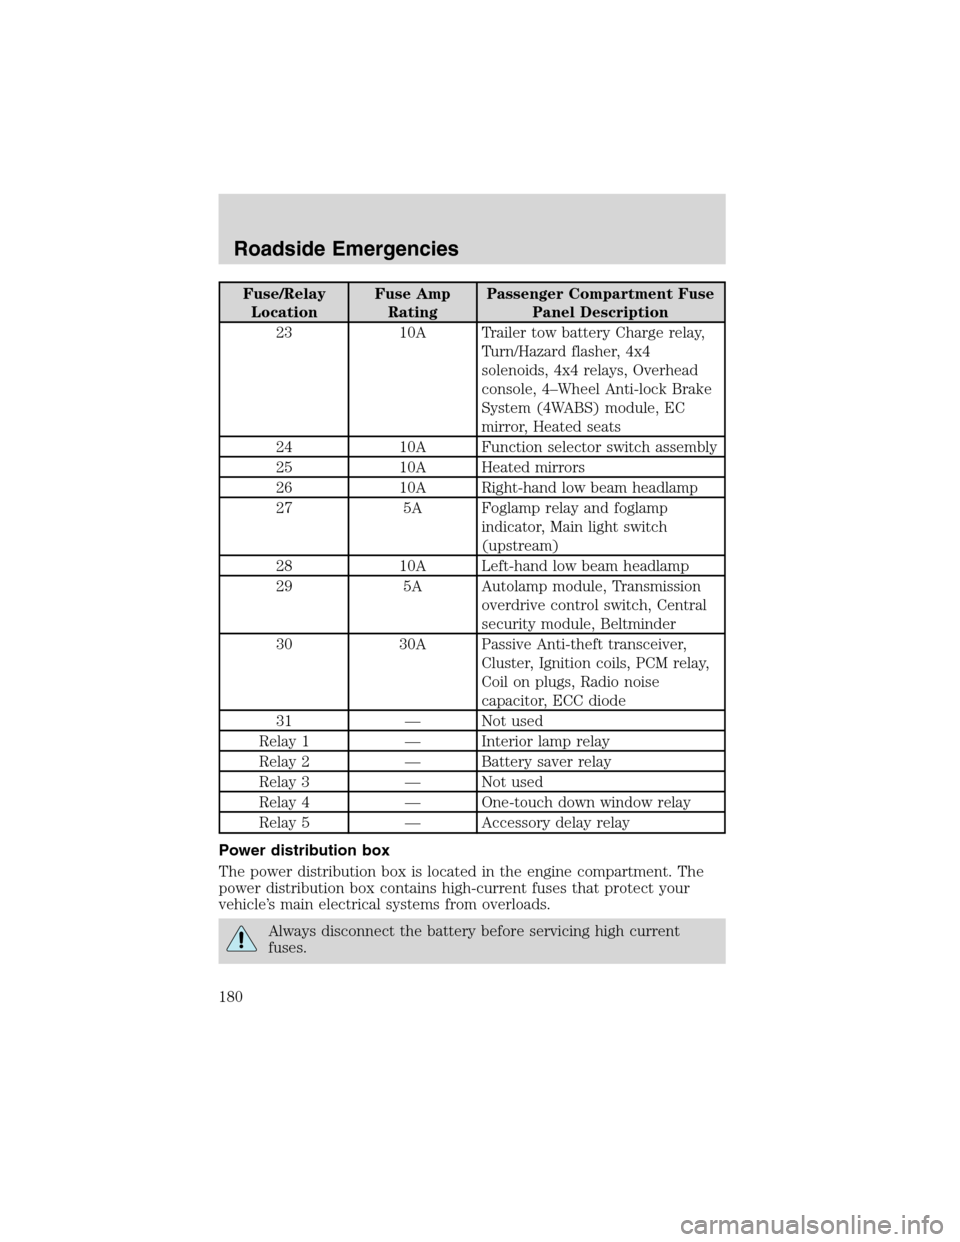
Fuse/Relay
LocationFuse Amp
RatingPassenger Compartment Fuse
Panel Description
23 10A Trailer tow battery Charge relay,
Turn/Hazard flasher, 4x4
solenoids, 4x4 relays, Overhead
console, 4–Wheel Anti-lock Brake
System (4WABS) module, EC
mirror, Heated seats
24 10A Function selector switch assembly
25 10A Heated mirrors
26 10A Right-hand low beam headlamp
27 5A Foglamp relay and foglamp
indicator, Main light switch
(upstream)
28 10A Left-hand low beam headlamp
29 5A Autolamp module, Transmission
overdrive control switch, Central
security module, Beltminder
30 30A Passive Anti-theft transceiver,
Cluster, Ignition coils, PCM relay,
Coil on plugs, Radio noise
capacitor, ECC diode
31—Not used
Relay 1—Interior lamp relay
Relay 2—Battery saver relay
Relay 3—Not used
Relay 4—One-touch down window relay
Relay 5—Accessory delay relay
Power distribution box
The power distribution box is located in the engine compartment. The
power distribution box contains high-current fuses that protect your
vehicle’s main electrical systems from overloads.
Always disconnect the battery before servicing high current
fuses.
Roadside Emergencies
180
Page 209 of 280

PAINT CHIPS
Your dealer has touch-up paint and sprays to match your vehicle’s color.
Take your color code (printed on a sticker in the driver’s door jam) to
your dealer to ensure you get the correct color.
•Remove particles such as bird droppings, tree sap, insect deposits, tar
spots, road salt and industrial fallout before repairing paint chips.
•Always read the instructions before using the products.
ALUMINUM WHEELS AND COVERS
Aluminum wheel rims or covers are coated with a clearcoat paint finish.
In order to maintain their shine:
•Clean weekly with Motorcraft Wheel and Tire Cleaner (ZC-37–A),
which is available from your dealer. Heavy dirt and brake dust
accumulation may require agitation with a sponge. Rinse thoroughly
with a strong stream of water.
•Never apply any cleaning chemical to hot or warm wheel rims or
covers.
•Some automatic car washes may cause damage to the finish on your
wheel rims or covers. Chemical-strength cleaners, or cleaning
chemicals, in combination with brush agitation to remove brake dust
and dirt, could wear away the clearcoat finish over time.
•Do not use hydrofluoric acid-based or high caustic-based wheel
cleaners, steel wool, fuels or strong household detergent.
•To remove tar and grease, use Ford Extra Strength Tar and Road Oil
Removal (B7A-19520–AA), available from your dealer.
ENGINE
Engines are more efficient when they are clean because grease and dirt
buildup keep the engine warmer than normal. When washing:
•Take care when using a power washer to clean the engine. The
high-pressure fluid could penetrate the sealed parts and cause
damage.
•Do not spray a hot engine with cold water to avoid cracking the
engine block or other engine components.
•Spray Motorcraft Engine Shampoo and Degreaser (ZC-20) on all parts
that require cleaning and pressure rinse clean.
•Cover the highlighted areas to prevent water damage when cleaning
the engine.
Cleaning
209