Page 11 of 280
Vehicle Symbol Glossary
Power Windows
Front/Rear
Power Window Lockout
Child Safety Door
Lock/UnlockInterior Luggage
Compartment Release
Symbol
Panic AlarmEngine Oil
Engine CoolantEngine Coolant
Temperature
Do Not Open When HotBattery
Avoid Smoking, Flames,
or SparksBattery Acid
Explosive GasFan Warning
Power Steering FluidMaintain Correct Fluid
LevelMAX
MIN
Emission SystemEngine Air Filter
Passenger Compartment
Air FilterJack
Check fuel capLow tire warning
Introduction
11
Page 15 of 280

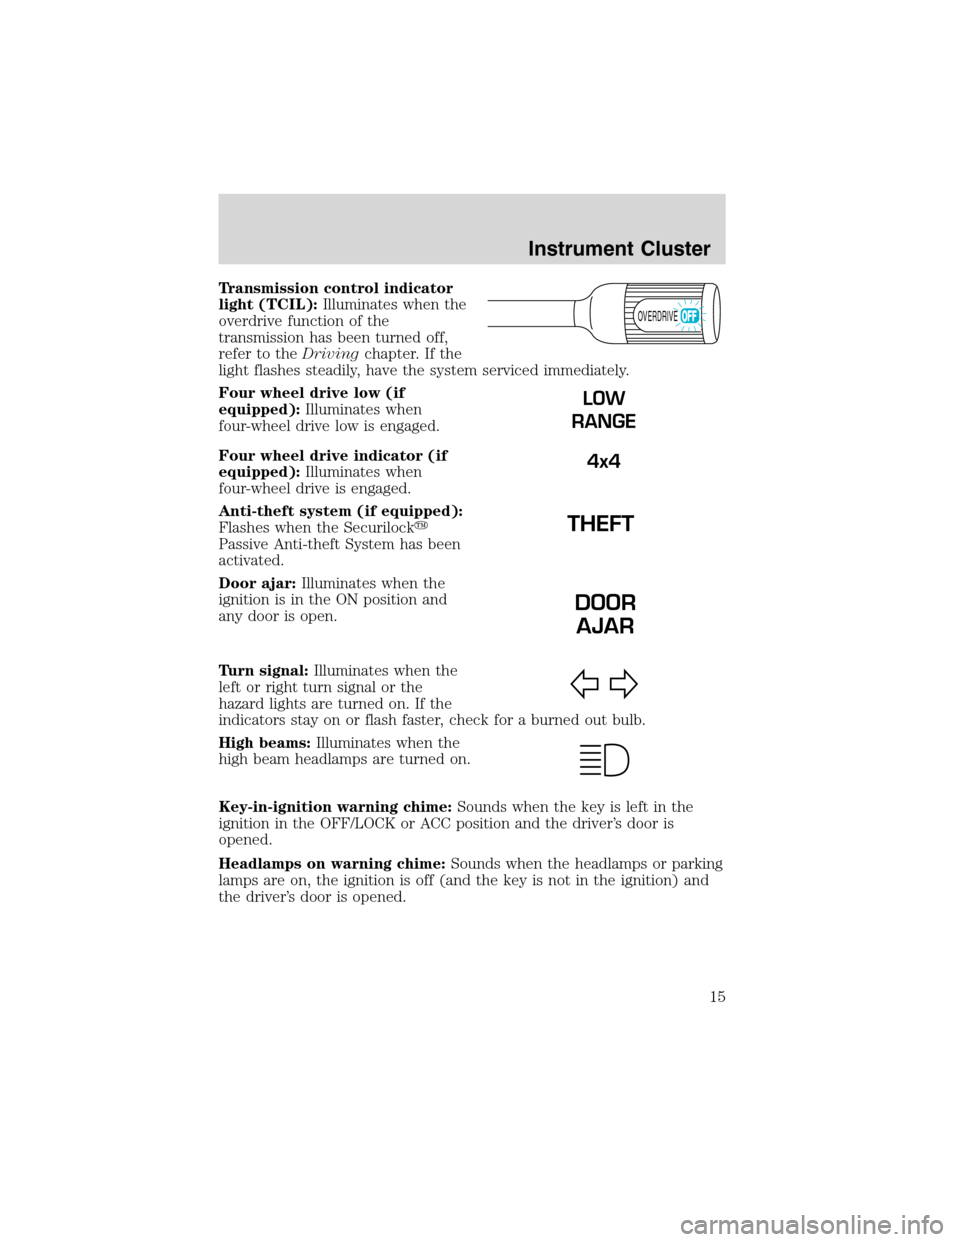
Transmission control indicator
light (TCIL):Illuminates when the
overdrive function of the
transmission has been turned off,
refer to theDrivingchapter. If the
light flashes steadily, have the system serviced immediately.
Four wheel drive low (if
equipped):Illuminates when
four-wheel drive low is engaged.
Four wheel drive indicator (if
equipped):Illuminates when
four-wheel drive is engaged.
Anti-theft system (if equipped):
Flashes when the Securilock�
Passive Anti-theft System has been
activated.
Door ajar:Illuminates when the
ignition is in the ON position and
any door is open.
Turn signal:Illuminates when the
left or right turn signal or the
hazard lights are turned on. If the
indicators stay on or flash faster, check for a burned out bulb.
High beams:Illuminates when the
high beam headlamps are turned on.
Key-in-ignition warning chime:Sounds when the key is left in the
ignition in the OFF/LOCK or ACC position and the driver’s door is
opened.
Headlamps on warning chime:Sounds when the headlamps or parking
lamps are on, the ignition is off (and the key is not in the ignition) and
the driver’s door is opened.
OVERDRIVE
LOW
RANGE
4x4
DOOR
AJAR
Instrument Cluster
15
Page 31 of 280
17.Disc/Tune:Radio: Press
orto manually tune down or up
the frequency band.
CD: Press
orto select the previous or next track on the CD.
18.CD door:Insert a CD label side
up.
PREMIUM AM/FM STEREO/CASSETTE/SINGLE CD
1.Power/volume:Press to turn
ON/OFF; turn
clockwise/counterclockwise to
increase/decrease volume.
2.Scan:Press SCAN to move up
the radio frequency band. SCAN
automatically finds a station, plays it
SCAN
Entertainment Systems
31
Page 61 of 280

One touch down
Allows the driver’s window to open
fully without holding the control
down. Press completely down on
AUTO and release quickly. Press
again to stop.
Accessory delay (if equipped)
With accessory delay, the window switches may be used for up to ten
minutes after the ignition switch is turned to the OFF position or until
any door is opened.
MIRRORS
Automatic dimming rear view mirrors (if equipped)
Your vehicle is equipped with an inside rear view mirror with an
auto-dimming function. The electronic day/night mirror will change from
the normal state to the non-glare state when bright lights (glare) reach
the inside rear view mirror. When the inside rear view mirror detects
bright light from behind the vehicle, the inside rear view mirror will
automatically adjust (darken) to minimize glare.
Do not block the sensor on the backside of the inside rear view mirror
since this may impair proper system performance.
Press the control to turn the mirror
OFF or AUTO.
The mirror will automatically return
to the normal state whenever the
vehicle is placed in R
(Reverse)(when the mirror is on) to ensure a bright clear view when
backing up.
OFF AUTO
Driver Controls
61
Page 67 of 280

Do not let children play with the moon roof. They may seriously
hurt themselves.
HOMELINK�UNIVERSAL TRANSCEIVER WITH TRAVELNOTE�
(IF EQUIPPED)
The HomeLink�Universal Transceiver, located on the driver’s visor,
provides a convenient way to replace up to three hand-held transmitters
with a single built-in device. This feature will learn the radio frequency
codes of most current transmitters to operate garage doors, entry gate
operators, security systems, entry door locks, and home or office lighting.
When programming your HomeLink�Universal Transceiver to a
garage door or gate, be sure that people and objects are out of
the way to prevent potential harm or damage.
Do not use the HomeLink�Universal Transceiver with any garage door
opener that lacks safety stop and reverse features as required by U.S.
federal safety standards (this includes any garage door opener model
manufactured before April 1, 1982). A garage door which cannot detect
an object, signaling the door to stop and reverse, does not meet current
U.S. federal safety standards. For more information, contact HomeLink�
at:www.homelink.comor1–800–355–3515.
Retain the original transmitter for use in other vehicles as well as for
future programming procedures (i.e. new HomeLink�equipped vehicle
purchase). It is also suggested that upon the sale of the vehicle, the
programmed Homelink�Universal Transceiver buttons be erased for
security purposes, refer toProgrammingin this section.
Programming
Do not program the HomeLink�Universal Transceiver with the
vehicle parked in the garage.
Note:Your vehicle may require the ignition switch to be turned to the
ACC position for programming and/or operation of the HomeLink�.Itis
also recommended that a new battery be placed in the hand-held
transmitter of the device being programmed to HomeLink�for quicker
training and accurate transmission of the radio-frequency signal.
Driver Controls
67
Page 69 of 280

8. Return to the vehicle and firmly press, hold for two seconds and
release the HomeLink�button. Repeat the press/hold/release sequence
again, and, depending on the brand of the garage door opener (or other
rolling code equipped device), repeat this sequence a third time to
complete the programming.
HomeLink�should now activate your rolling code equipped device. To
program additional HomeLink�buttons begin with step 2 in the
“Programming”section. For questions or comments, please contact
HomeLink atwww.homelink.comor1–800–355–3515.
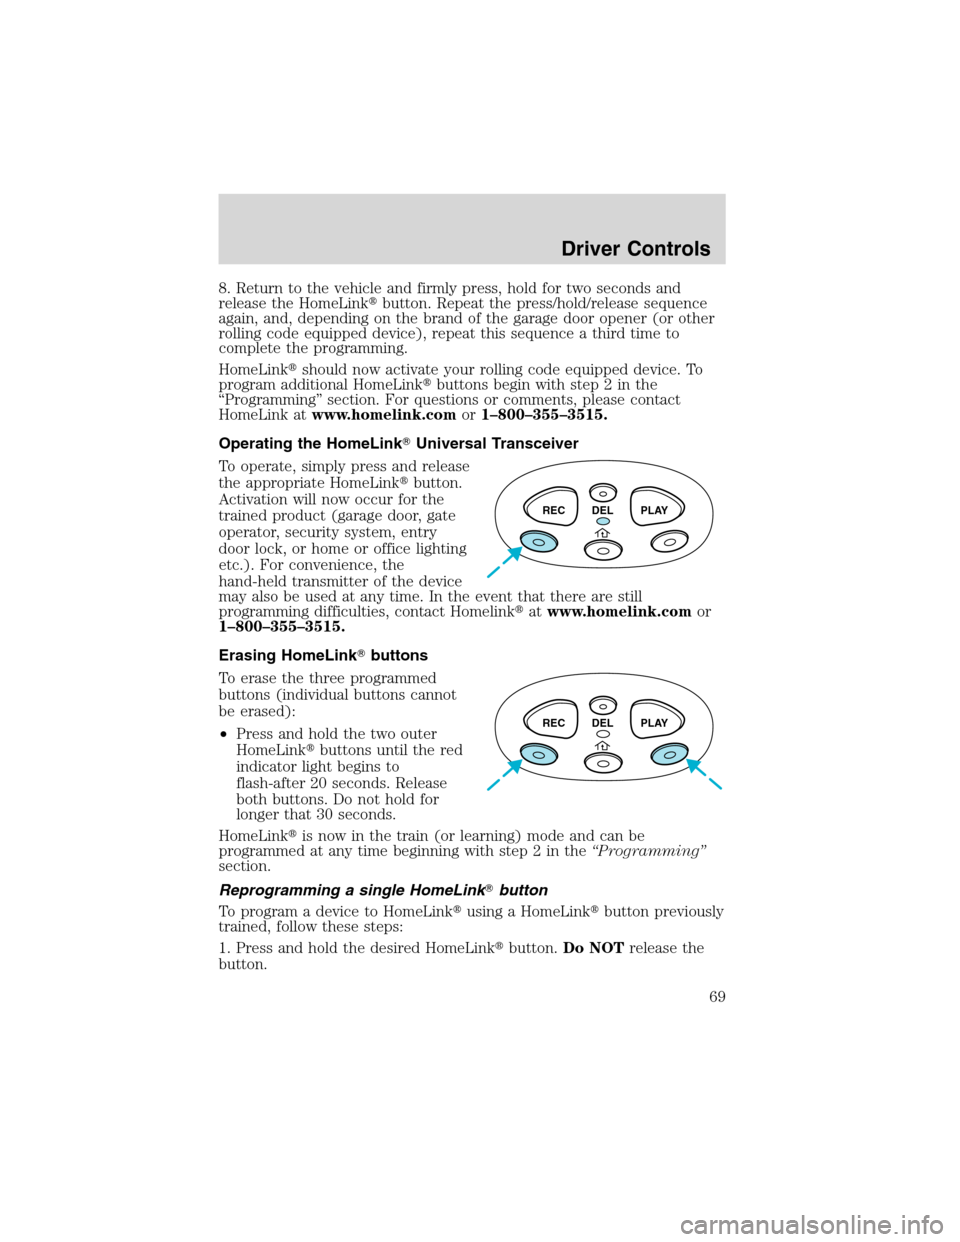
Operating the HomeLink�Universal Transceiver
To operate, simply press and release
the appropriate HomeLink�button.
Activation will now occur for the
trained product (garage door, gate
operator, security system, entry
door lock, or home or office lighting
etc.). For convenience, the
hand-held transmitter of the device
may also be used at any time. In the event that there are still
programming difficulties, contact Homelink�atwww.homelink.comor
1–800–355–3515.
Erasing HomeLink�buttons
To erase the three programmed
buttons (individual buttons cannot
be erased):
•Press and hold the two outer
HomeLink�buttons until the red
indicator light begins to
flash-after 20 seconds. Release
both buttons. Do not hold for
longer that 30 seconds.
HomeLink�is now in the train (or learning) mode and can be
programmed at any time beginning with step 2 in the“Programming”
section.
Reprogramming a single HomeLink�button
To program a device to HomeLink�using a HomeLink�button previously
trained, follow these steps:
1. Press and hold the desired HomeLink�button.Do NOTrelease the
button.
REC DEL PLAY
REC DEL PLAY
Driver Controls
69
Page 78 of 280
KEYS
The key operates all locks on your vehicle. In case of loss, replacement
keys are available from your dealer.
You should always carry a second key with you in a safe place in case
you require it in an emergency.
Refer toSecuriLock�Passive Anti-Theft Systemfor more information.
POWER DOOR LOCKS (IF EQUIPPED)
If the door does not unlock when
the U is pressed, seeInterior
power door disable featurein the
Remote entry sectionin this
chapter.
Press U to unlock all doors and L to
lock all doors.
U L
Locks and Security
78
Page 79 of 280
Childproof door locks (if equipped)
When these locks are set, the rear
doors cannot be opened from the
inside. The rear doors can be
opened from the outside when the
doors are unlocked.
The childproof locks are located on
rear edge of each rear door and
must be set separately for each
door. Setting the lock for one door
will not automatically set the lock
for both doors.
Move lock control up to engage the
childproof lock. Move control down
to disengage childproof locks.
INTERIOR TONNEAU COVER RELEASE (IF EQUIPPED)
Your vehicle is equipped with a mechanical interior tonneau cover
release handle that provides a means of escape for children and adults in
the event they become locked inside the pickup box.
Adults are advised to familiarize themselves with the operation and
location of the release handle.
Locks and Security
79