Page 86 of 288

MESSAGE CENTER
With the ignition in the ON position,
the message center, located on your
instrument cluster, displays
important vehicle information
through a constant monitor of
vehicle systems.You may select
display features on the message center for a display of status preceded
by a brief indicator chime. The system will also notify you of potential
vehicle problems with a display of system warnings followed by a long
indicator chime.
Selectable features
Reset
Press this control to select and reset
functions shown in the INFO menu
and SETUP menu.
Info menu
This control displays the following
control displays:
•Odometer/Compass
•Tripodometer/Odometer/Compass
•Distance to Empty
•Average Fuel Economy
•TripElapsed Drive Time
Odometer/Trip odometer
Refer toGaugesin theInstrument Clusterchapter.
Compass display
The compass reading may be affected when you drive near large
buildings, bridges, power lines and powerful broadcast antenna. Magnetic
or metallic objects placed in, on or near the vehicle may also affect
compass accuracy.
Usually, when something affects the compass readings, the compass will
correct itself after a few days of operating your vehicle in normal
Driver Controls
86
Page 87 of 288

conditions. If the compass still appears to be inaccurate, a manual
calibration may be necessary. Refer toCompass zone/calibration
adjustment.
Most geographic areas (zones) have a magnetic north compass point that
varies slightly from the northerly direction on maps. This variation is four
degrees between adjacent zones and will become noticeable as the
vehicle crosses multiple zones. A correct zone setting will eliminate this
error. Refer toCompass zone/calibration adjustment.
Compass zone/calibration adjustment
Perform this adjustment in an open area free from steel structures and
high voltage lines.
For optimum calibration, turn off all electrical accessories (heater/air
conditioning, wipers, etc.) and make sure all vehicle doors are shut.
1. Turn ignition to the ON position.
2. Start the engine.
3. Determine your magnetic zone by
referring to the zone map.
4. From Info menu, select the
Compass/Odometer function. (Do
not select Trip, DTE, or AFE. The
topof the message center must be
blank).
5. Press and hold the RESET and
SETUP control until the message
center display changes to show the
current zone setting.
6. Release the RESET AND SETUP
control, then slowly press RESET
down again.
7. Press the SETUP control
repeatedly until the correct zone
setting for your geographic location is displayed on the message center.
To exit the zone setting mode press and release the RESET control.
1
4
5
6 7 8 9 101112 13 15
Driver Controls
87
Page 89 of 288

Trip elapsed drive time
Select this function from the INFO
menu to display a timer.
To operate the Trip Elapsed Drive
Time preform the following:
1. Press and release RESET in order
to start the timer.
2. Press and release RESET to pause the timer.
3. Press and hold RESET for 2 seconds in order to reset the timer.
Miles to empty (DTE)
Selecting this function from the
INFO menu will give you an
estimate of how far you can drive
with the fuel remaining in your tank
under normal driving conditions.
Remember to turn the ignition OFF when refueling your vehicle.
Otherwise, the display will not show the addition of fuel for a few
kilometers (miles).
The DTE function will display LOW FUEL LEVEL and sound a tone for 1
second when you have low fuel level indicated on the fuel gauge.
Setup menu
Press this control for the following
displays:
•System Check
•Units (English/Metric)
•Autolock
•Easy Entry/Exit
•Reverse Mirrors
•AutolampDelay
•Oil change
•Language
•Rear Park Assist (while in reverse)
•AWD Locked (if equipped)
Driver Controls
89
Page 93 of 288

Warning messages that have been reset are divided into three categories:
•They will reappear on the display every minute from the reset.
•They will reappear on the display ten minutes from the reset.
•They will not reappear until an ignition OFF-ON cycle has been
completed.
This acts as a reminder that these warning conditions still exist within
the vehicle.
Warning display Status
Check park assist Warning displays when R (reverse)
gear is selected.
AdvTrac ON (if equipped) Displays for 4 seconds
AdvTrac OFF (if equipped)
Change Oil Soon
Temporary AWD locked
(vehicles equipped with
AdvanceTrac�only)
AWD lock OFF AWD auto ON
(vehicles equipped with
AdvanceTrac�only)
Door ajar Liftgate ajar Warning returns after cycling through
the system sequence
Low fuel level
Check charging system
Low brake fluid level
Low oil pressure
Transmission overheated
Check transmission
Check engine temperature
Reduced engine power
Stopengine safely
AWD disabled locked (vehicles
equipped with AdvanceTrac�
only)
Driver Controls
93
Page 94 of 288

Warning display Status
Low washer fluid level Warning returns after the ignition key
is turned from OFF to ON.
Check AdvTrac (if equipped)
Check AWD (vehicles equipped
with AdvanceTrac�only)
AWD Disabled (vehicles
equipped with AdvanceTrac�
only)
Check fuel cap
Oil change required
CHECK PARK ASSIST.Displayed when the transmission is in R
(Reverse) and the park assist does not operate properly. See your dealer
as soon as possible.
ADVTRAC ON (if equipped).Displayed when the AdvanceTrac is ON.
ADVTRAC OFF (if equipped).Displayed when the AdvanceTrac is
OFF.
TEMPORARY AWD LOCKED (vehicles equipped with
AdvanceTrac�only).Displayed when the AWD system is updating its
status of being locked.
AWD LOCK OFF and AWD AUTO ON (vehicles equipped with
AdvanceTrac�only).Displayed when the AWD is system is completely
cooled down from being overheated.
DOOR AJAR LIFTGATE AJAR.Displayed when a door or liftgate is
not completely closed.
CHECK ENGINE TEMPERATURE.Displayed when the engine
coolant is overheating. Stopthe vehicle as soon as safely possible, turn
off the engine and let it cool. Check the coolant and coolant level. Refer
toEngine coolantin theMaintenance and specificationschapter. If
the warning stays on or continues to come on, contact your dealer as
soon as safely possible.
REDUCED ENGINE POWER.Displayed when the engine is
overheating. Stopthe vehicle as soon as safely possible, turn off the
engine. If the warning stays on or continues to come on, contact your
dealer as soon as safely possible.
STOP ENGINE SAFELY.Displayed when the engine is overheating.
Stopthe vehicle as soon as safely possible, turn off the engine. If the
warning stays on or continues to come on, contact your dealer as soon as
safely possible.
Driver Controls
94
Page 104 of 288

Changes or modifications not expressly approved by the party
responsible for compliance could void the user’s authority to
operate the equipment.
The remote entry system allows you to lock or unlock all vehicle doors
and liftgate and open the liftgate window without a key.
The remote entry lock/unlock feature operates in any ignition position.
The liftgate glass features operate as long as the vehicle is in P (Park).
The panic feature operates with the key in the OFF or ACC position.
If there is any potential remote keyless entry problem with your vehicle,
ensureALLremote entry transmitters are brought to the dealership, to
aid in troubleshooting.
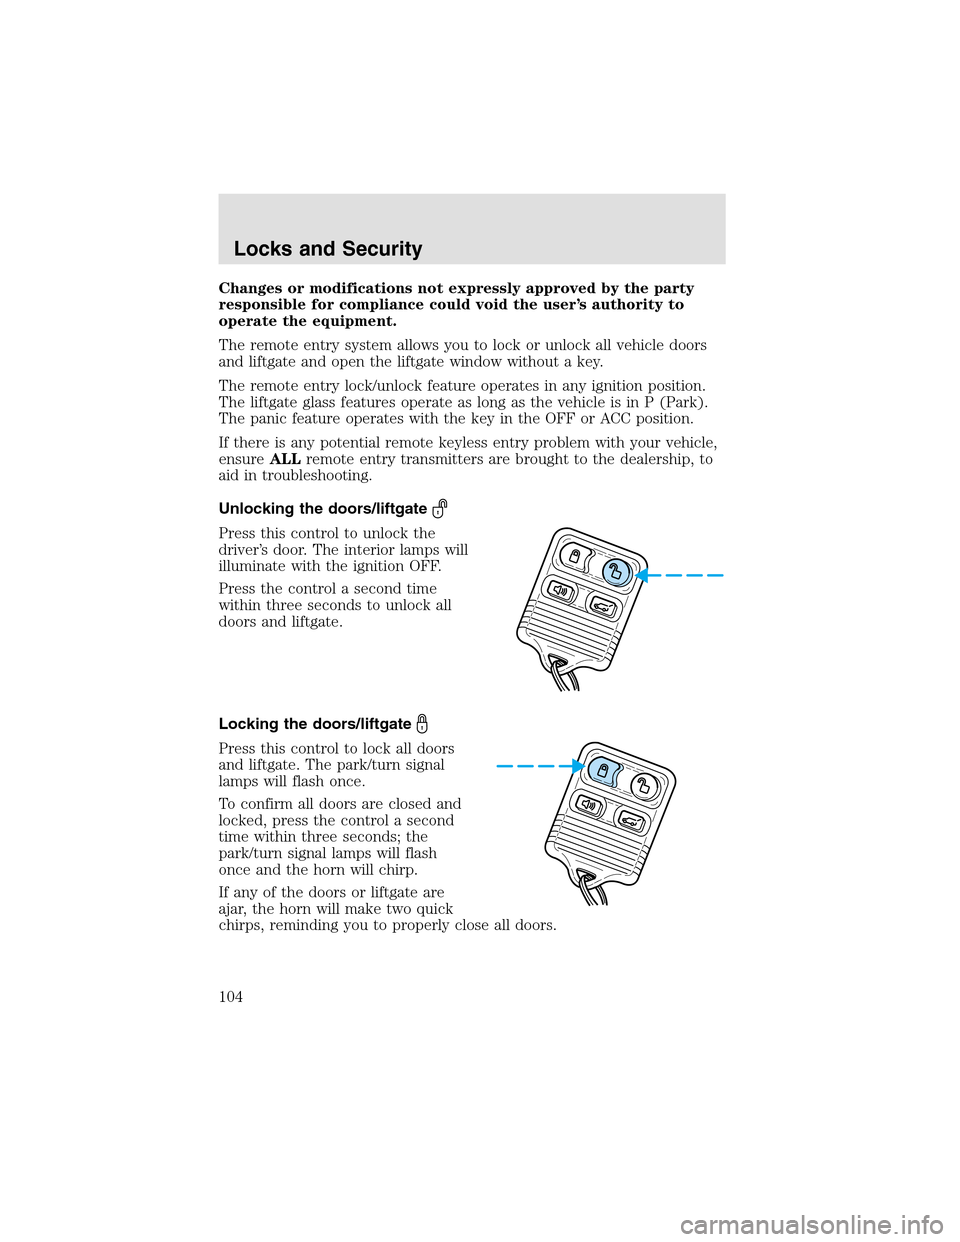
Unlocking the doors/liftgate
Press this control to unlock the
driver’s door. The interior lamps will
illuminate with the ignition OFF.
Press the control a second time
within three seconds to unlock all
doors and liftgate.
Locking the doors/liftgate
Press this control to lock all doors
and liftgate. The park/turn signal
lamps will flash once.
To confirm all doors are closed and
locked, press the control a second
time within three seconds; the
park/turn signal lamps will flash
once and the horn will chirp.
If any of the doors or liftgate are
ajar, the horn will make two quick
chirps, reminding you to properly close all doors.
Locks and Security
104
Page 105 of 288
Opening the liftgate window
Press the control to unlatch the
liftgate window.
Sounding a panic alarm
Press this control to activate the
alarm.
The personal panic alarm will cycle
the horn and parking lamps on/off.
To deactivate the alarm, press the
control again or turn the ignition to
ON.
Memory seat feature
The remote entry system can also
control the memory seat feature.
Press the control once to unlock the
driver’s door. Pressing the control
will automatically move the seat to
the desired memory position (when
associated to memory 1 and 2
positions).
Upto four remote entry transmitters can be associated to the two
memory positions.
Locks and Security
105
Page 108 of 288

To program the transmitters yourself:
1. Ensure the vehicle is
electronically unlocked.
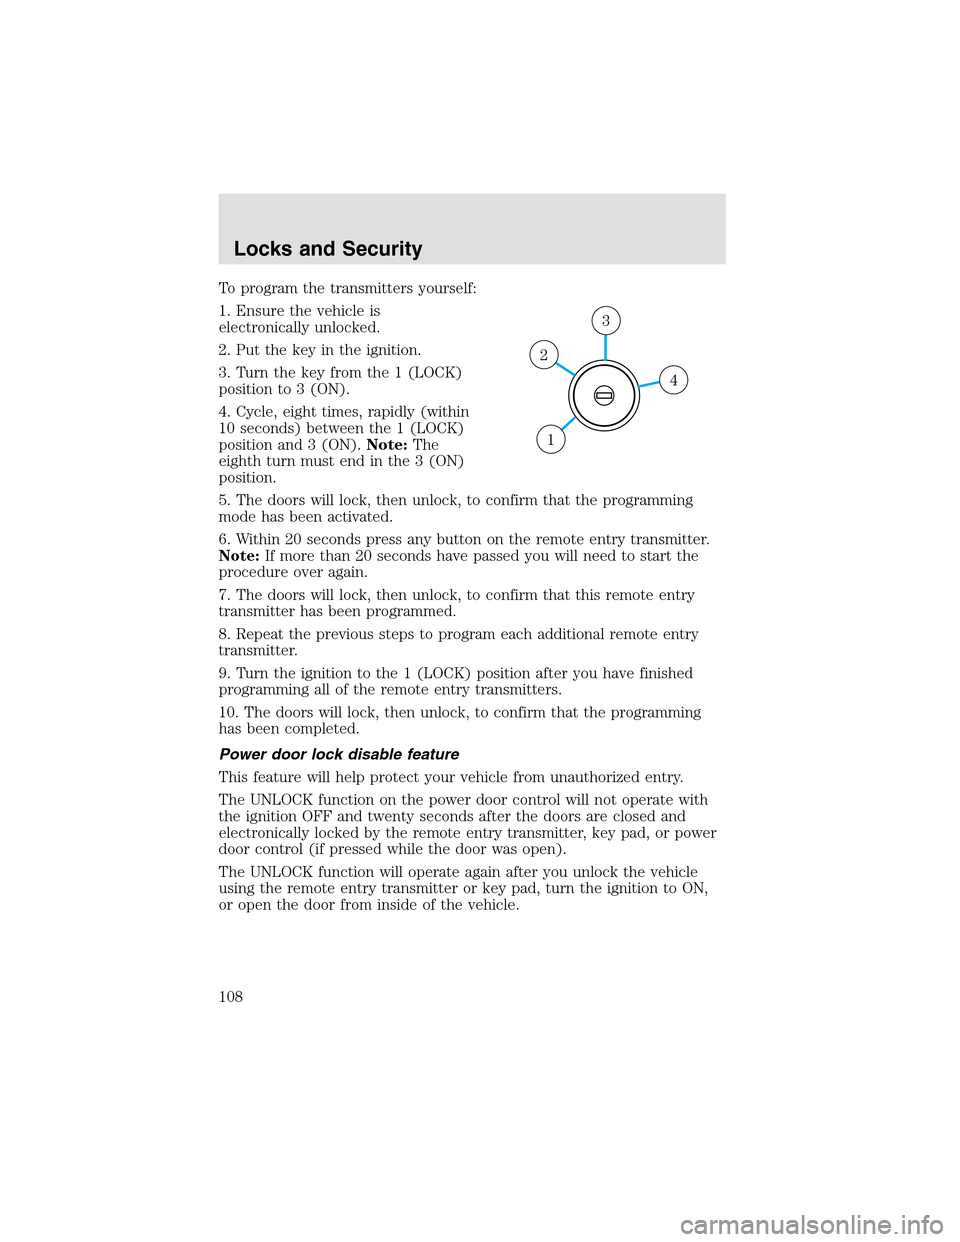
2. Put the key in the ignition.
3. Turn the key from the 1 (LOCK)
position to 3 (ON).
4. Cycle, eight times, rapidly (within
10 seconds) between the 1 (LOCK)
position and 3 (ON).Note:The
eighth turn must end in the 3 (ON)
position.
5. The doors will lock, then unlock, to confirm that the programming
mode has been activated.
6. Within 20 seconds press any button on the remote entry transmitter.
Note:If more than 20 seconds have passed you will need to start the
procedure over again.
7. The doors will lock, then unlock, to confirm that this remote entry
transmitter has been programmed.
8. Repeat the previous steps to program each additional remote entry
transmitter.
9. Turn the ignition to the 1 (LOCK) position after you have finished
programming all of the remote entry transmitters.
10. The doors will lock, then unlock, to confirm that the programming
has been completed.
Power door lock disable feature
This feature will helpprotect your vehicle from unauthorized entry.
The UNLOCK function on the power door control will not operate with
the ignition OFF and twenty seconds after the doors are closed and
electronically locked by the remote entry transmitter, key pad, or power
door control (if pressed while the door was open).
The UNLOCK function will operate again after you unlock the vehicle
using the remote entry transmitter or key pad, turn the ignition to ON,
or open the door from inside of the vehicle.
4
3
2
1
Locks and Security
108