Page 67 of 288
TILT STEERING
Push the lever down to unlock the
steering column. While the lever is
in the down position, tilt the
steering column to the desired
position.
While holding the steering wheel,
find the nearest gear mesh point
and pull the lever up to its original
position to lock the steering column.
Never adjust the steering
column when the vehicle is
moving.
ILLUMINATED VISOR MIRROR
Lift the mirror cover to turn on the
visor mirror lamps.
OVERHEAD CONSOLE
The appearance of your vehicle’s overhead console will vary according to
your option package.
Driver Controls
67
Page 68 of 288

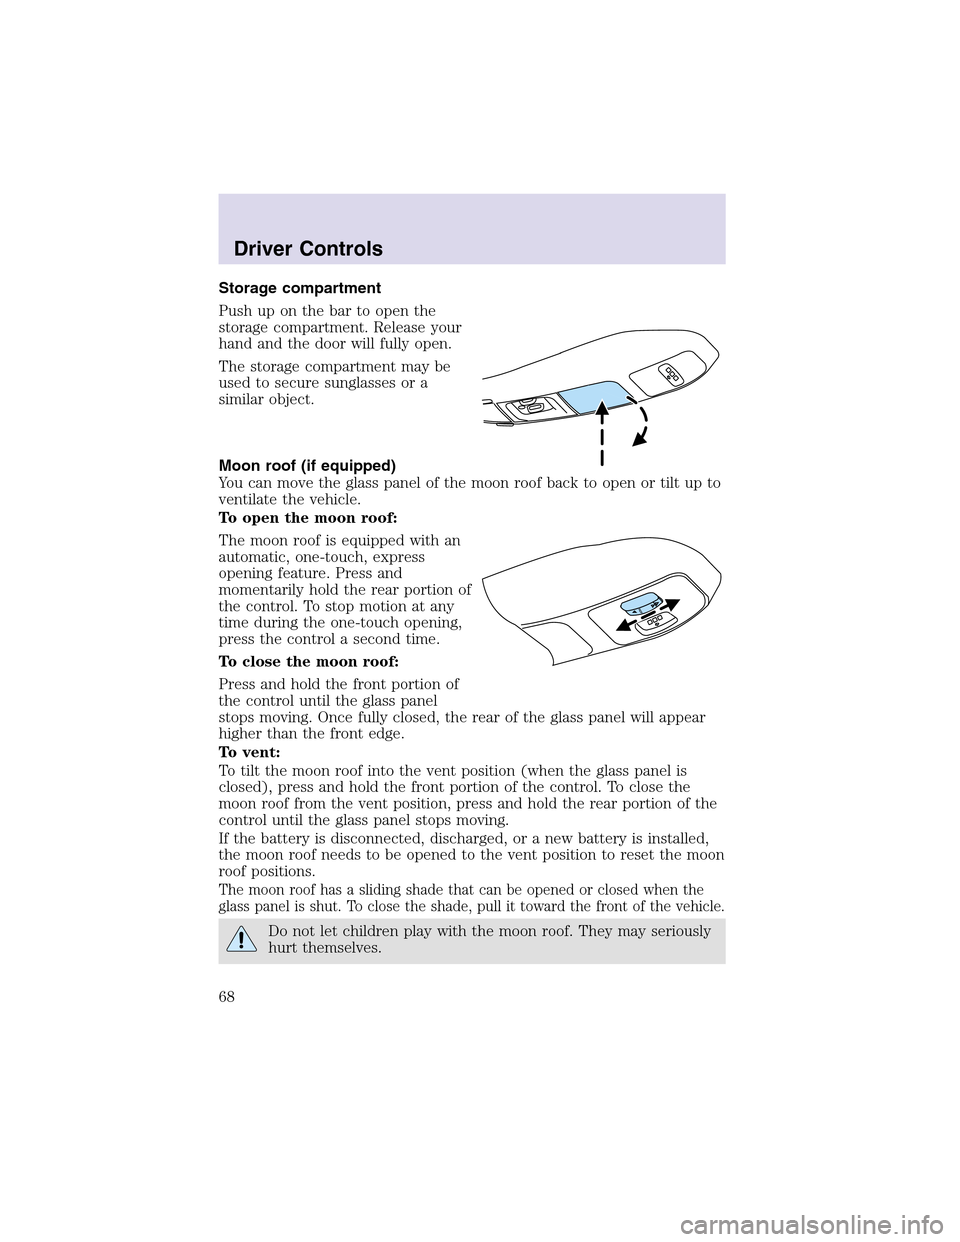
Storage compartment
Push upon the bar to open the
storage compartment. Release your
hand and the door will fully open.
The storage compartment may be
used to secure sunglasses or a
similar object.
Moon roof (if equipped)
You can move the glass panel of the moon roof back to open or tilt up to
ventilate the vehicle.
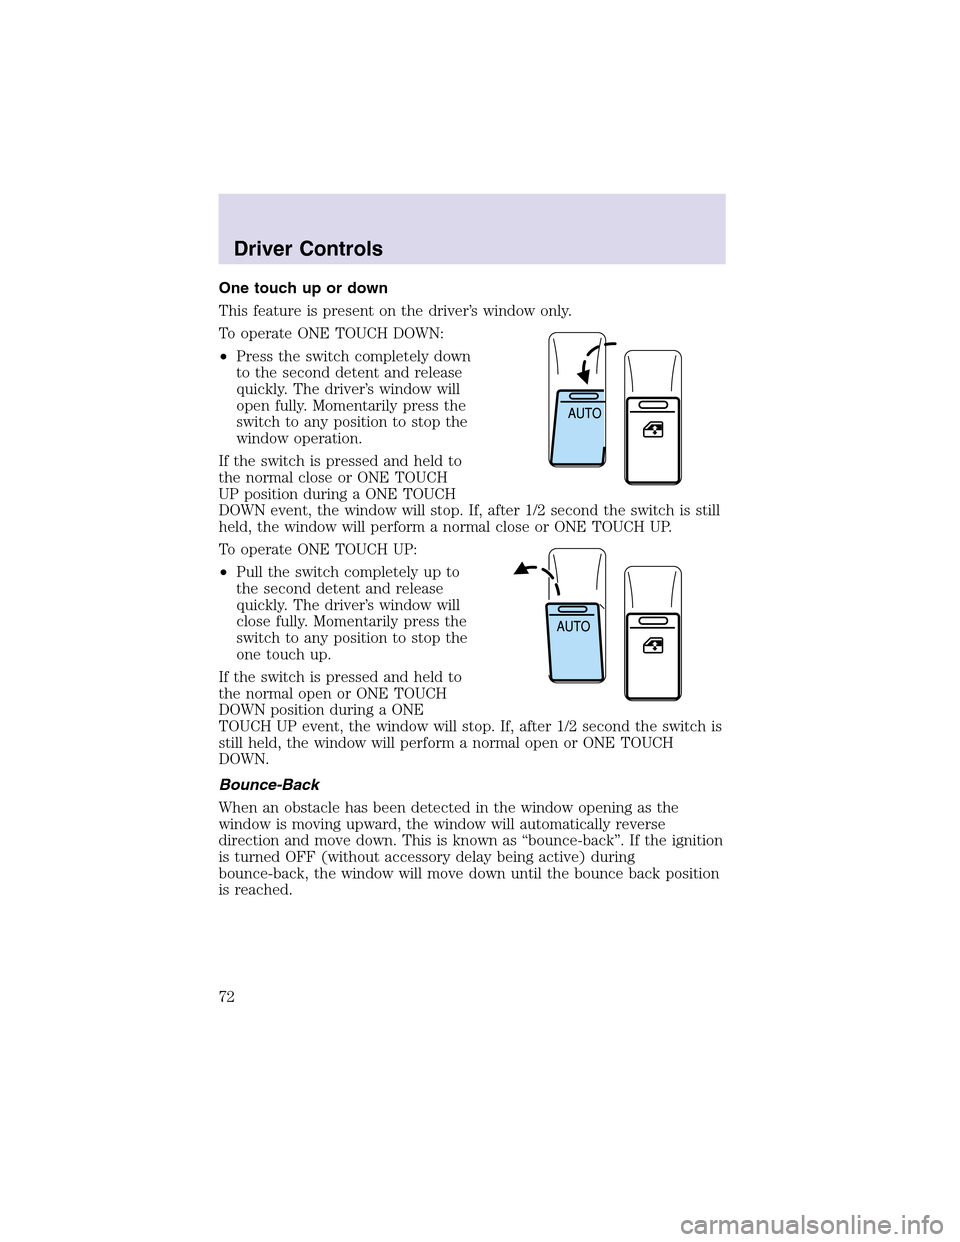
To open the moon roof:
The moon roof is equipped with an
automatic, one-touch, express
opening feature. Press and
momentarily hold the rear portion of
the control. To stopmotion at any
time during the one-touch opening,
press the control a second time.
To close the moon roof:
Press and hold the front portion of
the control until the glass panel
stops moving. Once fully closed, the rear of the glass panel will appear
higher than the front edge.
To vent:
To tilt the moon roof into the vent position (when the glass panel is
closed), press and hold the front portion of the control. To close the
moon roof from the vent position, press and hold the rear portion of the
control until the glass panel stops moving.
If the battery is disconnected, discharged, or a new battery is installed,
the moon roof needs to be opened to the vent position to reset the moon
roof positions.
The moon roof has a sliding shade that can be opened or closed when the
glass panel is shut. To close the shade, pull it toward the front of the vehicle.
Do not let children play with the moon roof. They may seriously
hurt themselves.
Driver Controls
68
Page 69 of 288
CLOCK
Press the right control to increase
the time displayed.
Press the left control to decrease
the time displayed.
AUXILIARY POWER POINT(IF EQUIPPED)
Power outlets are designed for
accessory plugs only. Do not
hang any type of accessory or
accessory bracket from the plug.
Improper use of the power
outlet can cause damage not
covered by your warranty.
The auxiliary power point is located
inside the center console.
Do not plug optional electrical accessories into the cigarette
lighter. Use the power point.
An auxiliary power point is located
on the lower rear side of the center
console. The power point is
accessible from the rear seats.
Driver Controls
69
Page 70 of 288
Another auxiliary power point is
located on the right rear quarter
panel. The power point is accessible
from the liftgate.
The maximum current draw of any single power point should not exceed
it’s fuse rating, otherwise this will result in a blown fuse.
Do not use the cigarette/cigar lighter element in any power point.
Keep power point caps closed when not in use.
POWER WINDOWS
When closing the power windows, you should verify they are free
of obstructions and ensure that children and/or pets are not in
the proximity of the window openings.
The power window switches located
on the center console are called
push-pull switches.
A. Drivers side
B. Window lock
C. Front passenger side
D. Left and right rear passenger
Driver Controls
70
Page 71 of 288
The following views are the driver’s side switches:
Normal operation
•Push down (to the first detent)
and hold the topportion of the
switch to open.
•Pull up(to the first detent) and
hold the topportion of the switch
to close.
The following view is the power
window switch on the rear door trim
panels.
•Press and hold the topor bottom
of the rear rocker switches to
open or close.
Driver Controls
71
Page 72 of 288

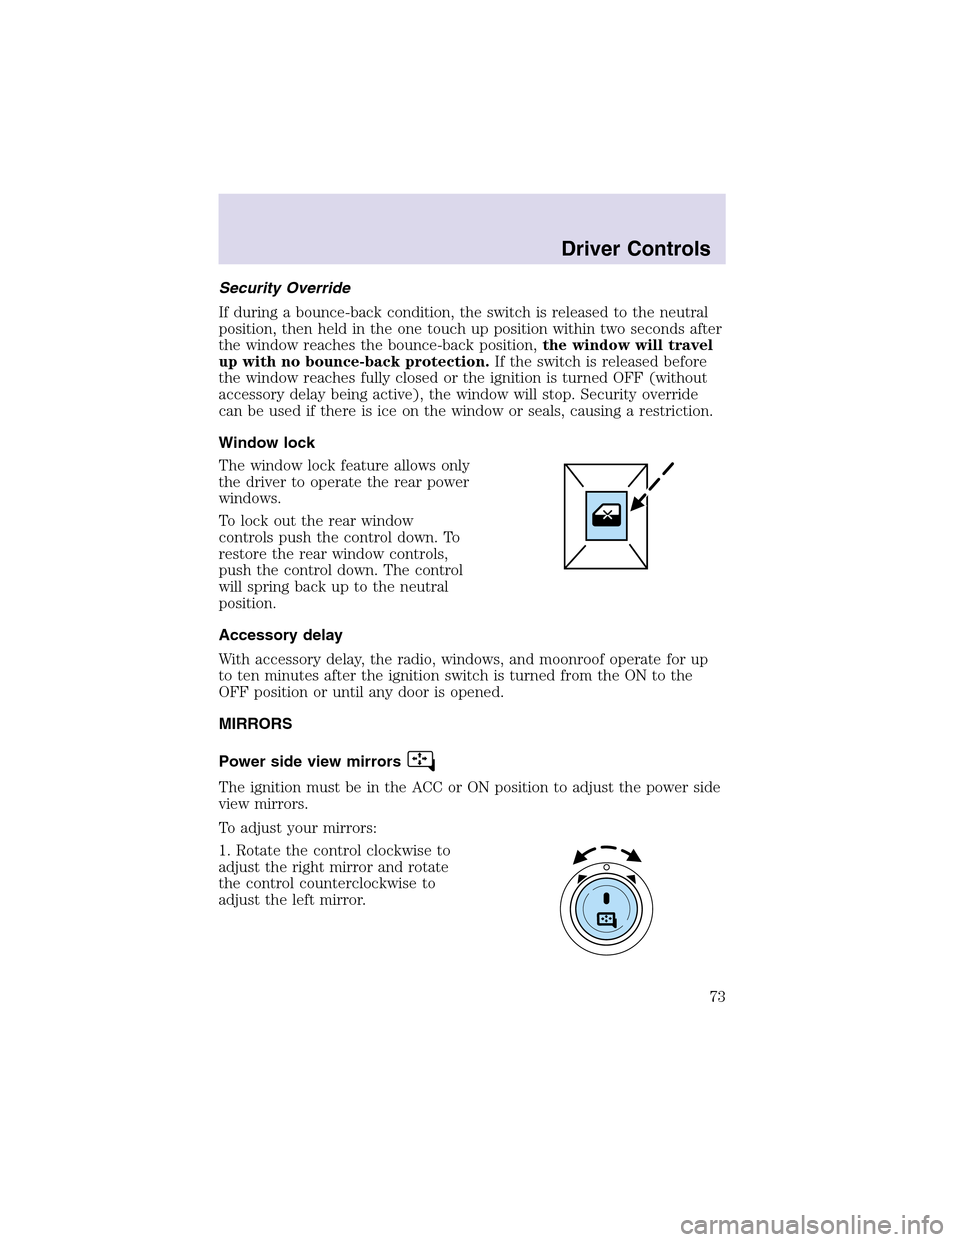
One touch up or down
This feature is present on the driver’s window only.
To operate ONE TOUCH DOWN:
•Press the switch completely down
to the second detent and release
quickly. The driver’s window will
open fully. Momentarily press the
switch to any position to stop the
window operation.
If the switch is pressed and held to
the normal close or ONE TOUCH
UP position during a ONE TOUCH
DOWN event, the window will stop. If, after 1/2 second the switch is still
held, the window will perform a normal close or ONE TOUCH UP.
To operate ONE TOUCH UP:
•Pull the switch completely up to
the second detent and release
quickly. The driver’s window will
close fully. Momentarily press the
switch to any position to stop the
one touch up.
If the switch is pressed and held to
the normal open or ONE TOUCH
DOWN position during a ONE
TOUCH UP event, the window will stop. If, after 1/2 second the switch is
still held, the window will perform a normal open or ONE TOUCH
DOWN.
Bounce-Back
When an obstacle has been detected in the window opening as the
window is moving upward, the window will automatically reverse
direction and move down. This is known as “bounce-back”. If the ignition
is turned OFF (without accessory delay being active) during
bounce-back, the window will move down until the bounce back position
is reached.
Driver Controls
72
Page 73 of 288

Security Override
If during a bounce-back condition, the switch is released to the neutral
position, then held in the one touch up position within two seconds after
the window reaches the bounce-back position,the window will travel
up with no bounce-back protection.If the switch is released before
the window reaches fully closed or the ignition is turned OFF (without
accessory delay being active), the window will stop. Security override
can be used if there is ice on the window or seals, causing a restriction.
Window lock
The window lock feature allows only
the driver to operate the rear power
windows.
To lock out the rear window
controls push the control down. To
restore the rear window controls,
push the control down. The control
will spring back up to the neutral
position.
Accessory delay
With accessory delay, the radio, windows, and moonroof operate for up
to ten minutes after the ignition switch is turned from the ON to the
OFF position or until any door is opened.
MIRRORS
Power side view mirrors
The ignition must be in the ACC or ON position to adjust the power side
view mirrors.
To adjust your mirrors:
1. Rotate the control clockwise to
adjust the right mirror and rotate
the control counterclockwise to
adjust the left mirror.
Driver Controls
73
Page 74 of 288
2. Move the control in the direction
you wish to tilt the mirror.
3. Return to the center position to lock mirrors in place.
Heated outside mirrors
Both mirrors are heated
automatically to remove ice, mist
and fog when the rear window
defrost is activated.
Do not remove ice from the
mirrors with a scraper or
attempt to readjust the mirror
glass if it is frozen in place.
These actions could cause
damage to the glass and mirrors.
Signal mirrors
When the turn signal is activated,
the lower portion of the mirror
housing will blink.
This provides an additional warning
to other drivers that your vehicle is
about to turn.
Driver Controls
74