Page 64 of 221
1- 52 FEATURES OF YOUR HYUNDAI
!
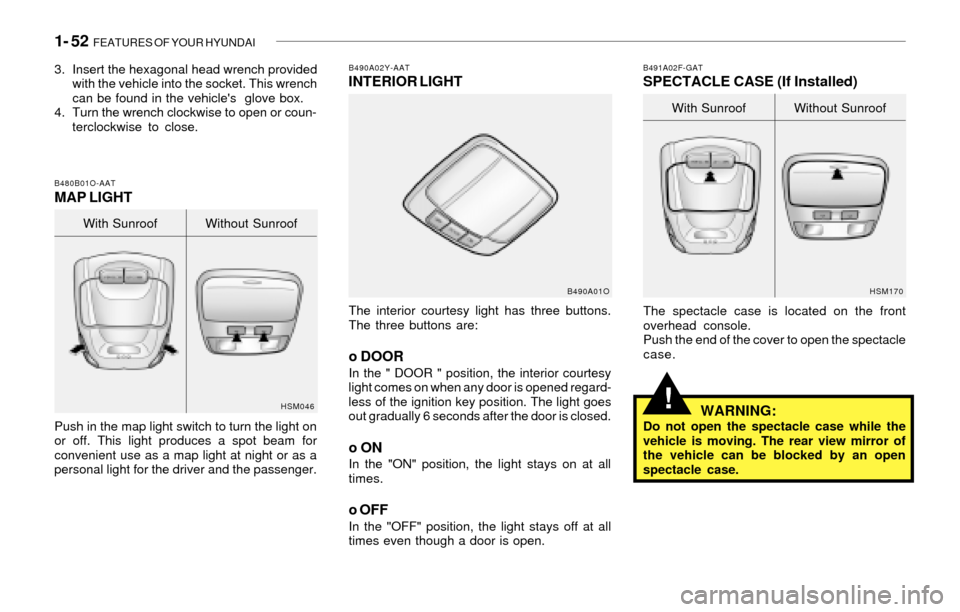
B490A02Y-AATINTERIOR LIGHT
The interior courtesy light has three buttons.
The three buttons are:
o DOORIn the " DOOR " position, the interior courtesy
light comes on when any door is opened regard-
less of the ignition key position. The light goes
out gradually 6 seconds after the door is closed.
o ONIn the "ON" position, the light stays on at all
times.
o OFFIn the "OFF" position, the light stays off at all
times even though a door is open.
B490A01OB491A02F-GAT
SPECTACLE CASE (If Installed)
HSM170
The spectacle case is located on the front
overhead console.
Push the end of the cover to open the spectacle
case.
WARNING:Do not open the spectacle case while the
vehicle is moving. The rear view mirror of
the vehicle can be blocked by an open
spectacle case.With Sunroof Without Sunroof
3. Insert the hexagonal head wrench provided
with the vehicle into the socket. This wrench
can be found in the vehicle's glove box.
4. Turn the wrench clockwise to open or coun-
terclockwise to close.
B480B01O-AATMAP LIGHT
Push in the map light switch to turn the light on
or off. This light produces a spot beam for
convenient use as a map light at night or as a
personal light for the driver and the passenger.
HSM046
With Sunroof Without Sunroof
Page 67 of 221
FEATURES OF YOUR HYUNDAI 1- 55
!
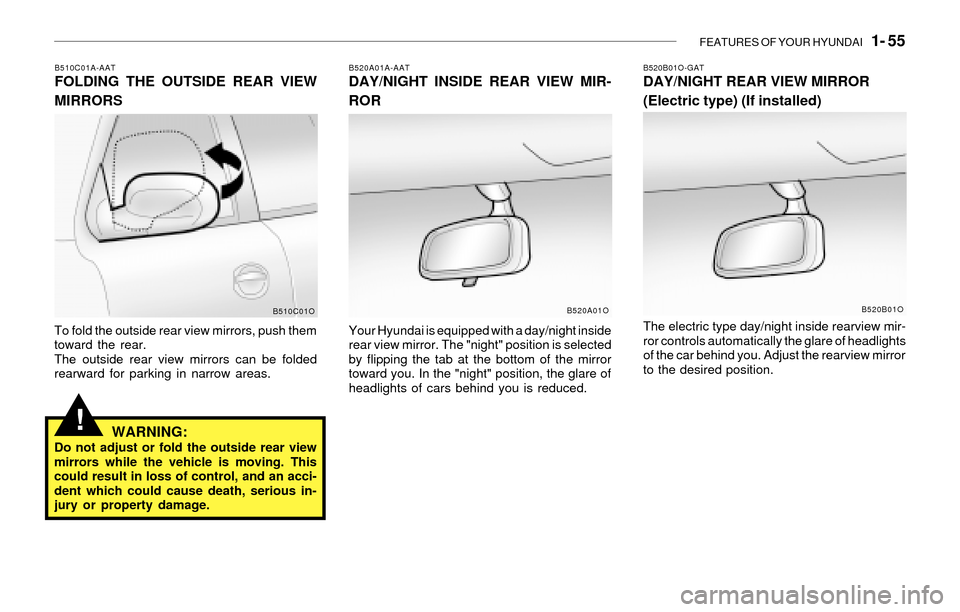
B510C01A-AATFOLDING THE OUTSIDE REAR VIEW
MIRRORS
To fold the outside rear view mirrors, push them
toward the rear.
The outside rear view mirrors can be folded
rearward for parking in narrow areas.
WARNING:Do not adjust or fold the outside rear view
mirrors while the vehicle is moving. This
could result in loss of control, and an acci-
dent which could cause death, serious in-
jury or property damage.
B520A01A-AATDAY/NIGHT INSIDE REAR VIEW MIR-
ROR
Your Hyundai is equipped with a day/night inside
rear view mirror. The "night" position is selected
by flipping the tab at the bottom of the mirror
toward you. In the "night" position, the glare of
headlights of cars behind you is reduced.
B510C01OB520A01O
B520B01O-GATDAY/NIGHT REAR VIEW MIRROR
(Electric type) (If installed)
The electric type day/night inside rearview mir-
ror controls automatically the glare of headlights
of the car behind you. Adjust the rearview mirror
to the desired position.
B520B01O
Page 68 of 221
1- 56 FEATURES OF YOUR HYUNDAI
!
!
HOMELINK PROGRAMMING
CAUTION:
o Make sure people and/or objects are out
of the way of any garage doors or gates
you may be operating during the pro-
gramming procedures.
o Keep original transmitters for potential
future programming needs, or in case
you sell the vehicle.
o In the event you do sell your vehicle, it's
recommended you erase your pro-
grammed HomeLink mirror buttons.
WARNING:Do not use HomeLink with any garage door
opener that lacks the safety stop and re-
verse feature as required by federal safety
standards (includes garage doors manu-
factured before April 1, 1982), as these
doors can increase the risk of serious injury
or death. Call 1-800-355-3515 or visit
www.homelink.com for more information.
NOTE:If programming a garage door opener or
gate, it is advised to unplug the device
during the "cycling" process to prevent
possible motor burnout.
Indicator Light
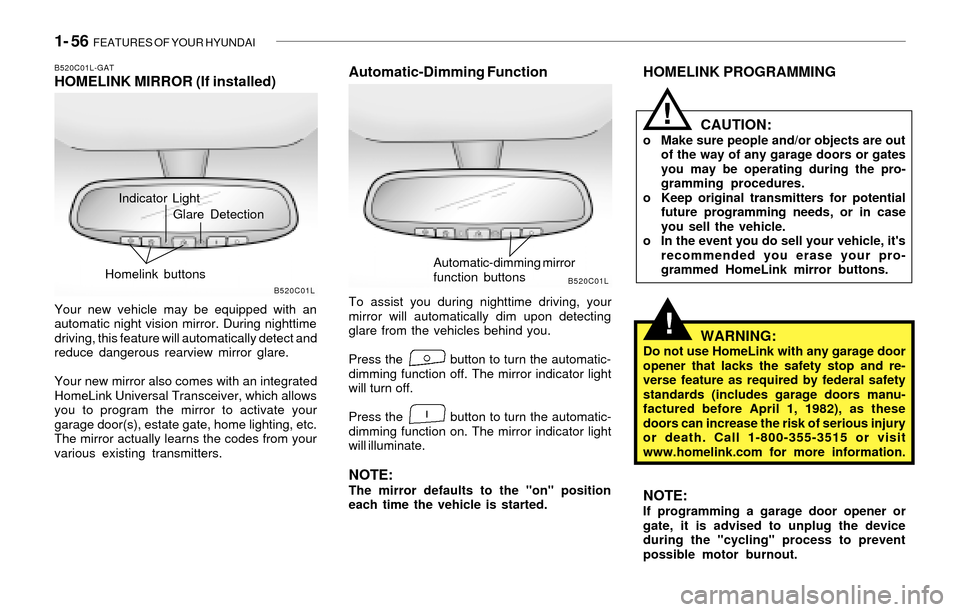
B520C01L-GATHOMELINK MIRROR (If installed)
Your new vehicle may be equipped with an
automatic night vision mirror. During nighttime
driving, this feature will automatically detect and
reduce dangerous rearview mirror glare.
Your new mirror also comes with an integrated
HomeLink Universal Transceiver, which allows
you to program the mirror to activate your
garage door(s), estate gate, home lighting, etc.
The mirror actually learns the codes from your
various existing transmitters.
Automatic-Dimming Function
To assist you during nighttime driving, your
mirror will automatically dim upon detecting
glare from the vehicles behind you.
Press the button to turn the automatic-
dimming function off. The mirror indicator light
will turn off.
Press the button to turn the automatic-
dimming function on. The mirror indicator light
will illuminate.
NOTE:The mirror defaults to the "on" position
each time the vehicle is started.
B520C01LB520C01L
Glare Detection
Homelink buttons
Automatic-dimming mirror
function buttons
Page 71 of 221
FEATURES OF YOUR HYUNDAI 1- 59
!
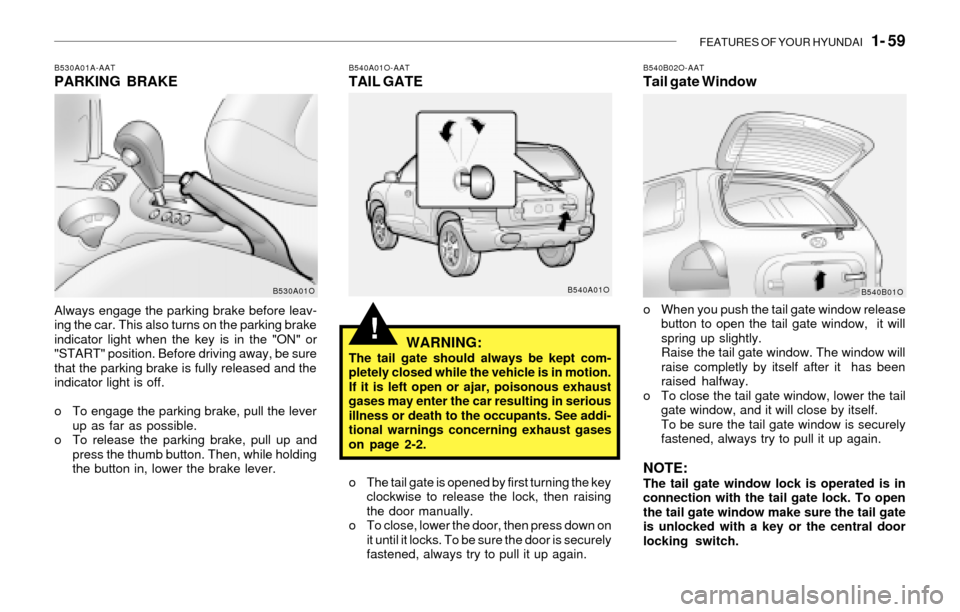
B530A01A-AATPARKING BRAKE
Always engage the parking brake before leav-
ing the car. This also turns on the parking brake
indicator light when the key is in the "ON" or
"START" position. Before driving away, be sure
that the parking brake is fully released and the
indicator light is off.
o To engage the parking brake, pull the lever
up as far as possible.
o To release the parking brake, pull up and
press the thumb button. Then, while holding
the button in, lower the brake lever.
B540A01O-AATTAIL GATE
WARNING:
The tail gate should always be kept com-
pletely closed while the vehicle is in motion.
If it is left open or ajar, poisonous exhaust
gases may enter the car resulting in serious
illness or death to the occupants. See addi-
tional warnings concerning exhaust gases
on page 2-2.
o The tail gate is opened by first turning the key
clockwise to release the lock, then raising
the door manually.
o To close, lower the door, then press down on
it until it locks. To be sure the door is securely
fastened, always try to pull it up again.
B530A01OB540A01O
B540B02O-AATTail gate Window
o When you push the tail gate window release
button to open the tail gate window, it will
spring up slightly.
Raise the tail gate window. The window will
raise completly by itself after it has been
raised halfway.
o To close the tail gate window, lower the tail
gate window, and it will close by itself.
To be sure the tail gate window is securely
fastened, always try to pull it up again.
NOTE:The tail gate window lock is operated is in
connection with the tail gate lock. To open
the tail gate window make sure the tail gate
is unlocked with a key or the central door
locking switch.
B540B01O
Page 74 of 221
1- 62 FEATURES OF YOUR HYUNDAI
!WARNING:o The fuel cap must be tightened at least
3 clicks, otherwise " " light will
illuminate.
o Gasoline vapors are dangerous. Before
refueling, always stop the engine and
never allow sparks or open flames near
the filler area. If you need to replace the
filler cap, use a genuine Hyundai re-
placement part.
B560A02O
!
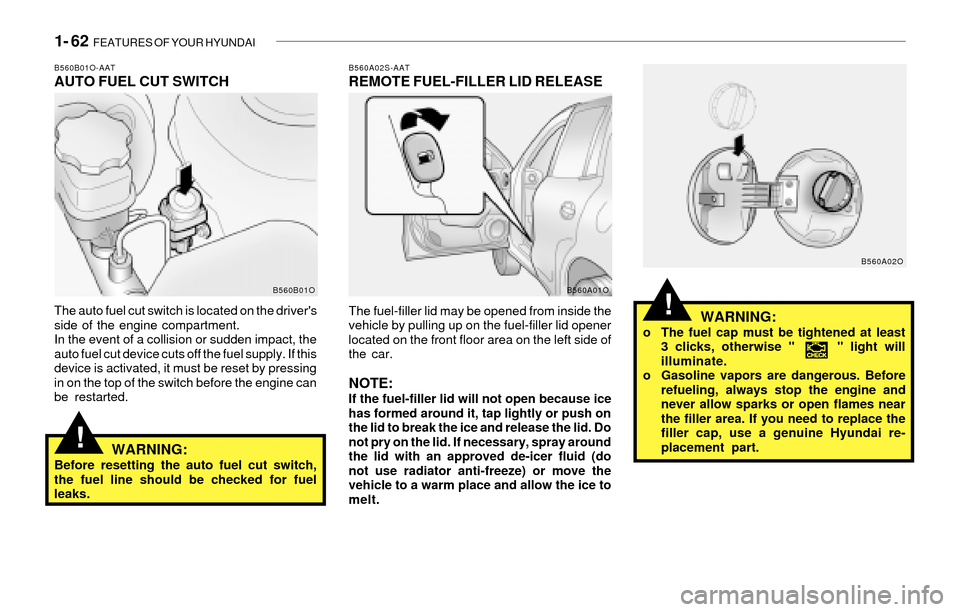
B560B01O-AATAUTO FUEL CUT SWITCH
The auto fuel cut switch is located on the driver's
side of the engine compartment.
In the event of a collision or sudden impact, the
auto fuel cut device cuts off the fuel supply. If this
device is activated, it must be reset by pressing
in on the top of the switch before the engine can
be restarted.
WARNING:Before resetting the auto fuel cut switch,
the fuel line should be checked for fuel
leaks.
B560A02S-AATREMOTE FUEL-FILLER LID RELEASE
The fuel-filler lid may be opened from inside the
vehicle by pulling up on the fuel-filler lid opener
located on the front floor area on the left side of
the car.
NOTE:If the fuel-filler lid will not open because ice
has formed around it, tap lightly or push on
the lid to break the ice and release the lid. Do
not pry on the lid. If necessary, spray around
the lid with an approved de-icer fluid (do
not use radiator anti-freeze) or move the
vehicle to a warm place and allow the ice to
melt.
B560B01OB560A01O
Page 75 of 221
FEATURES OF YOUR HYUNDAI 1- 63
!
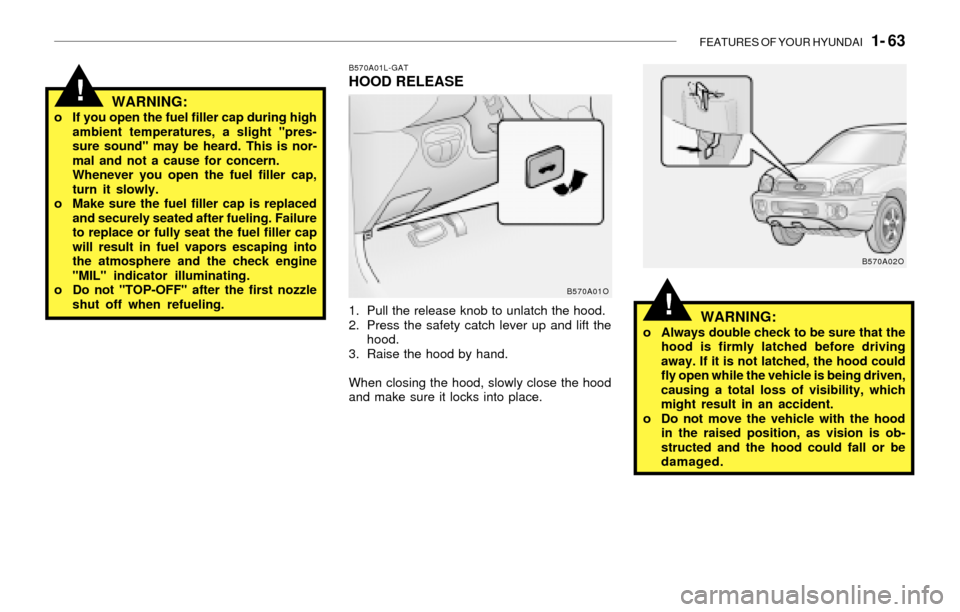
B570A01L-GATHOOD RELEASE
1. Pull the release knob to unlatch the hood.
2. Press the safety catch lever up and lift the
hood.
3. Raise the hood by hand.
When closing the hood, slowly close the hood
and make sure it locks into place.
WARNING:o If you open the fuel filler cap during high
ambient temperatures, a slight "pres-
sure sound" may be heard. This is nor-
mal and not a cause for concern.
Whenever you open the fuel filler cap,
turn it slowly.
o Make sure the fuel filler cap is replaced
and securely seated after fueling. Failure
to replace or fully seat the fuel filler cap
will result in fuel vapors escaping into
the atmosphere and the check engine
"MIL" indicator illuminating.
o Do not "TOP-OFF" after the first nozzle
shut off when refueling.
B570A01O
!WARNING:o Always double check to be sure that the
hood is firmly latched before driving
away. If it is not latched, the hood could
fly open while the vehicle is being driven,
causing a total loss of visibility, which
might result in an accident.
o Do not move the vehicle with the hood
in the raised position, as vision is ob-
structed and the hood could fall or be
damaged.
B570A02O
Page 76 of 221
1- 64 FEATURES OF YOUR HYUNDAI
!
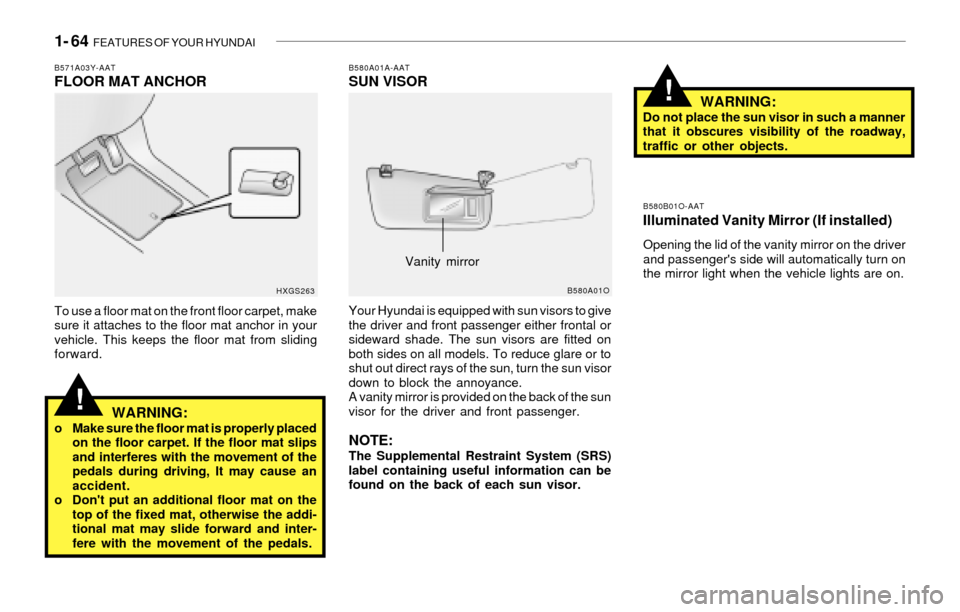
B580A01A-AATSUN VISOR
Your Hyundai is equipped with sun visors to give
the driver and front passenger either frontal or
sideward shade. The sun visors are fitted on
both sides on all models. To reduce glare or to
shut out direct rays of the sun, turn the sun visor
down to block the annoyance.
A vanity mirror is provided on the back of the sun
visor for the driver and front passenger.
NOTE:The Supplemental Restraint System (SRS)
label containing useful information can be
found on the back of each sun visor.
B580A01O
WARNING:Do not place the sun visor in such a manner
that it obscures visibility of the roadway,
traffic or other objects.
B580B01O-AATIlluminated Vanity Mirror (If installed)
Opening the lid of the vanity mirror on the driver
and passenger's side will automatically turn on
the mirror light when the vehicle lights are on.
Vanity mirror
!
B571A03Y-AATFLOOR MAT ANCHOR
To use a floor mat on the front floor carpet, make
sure it attaches to the floor mat anchor in your
vehicle. This keeps the floor mat from sliding
forward.
WARNING:o Make sure the floor mat is properly placed
on the floor carpet. If the floor mat slips
and interferes with the movement of the
pedals during driving, It may cause an
accident.
o Don't put an additional floor mat on the
top of the fixed mat, otherwise the addi-
tional mat may slide forward and inter-
fere with the movement of the pedals.
HXGS263
Page 77 of 221
FEATURES OF YOUR HYUNDAI 1- 65
!
To adjust the steering wheel:
1. Pull the lever upward and hold it to unlock.
2. Raise or lower the steering wheel to the
desired position.
3. After adjustment, release the lever.
WARNING:Do not attempt to adjust the steering wheel
while driving as this may result in loss of
control of the vehicle and serious injury or
death.
B600A02Y-AATSTEERING WHEEL TILT LEVER
B600A01O
B620A01S-AATFRONT DOOR EDGE WARNING
LIGHT (If installed)
A red light comes on when the front door is
opened. The purpose of this light is to assist
when you get in or out and also to warn passing
vehicles.
B610A01L-GATHORN
Press the pad on the steering wheel to sound the
horn.B620A01OB610A01O