Page 143 of 415
The cargo area light comes on
whenanydoororthetailgateis
opened if the switch in the light is
in the door activated (center)
position. When the doors and the
tailgate are closed, it can be turned
on with the switch in the light.When the switch is in the ON
position:
All the individual map lights come
onandstayonaslongasthe
switch remains in the ON position.
The cargo area light comes on and
stays on if the switch in the light is
in the door activated (center)
position. The lights go out about six seconds
after all the doors and the tailgate
are closed.
With the light control switch in the
Door Activated position, all the
individual map lights and the cargo
area light (with the switch in the
center position) come on when you
unlock the door with the remote
transmitter (see page ).
Withanydoororthetailgateleft
open, the lights stay on about three
minutes, then go out.
94On EX and EX-L models
Interior Lights
Inst rument s and Cont rols140
Page 144 of 415
Turn on the f ront individual map
lights by pushing the button next to
each light. Push the button again to
turn it off. You can also operate
these lights with the light control
switch (see page ).Turn on each rear individual map
light by pushing the lens when the
ignition switch is in the
ACCESSORY (I) or ON (II) position.
Push the lens again to turn it off.
You can also operate these lights
with the light control switch (see
page ).The cargo area light has a three-
position switch. In the OFF position,
the light does not come on. In the
center position, it comes on when
you open the tailgate. In the ON
position, it stays on continuously.
This light also works with the light
control switch (see page ).
139
139 139
Inst rument s and Cont rols
Interior Lights
Individual Map L ights Cargo A rea L ight
141
FRONTREAR
OFF
ON
Page 237 of 415

The security system helps to protect
your vehicle and valuables f rom thef t.
The horn sounds and a combination
of headlights, parking lights, side
marker lights and taillights f lashes if
someone attempts to break into your
vehicleorremovetheradio.This
alarm continues f or two minutes,
then the alarm stops. To reset an
alarming system before the two
minutes have elapsed, unlock either
f ront door with the key or the
remote transmitter.
The security system sets
automatically fifteen seconds after
you lock the doors, hood, and
tailgate. For the system to activate,
you must lock the doors f rom the
outside with the key, the lock tab,
the door lock switch, or the remote
transmitter. The security system
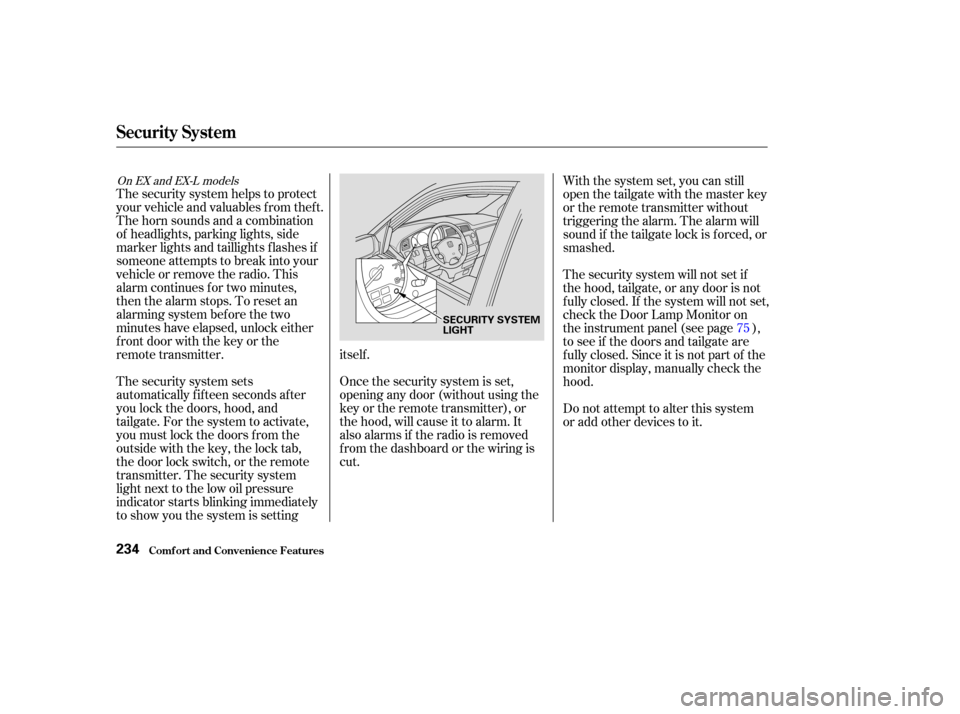
light next to the low oil pressure
indicator starts blinking immediately
to show you the system is settingitself .
Once the security system is set,
opening any door (without using the
key or the remote transmitter), or
the hood, will cause it to alarm. It
also alarms if the radio is removed
f rom the dashboard or the wiring is
cut.With the system set, you can still
open the tailgate with the master key
or the remote transmitter without
triggering the alarm. The alarm will
sound if the tailgate lock is f orced, or
smashed.
The security system will not set if
the hood, tailgate, or any door is not
f ully closed. If the system will not set,
check the Door Lamp Monitor on
the instrument panel (see page ),
to see if the doors and tailgate are
f ully closed. Since it is not part of the
monitor display, manually check the
hood.
Do not attempt to alter this system
or add other devices to it.
75
On EX and EX-L models
Security System
Comf ort and Convenience Feat ures234
SECURITY SYSTEM
LIGHT
Page 258 of 415

Distribute cargo evenly on the
f loor of the cargo area, placing the
heaviest items on the bottom and
as far forward as possible. Tie
down items that could be thrown
about the vehicle during a crash or
sudden stop.
If you carry large items that
prevent you f rom closing the
tailgate, exhaust gas can enter the
passenger area. To avoid the
possibility of, f ollow the instructions
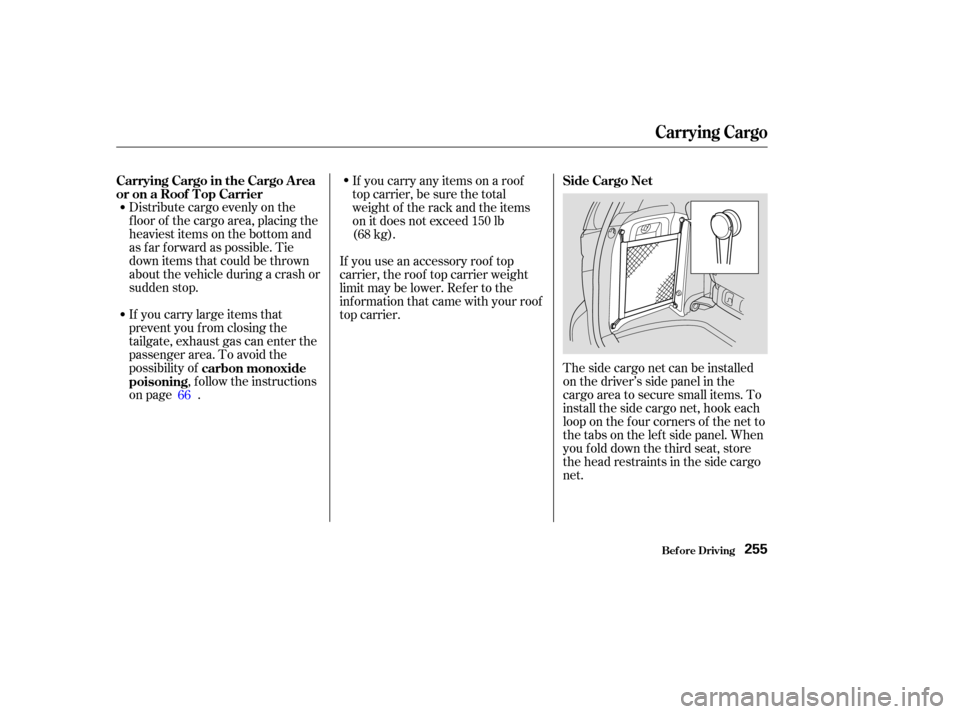
on page . The side cargo net can be installed
on the driver’s side panel in the
cargo area to secure small items. To
install the side cargo net, hook each
loop on the f our corners of the net to
the tabs on the lef t side panel. When
youfolddownthethirdseat,store
the head restraints in the side cargo
net.
If you carry any items on a roof
top carrier, be sure the total
weight of the rack and the items
on it does not exceed 150 lb
(68 kg).
If you use an accessory roof top
carrier, the roof top carrier weight
limit may be lower. Ref er to the
inf ormation that came with your roof
top carrier.
66 carbon monoxide
poisoning Side Cargo Net
Carrying Cargo in the Cargo A rea
or on a Roof T op Carrier
Carrying Cargo
Bef ore Driving255
Page 259 of 415
You can use the cargo net to secure
items in the cargo area, and store
small items between the two halves
of the net. To install the cargo net,
hook the loops on the f our corners of
the net to the tabs at both sides of
the tailgate sill.There are cargo hooks f or plastic
grocery bags on the back of the third
row seat. They are designed to hold
light items. Heavy objects may
damage the hooks.
On EX and EX-L models
Carrying Cargo
Cargo Net
Cargo Hooks
Bef ore Driving256
CARGO HOOKS
Page 261 of 415

Youshoulddothefollowingchecks
and adjustments every day bef ore
you drive your vehicle.Make sure all windows, mirrors,
and outside lights are clean and
unobstructed. Remove f rost, snow,
or ice. Check the adjustment of the seat
(see page ).
Check the adjustment of the
inside and outside mirrors (see
page ).
Check the adjustment of the
steering wheel (see page ).
Fasten your seat belt. Check that
your passengers have f astened
their seat belts (see page ).Turn the ignition switch ON (II).
Check the indicator lights in the
instrument panel.
Start the engine (see page ).
Check the gauges and indicator
lights in the instrument panel (see
page ).
Check that any items you may be
carrying with you inside are stored
properly or f astened down
securely. Visually check the tires. If a tire
looks low, use a gauge to check its
pressure. Check that the hood and tailgate
arefullyclosed. Makesurethedoorsandtailgate
are securely closed and locked.
3. 2.
1.
4. 5.
6.
7.
8.
9. 11.
12. 10.
128 88
17 259
71
110
Preparing to Drive
Driving258
Page 268 of 415

�µ
Always use the parking brake when
you park your vehicle. The indicator
on the instrument panel shows that
the parking brake is not f ully
released; it does not indicate that the
parking brake is f irmly set. Make
sure the parking brake is set f irmly
or your vehicle may roll if it is
parked on an incline.
Set the parking brake bef ore you put
the transmission in Park. This keeps
the vehicle from moving and putting
pressure on the parking mechanism
in the transmission making it
easier to move the shif t lever out of
Park when you want to drive away. If the vehicle is f acing uphill, turn
the f ront wheels away f rom the curb.
If the vehicle is f acing downhill, turn
the f ront wheels toward the curb.
Make sure the parking brake is f ully
released bef ore driving away.
Driving with the parking brake
partially set can overheat or damage
the rear brakes.
Make sure the windows are closed.
Turn of f the lights.
Place any packages, valuables, etc.,
in the cargo area or take them
with you.
Lock the doors and the tailgate
with the key or the remote
transmitter.
Never park over dry leaves, tall
grass, or other f lammable
materials. The three way catalytic
converter gets very hot, and could
cause these materials to catch on
fire.
Parking T ips
Parking
Driving265
Page 337 of 415

Remove the socket from the
headlight assembly by turning it
one-quarter turn counterclockwise.
Remove the burned out bulb f rom
thesocketbypushingitinand
turning the bulb counterclockwise
until it unlocks.
Install the new bulb in the socket.
Turn it clockwise to lock it in place.
Insert the socket back into the
headlight assembly. Turn it
clockwise to lock it in place.
Put the inner f ender in place.
Install the two holding clips. Lock
each clip in place by pushing on
the center.Determine which of the two bulbs
is burned out: stop/taillight/side
marker light or turn signal light. Pull the taillight assembly out of
thebodybyslidingitbackward.
Use a Phillips-head screwdriver to
remove the taillight assembly
mounting screw under each cover. Open the tailgate. Release the
covers by inserting a f lat-tip
screwdriver into the slot until the
cover bows slightly. Then pivot
the screwdriver 90° and pull it
straight out of the slot.
Turn on the lights to make sure
the new bulb is working.
1.
2. 3.
4.
4.
5.
6.
7.
8.
9.
Lights
Maint enance
Replacing Rear Bulbs
(in Fenders)
334