Page 74 of 415
�Î
�Î
�Î
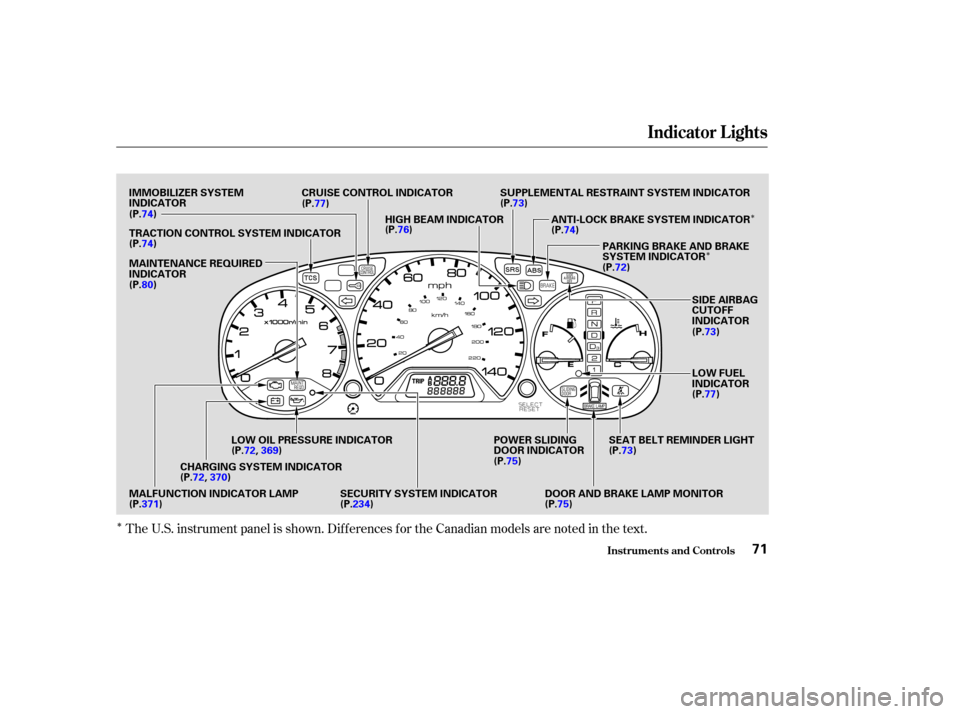
The U.S. instrument panel is shown. Dif f erences f or the Canadian models are noted in the text.
Indicator L ights
Inst rument s and Cont rols71
IMMOBILIZER SYSTEM
INDICATOR CRUISE CONTROL INDICATOR
HIGH BEAM INDICATOR SUPPLEMENTAL RESTRAINT SYSTEM INDICATOR
ANTI-LOCK BRAKE SYSTEM INDICATORPARKING BRAKE AND BRAKE
SYSTEM INDICATOR
SIDE AIRBAG
CUTOFF
INDICATOR
LOW FUEL
INDICATOR
SEAT BELT REMINDER LIGHT
DOOR AND BRAKE LAMP MONITOR
POWER SLIDING
DOOR INDICATOR
SECURITY SYSTEM INDICATOR
LOW OIL PRESSURE INDICATOR
CHARGING SYSTEM INDICATOR
MALFUNCTION INDICATOR LAMP MAINTENANCE REQUIRED
INDICATOR TRACTION CONTROL SYSTEM INDICATOR (P.74)
(P.74)
(P.80) (P.77)
(P.76) (P.73)
(P.74)
(P.72)
(P.73)
(P.77)
(P.73)
(P. 75)
(P.75)
(P.371) (P.72,
369)
(P.72, 370)
(P.234)
Page 75 of 415

This light has two f unctions:This indicator comes on when you
turn the ignition switch ON (II). It
is a reminder to check the parking
brake. Driving with the parking
brake not f ully released can
damage the brakes and tires.
If this light comes on when the
engine is running, the battery is not
being charged. For complete
inf ormation, see page . The engine can be severely damaged
if this light f lashes or stays on when
the engine is running. For complete
inf ormation, see page . See page .
The instrument panel has many
indicators to give you important
inf ormation about your vehicle.
If the indicator remains lit after
you have f ully released the
parking brake while the engine is
running, or if it comes on while
driving, it can indicate a problem
in the brake system. For complete
inf ormation, see page .
1.
2.
371
369
370 373
Indicator L ights
Inst rument s and Cont rols
Charging System
Indicator L ow Oil Pressure
Indicator Malf unction Indicator
LampParking Brake and Brake System
Indicator
72
U.S. Canada
Page 83 of 415
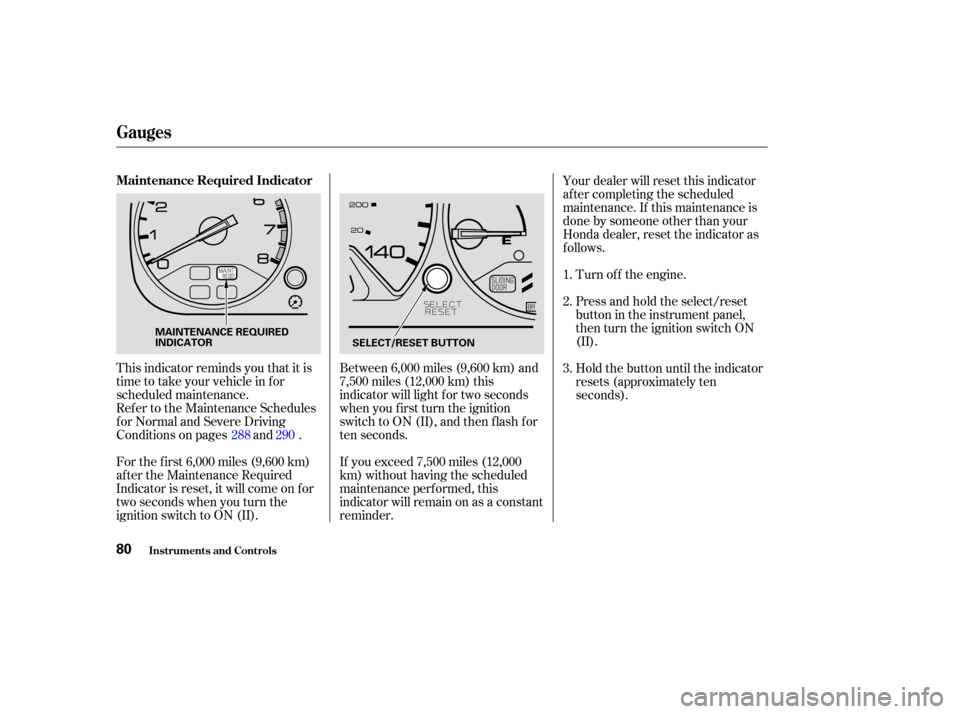
Ref er to the Maintenance Schedules
f or Normal and Severe Driving
Conditions on pages and .
For the f irst 6,000 miles (9,600 km)
af ter the Maintenance Required
Indicator is reset, it will come on f or
two seconds when you turn the
ignition switch to ON (II).Between 6,000 miles (9,600 km) and
7,500 miles (12,000 km) this
indicator will light f or two seconds
when you first turn the ignition
switch to ON (II), and then flash for
ten seconds.
If you exceed 7,500 miles (12,000
km) without having the scheduled
maintenance perf ormed, this
indicator will remain on as a constant
reminder.Your dealer will reset this indicator
af ter completing the scheduled
maintenance. If this maintenance is
done by someone other than your
Honda dealer, reset the indicator as
f ollows.
Turn of f the engine.
This indicator reminds you that it is
time to take your vehicle in for
scheduled maintenance. Press and hold the select/reset
buttonintheinstrumentpanel,
then turn the ignition switch ON
(II).
Hold the button until the indicator
resets (approximately ten
seconds).
1.
2.
3.
288 290
Gauges
Maintenance Required Indicator
Inst rument s and Cont rols80
MAINTENANCE REQUIRED
INDICATOR SELECT/RESET BUTTON
Page 85 of 415
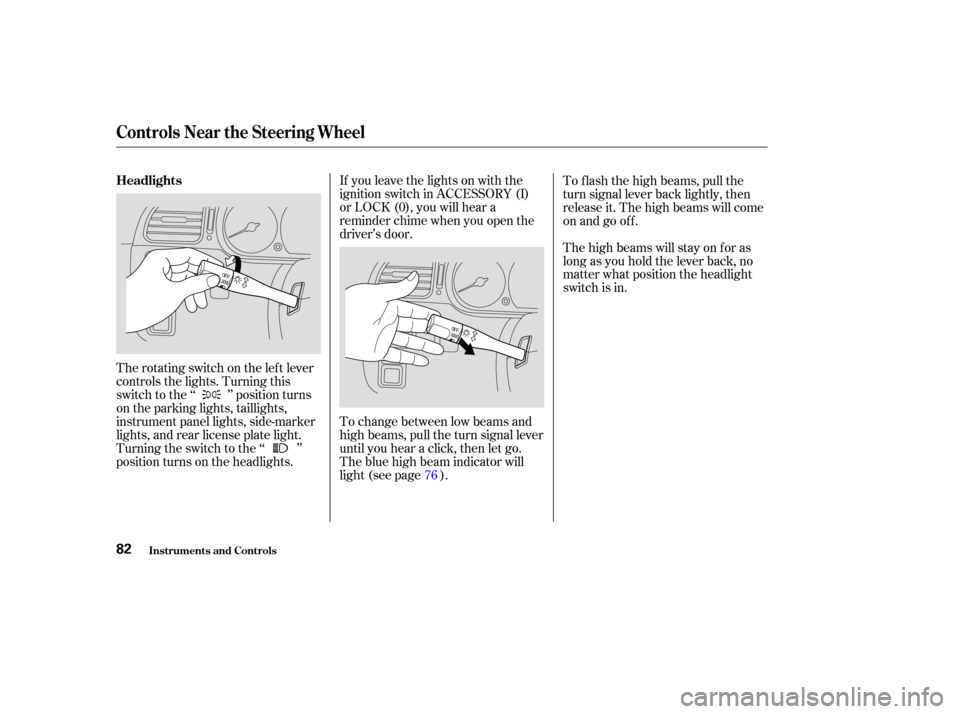
If you leave the lights on with the
ignition switch in ACCESSORY (I)
or LOCK (0), you will hear a
reminder chime when you open the
driver’s door.
To change between low beams and
high beams, pull the turn signal lever
until you hear a click, then let go.
The blue high beam indicator will
light (see page ).To f lash the high beams, pull the
turn signal lever back lightly, then
release it. The high beams will come
on and go of f .
The high beams will stay on f or as
long as you hold the lever back, no
matter what position the headlight
switch is in.
The rotating switch on the lef t lever
controls the lights. Turning this
switch to the ‘‘ ’’ position turns
on the parking lights, taillights,
instrument panel lights, side-marker
lights, and rear license plate light.
Turning the switch to the ‘‘ ’’
position turns on the headlights. 76
Controls Near the Steering Wheel
Inst rument s and Cont rols
Headlights
82
Page 86 of 415
The Automatic Lighting Of f f eature
turns of f the headlights, parking
lights, taillights, side marker lights,
license plate lights and instrument
panel lights within 15 seconds of
removing the key from the ignition
switch and closing the driver’s door.The lights will turn on again when
you unlock or open the driver’s door.
If you unlock the door, but do not
open it within 15 seconds, the lights
will go off. With the driver’s door
open, you will hear a lights-on
reminder chime.
With the headlight switch off, the
high beam headlights come on with
reduced brightness when you turn
the ignition switch to ON (II) and
release the parking brake. They
remain on until you turn the ignition
of f , even if you set the parking brake.
The headlights revert to normal
operation when you turn them on
with the switch.
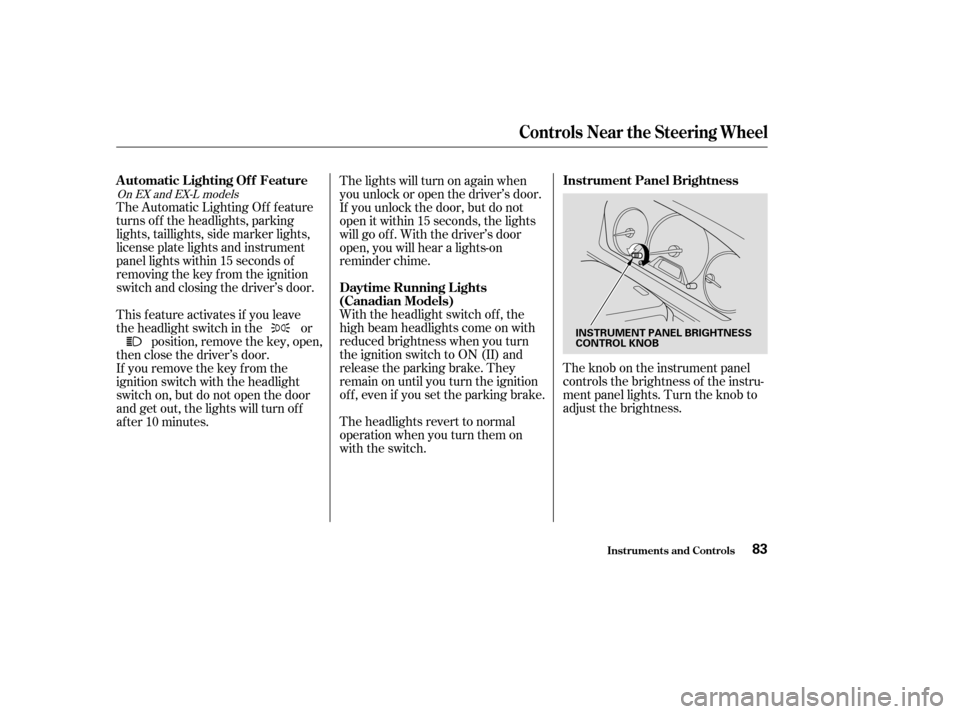
The knob on the instrument panel
controls the brightness of the instru-
ment panel lights. Turn the knob to
adjust the brightness.
This feature activates if you leave
the headlight switch in the or
position, remove the key, open,
then close the driver’s door.
If you remove the key f rom the
ignition switch with the headlight
switch on, but do not open the door
and get out, the lights will turn of f
af ter 10 minutes.
On EX and EX-L models
Controls Near the Steering Wheel
Inst rument s and Cont rols
Automatic Lighting Of f Feature
Daytime Running L ights
(Canadian Models)Instrument Panel Brightness
83
INSTRUMENT PANEL BRIGHTNESS
CONTROL KNOB
Page 90 of 415
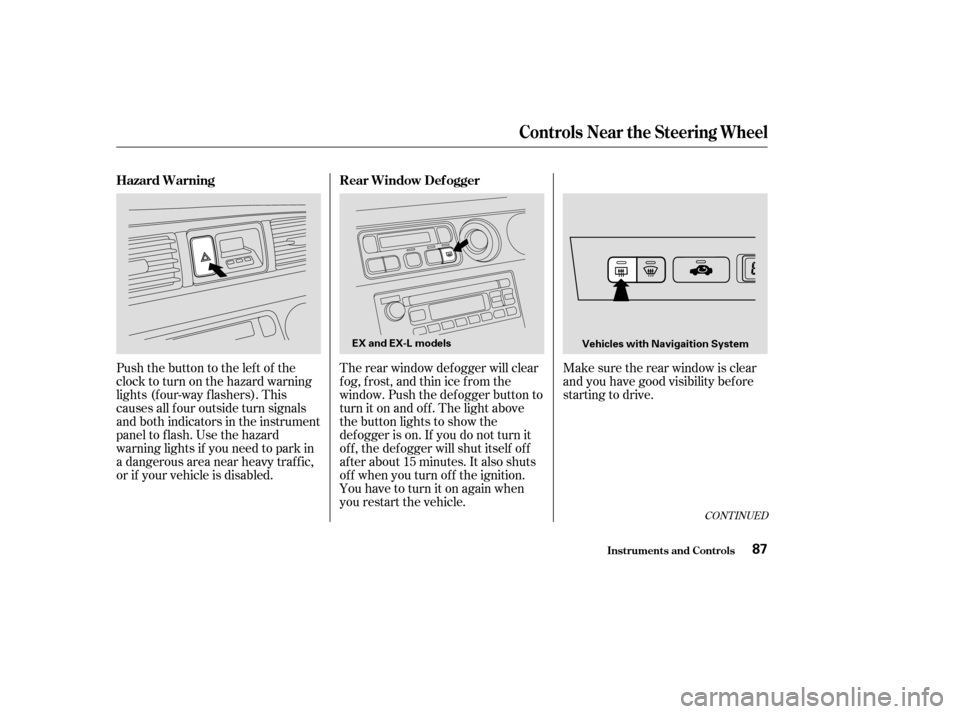
Make sure the rear window is clear
and you have good visibility bef ore
starting to drive.
The rear window def ogger will clear
fog, frost, and thin ice from the
window. Push the def ogger button to
turn it on and of f . The light above
the button lights to show the
def ogger is on. If you do not turn it
of f , the def ogger will shut itself of f
af ter about 15 minutes. It also shuts
of f when you turn of f the ignition.
You have to turn it on again when
you restart the vehicle.
Push the button to the left of the
clocktoturnonthehazardwarning
lights (f our-way f lashers). This
causes all f our outside turn signals
and both indicators in the instrument
panel to f lash. Use the hazard
warning lights if you need to park in
a dangerous area near heavy traffic,
or if your vehicle is disabled.
CONT INUED
Controls Near the Steering Wheel
Inst rument s and Cont rols
Rear Window Def ogger
Hazard Warning
87
EX and EX-L models
Vehicles with Navigaition System
Page 91 of 415
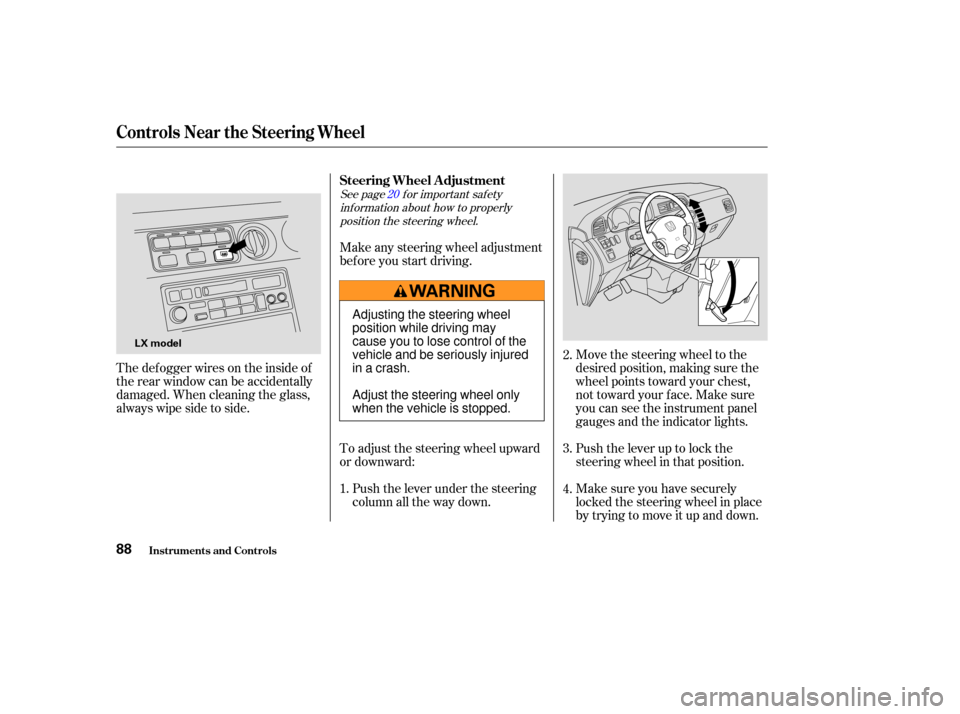
See page f or important saf etyinf ormation about how to properlyposition the steering wheel. 20
Make any steering wheel adjustment
bef ore you start driving.
Make sure you have securely
locked the steering wheel in place
by trying to move it up and down. Push the lever up to lock the
steering wheel in that position. Move the steering wheel to the
desired position, making sure the
wheel points toward your chest,
not toward your f ace. Make sure
you can see the instrument panel
gauges and the indicator lights.
Push the lever under the steering
column all the way down.
To adjust the steering wheel upward
or downward:
Thedefoggerwiresontheinsideof
the rear window can be accidentally
damaged. When cleaning the glass,
always wipe side to side.
3.
4.
1. 2.
Controls Near the Steering Wheel
Inst rument s and Cont rols
Steering Wheel A djustment
88
LX model
Adjusting the steering wheel
position while driving may
cause you to lose control of the
vehicle and be seriously injured
inacrash.
Adjust the steering wheel only
when the vehicle is stopped.
Page 95 of 415
�µ
�µ �µ
Use this position
only to start the engine. The switch
returns to ON (II) when you let go of
the key.
This is the normal key
position when driving. All f eatures
and accessories on the vehicle are
usable. Several of the lights on the
instrument panel come on as a test
when you turn the ignition switch
f rom ACCESSORY to ON. The engine will not start if the
Immobilizer System does not
recognize the key’s coding (see page
).
You will hear a reminder beeper if
you leave the key in the ignition
switch in the LOCK (0) or
ACCESSORY (I) position and open
thedriver’sdoor.Removethekeyto
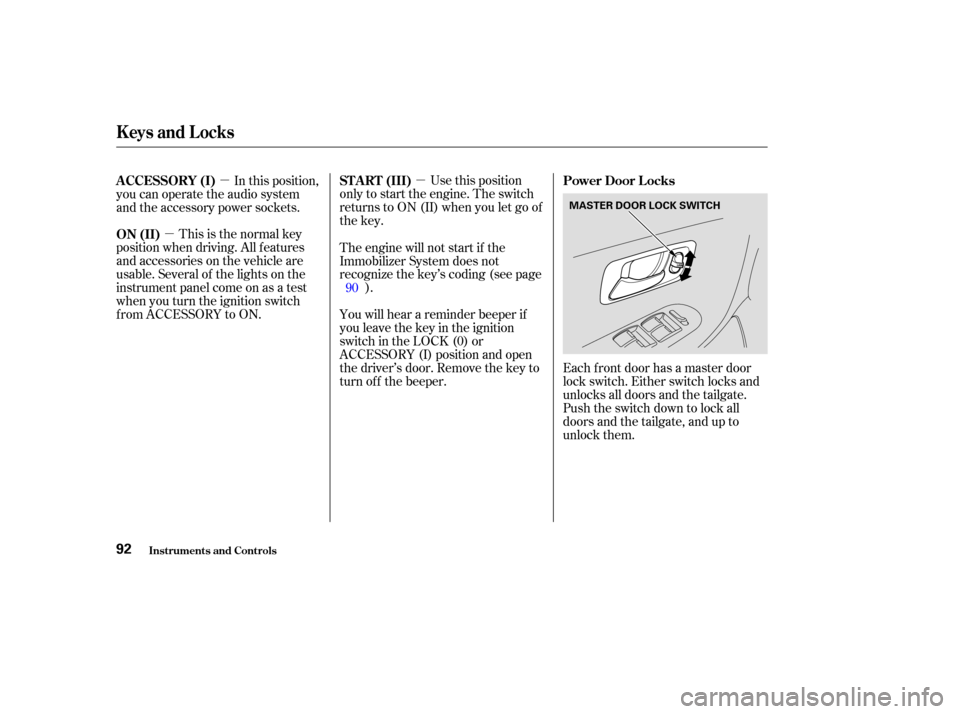
turn of f the beeper. Each f ront door has a master door
lock switch. Either switch locks and
unlocks all doors and the tailgate.
Push the switch down to lock all
doors and the tailgate, and up to
unlock them.
In this position,
you can operate the audio system
and the accessory power sockets.
90
ST A RT (III)
Power Door L ocks
ON (II) A CCESSORY (I)
Keys and Locks
Inst rument s and Cont rols92
MASTER DOOR LOCK SWITCH