Page 168 of 302
Your Honda’s transmission has f our
f orward speeds, and is electronically
controlled f or smoother shif ting. It
also has a ‘‘lock-up’’ torque converter
forbetterfueleconomy.Youmay
f eel what seems like another shif t
when the converter locks.This indicator on the instrument
panel shows which position the shif t
lever is in.The ‘‘D’’ indicator comes on f or a
f ew seconds when you turn the
ignition switch to ON (II). If it
f lashes while driving (in any shif t
position), it indicates a possible
problem in the transmission. Avoid
rapid acceleration and have the trans-
missioncheckedbyanauthorized
Honda dealer as soon as possible.
To operate the HX model’s
Continuously Variable Transmission
(CVT), refer to page .
179
Automatic Transmission
Driving
Shif t L ever Position Indicator
174
U.S.: LX, EX, Canada: LX, Si
Canada: DX
�����—�����—�����y�
�������������y���
�(���%�������y���
�����y
Page 171 of 302

�µ
�µ To shif t to Second,
pressthereleasebuttononthefront
of the shif t lever. This position locks
thetransmissioninsecondgear.It
does not downshif t to f irst gear
when you come to a stop. Second
gives you more power when climbing,
and increased engine braking when
going down steep hills. Use second
gear when starting out on a slippery
surf ace or in deep snow. It will help
reduce wheelspin. If you exceed the maximum speed
f or the gear you are in, the engine
speed will enter into the tachometer’s
red zone. If this occurs, you may f eel
the engine cut in and out. This is
caused by a limiter in the engine’s
computer controls. The engine will
run normally when you reduce the
RPM below the red zone.
If you exceed the maximum speed
f or the gear you are in, you may f eel
the engine cut in and out. This is
caused by a limiter in the engine’s
computer controls. The engine will
run normally when you reduce the
engine speed by upshif ting or
slowing down.
This position is similar
to D, except only the first three
gears are selected. Use D to provide
engine braking when going down a
steep hill. D can also keep the
transmission f rom cycling between
third and f ourth gears in stop-and-go
driving.
ForfasteraccelerationwheninD or
D, you can get the transmission to
automatically downshif t by pushing
the accelerator pedal to the floor.
The transmission will shif t down one
or two gears, depending on your
speed.
3
3
3
All models except U.S. DX
U.S. DX model
Automatic Transmission
Driving
Engine Speed L imiter
Second (2)
Drive (D )3
177
�����—�����—�����y�
�������������y���
�(���%�������y���
�����y
Page 173 of 302
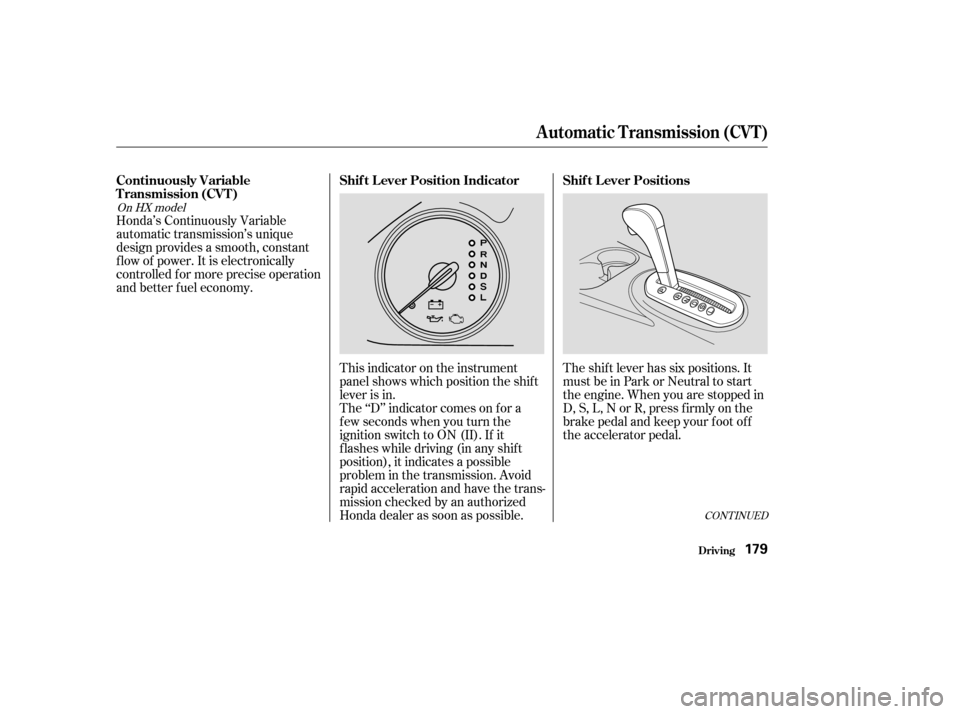
Honda’s Continuously Variable
automatic transmission’s unique
design provides a smooth, constant
f low of power. It is electronically
controlled f or more precise operation
and better f uel economy.This indicator on the instrument
panel shows which position the shif t
lever is in.
The ‘‘D’’ indicator comes on f or a
f ew seconds when you turn the
ignition switch to ON (II). If it
f lashes while driving (in any shif t
position), it indicates a possible
problem in the transmission. Avoid
rapid acceleration and have the trans-
mission checked by an authorized
Honda dealer as soon as possible.The shif t lever has six positions. It
must be in Park or Neutral to start
the engine. When you are stopped in
D, S, L, N or R, press f irmly on the
brake pedal and keep your f oot of f
the accelerator pedal.
CONT INUED
On HX model
Continuously Variable
T ransmission (CVT )
Shif t L ever Position Indicator Shif t L ever Positions
Automatic Transmission (CVT)
Driving179
�����—�����—�
���y�
���������
���y���
�(���%�������y���
�����y
Page 203 of 302
�µ
�´ �´ �µ
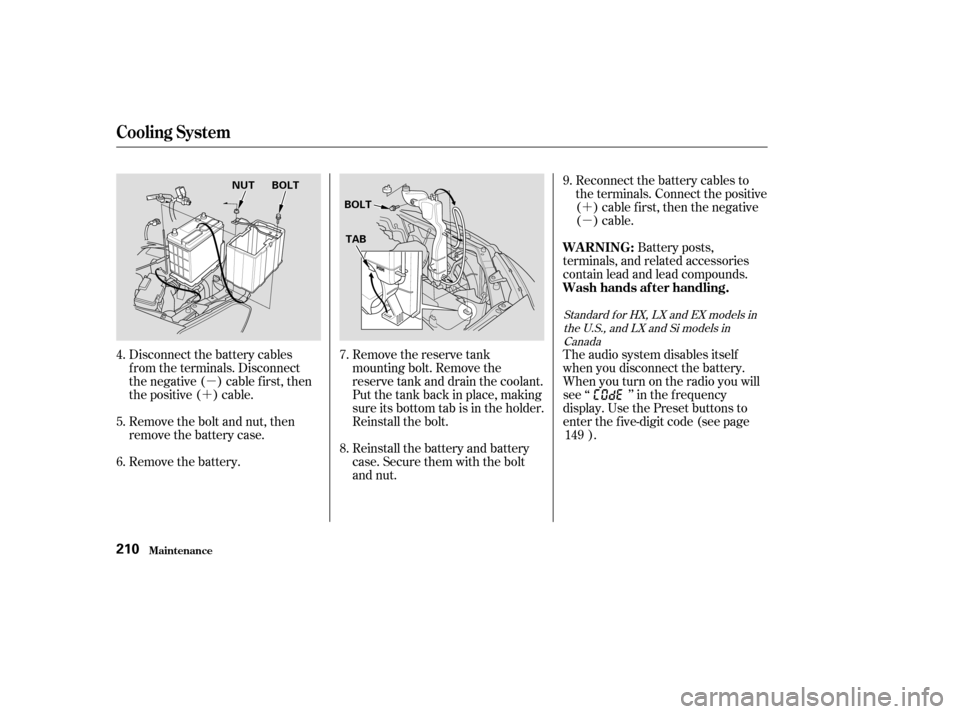
Disconnect the battery cables
f rom the terminals. Disconnect
the negative ( ) cable first, then
the positive ( ) cable.
Remove the bolt and nut, then
remove the battery case. Remove the reserve tank
mounting bolt. Remove the
reserve tank and drain the coolant.
Put the tank back in place, making
sure its bottom tab is in the holder.
Reinstall the bolt.
Reinstall the battery and battery
case. Secure them with the bolt
and nut.Reconnect the battery cables to
the terminals. Connect the positive
( ) cable f irst, then the negative
()cable.
Battery posts,
terminals, and related accessories
contain lead and lead compounds.
Remove the battery. The audio system disables itself
when you disconnect the battery.
Whenyouturnontheradioyouwill
see ‘‘ ’’ in the f requency
display. Use the Preset buttons to
enter the f ive-digit code (see page
).
4. 6. 7.
5. 8.9.
149
Standard f or HX, LX and EX models in the U.S., and LX and Si models inCanada
Cooling Syst em
Maint enance
WARNING:
Wash hands af ter handling.
210
NUT BOLT
BOLT
TAB
�����—�����—�����y�
�������������y���
�(���%�������y�����
���y
Page 208 of 302
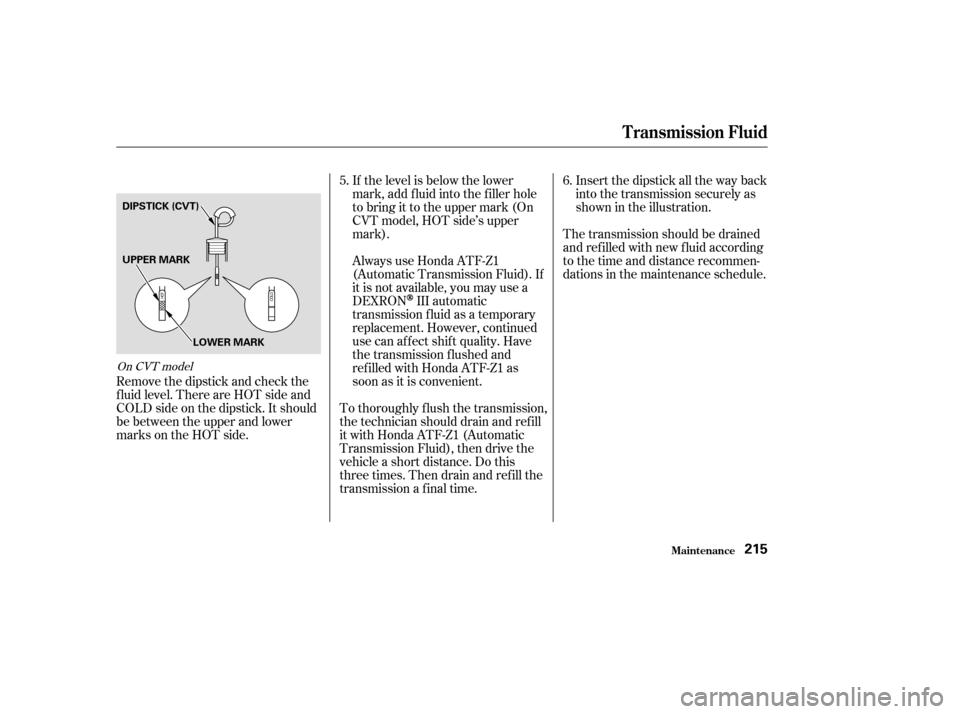
Insert the dipstick all the way back
into the transmission securely as
shown in the illustration.
The transmission should be drained
and ref illed with new f luid according
to the time and distance recommen-
dations in the maintenance schedule.
If the level is below the lower
mark, add f luid into the f iller hole
to bring it to the upper mark (On
CVT model, HOT side’s upper
mark).
Always use Honda ATF-Z1
(Automatic Transmission Fluid). If
it is not available, you may use a
DEXRON
III automatic
transmission f luid as a temporary
replacement. However, continued
use can affect shift quality. Have
the transmission f lushed and
ref illed with Honda ATF-Z1 as
soon as it is convenient.
To thoroughly f lush the transmission,
the technician should drain and ref ill
it with Honda ATF-Z1 (Automatic
Transmission Fluid), then drive the
vehicle a short distance. Do this
three times. Then drain and ref ill the
transmission a f inal time.
Remove the dipstick and check the
f luid level. There are HOT side and
COLD side on the dipstick. It should
be between the upper and lower
marks on the HOT side. 5.
6.
On CVT model
T ransmission Fluid
Maint enance215
UPPER MARK
DIPSTICK (CVT)
LOWER MARK
�����—�����—�
���y�
�������������y���
�(���%�������y�����
���y
Page 209 of 302

Check the f luid level in the reser-
voirs monthly. There are up to two
reservoirs, depending on the model.
They are:
The brake f luid should be replaced
accordingtothetimeanddistance
recommendations in the mainte-
nance schedule.Brake f luid reservoir (all models)
Clutch f luid reservoir
(manual transmission only)
Check the f luid level with the
transmission at normal operating
temperature and the car sitting on
level ground. Remove the
transmission f iller bolt and caref ully
f eel inside the bolt hole with your
f inger. The f luid level should be up
to the edge of the bolt hole. If it is
not, add Honda Manual Transmis-
sion Fluid (MTF) until it starts to
run out of the hole. Reinstall the
f iller bolt and tighten it securely. If Honda MTF is not available, you
may use an SAE 10W-30 or 10W-40
viscosity motor oil with the API
Certif ication seal that says ‘‘FOR
GASOLINE ENGINES’’ as a
temporary replacement. However,
motor oil does not contain the proper
additives and continued use can
cause stiffer shifting. Replace as
soon as it is convenient.
The transmission should be drained
and ref illed with new f luid according
to the time and distance recommen-
dations in the maintenance schedule.
5-speed Manual Transmission
T ransmission Fluid
Maint enance216
FILLER BOLT
Correct Level
�����—�����—�����y�
�������������y���
�(���%�������y�����
���y
Page 218 of 302
�µ
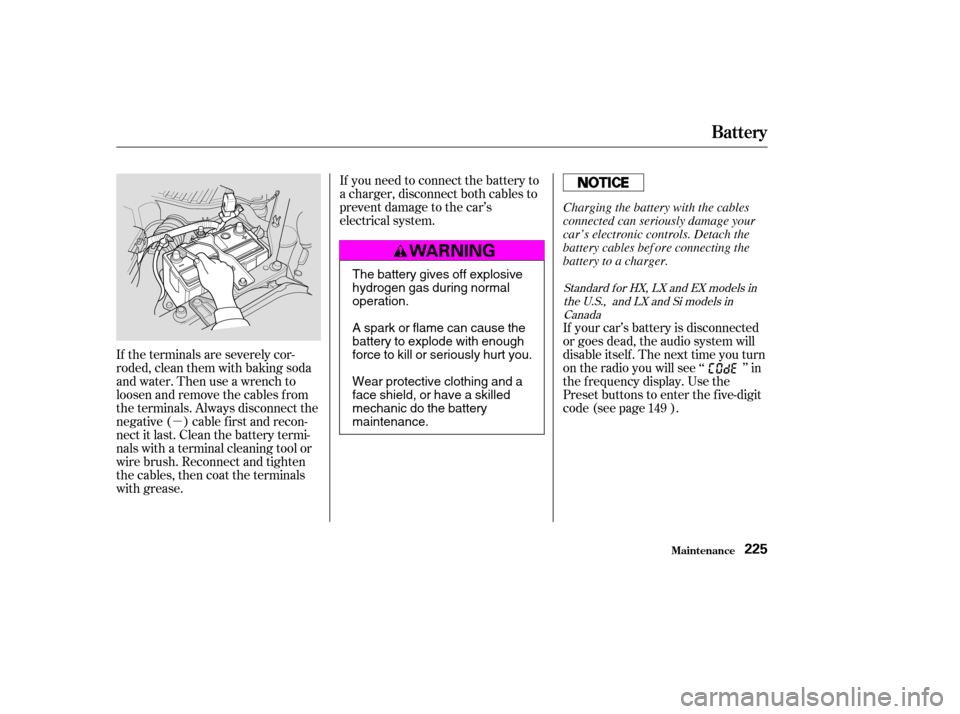
If the terminals are severely cor-
roded, clean them with baking soda
and water. Then use a wrench to
loosen and remove the cables f rom
the terminals. Always disconnect the
negative ( ) cable f irst and recon-
nect it last. Clean the battery termi-
nals with a terminal cleaning tool or
wire brush. Reconnect and tighten
the cables, then coat the terminals
with grease. If you need to connect the battery to
a charger, disconnect both cables to
prevent damage to the car’s
electrical system.
If your car’s battery is disconnected
or goes dead, the audio system will
disableitself.Thenexttimeyouturn
on the radio you will see ‘‘ ’’ in
the f requency display. Use the
Preset buttons to enter the five-digit
code (see page ).149
Standard f or HX, LX and EX models in
the U.S., and LX and Si models inCanada
Battery
Maint enance225
The battery gives off explosive
hydrogen gas during normaloperation.
A spark or flame can cause the
battery to explode with enough
force to kill or seriously hurt you.
Wear protective clothing and a
face shield, or have a skilled
mechanic do the batterymaintenance. Charging the battery with the cables
connected can seriously damage your
car’s electronic controls. Detach the
battery cables bef ore connecting the
battery to a charger.
�����—�����—�����y�
�������������y���
�(���%�������y���������y
Page 222 of 302
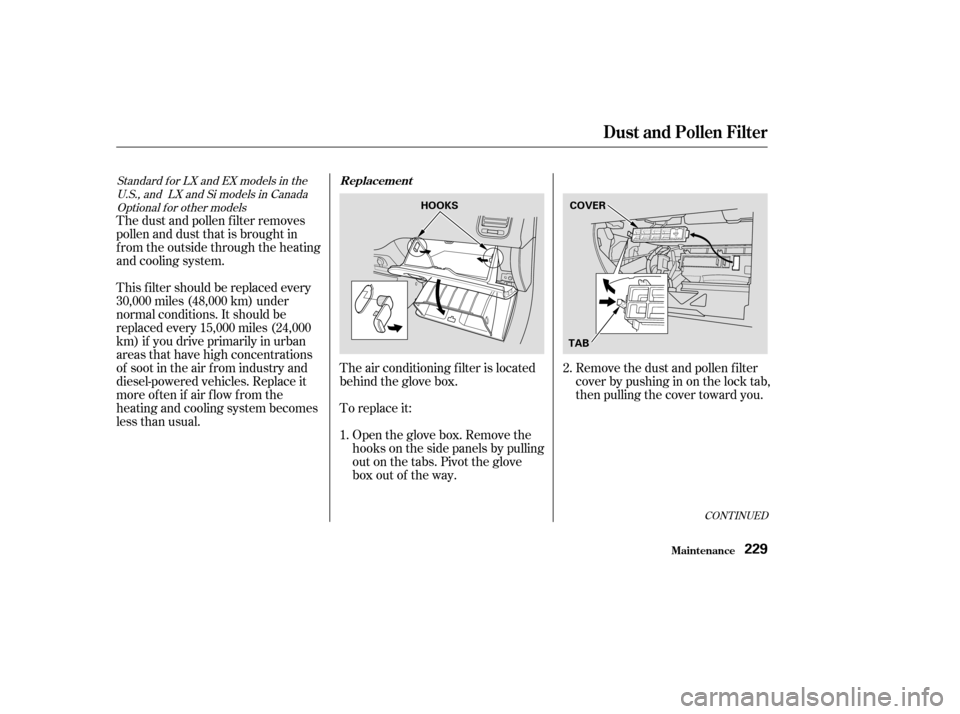
To replace it:
The air conditioning f ilter is located
behind the glove box.
Open the glove box. Remove the
hooks on the side panels by pulling
out on the tabs. Pivot the glove
box out of the way. Remove the dust and pollen f ilter
cover by pushing in on the lock tab,
then pulling the cover toward you.
The dust and pollen f ilter removes
pollen and dust that is brought in
f rom the outside through the heating
andcoolingsystem.
This f ilter should be replaced every
30,000 miles (48,000 km) under
normal conditions. It should be
replaced every 15,000 miles (24,000
km) if you drive primarily in urban
areas that have high concentrations
of soot in the air f rom industry and
diesel-powered vehicles. Replace it
more of ten if air f low f rom the
heating and cooling system becomes
less than usual.
1.2.
CONT INUED
Standard f or LX and EX models in the
U.S.,and LXandSimodelsinCanadaOptional f or other models
Maint enance
Replacement
Dust and Pollen Filter
229
HOOKS COVER
TAB
�����—�����—�����y�
�������������y���
�(���%�������y���������y