Page 317 of 395
Push the electrical connector back
onto the bulb. Make sure it is on
all the way.
Turn on the headlights to test the
new bulb.
Reinstall the air intake cover.
Reinstall the two fasteners and
secure them by pushing on the
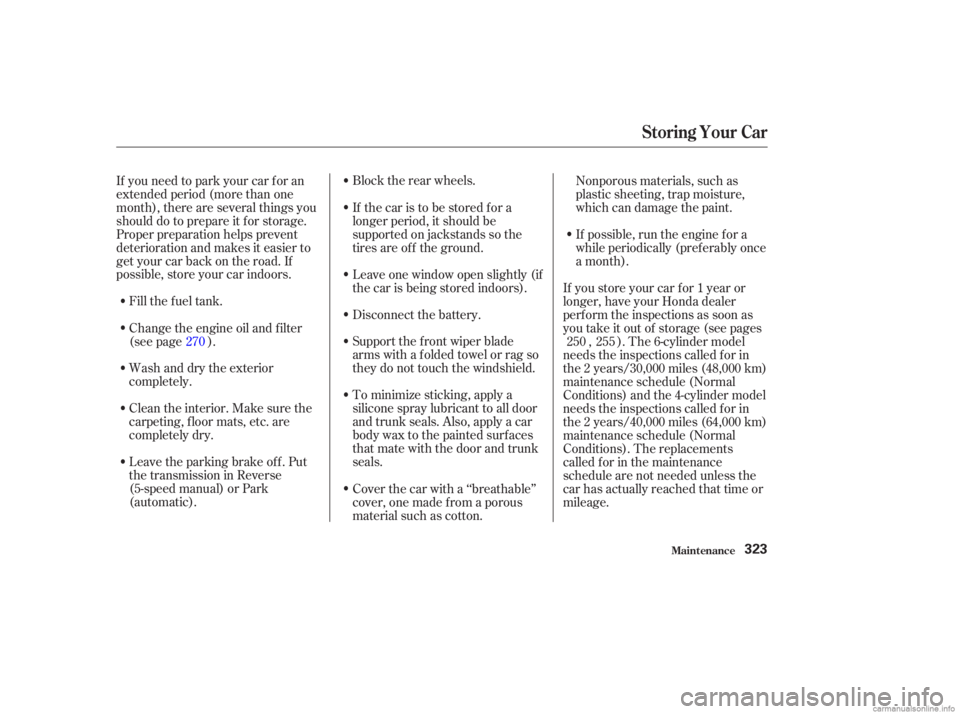
heads until they lock.Use a f lat-tipped screwdriver to
remove the two holding clips f rom
the inner f ender.Pull the inner f ender cover away
f rom the f ender and bumper.
(Passenger’s side) Remove the electrical connector
fromthebulbbysqueezingthe
connector to unlock the tab, then
slide the connector of f the bulb. Remove the bulb by turning it
approximately one-quarter turn
counterclockwise.
If you are changing the bulb on
the passenger’s side, start the
engine, turn the steering wheel all
the way to the left, and turn off the
engine. If you are changing the
bulb on the driver’s side, turn the
steering wheel to the right.
6.
7. 5.
3.
4.
5.
1.
2.
L ow Beam Headlight
Lights
Maint enance314
HOLDING CLIPS
TAB BULB
6-cylinder models
Page 318 of 395
Turn on the headlights to test the
new bulb. Push the electrical connector back
onto the bulb. Make sure it is on
all the way. Insert the new bulb into the hole
and turn it one-quarter turn clock-
wise to lock it in place.
Put the inner f ender cover in place.
Install the two holding clips. Lock
each one in place by pushing on
the center.If you are changing the bulb on
the passenger’s side, start the
engine, turn the steering wheel all
the way to the left, and turn off the
engine. If you are changing the
bulb on the driver’s side, turn the
steering wheel to the right.
Use a f lat-tipped screwdriver to
remove the holding clips f rom the
inner f ender.Pull the inner f ender cover away
f rom the f ender and bumper.
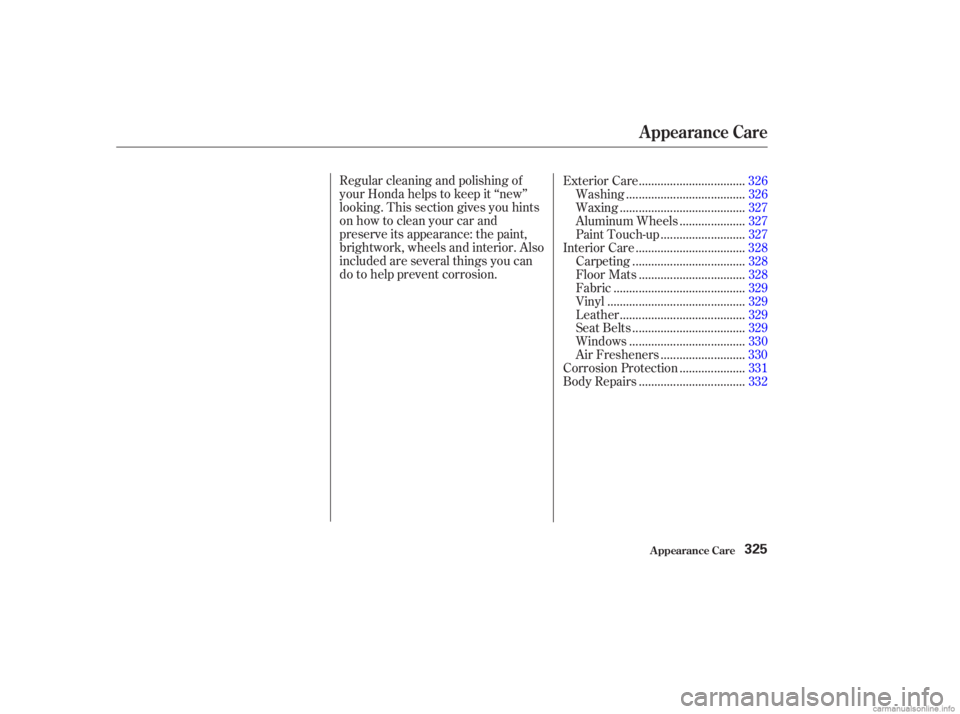
Remove the socket from the
headlight assembly by turning it
one-quarter turn counterclockwise.
1.
3.
2. 4.
9. 8. 7.
6.
CONT INUED
Replacing a Front T urn Signal/
Parking L ight Bulbs
Lights
Maint enance315
HOLDING CLIPS
Page 326 of 395

Block the rear wheels.
Fill the f uel tank.
Wash and dry the exterior
completely.
Cleantheinterior.Makesurethe
carpeting, floor mats, etc. are
completely dry.
Leave the parking brake off. Put
the transmission in Reverse
(5-speed manual) or Park
(automatic).
If you need to park your car f or an
extended period (more than one
month), there are several things you
should do to prepare it f or storage.
Proper preparation helps prevent
deterioration and makes it easier to
get your car back on the road. If
possible, store your car indoors.
If the car is to be stored for a
longer period, it should be
supported on jackstands so the
tires are of f the ground.
Leave one window open slightly (if
the car is being stored indoors).
Disconnect the battery.
Support the f ront wiper blade
arms with a f olded towel or rag so
they do not touch the windshield.
To minimize sticking, apply a
silicone spray lubricant to all door
and trunk seals. Also, apply a car
body wax to the painted surf aces
that mate with the door and trunk
seals.
Change the engine oil and f ilter
(see page ).
If you store your car f or 1 year or
longer, have your Honda dealer
perf orm the inspections as soon as
youtakeitoutof storage(seepages
, ). The 6-cylinder model
needs the inspections called f or in
the 2 years/30,000 miles (48,000 km)
maintenance schedule (Normal
Conditions) and the 4-cylinder model
needs the inspections called f or in
the 2 years/40,000 miles (64,000 km)
maintenance schedule (Normal
Conditions). The replacements
called f or in the maintenance
schedule are not needed unless the
car has actually reached that time or
mileage.
Coverthecarwitha‘‘breathable’’
cover, one made f rom a porous
material such as cotton. Nonporous materials, such as
plastic sheeting, trap moisture,
which can damage the paint.
If possible, run the engine f or a
while periodically (pref erably once
amonth).
270 250 255
St oring Your Car
Maint enance323
Page 328 of 395

Regular cleaning and polishing of
your Honda helps to keep it ‘‘new’’
looking. This section gives you hints
on how to clean your car and
preserve its appearance: the paint,
brightwork, wheels and interior. Also
included are several things you can
do to help prevent corrosion..................................
Exterior Care .326
.....................................
Washing .326
.......................................
Waxing .327
....................
Aluminum Wheels .327
..........................
Paint Touch-up .327
..................................
Interior Care .328
...................................
Carpeting .328
.................................
Floor Mats .328
.........................................
Fabric .329
...........................................
Vinyl .329
.......................................
Leather .329
...................................
Seat Belts .329
....................................
Windows .330
..........................
Air Fresheners .330
....................
Corrosion Protection .331
.................................
Body Repairs .332
Appearance Care
Appearance Care325
Page 330 of 395

�µ�µ
Always wash and dry the whole car
bef ore waxing it. You should wax
your car, including the metal trim,
whenever water sits on the surf ace
in large patches. It should f orm into
beads or droplets af ter waxing.
You should use a quality liquid or
paste wax. Apply it according to the
instructions on the container. In
general, there are two types of
products:
Waxes A wax coats the finish and
protects it f rom damage by exposure
to sunlight, air pollution, etc. You
should use a wax on your Honda
when it is new.
Polishes Polishes and cleaner/
waxes can restore the shine to paint
that has oxidized and lost some of its
shine. They normally contain mild
abrasives and solvents that remove
the top layer of the f inish. You should use a polish on your Honda if
the f inish does not have its original
shine af ter using a wax.
Cleaning tar, insects, etc. with
removers also takes off the wax.
Remember to re-wax those areas,
even if the rest of the car does not
need waxing.
Clean your Honda’s aluminum alloy
wheels as you do the rest of the
exterior.Washthemwiththesame
solution, and rinse them thoroughly.
The wheels have a protective clear-
coat that keeps the aluminum from
corroding and tarnishing. Using
harsh chemicals, including some
commercial wheel cleaners, or stif f
brushes can damage this clear-coat.
Only use a mild detergent and sof t
brush or sponge to clean the wheels.
Your dealer has touch-up paint to
match your car’s color. The color
code is printed on a sticker on the
driver’s doorjamb. Take this code to
your dealer so you are sure to get
the correct color.
Inspect your car f requently f or chips
or scratches in the paint. Repair
them right away to prevent corrosion
of the metal underneath. Use the
touch-up paint only on small chips
and scratches. More extensive paint
damage should be repaired by a
prof essional.
All EX models
Exterior Care
Appearance Care
Waxing
A luminum WheelsPaint T ouch-up
327
Page 334 of 395

Repair chips and scratches in the
paint as soon as you discover them.
Inspect and clean out the drain
holes in the bottom of the doors
and body.
Check the f loor coverings f or
dampness. Carpeting and f loor
mats may remain damp f or a long
time, especially in winter. This
dampness can eventually cause
the f loor panels to corrode.
Two f actors normally contribute to
causing corrosion in your car:
Moisture trapped in body cavities.
Dirtandroadsaltthatcollectsin
hollows on the underside of the
car stays damp, promoting
corrosion in that area.
Removal of paint and protective
coatings f rom the exterior and
underside of the car. Many corrosion-preventive measures
are built into your Honda. You can
help keep your car f rom corroding
by perf orming some simple periodic
maintenance:
Have the corrosion-preventive
coatings on the underside of your
car inspected and repaired
periodically. Use a high-pressure spray to clean
the underside of your car. This is
especially important in areas that
useroadsaltinwinter.Itisalsoa
good idea in humid climates and
areas subject to salt air. Be careful
not to damage the ABS wheel
sensors and wiring at each wheel.
1.
2.
Appearance Care
Corrosion Prot ect ion
331
Page 337 of 395

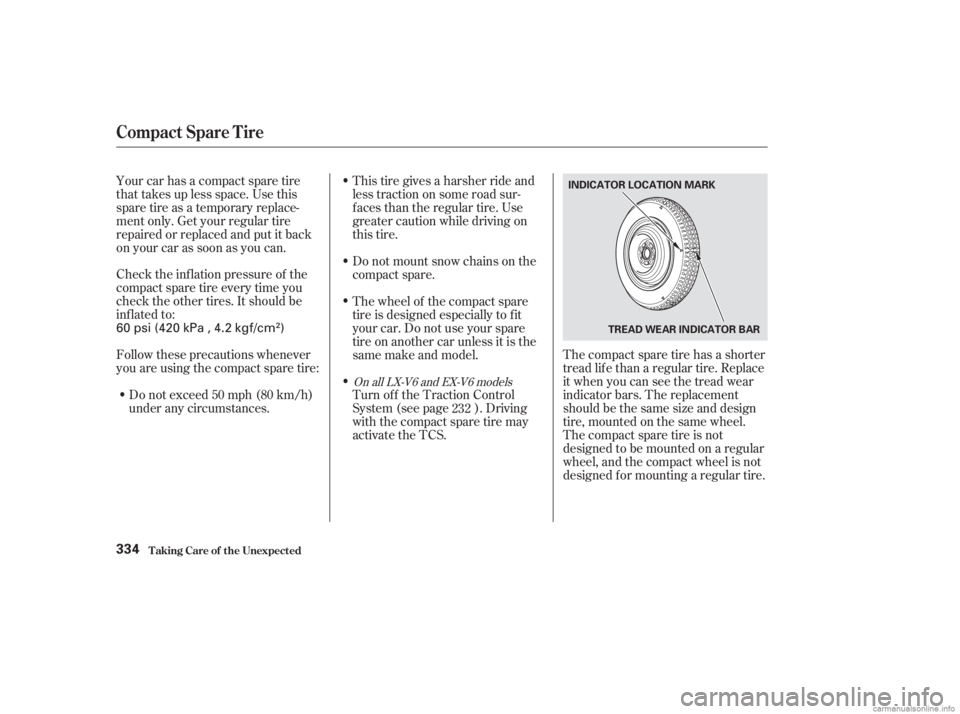
Thecompactsparetirehasashorter
tread lif e than a regular tire. Replace
it when you can see the tread wear
indicator bars. The replacement
should be the same size and design
tire, mounted on the same wheel.
Thecompactsparetireisnot
designed to be mounted on a regular
wheel, and the compact wheel is not
designed f or mounting a regular tire.
Check the inf lation pressure of the
compact spare tire every time you
check the other tires. It should be
inf lated to: Your car has a compact spare tire
that takes up less space. Use this
sparetireasatemporaryreplace-
ment only. Get your regular tire
repaired or replaced and put it back
on your car as soon as you can.
Follow these precautions whenever
you are using the compact spare tire:
Do not exceed 50 mph (80 km/h)
under any circumstances. This tire gives a harsher ride and
less traction on some road sur-
f aces than the regular tire. Use
greater caution while driving on
this tire.
Do not mount snow chains on the
compact spare.
Turn off the Traction Control
System (see page ). Driving
withthecompactsparetiremay
activate the TCS. The wheel of the compact spare
tire is designed especially to f it
your car. Do not use your spare
tire on another car unless it is the
same make and model.
232
On all LX-V6 and EX-V6 models
Compact Spare Tire
T aking Care of t he Unexpect ed334
INDICATOR LOCATION MARK
TREAD WEAR INDICATOR BAR
60 psi (420 kPa , 4.2 kgf/cm)
Page 339 of 395
Turn the jack’s end bracket
counterclockwise to loosen it, then
remove the jack.Loosen the f ive wheel nuts 1/2
turn with the wheel wrench.
The jack is behind a cover in the
right f ender. Remove the cover by
turning the handle counterclock-
wise, then pulling on the cover.
6.
7.8.
T aking Care of t he Unexpect ed
Changing a Flat T ire
336
JACK WHEEL NUTS