Page 112 of 395
After all doors are closed tightly, the
light dims slightly, then f ades out in
about 30 seconds. In the ON position,
the ceiling light stays on
continuously.Turn on the spotlight by pushing the
lens. Push the lens again to turn it
of f . You can use the spotlights at all
times.
The ceiling light (with the switch in
the center position) also comes on
when you unlock the door with the
remote transmitter (see page ).
The light f ades out af ter all doors are
closed.
The courtesy light between the
spotlights comes on when you turn
the parking lights on. To adjust its
brightness, turn the Select/Reset
knob on the instrument panel.
80
All models except DX
Interior Lights
Inst rument s and Cont rols
Spotlights
109
On LX models
On EX and EX-V6 modelsCOURTESY LIGHT
Page 114 of 395

.....................
Heating and Cooling .112
.........
What Each Control Does . 112
............
How to Use the System . 115
..........
To Turn Everything Of f . 118
...............
Climate Control System . 119
.......
Fully-automatic Operation . 121
.......
Semi-automatic Operation . 122
.......
Fully-automatic Operation . 127
.....................
Manual Operation .128
Sunlight Sensor/ .............
Temperature sensor . 133
................................
Audio System .134
.................
Operating the Radio . 134
.................
Adjusting the Sound . 138
..........................
Digital Clock .139
.........
Operating the CD Player . 140
.......
Protecting Compact Discs . 142
.....
Operating the CD Changer . 142
....
CD player Error Indications . 144
CD Changer Error .............................
Indications .145
Operating the Cassette ....................................
Player .146 ...........
Tape Search Functions . 148
Caring f or the Cassette ....................................
Player .149
................................
Audio System .150
.................
Operating the Radio . 151
.................
Adjusting the Sound . 155
..............................
Digital Clock .156
.....
Operating the CD Changer . 157
.......
Protecting Compact Discs . 163
CD Changer Error .............................
Indications .164
Operating the Cassette ....................................
Player .165
...........
Tape Search Functions . 167
Caring f or the Cassette ....................................
Player .168
................................
Audio System .169
.................
Operating the Radio . 170
................
Adjusting the Sound . 173
.............................
Digital Clock .174
...................
Radio Frequencies . 175
.......................
Radio Reception .175
.....
Operating the CD Changer . 177
.......
Protecting Compact Discs . 184CD Changer Error
.............................
Indications .185
......
Protecting Compact Discs . 186
Operating the Cassette ....................................
Player .187
...........
Tape Search Functions . 189
Caring f or the Cassette ....................................
Player .191
...........
Remote Audio Controls . 192
.......................
Thef t Protection .193
............................
Security System .194
...............................
Cruise Control .195
Homelink Wireless Control ........................................
System .198
Without Navigation System
With Navigation System
DX and LX models Without Navigation System
With Navigation System
Comf ort and Convenience Features
Comf ort and Convenience Feat ures111
Page 115 of 395

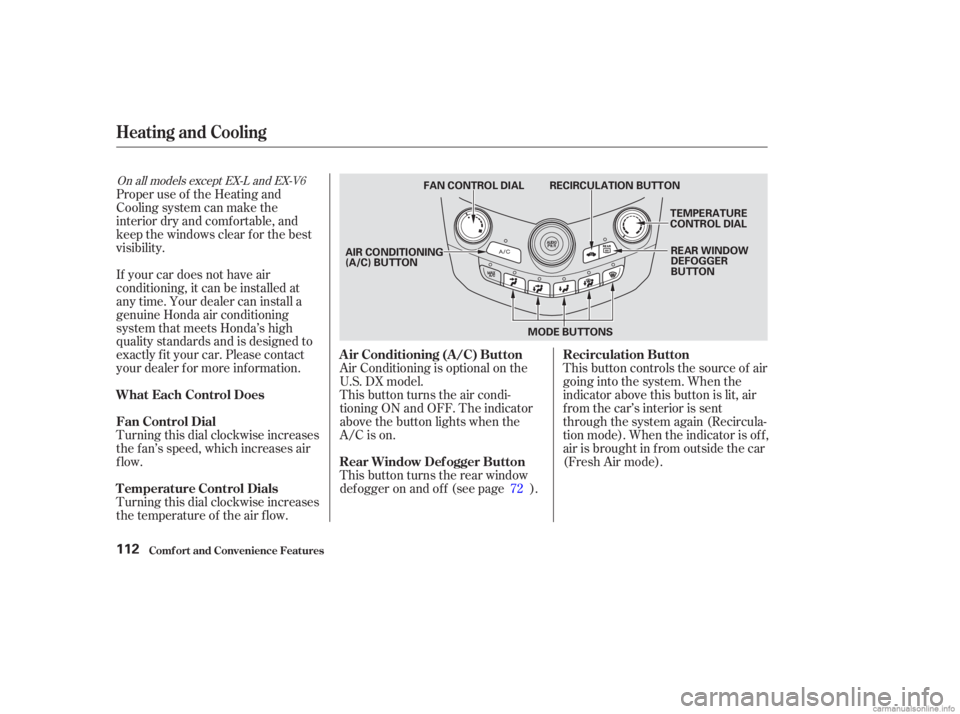
This button controls the source of air
going into the system. When the
indicator above this button is lit, air
from the car’s interior is sent
through the system again (Recircula-
tion mode). When the indicator is off,
air is brought in f rom outside the car
(Fresh Air mode).
This button turns the air condi-
tioning ON and OFF. The indicator
above the button lights when the
A/C is on. Air Conditioning is optional on the
U.S. DX model.
Turning this dial clockwise increases
the temperature of the air flow. Turning this dial clockwise increases
the f an’s speed, which increases air
flow. If your car does not have air
conditioning, it can be installed at
any time. Your dealer can install a
genuine Honda air conditioning
system that meets Honda’s high
quality standards and is designed to
exactly f it your car. Please contact
your dealer f or more inf ormation. This button turns the rear window
def ogger on and of f (see page ).
Proper use of the Heating and
Cooling system can make the
interior dry and comf ortable, and
keep the windows clear f or the best
visibility.
72
On all models except EX-L and EX-V6
Comf ort and Convenience Feat ures
Heating and Cooling
Air Conditioning (A/C) Button Recirculation Button
Rear Window Def ogger Button
T emperature Control Dials Fan Control Dial What Each Control Does
112
TEMPERATURE
CONTROL DIAL
FAN CONTROL DIAL RECIRCULATION BUTTON
REAR WINDOW
DEFOGGER
BUTTON
MODE BUTTONS
AIR CONDITIONING
(A/C) BUTTON
Page 142 of 395

If your car’s battery is disconnected
or goes dead, the time setting will be
lost. To set the time again, f ollow the
setting procedure.
The audio system usually shows the
time when the ignition switch is in
ACCESSORY (I) or ON (II). It
shows the operation mode of the
radio, CD player, or optional CD
changer when you operate them,
then goes back to the time display
af ter three seconds.
You can use the R (Preset 6) side of
the bar to quickly set the time to the
nearest hour. Press the R (Preset 6)
side of the bar while pressing the
SOUND button. If the displayed time
is bef ore the half hour, pressing R
sets the clock back to the previous
hour. If the displayed time is af ter
the half hour, pressing R sets the
clock f orward to the beginning of the
next hour.
To set the time, press and hold the
SOUND button until the audio
system beeps and the clock f lashes.
To set the hours, press and hold the
H (Preset 4) side of the bar until the
numbers advance to the desired time.
To set the minutes, press and hold
the M (Preset 5) side of the bar until
the numbers advance to the desired
time.
When you are f inished, press the
SOUND button again.
For example:
1:06 will reset to 1:00
1:52 will reset to 2:00
Digital Clock
Audio System
Comf ort and Convenience Feat ures139
DIGITAL CLOCK
PRESET BARS
SOUND BUTTON
Page 159 of 395

For example:1:06 would RESET to 1:00.
1:52 would RESET to 2:00.
If your car’s battery is disconnected
or goes dead, the time setting will be
lost. To set the time again, f ollow the
setting procedure.
The audio system usually shows the
time when the ignition switch is in
ACCESSORY (I) or ON (II). It
shows the operation mode of the
radio, or CD changer when you
operate them, then goes back to the
time display af ter three seconds.
You can use the R (Preset 6) side of
the bar to quickly set the time to the
nearest hour. Press R while pressing
the SOUND button. If the displayed
time is before the half hour, pressing
Rsetstheclockbacktotheprevious
hour. If the displayed time is af ter
the half hour, pressing R sets the
clock f orward to the beginning of the
next hour.
To set the time, press and hold the
SOUND button until the audio
system beeps and the clock f lashes.
To set the hours, press and hold the
H (Preset 4) side of the bar until the
numbers advance to the desired time.
To set the minutes, press and hold
the M (Preset 5) side of the bar until
the numbers advance to the desired
time.
When you are f inished, press the
SOUND button again. Digital Clock
Audio System
Comf ort and Convenience Feat ures156
DIGITAL CLOCK
SOUND BUTTON PRESET BARS
Page 177 of 395
If you want to adjust the sound while
the radio/CD is playing, push the
AUDIO DISPLAY button, then touch
the SOUND icon in the display.To return to the previous display,
push the AUDIO DISPLAY button
again.The upper display shows the time
when the ignition switch is in
ACCESSORY (I) or ON (II). Ref er to
the Navigation System Owner’s
Manual to set up the time.
Audio System
Comf ort and Convenience Feat ures
Digital Clock
174
DIGITAL CLOCK
SOUND ICON AUDIO DISPLAY
BUTTON UPPER DISPLAY
Page 197 of 395

With the system set, you can still
open the trunk with the master key
or the remote transmitter without
triggering the alarm. The alarm will
sound if the trunk lock is f orced, or
the trunk is opened with the trunk
release handle.
Do not attempt to alter this system
or add other devices to it. The security system will not set if
the hood, trunk, or any door is not
f ully closed. If the system will not set,
check the Door Monitor on the
instrument panel (see page ), to
see if the doors and trunk are f ully
closed. Since it is not part of the
monitor display, manually check the
hood.
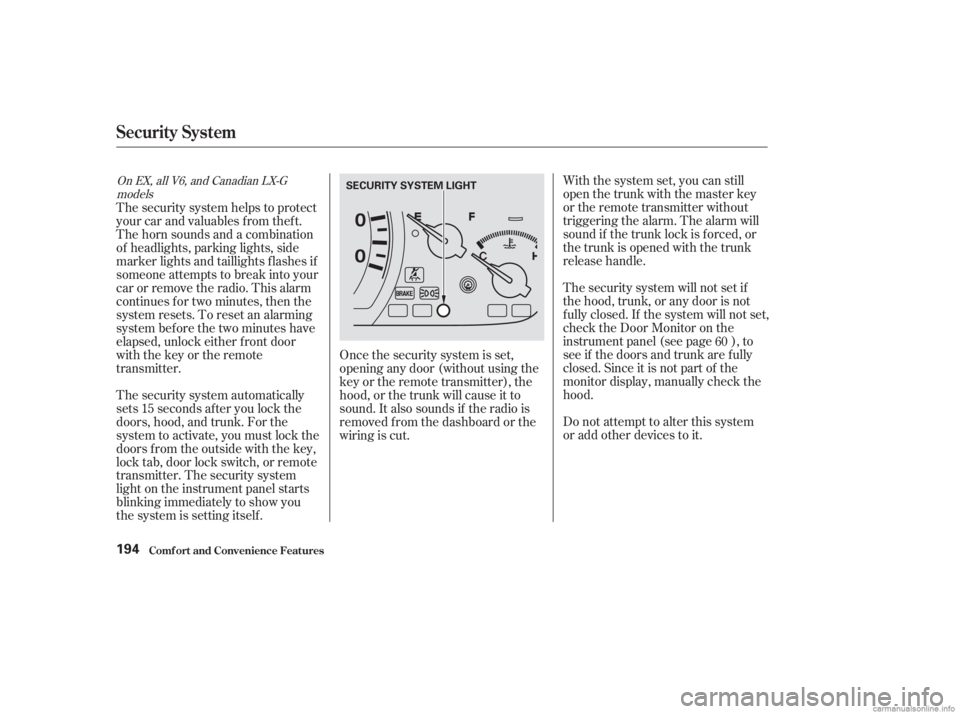
The security system helps to protect
your car and valuables f rom thef t.
The horn sounds and a combination
of headlights, parking lights, side
marker lights and taillights f lashes if
someone attempts to break into your
carorremovetheradio.Thisalarm
continues f or two minutes, then the
system resets. To reset an alarming
system bef ore the two minutes have
elapsed, unlock either f ront door
with the key or the remote
transmitter.
The security system automatically
sets 15 seconds after you lock the
doors, hood, and trunk. For the
system to activate, you must lock the
doors f rom the outside with the key,
lock tab, door lock switch, or remote
transmitter. The security system
light on the instrument panel starts
blinking immediately to show you
the system is setting itself.
Once the security system is set,
opening any door (without using the
key or the remote transmitter), the
hood, or the trunk will cause it to
sound. It also sounds if the radio is
removed f rom the dashboard or the
wiring is cut.
60On EX, all V6, and Canadian LX-G
models
Security System
Comf ort and Convenience Feat ures194
SECURITY SYSTEM LIGHT
Page 202 of 395

�µ
If you are training the second or
third buttons, go directly to Step 1. Unplug the garage door opener
motor f rom the house current.
Bef ore you can use HomeLink to
operate devices around your home, it
must ‘‘learn’’ the proper codes. For
example, to train HomeLink to open
and close the garage door:
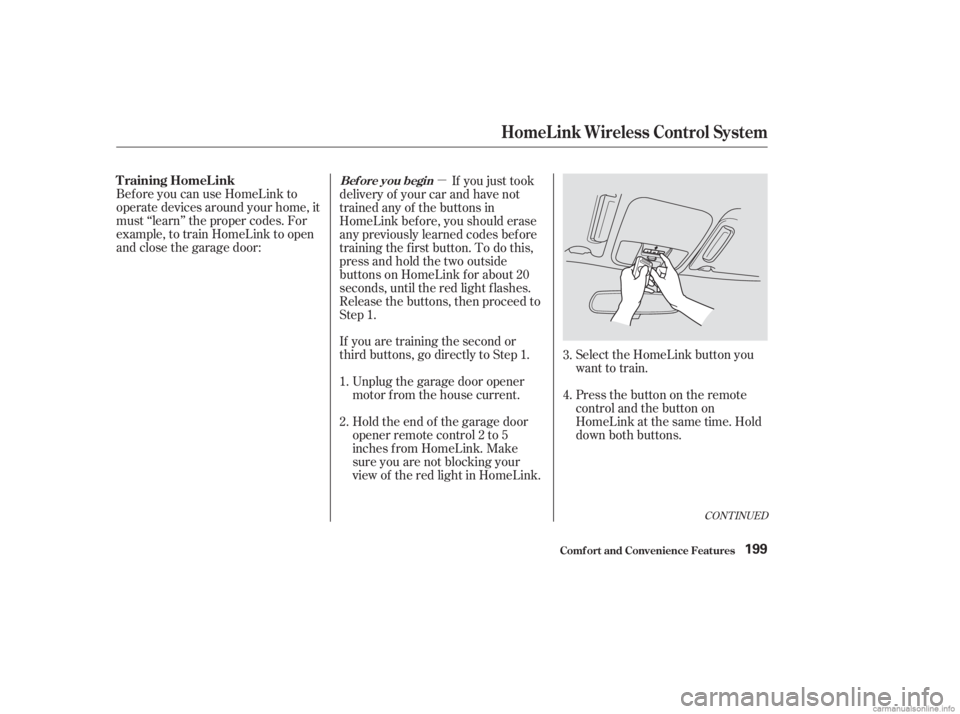
Holdtheendof thegaragedoor
opener remote control 2 to 5
inches f rom HomeLink. Make
sure you are not blocking your
view of the red light in HomeLink.Select the HomeLink button you
want to train.
Press the button on the remote
control and the button on
HomeLink at the same time. Hold
down both buttons.
If you just took
delivery of your car and have not
trained any of the buttons in
HomeLink bef ore, you should erase
any previously learned codes bef ore
training the f irst button. To do this,
press and hold the two outside
buttons on HomeLink f or about 20
seconds, until the red light f lashes.
Release the buttons, then proceed to
Step 1.
2. 3.
4.
1.
CONT INUED
T raining HomeL ink
Comf ort and Convenience Feat ures
HomeL ink Wireless Control System
Bef ore you begin
199