Page 103 of 395

The moonroof has a key-of f delay.
You can still open and close the
moonroof f or up to ten minutes af ter
you turn of f the ignition. The key-of f
delay cancels as soon as you open
either f ront door. You must then
turn the ignition ON (II) for the
moonroof to operate.
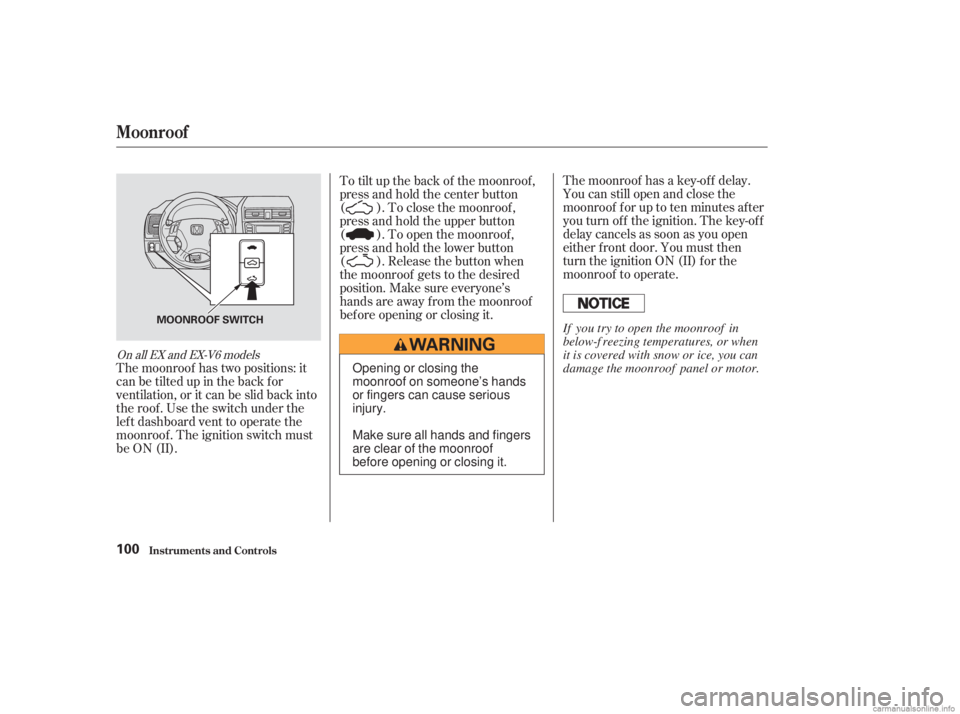
To tilt up the back of the moonroof ,
press and hold the center button
( ). To close the moonroof ,
press and hold the upper button
( ). To open the moonroof ,
press and hold the lower button
( ). Release the button when
the moonroof gets to the desired
position. Make sure everyone’s
hands are away f rom the moonroof
bef ore opening or closing it.
The moonroof has two positions: it
can be tilted up in the back f or
ventilation, or it can be slid back into
the roof . Use the switch under the
lef t dashboard vent to operate the
moonroof . The ignition switch must
be ON (II).
On all EX and EX-V6 models
Moonroof
Inst rument s and Cont rols100
MOONROOF SWITCH
Opening or closing the
moonroof on someone’s hands
or fingers can cause serious
injury.
Make sure all hands and fingers
are clear of the moonroof
before opening or closing it. If you try to open the moonroof in
below-f reezing temperatures, or when
it is covered with snow or ice, you can
damage the moonroof panel or motor.
Page 104 of 395

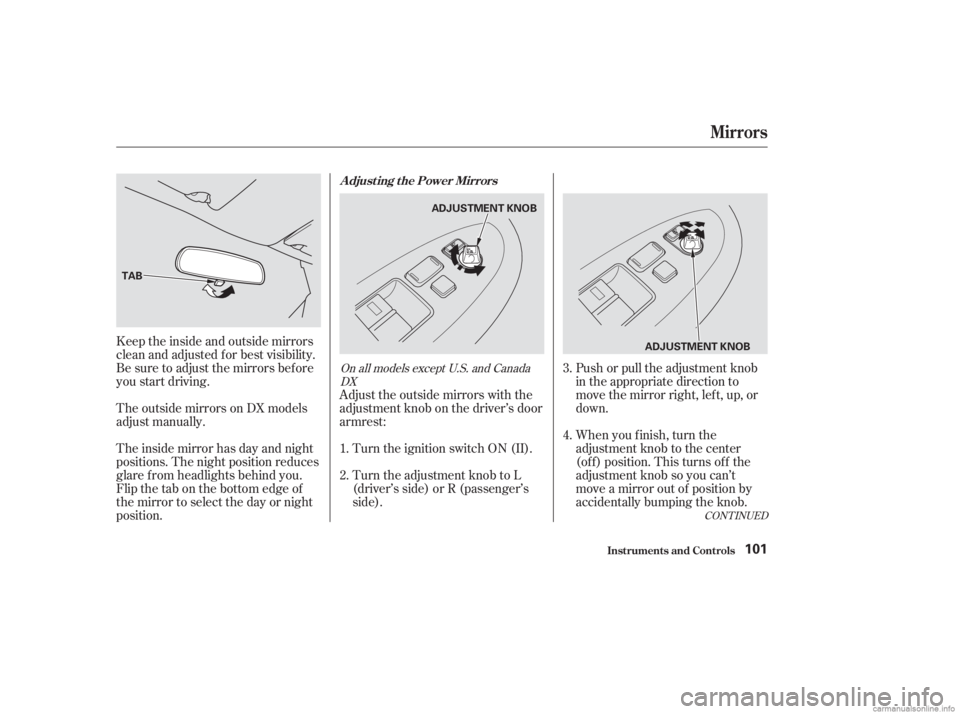
Push or pull the adjustment knob
in the appropriate direction to
move the mirror right, left, up, or
down.
When you f inish, turn the
adjustment knob to the center
(of f ) position. This turns of f the
adjustment knob so you can’t
move a mirror out of position by
accidentally bumping the knob.
The inside mirror has day and night
positions. The night position reduces
glare f rom headlights behind you.
Flip the tab on the bottom edge of
the mirror to select the day or night
position. The outside mirrors on DX models
adjust manually.
Turn the adjustment knob to L
(driver’s side) or R (passenger’s
side). Turn the ignition switch ON (II).
Adjust the outside mirrors with the
adjustment knob on the driver’s door
armrest:
Keeptheinsideandoutsidemirrors
clean and adjusted f or best visibility.
Be sure to adjust the mirrors bef ore
you start driving.
3.
4.
1.
2.
CONT INUED
On all models except U.S. and Canada
DX
Adjusting the Power Mirrors
Mirrors
Inst rument s and Cont rols101
ADJUSTMENT KNOB
TAB
ADJUSTMENT KNOB
Page 105 of 395
To apply the parking brake, pull the
lever up f ully. To release it, pull up
slightly, push the button, and lower
the lever. The parking brake light on
the instrument panel should go out
when the parking brake is f ully
released with the engine running
(see page ).
The outside mirrors are heated to re-
move fog and frost. With the ignition
switchON(II),turnontheheaters
by pressing the button. The light in
the button comes on as a reminder.
Press the button again to turn the
heaters of f .
58On all Canadian models except DX
Parking Brake
Mirrors, Parking Brake
Inst rument s and Cont rols102
HEATED MIRROR BUTTON
PARKING BRAKE LEVERDriving the car with the parking brake
applied can damage the rear brakes
and hubs.
Page 110 of 395
Some larger styles of sunglasses
may not f it in the holder.There are two accessory power
sockets, one is located in the f ront of
the center console. The other is
located in the center console
compartment. To use an accessory
power socket, the ignition switch
must be in ACCESSORY (I) or ON
(II).
To open the socket, pull the cover up.
To open the sunglasses holder, push
on the f ront edge. It will unlatch and
swing down. To close it, push it until
it latches. Make sure the holder is
closed while you are driving.
CONT INUED
On all models except U.S. and Canada
DX
Sunglasses Holder Accessory Power Sockets
Inst rument s and Cont rols
Sunglasses Holder, A ccessory Power Sockets
107
ACCESSORY POWER SOCKETCOVER
Page 113 of 395
Your car also has a courtesy light in
the ignition switch. This light comes
on when you open the driver’s door.
It remains on f or several seconds
af ter the door is closed. Each f ront door has a courtesy light.
This light comes on when you open
the door.
On all models except U.S. and CanadaDX
Interior Lights
Inst rument s and Cont rols
Courtesy Lights
110
IGNITION SWITCH LIGHT
DOOR LIGHT
Page 137 of 395
The band and f requency that the
radio was last tuned to is displayed.
To change bands, press the AM/FM
button. On the FM band, ST will be
displayed if the station is broadcast-
ing in stereo. Stereo reproduction on
AM is not available.
Your Honda’s audio system provides
clear reception on both AM and FM
bands, while the preset bars allow
you to easily select your f avorite
stations.
The ignition switch must be in
ACCESSORY (I) or ON (II) to
operate the audio system. Turn the
system on by pushing the PWR/
VOL knob or the AM/FM button.
Adjust the volume by turning the
same knob.
You can use any of f ive methods to
f ind radio stations on the selected
band: TUNE, SEEK, SCAN, AUTO
SELECT, and the preset bars.
DX and LX models
AM/FM/CD Audio System
Operating the Radio
Audio System
Comf ort and Convenience Feat ures134
STEREO INDICATOR
SEEK BAR PRESET BARS
PWR/VOL KNOB
SCAN BUTTON
TUNE BAR
Page 142 of 395

If your car’s battery is disconnected
or goes dead, the time setting will be
lost. To set the time again, f ollow the
setting procedure.
The audio system usually shows the
time when the ignition switch is in
ACCESSORY (I) or ON (II). It
shows the operation mode of the
radio, CD player, or optional CD
changer when you operate them,
then goes back to the time display
af ter three seconds.
You can use the R (Preset 6) side of
the bar to quickly set the time to the
nearest hour. Press the R (Preset 6)
side of the bar while pressing the
SOUND button. If the displayed time
is bef ore the half hour, pressing R
sets the clock back to the previous
hour. If the displayed time is af ter
the half hour, pressing R sets the
clock f orward to the beginning of the
next hour.
To set the time, press and hold the
SOUND button until the audio
system beeps and the clock f lashes.
To set the hours, press and hold the
H (Preset 4) side of the bar until the
numbers advance to the desired time.
To set the minutes, press and hold
the M (Preset 5) side of the bar until
the numbers advance to the desired
time.
When you are f inished, press the
SOUND button again.
For example:
1:06 will reset to 1:00
1:52 will reset to 2:00
Digital Clock
Audio System
Comf ort and Convenience Feat ures139
DIGITAL CLOCK
PRESET BARS
SOUND BUTTON
Page 143 of 395

For best results when using CD-R
discs, use only high quality discs
labeled f or audio use. When
recording a CD-R, the recording
must be closed in order f or the disc
to be used by CD players. CD-RW
discs will not work in this unit.
For inf ormation, see page .
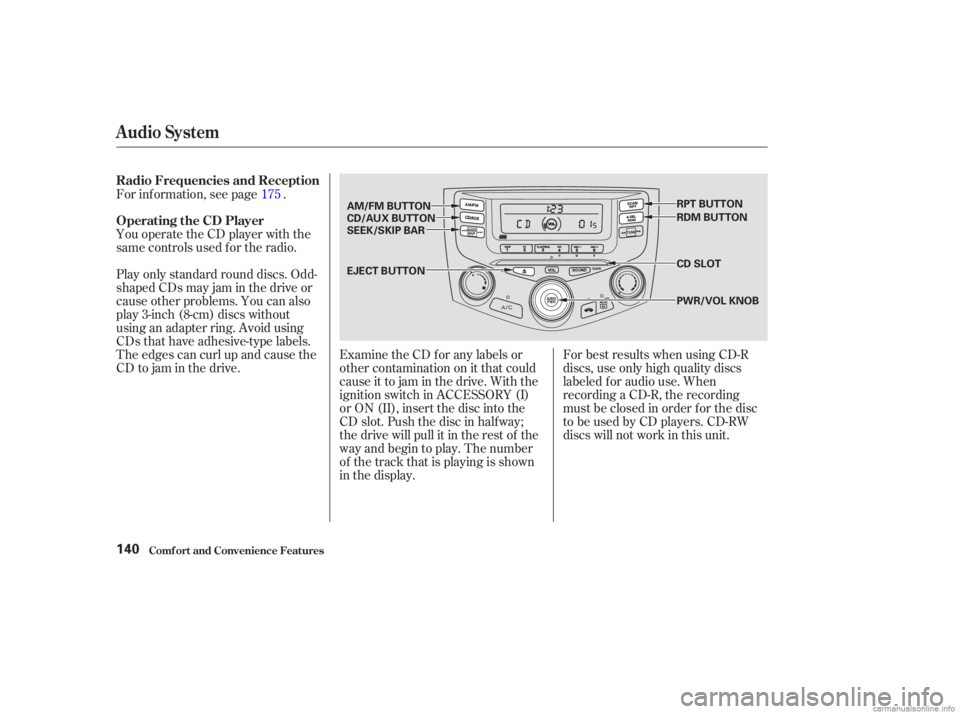
You operate the CD player with the
same controls used f or the radio.
Play only standard round discs. Odd-
shaped CDs may jam in the drive or
cause other problems. You can also
play 3-inch (8-cm) discs without
using an adapter ring. Avoid using
CDs that have adhesive-type labels.
The edges can curl up and cause the
CD to jam in the drive.
Examine the CD f or any labels or
other contamination on it that could
causeittojaminthedrive.Withthe
ignition switch in ACCESSORY (I)
or ON (II), insert the disc into the
CD slot. Push the disc in half way;
the drive will pull it in the rest of the
way and begin to play. The number
of the track that is playing is shown
in the display.
175
Audio System
Comf ort and Convenience Feat ures
Radio Frequencies and Reception
Operating the CD Player
140
CD SLOT
AM/FM BUTTON
CD/AUX BUTTON
SEEK/SKIP BAR
EJECT BUTTON RPT BUTTON
RDM BUTTON
PWR/VOL KNOB