Page 118 of 395
CONT INUED
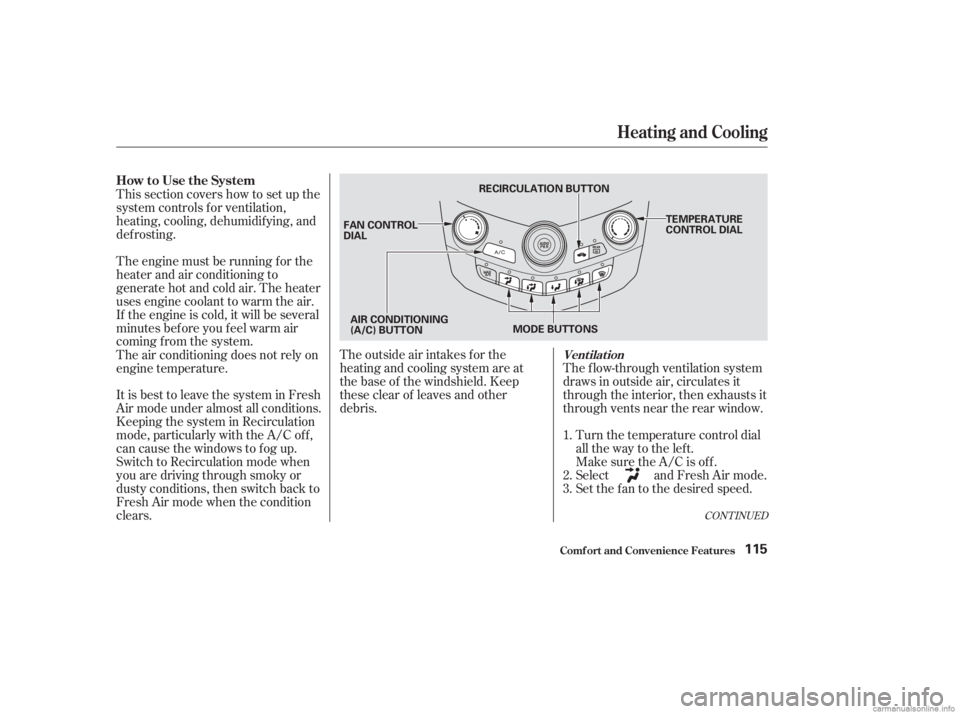
The f low-through ventilation system
draws in outside air, circulates it
through the interior, then exhausts it
through vents near the rear window.Turn the temperature control dial
all the way to the lef t.
Make sure the A/C is of f .
Select and Fresh Air mode.
Set the f an to the desired speed.
The outside air intakes f or the
heating and cooling system are at
the base of the windshield. Keep
these clear of leaves and other
debris.
This section covers how to set up the
system controls f or ventilation,
heating, cooling, dehumidif ying, and
def rosting.
The engine must be running f or the
heater and air conditioning to
generate hot and cold air. The heater
uses engine coolant to warm the air.
If the engine is cold, it will be several
minutes bef ore you f eel warm air
coming from the system.
It is best to leave the system in Fresh
Air mode under almost all conditions.
Keeping the system in Recirculation
mode, particularly with the A/C of f ,
can cause the windows to fog up.
Switch to Recirculation mode when
you are driving through smoky or
dusty conditions, then switch back to
Fresh Air mode when the condition
clears. The air conditioning does not rely on
engine temperature.
1.
2.
3.
Heating and Cooling
Comf ort and Convenience Feat ures
Vent ilat ion
How to Use the System
115
RECIRCULATION BUTTONTEMPERATURE
CONTROL DIAL
FAN CONTROL
DIAL
MODE BUTTONS
AIR CONDITIONING
(A/C) BUTTON
Page 119 of 395

Air conditioning places an extra load
on the engine. Watch the engine
coolant temperature gauge (see page) when driving in stop-and-go
traf f ic or climbing a long, steep hill.
If it moves near the red zone, turn
of f the A/C until the gauge reads
normally.
When the interior has cooled down
to a more comf ortable temperature,
close the windows and set the
controls as described f or normal
cooling.
If the interior is very warm f rom
beingparkedinthesun,youcancool
it down more rapidly by setting up
the controls this way: Turn on the A/C by pressing the
A/C button. The light above the
buttonshouldcomeonwhenafan
speed is selected.
Make sure the temperature
controldialissettomaximumcool.
Select .
If the outside air is humid, select
Recirculation mode. If the outside
air is dry, select Fresh Air mode.
Set the f an to the desired speed.
Start the engine.
Turn on the A/C by pressing the
A/C button. Make sure the tem-
perature control dial is set to
maximum cool.
Set the f an to maximum speed.
Open the windows partially. Select
and Fresh Air mode.
1.
2.
3.
4.
5.
1.
2.
3. 4.
64
On cars with manual air conditioningsystem
Comf ort and Convenience Feat ures
Heating and Cooling
T o Cool wit h A /C
116
RECIRCULATION BUTTON
TEMPERATURE
CONTROL DIAL
AIR CONDITIONING
(A/C) BUTTON
FAN CONTROL
DIAL
MODE BUTTONS
Page 120 of 395
To warm the interior:Air conditioning, as it cools, removes
moisture from the air. When used in
combination with the heater, it
makes the interior warm and dry.To remove f og f rom the inside of the
windows:
Set the f an to the desired speed.
Turn on the air conditioning.
Select and Fresh Air mode.
Adjust the temperature control
dial so the mixture of heated and
cooled air f eels comf ortable.
Start the engine.
Select and Fresh Air mode.
Set the f an to the desired speed.
Adjust the warmth of the air with
the temperature control dial.
Once the engine is warmed up, this
setting is suitable f or all driving
conditions. Set the f an to the desired speed.
Select .
When you select , the
system automatically switches to
Fresh Air mode and turns on the
A/C. (The indicator above the
A/C button stays off.)
Adjust the temperature control
dial so the air flow from the
def roster vents f eels warm.
Turn on the rear window def ogger
to help clear the rear window.
When you switch to another mode
f rom , the A/C turns of f .
Butifitwasontostartwith,it
stays on.
1.
2.
3.
4.
1.
2.
3.
4.1.
2.
3.
4.
CONT INUED
Heating and Cooling
Comf ort and Convenience Feat ures
T o Heat
T o Heat and Dehumidif y wit h A ir
Condit ioning T o Def og and Def rost
117
Page 121 of 395
For saf ety, make sure you have a
clear view through all the windows
bef ore driving away.To shut of f the system temporarily,
turn the fan speed and temperature
control dials all the way to the lef t.
You should shut the system
completely of f only f or the f irst f ew
minutes of driving in cold weather,
until the engine coolant warms up
enough to operate the heater. Keep
the fan on at all other times so stale
air does not build up in the interior.
These settings direct all the air f low
to the defroster vents at the base of
the windshield and the side window
def roster vents. The air f low will get
warmer and clear the windows faster
as the engine warms up. You can
close the side vents with the dial
underneath each vent. This will send
more warm air to the windshield
defroster vents.
To remove exterior f rost or ice f rom
the windshield and side windows
after the car has been sitting out in
cold weather:
Start the engine.
Select .
When you select , the
system automatically switches to
Fresh Air mode and turns on the
A/C. (The indicator above the
A/C button stays off.)
Set the f an and temperature
controls to maximum.
To rapidly remove exterior f rost or
ice f rom the windshield (on very cold
days), f irst select the Recirculation
mode. Once the windshield is clear,
select the Fresh Air mode to avoid
f ogging the windows. 1.
2.
3.
Heating and Cooling
Comf ort and Convenience Feat ures
To Turn Everything Of f
118
Page 122 of 395
CONT INUED
To adjust the air f low f rom the
center vent, move the tab up-and-
down and side-to-side.Thesideventscanbeopenedand
closed with the dials underneath
them.
For the climate control system to
provide heating and cooling, the
engine must be running. The climate control system draws air
through the exterior vents at the
bottom of the windshield. Keep
these vents clear of leaves and other
debris. The direction of air f low f rom the
vents in the center and each side of
the dashboard is adjustable. The automatic climate control
system in your Honda picks the
proper combination of air condi-
tioning, heating, and ventilation to
maintain the interior temperature
you select. The system also adjusts
the fan speed and air flow levels.
On 4-cylinder EX models with lether interior and EX-V6 models only
Climat e Cont rol Syst em
Comf ort and Convenience Feat ures119
CENTER VENTS TAB
TABS
Close
Open
SIDE VENT
Page 206 of 395
Bef ore you begin driving your Honda,
youshouldknowwhatgasolineto
use, and how to check the levels of
important f luids. You also need to
know how to properly store luggage
or packages. The inf ormation in this
section will help you. If you plan to
add any accessories to your car,
please read the inf ormation in this
section f irst..............................
Break-in Period .204
.........................................
Gasoline .204
.........
Service Station Procedures . 204
................
Filling the Fuel Tank . 204
....................
Opening the Hood .206
...............................
Oil Check .208
.........
Engine Coolant Check . 210
...............................
Fuel Economy .211
............................
Car Condition .211
...........................
Driving Habits .211
...
Accessories and Modif ications . 212
.............................
Carrying Cargo .214
Bef ore Driving
Bef ore Driving203
Page 207 of 395
During this period:Avoid full-throttle starts and rapid
acceleration. We recommend gasolines containing
detergent additives that help prevent
f uel system and engine deposits.
Avoidhardbraking.Newbrakes
need to be broken-in by moderate
use f or the f irst 200 miles (300
km).
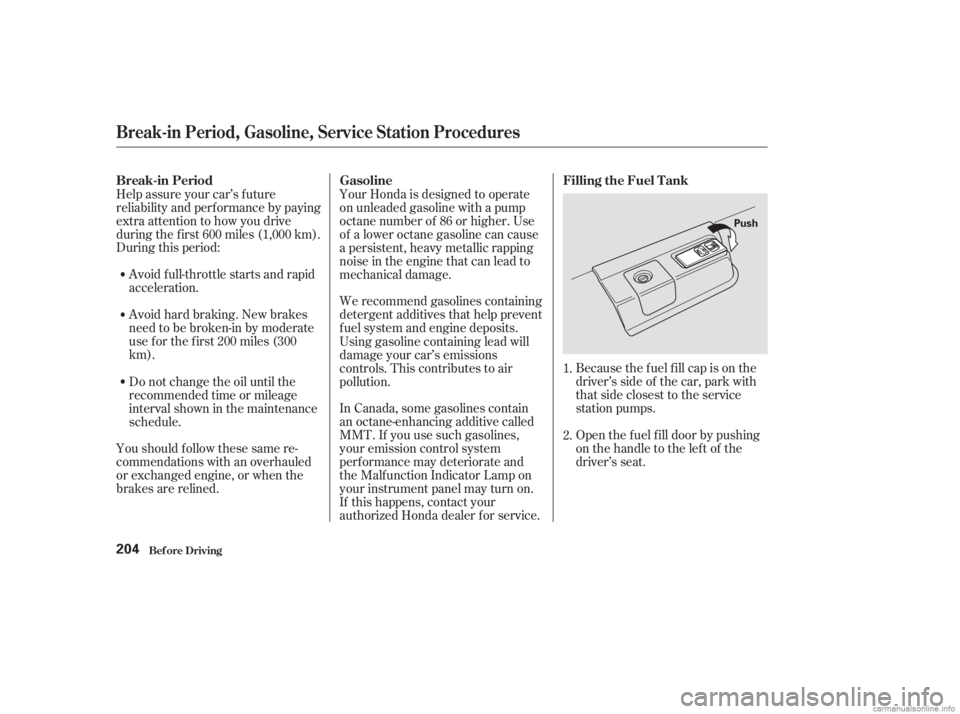
Open the f uel f ill door by pushing
onthehandletotheleftof the
driver’s seat.
Help assure your car’s f uture
reliability and perf ormance by paying
extra attention to how you drive
during the f irst 600 miles (1,000 km).
Because the f uel f ill cap is on the
driver’s side of the car, park with
that side closest to the service
station pumps.
In Canada, some gasolines contain
an octane-enhancing additive called
MMT. If you use such gasolines,
your emission control system
perf ormance may deteriorate and
the Malf unction Indicator Lamp on
your instrument panel may turn on.
If this happens, contact your
authorized Honda dealer f or service. Using gasoline containing lead will
damage your car’s emissions
controls. This contributes to air
pollution.
Youshouldfollowthesesamere-
commendations with an overhauled
or exchanged engine, or when the
brakes are relined. Do not change the oil until the
recommended time or mileage
intervalshowninthemaintenance
schedule. Your Honda is designed to operate
on unleaded gasoline with a pump
octane number of 86 or higher. Use
of a lower octane gasoline can cause
a persistent, heavy metallic rapping
noise in the engine that can lead to
mechanical damage.
1.
2.
Bef ore Driving
Break-in Period GasolineFilling the Fuel Tank
Break-in Period, Gasoline, Service Station Procedures
204
Push
Page 208 of 395
Screw the f uel f ill cap back on,
tighten it until it clicks several
times. If you do not properly
tighten the cap, the Malfunction
Indicator Lamp may come on (see
page ).
Push the f uel f ill door closed until
it latches.
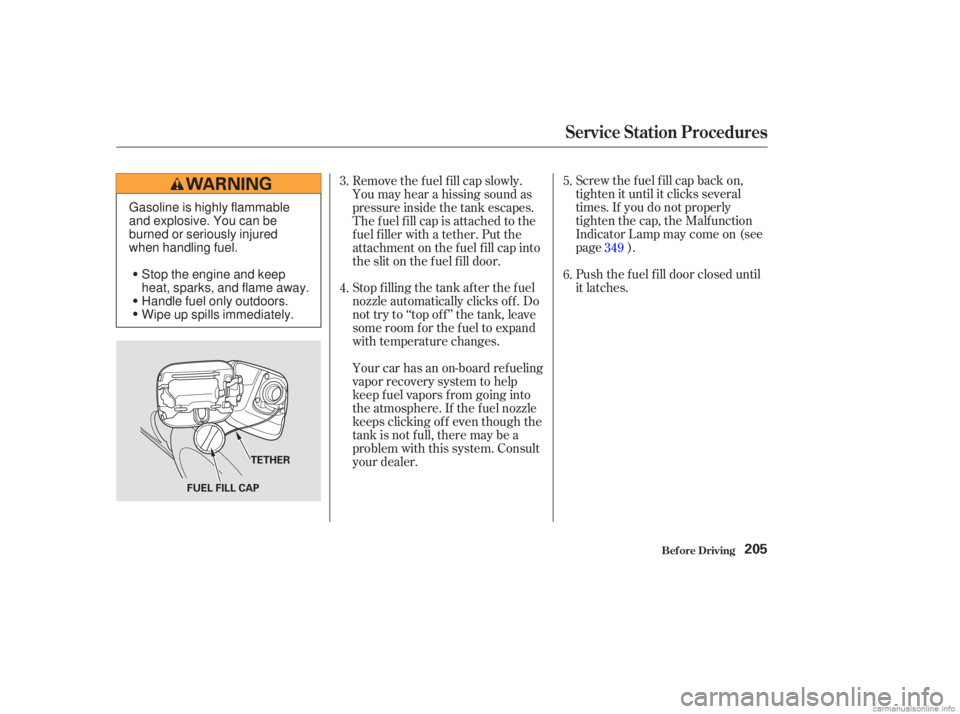
Remove the f uel f ill cap slowly.
You may hear a hissing sound as
pressure inside the tank escapes.
The fuel fill cap is attached to the
f uel f iller with a tether. Put the
attachment on the f uel f ill cap into
the slit on the f uel f ill door.
Stop f illing the tank af ter the f uel
nozzle automatically clicks of f . Do
not try to ‘‘top off’’ the tank, leave
some room f or the f uel to expand
with temperature changes.
Your car has an on-board ref ueling
vapor recovery system to help
keep f uel vapors f rom going into
the atmosphere. If the fuel nozzle
keeps clicking of f even though the
tank is not f ull, there may be a
problem with this system. Consult
your dealer.
3.
4.
5.
6.
349
Service Station Procedures
Bef ore Driving205
FUEL FILL CAP TETHER
Gasoline is highly flammable
and explosive. You can be
burned or seriously injured
when handling fuel.
Stop the engine and keep
heat, sparks, and flame away.
Handle fuel only outdoors.
Wipe up spills immediately.