Page 159 of 395

For example:1:06 would RESET to 1:00.
1:52 would RESET to 2:00.
If your car’s battery is disconnected
or goes dead, the time setting will be
lost. To set the time again, f ollow the
setting procedure.
The audio system usually shows the
time when the ignition switch is in
ACCESSORY (I) or ON (II). It
shows the operation mode of the
radio, or CD changer when you
operate them, then goes back to the
time display af ter three seconds.
You can use the R (Preset 6) side of
the bar to quickly set the time to the
nearest hour. Press R while pressing
the SOUND button. If the displayed
time is before the half hour, pressing
Rsetstheclockbacktotheprevious
hour. If the displayed time is af ter
the half hour, pressing R sets the
clock f orward to the beginning of the
next hour.
To set the time, press and hold the
SOUND button until the audio
system beeps and the clock f lashes.
To set the hours, press and hold the
H (Preset 4) side of the bar until the
numbers advance to the desired time.
To set the minutes, press and hold
the M (Preset 5) side of the bar until
the numbers advance to the desired
time.
When you are f inished, press the
SOUND button again. Digital Clock
Audio System
Comf ort and Convenience Feat ures156
DIGITAL CLOCK
SOUND BUTTON PRESET BARS
Page 177 of 395
If you want to adjust the sound while
the radio/CD is playing, push the
AUDIO DISPLAY button, then touch
the SOUND icon in the display.To return to the previous display,
push the AUDIO DISPLAY button
again.The upper display shows the time
when the ignition switch is in
ACCESSORY (I) or ON (II). Ref er to
the Navigation System Owner’s
Manual to set up the time.
Audio System
Comf ort and Convenience Feat ures
Digital Clock
174
DIGITAL CLOCK
SOUND ICON AUDIO DISPLAY
BUTTON UPPER DISPLAY
Page 276 of 395

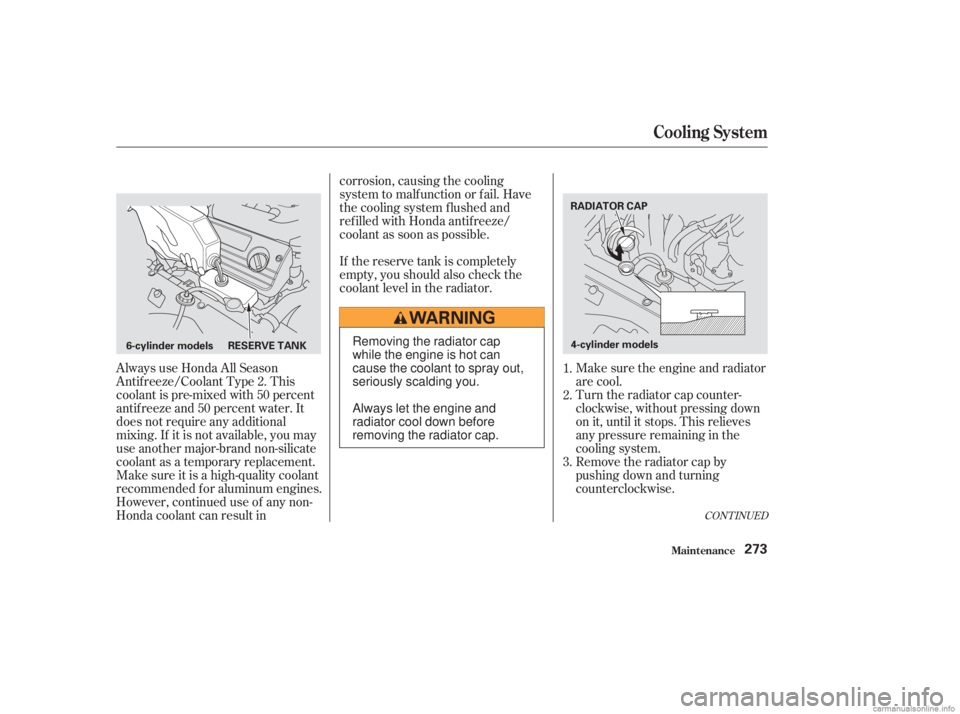
Always use Honda All Season
Antif reeze/Coolant Type 2. This
coolant is pre-mixed with 50 percent
antif reeze and 50 percent water. It
does not require any additional
mixing. If it is not available, you may
use another major-brand non-silicate
coolant as a temporary replacement.
Make sure it is a high-quality coolant
recommended f or aluminum engines.
However, continued use of any non-
Honda coolant can result incorrosion, causing the cooling
system to malf unction or f ail. Have
the cooling system f lushed and
ref illed with Honda antif reeze/
coolant as soon as possible.
If the reserve tank is completely
empty, you should also check the
coolant level in the radiator.
Make sure the engine and radiator
are cool.
Turn the radiator cap counter-
clockwise, without pressing down
on it, until it stops. This relieves
any pressure remaining in the
cooling system.
Remove the radiator cap by
pushing down and turning
counterclockwise.
1.
2.
3.
CONT INUED
Cooling Syst em
Maint enance273
6-cylinder models RESERVE TANK RADIATOR CAP
4-cylinder modelsRemoving the radiator cap
while the engine is hot can
cause the coolant to spray out,
seriously scalding you.
Always let the engine and
radiator cool down before
removing the radiator cap.
Page 278 of 395

Thecoolingsystemshouldbe
completely drained and ref illed with
new coolant according to the time
and distance recommendations in
the maintenance schedule. Only use
Honda All Season Antif reeze/
Coolant Type 2. Use of any non-
Honda coolant or plain water can
result in corrosion and deposits in
the cooling system.
Draining the coolant requires access
to the underside of the car. Unless
you have the tools and knowledge,
you should have this maintenance
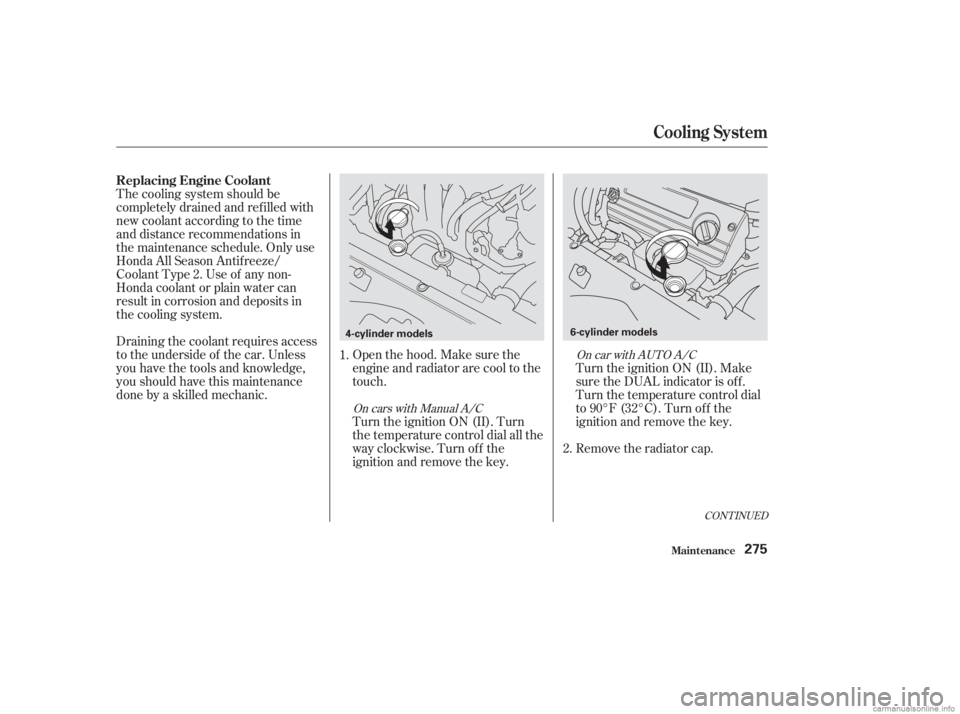
done by a skilled mechanic.Openthehood.Makesurethe
engine and radiator are cool to the
touch.
Turn the ignition ON (II). Turn
the temperature control dial all the
way clockwise. Turn off the
ignition and remove the key.Turn the ignition ON (II). Make
sure the DUAL indicator is off.
Turn the temperature control dial
to 90°F (32°C). Turn of f the
ignition and remove the key.
Remove the radiator cap.
1.
2.
CONT INUED
On cars with Manual A/C On car with AUTO A/C
Replacing Engine Coolant
Cooling Syst em
Maint enance275
4-cylinder models
6-cylinder models
Page 295 of 395
Disconnect the wire connector
f rom the ignition coil by pushing
on the lock tab and pulling on the
connector. Pull on the plastic
connector, not the wires.Remove the spark plug with
a f ive-eighths inch (16 mm) spark
plug socket. Use a wrench to remove the
hexagonsocketheadcapbolt
holding the ignition coil. Remove
the ignition coil by pulling it
straight out.
Loosen the two holding clips by
turning the heads one-quarter turn
counterclockwise with a f lat-tipped
screwdriver. Remove the cover on
the f ront cylinder bank by pulling
it straight up. Cleanoffanydirtandoilthathas
collected around the ignition coil.
1.
2.
3.4.
5.
Replacement
Spark Plugs (6-cylinder Models)
Maint enance292
HOLDING CLIP CONNECTOR
HEXAGON SOCKET HEAD CAP BOLT
IGNITION COIL
Page 296 of 395

Torque the spark plug. (If you do
not have a torque wrench, tighten
the spark plug two-thirds of a turn
af ter it contacts the cylinder head.)
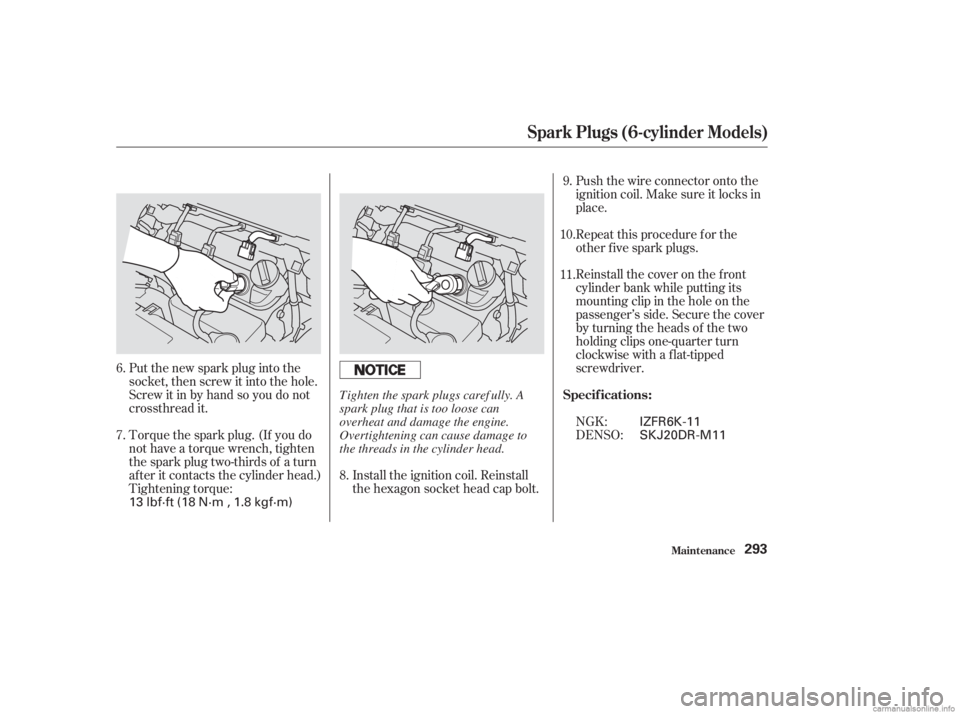
Tightening torque: Put the new spark plug into the
socket, then screw it into the hole.
Screw it in by hand so you do not
crossthread it.Install the ignition coil. Reinstall
the hexagon socket head cap bolt.Push the wire connector onto the
ignition coil. Make sure it locks in
place.
Reinstall the cover on the front
cylinder bank while putting its
mounting clip in the hole on the
passenger’s side. Secure the cover
by turning the heads of the two
holding clips one-quarter turn
clockwise with a f lat-tipped
screwdriver. Repeat this procedure f or the
other f ive spark plugs.
NGK:
DENSO:
6.
7.
8.9.
10.
11.
Specif ications:
Spark Plugs (6-cylinder Models)
Maint enance293
13 lbf·ft (18 N·m , 1.8 kgf·m) IZFR6K-11
SKJ20DR-M11
Tighten the spark plugs caref ully. A
spark plug that is too loose can
overheat and damage the engine.
Overtightening can cause damage to
the threads in the cylinder head.
Page 316 of 395
Open the hood. If you need to
change a bulb on the passenger’s
side, undo the two f asteners and
remove the air intake cover.Remove the electrical connector
f rom the bulb by squeezing the
connector to unlock the tab, then
slide the connector of f the bulb.Remove the bulb by turning it
approximately one-quarter turn
counterclockwise.
Insert the new bulb into the hole
and turn it one-quarter turn clock-
wise to lock it in place.
1.
3.
2.
4.
CONT INUED
High Beam Headlight
Lights
Maint enance313
FASTENERS
4-cylinder models 6-cylinder models TAB BULB
AIR INTAKE
COVER AIR INTAKE
COVER
FASTENERS
4-cylinder models
Page 317 of 395
Push the electrical connector back
onto the bulb. Make sure it is on
all the way.
Turn on the headlights to test the
new bulb.
Reinstall the air intake cover.
Reinstall the two fasteners and
secure them by pushing on the
heads until they lock.Use a f lat-tipped screwdriver to
remove the two holding clips f rom
the inner f ender.Pull the inner f ender cover away
f rom the f ender and bumper.
(Passenger’s side) Remove the electrical connector
fromthebulbbysqueezingthe
connector to unlock the tab, then
slide the connector of f the bulb. Remove the bulb by turning it
approximately one-quarter turn
counterclockwise.
If you are changing the bulb on
the passenger’s side, start the
engine, turn the steering wheel all
the way to the left, and turn off the
engine. If you are changing the
bulb on the driver’s side, turn the
steering wheel to the right.
6.
7. 5.
3.
4.
5.
1.
2.
L ow Beam Headlight
Lights
Maint enance314
HOLDING CLIPS
TAB BULB
6-cylinder models