Page 82 of 240
When pressing the controls on the keypad, press the middle of the
controls to ensure a good activation.
Programming a personal entry code
To create your own personal entry code:
1. Enter the factory set code.
2. Within five seconds press the 1•2 on the keypad.
3. Enter your personal 5-digit code. Each number must be entered
within five seconds of each other.
Tips:
•Do not set a code that uses five of the same number.
•Do not use five numbers in sequential order.
•The factory set code will work even if you have set your own personal
code.
•If you set a second personal code it will erase your first personal code.
Unlocking and locking the doors using keyless entry
To unlock the driver’s door,enter the factory set 5-digit code or your
personal code. Each number must be pressed within five seconds of each
other. The interior lamps will illuminate after pressing the first control on
the keypad.
To unlock all doors,press the 3•4 control within five seconds.
To lock all doors,press the 7•8 and the 9•0 at the same time. You
do notneed to enter the keypad code first.Note:The interior lamps
will turn off.
Autolock
This feature will automatically lock all the doors when:
•all the doors are closed,
•the ignition key is in the ON position,
•the gearshift lever is shifted into R reverse or a forward gear and
•the brake pedal is released.
This feature will also automatically relock all the doors when:
•the ignition is running and any door is opened then closed, and
•you put the vehicle in motion by releasing the brake pedal.
Locks and Security
82
Page 83 of 240
To deactivate/reactivate the autolock feature using the keypad
Your vehicle comes with the autolock feature activated. To
deactivate/reactivate this feature:
1. Turn the ignition to the OFF position.
2. Close all the doors.
3. Enter the 5-digit entry code.
4. Press and hold the 3•4. While holding the 3•4 press the 7•8.
5. Release the 3•4.
6. Release the 7•8.
The horn will chirp once when the system has been successfully
deactivated.
The horn will chirp twice (one short and one long chirp) when the
system has been successfully reactivated.
SECURILOCK�PASSIVE ANTI-THEFT SYSTEM
SecuriLock�passive anti-theft system is an engine immobilization
system. This system is designed to prevent the engine from being started
unless acoded key programmed to your vehicleis used. The use of
the wrong type of coded key may lead to a“no-start”condition.
Your vehicle comes with two coded keys; additional coded keys may be
purchased from your dealer. The dealer can program your spare keys to
your vehicle or you can program the keys yourself. Refer to
Programming spare keysfor instructions on how to program the coded
key.
Note:The SecuriLock�passive anti-theft system is not compatible with
non-Ford aftermarket remote start systems. Use of these systems may
result in vehicle starting problems and a loss of security protection.
Note:Large metallic objects, electronic devices that are used to
purchase gasoline or similar items, or a second coded key on the same
key chain may cause vehicle starting issues. You need to prevent these
objects from touching the coded key while starting the engine. These
objects will not cause damage to the coded key, but may cause a
momentary issue if they are too close to the key when starting the
engine. If a problem occurs, turn the ignition off, remove all objects on
the key chain away from the coded key and restart the engine.
Locks and Security
83
Page 84 of 240
Automatic arming
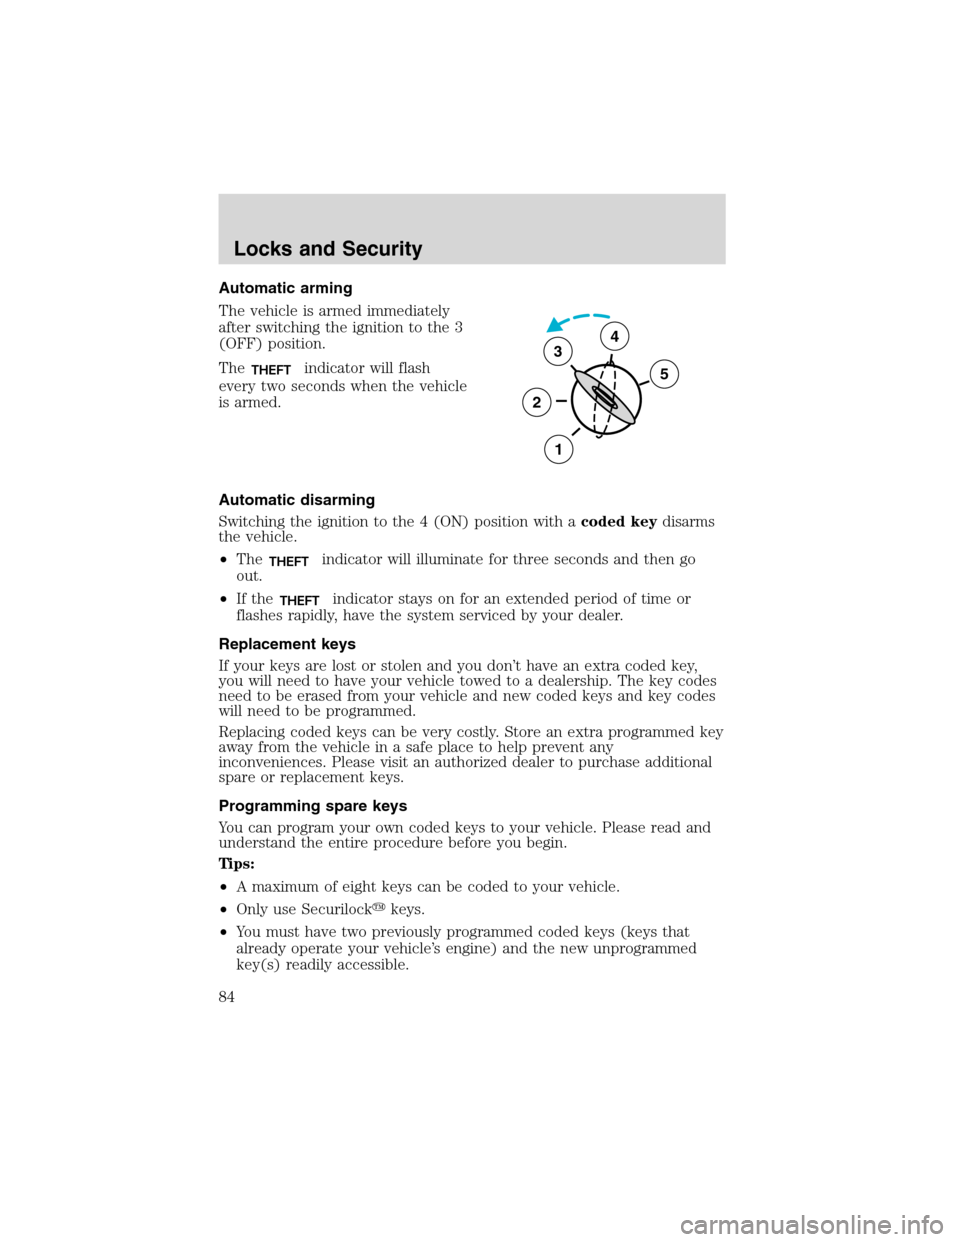
The vehicle is armed immediately
after switching the ignition to the 3
(OFF) position.
The
THEFTindicator will flash
every two seconds when the vehicle
is armed.
Automatic disarming
Switching the ignition to the 4 (ON) position with acoded keydisarms
the vehicle.
•The
THEFTindicator will illuminate for three seconds and then go
out.
•If the
THEFTindicator stays on for an extended period of time or
flashes rapidly, have the system serviced by your dealer.
Replacement keys
If your keys are lost or stolen and you don’t have an extra coded key,
you will need to have your vehicle towed to a dealership. The key codes
need to be erased from your vehicle and new coded keys and key codes
will need to be programmed.
Replacing coded keys can be very costly. Store an extra programmed key
away from the vehicle in a safe place to help prevent any
inconveniences. Please visit an authorized dealer to purchase additional
spare or replacement keys.
Programming spare keys
You can program your own coded keys to your vehicle. Please read and
understand the entire procedure before you begin.
Tips:
•A maximum of eight keys can be coded to your vehicle.
•Only use Securilock�keys.
•You must have two previously programmed coded keys (keys that
already operate your vehicle’s engine) and the new unprogrammed
key(s) readily accessible.
3
2
1
5
4
Locks and Security
84
Page 85 of 240
•If no previously programmed coded keys are available, you must take
your vehicle to your dealer to have the spare key(s) programmed.
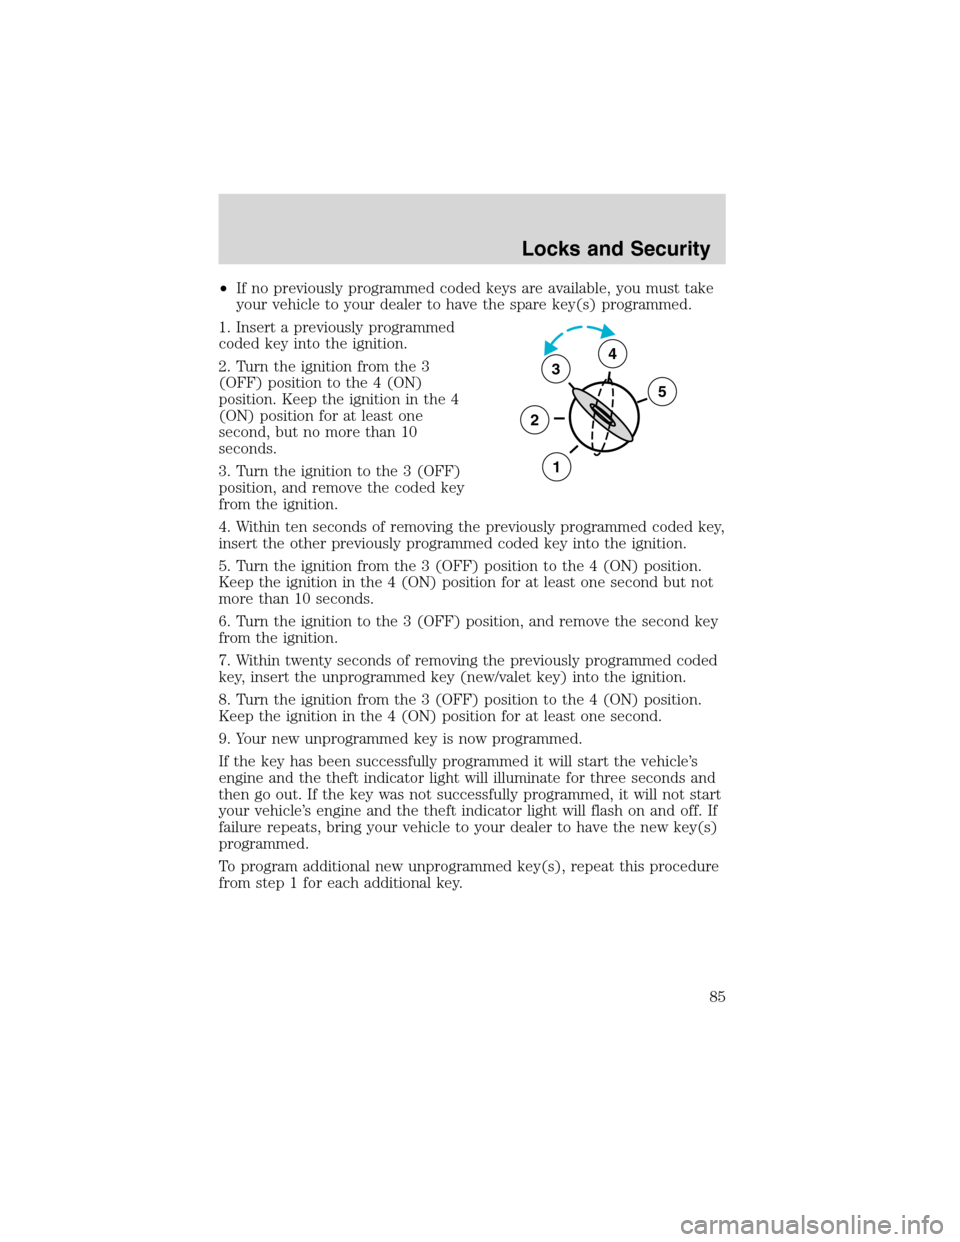
1. Insert a previously programmed
coded key into the ignition.
2. Turn the ignition from the 3
(OFF) position to the 4 (ON)
position. Keep the ignition in the 4
(ON) position for at least one
second, but no more than 10
seconds.
3. Turn the ignition to the 3 (OFF)
position, and remove the coded key
from the ignition.
4. Within ten seconds of removing the previously programmed coded key,
insert the other previously programmed coded key into the ignition.
5. Turn the ignition from the 3 (OFF) position to the 4 (ON) position.
Keep the ignition in the 4 (ON) position for at least one second but not
more than 10 seconds.
6. Turn the ignition to the 3 (OFF) position, and remove the second key
from the ignition.
7. Within twenty seconds of removing the previously programmed coded
key, insert the unprogrammed key (new/valet key) into the ignition.
8. Turn the ignition from the 3 (OFF) position to the 4 (ON) position.
Keep the ignition in the 4 (ON) position for at least one second.
9. Your new unprogrammed key is now programmed.
If the key has been successfully programmed it will start the vehicle’s
engine and the theft indicator light will illuminate for three seconds and
then go out. If the key was not successfully programmed, it will not start
your vehicle’s engine and the theft indicator light will flash on and off. If
failure repeats, bring your vehicle to your dealer to have the new key(s)
programmed.
To program additional new unprogrammed key(s), repeat this procedure
from step 1 for each additional key.
3
2
1
5
4
Locks and Security
85
Page 86 of 240
PERIMETER ALARM SYSTEM (IF EQUIPPED)
The perimeter anti-theft system will help prevent your vehicle from
unauthorized entry.
If there is any potential perimeter anti-theft problem with your vehicle,
ensureALL remote entry transmittersare taken to the dealership to
aid in troubleshooting.
Arming the system
When armed, this system will help protect your vehicle from
unauthorized entry. When unauthorized entry occurs, the system will
flash the turn signal lamps and side repeaters and honk the horn.
The system is ready to arm whenever the key is removed from the
ignition. Any of the following actions will prearm the alarm system:
•Press the remote entry lock control
•Press the interior power door lock control while the door is open
Twenty seconds after one of the above events occurs, any door/hood that
is closed is armed.
Any door/hood that is still open is prearmed and waiting for the
door/hood to be closed.
Once that input is closed, the input will arm in 20 seconds and the
exterior lamps may flash.
Disarming the system
You can disarm the system by any of the following actions:
•Press the transmitter unlock control.
•Unlock the doors with a key.
•Turn a programmed SecuriLock key to RUN /START.
Locks and Security
86
Page 90 of 240
Memory seats/rearview mirrors/adjustable pedals (if equipped)
This system allows automatic
positioning of the driver seat,
outside rearview mirrors, and
adjustable pedals to two
programmable positions.
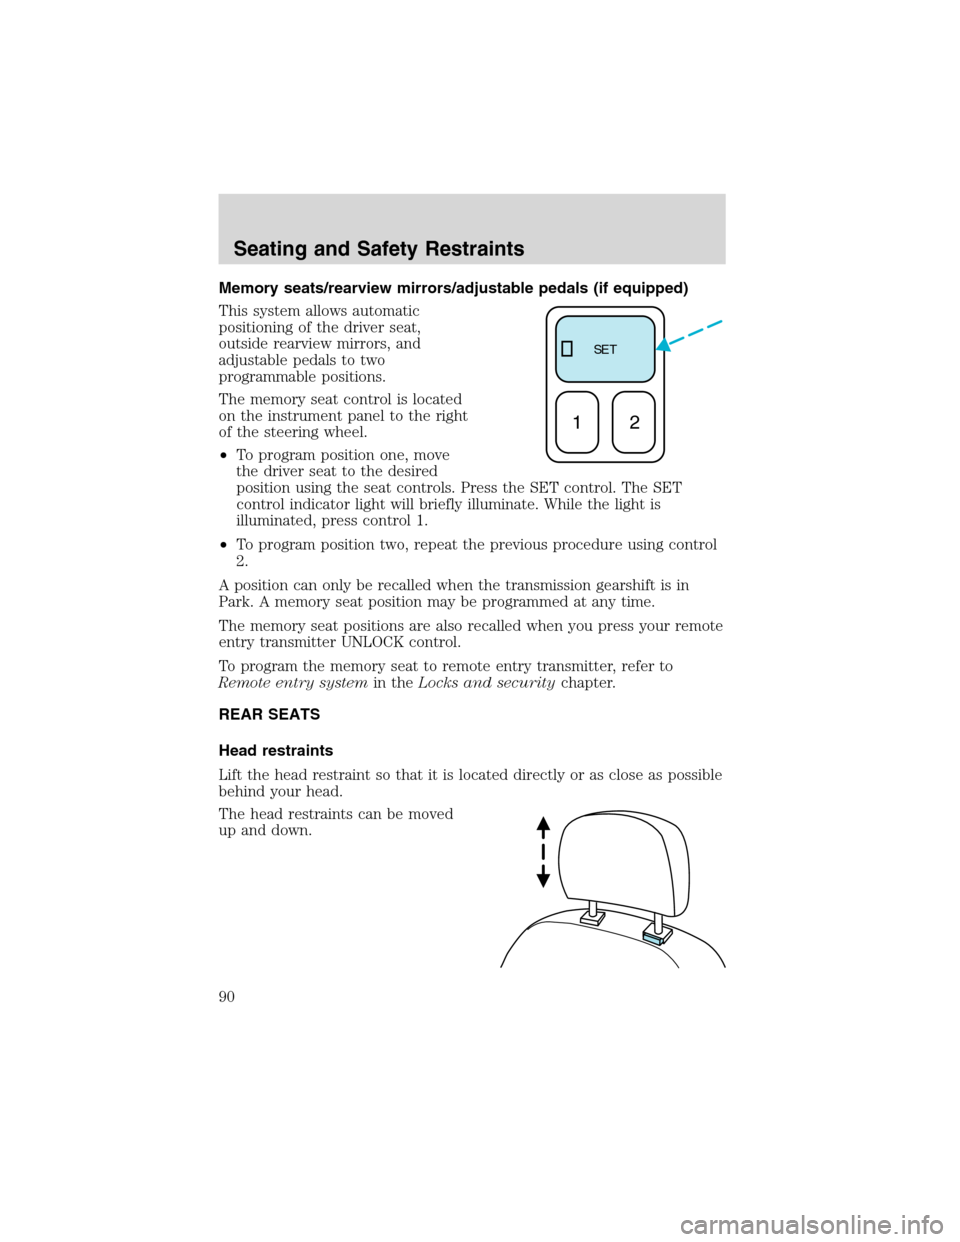
The memory seat control is located
on the instrument panel to the right
of the steering wheel.
•To program position one, move
the driver seat to the desired
position using the seat controls. Press the SET control. The SET
control indicator light will briefly illuminate. While the light is
illuminated, press control 1.
•To program position two, repeat the previous procedure using control
2.
A position can only be recalled when the transmission gearshift is in
Park. A memory seat position may be programmed at any time.
The memory seat positions are also recalled when you press your remote
entry transmitter UNLOCK control.
To program the memory seat to remote entry transmitter, refer to
Remote entry systemin theLocks and securitychapter.
REAR SEATS
Head restraints
Lift the head restraint so that it is located directly or as close as possible
behind your head.
The head restraints can be moved
up and down.
SE T
12
Seating and Safety Restraints
90
Page 96 of 240
To install the seat:
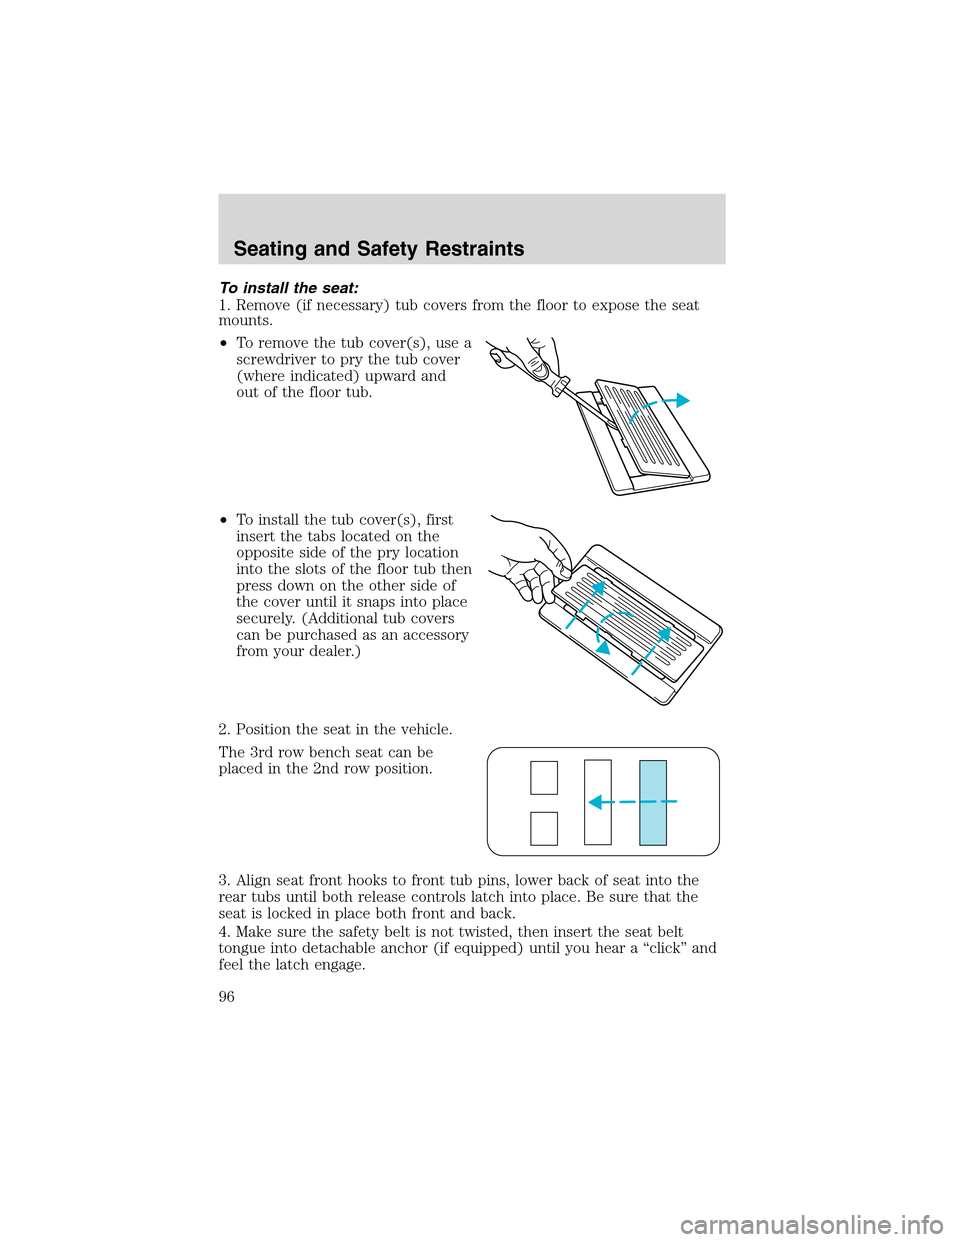
1. Remove (if necessary) tub covers from the floor to expose the seat
mounts.
•To remove the tub cover(s), use a
screwdriver to pry the tub cover
(where indicated) upward and
out of the floor tub.
•To install the tub cover(s), first
insert the tabs located on the
opposite side of the pry location
into the slots of the floor tub then
press down on the other side of
the cover until it snaps into place
securely. (Additional tub covers
can be purchased as an accessory
from your dealer.)
2. Position the seat in the vehicle.
The 3rd row bench seat can be
placed in the 2nd row position.
3. Align seat front hooks to front tub pins, lower back of seat into the
rear tubs until both release controls latch into place. Be sure that the
seat is locked in place both front and back.
4. Make sure the safety belt is not twisted, then insert the seat belt
tongue into detachable anchor (if equipped) until you hear a“click”and
feel the latch engage.
Seating and Safety Restraints
96
Page 97 of 240
Always latch the vehicle seat to the floor, whether the seat is
occupied or empty. If not latched, the seat may cause injury
during a sudden stop.
Bucket seats
To remove the seat(s):
Position the seatback in the full down position to make removing the
seat easier.
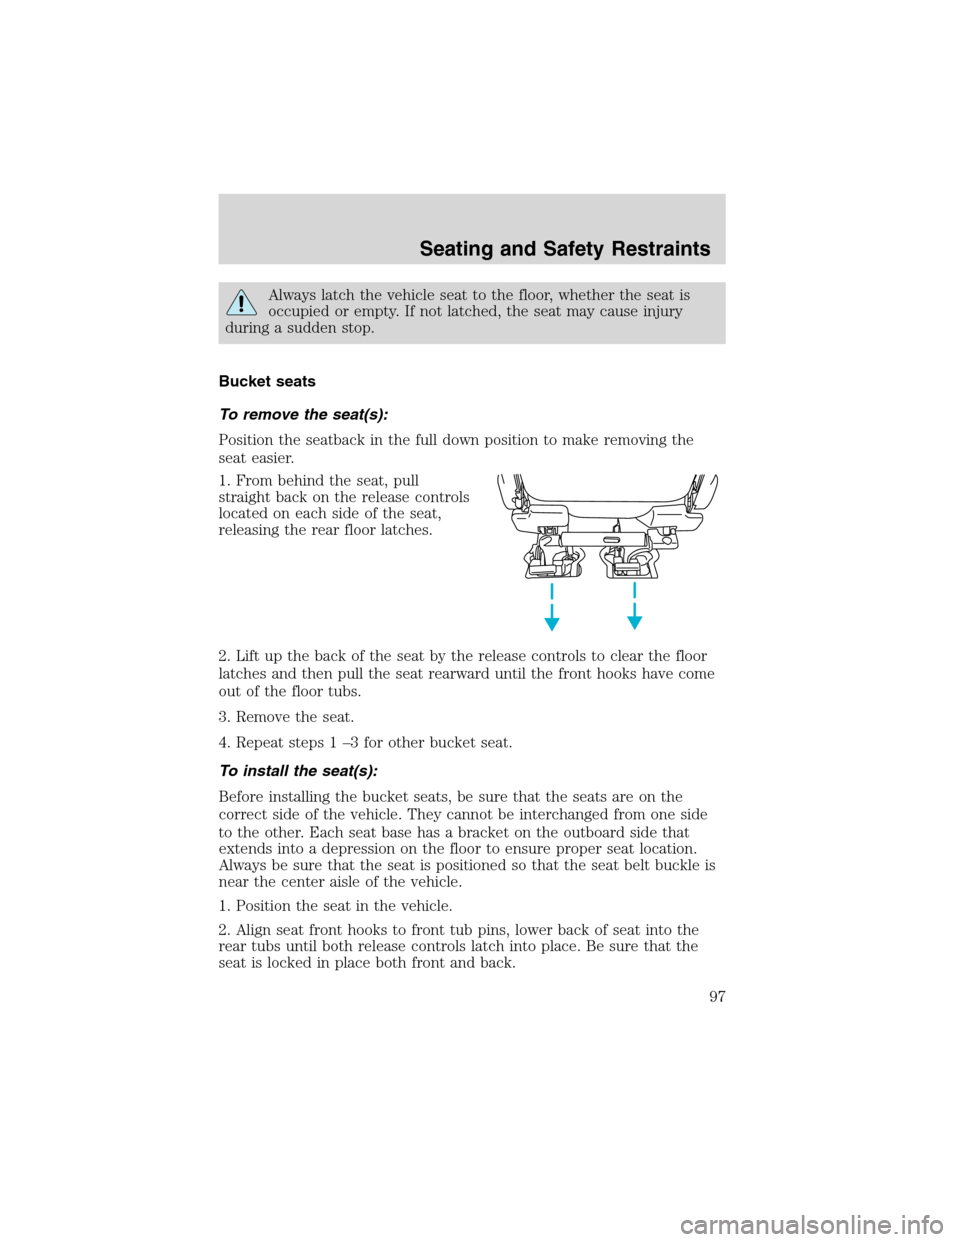
1. From behind the seat, pull
straight back on the release controls
located on each side of the seat,
releasing the rear floor latches.
2. Lift up the back of the seat by the release controls to clear the floor
latches and then pull the seat rearward until the front hooks have come
out of the floor tubs.
3. Remove the seat.
4. Repeat steps 1–3 for other bucket seat.
To install the seat(s):
Before installing the bucket seats, be sure that the seats are on the
correct side of the vehicle. They cannot be interchanged from one side
to the other. Each seat base has a bracket on the outboard side that
extends into a depression on the floor to ensure proper seat location.
Always be sure that the seat is positioned so that the seat belt buckle is
near the center aisle of the vehicle.
1. Position the seat in the vehicle.
2. Align seat front hooks to front tub pins, lower back of seat into the
rear tubs until both release controls latch into place. Be sure that the
seat is locked in place both front and back.
Seating and Safety Restraints
97