2003 FORD SUPER DUTY check engine light
[x] Cancel search: check engine lightPage 6 of 64
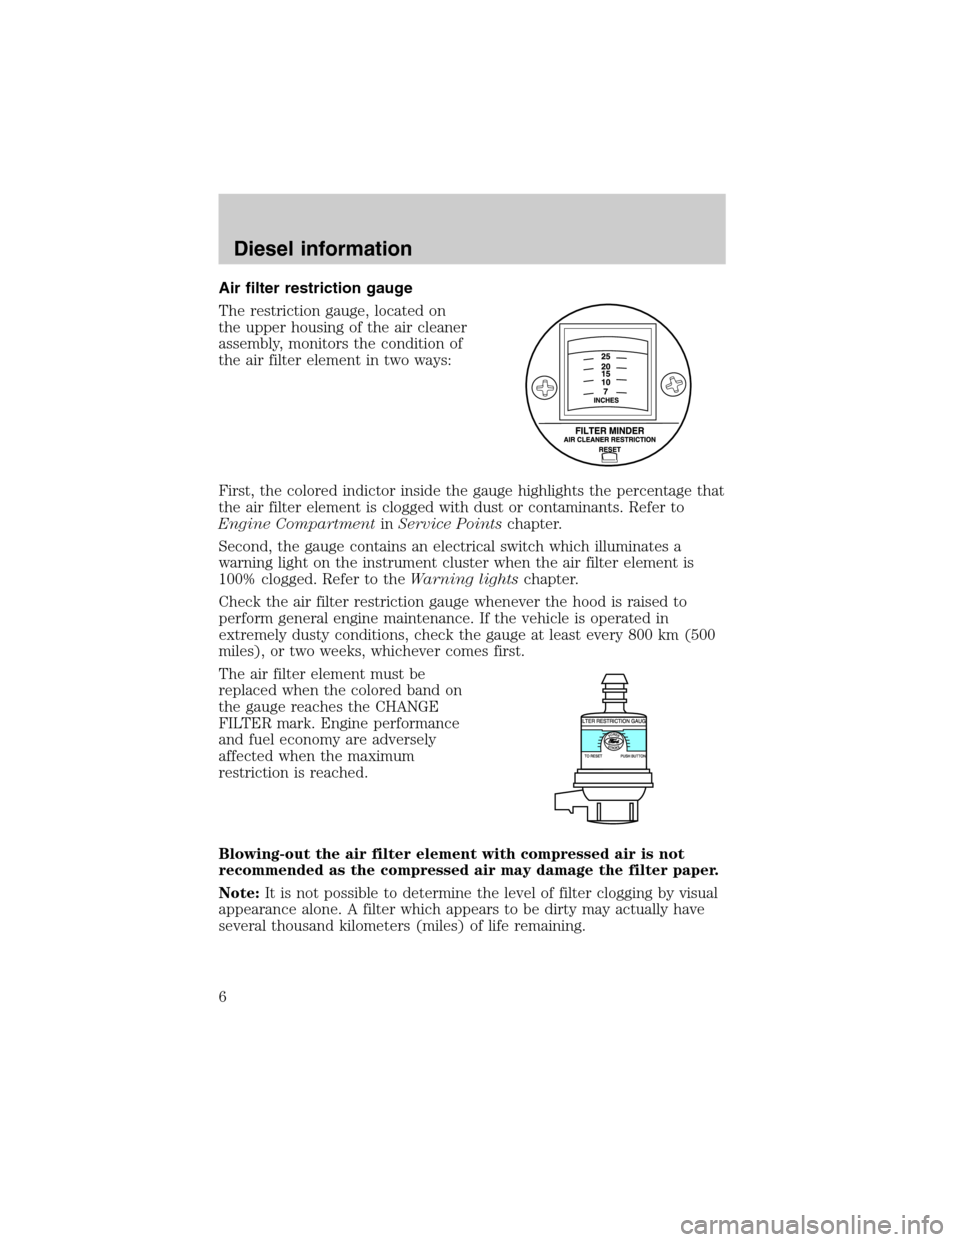
Air filter restriction gauge
The restriction gauge, located on
the upper housing of the air cleaner
assembly, monitors the condition of
the air filter element in two ways:
First, the colored indictor inside the gauge highlights the percentage that
the air filter element is clogged with dust or contaminants. Refer to
Engine CompartmentinService Pointschapter.
Second, the gauge contains an electrical switch which illuminates a
warning light on the instrument cluster when the air filter element is
100% clogged. Refer to theWarning lightschapter.
Check the air filter restriction gauge whenever the hood is raised to
perform general engine maintenance. If the vehicle is operated in
extremely dusty conditions, check the gauge at least every 800 km (500
miles), or two weeks, whichever comes first.
The air filter element must be
replaced when the colored band on
the gauge reaches the CHANGE
FILTER mark. Engine performance
and fuel economy are adversely
affected when the maximum
restriction is reached.
Blowing-out the air filter element with compressed air is not
recommended as the compressed air may damage the filter paper.
Note:It is not possible to determine the level of filter clogging by visual
appearance alone. A filter which appears to be dirty may actually have
several thousand kilometers (miles) of life remaining.
Diesel information
6
Page 8 of 64
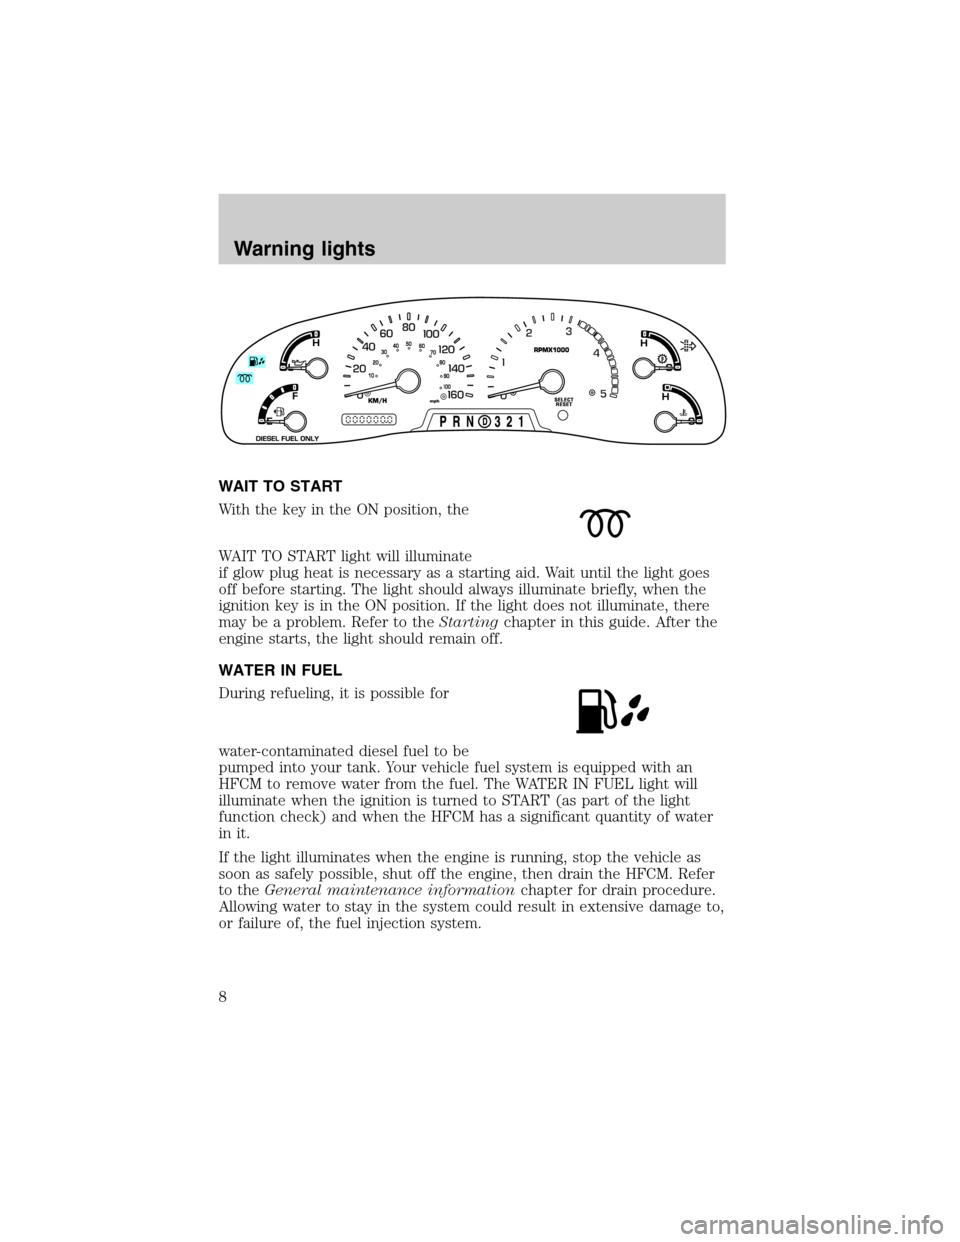
WAIT TO START
With the key in the ON position, the
WAIT TO START light will illuminate
if glow plug heat is necessary as a starting aid. Wait until the light goes
off before starting. The light should always illuminate briefly, when the
ignition key is in the ON position. If the light does not illuminate, there
may be a problem. Refer to theStartingchapter in this guide. After the
engine starts, the light should remain off.
WATER IN FUEL
During refueling, it is possible for
water-contaminated diesel fuel to be
pumped into your tank. Your vehicle fuel system is equipped with an
HFCM to remove water from the fuel. The WATER IN FUEL light will
illuminate when the ignition is turned to START (as part of the light
function check) and when the HFCM has a significant quantity of water
in it.
If the light illuminates when the engine is running, stop the vehicle as
soon as safely possible, shut off the engine, then drain the HFCM. Refer
to theGeneral maintenance informationchapter for drain procedure.
Allowing water to stay in the system could result in extensive damage to,
or failure of, the fuel injection system.
Warning lights
8
Page 26 of 64
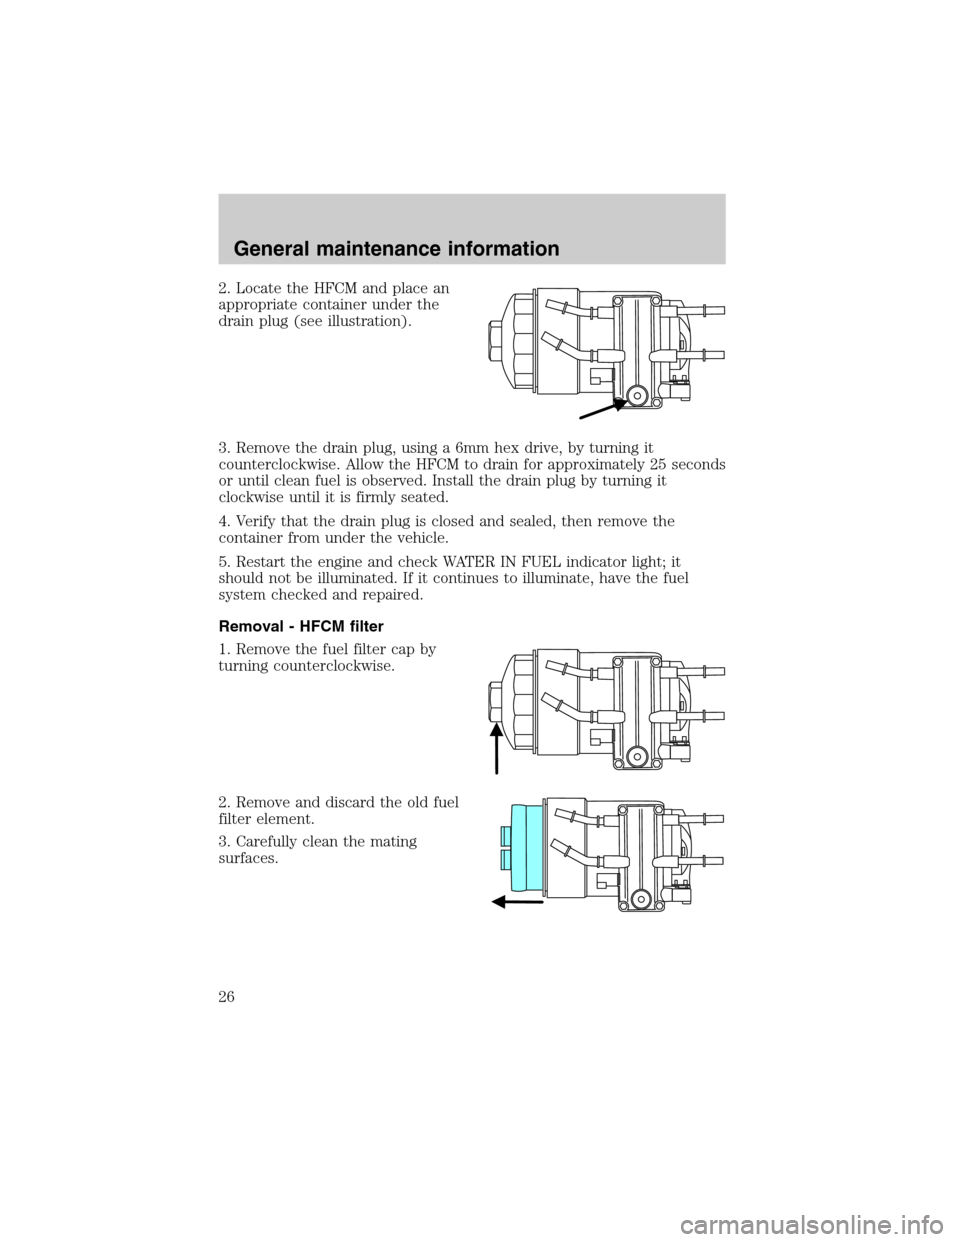
2. Locate the HFCM and place an
appropriate container under the
drain plug (see illustration).
3. Remove the drain plug, using a 6mm hex drive, by turning it
counterclockwise. Allow the HFCM to drain for approximately 25 seconds
or until clean fuel is observed. Install the drain plug by turning it
clockwise until it is firmly seated.
4. Verify that the drain plug is closed and sealed, then remove the
container from under the vehicle.
5. Restart the engine and check WATER IN FUEL indicator light; it
should not be illuminated. If it continues to illuminate, have the fuel
system checked and repaired.
Removal - HFCM filter
1. Remove the fuel filter cap by
turning counterclockwise.
2. Remove and discard the old fuel
filter element.
3. Carefully clean the mating
surfaces.
General maintenance information
26
Page 34 of 64
To reduce the risk of personal injury, make sure the engine is
cool before unscrewing the coolant pressure relief cap. The
cooling system is under pressure; steam and hot liquid can come out
forcefully when the cap is loosened slightly.
1. Before you begin, turn the engine off and let it cool.
2. When the engine is cool, wrap a thick cloth around the coolant
pressure relief cap on the coolant reservoir (an semi-clear plastic bottle).
Slowly turn cap counterclockwise (left) until pressure begins to release.
3. Step back while the pressure releases.
4. When you are sure that all the pressure has been released, use the
cloth to turn it counterclockwise and remove the cap.
5. Fill the coolant reservoir slowly with the proper coolant mixture (see
above), to within the“cold fill range”or the“cold full”level on the
reservoir. If you removed the radiator cap in an overflow system, fill the
radiator until the coolant is visible and radiator is almost full.
6. Replace the cap. Turn until tightly installed. (Cap must be tightly
installed to prevent coolant loss.)
After any coolant has been added, check the coolant concentration see
Checking engine coolantsection). If the concentration is not 50/50
(protection to–34°F/–36°C), drain some coolant and adjust the
concentration. It may take several drains and additions to obtain a 50/50
coolant concentration.
Whenever coolant has been added, the coolant level in the coolant
reservoir should be checked the next few times you drive the vehicle. If
necessary, add enough 50/50 concentration of engine coolant and
distilled water to bring the liquid level to the proper level.
If you have to add more than 1.0 liter (1.0 quart) of engine coolant per
month, have your dealer check the engine cooling system. Your cooling
system may have a leak. Operating an engine with a low level of coolant
can result in engine overheating and possible engine damage.
General maintenance information
34
Page 40 of 64
IF THE ENGINE WON’T CRANK
Turn on the headlights. If the lights are dim, do not go on at all or if
when the ignition is turned to START the lights become dim or go out,
the battery connections may be loose or corroded, or the battery may be
discharged. If there is a clicking or stuttering sound coming from the
engine compartment when you turn the key to START, this may also
indicate a loose or corroded battery connection.
Check the battery connections at the battery posts, cable connection to
the engine grounding point and at the starter connection.
If a discharged battery is suspected, have it checked and corrected.
•For vehicles with manual transmissions, the clutch pedalmustbe fully
depressed in order for the starter to operate.
•For vehicles with automatic transmissions, the gearshift lever must be
in Park or Neutral in order for the starter to operate.
•Try operating the starter switch several times. Should the switch be
corroded, this operation may clean the contacts or make the switch
temporarily operable until you can reach the dealer.
•If all electrical connections are tight and you need assistance to start,
seeJump Startingin theRoadside emergencieschapter of your
owner guide.
IF ENGINE CRANKS BUT WON’T START
Prolonged starter cranking (in excess of 30 seconds) could cause
damage to the starter motor.
•Check the fuel gauge. You may be out of fuel. If the gauge shows that
there is fuel in the tank, the trouble may be in the electrical system or
the fuel system. If equipped with an auxiliary tank, be sure that the
tank control switch is set for the tank with fuel and not on an empty
tank.
•Leaving the ignition key ON for over two minutes without starting may
make starting difficult because the glow plugs will cease activation.
Reset the system by turning the ignition key to OFF and then back to
ON again.
Minor troubleshooting guide
40
Page 49 of 64

Any adverse condition should be brought to the attention of your dealer
or qualified service technician as soon as possible for the proper service
advice. The owner maintenance service checks are generally not covered
by warranties so you may be charged for labor, parts or lubricants used.
Maximum Oil Change Interval:
Normal Schedule: 7,500 miles or 6 months, whichever occurs first.
Special Operating Conditions: 5,000 miles or 6 months, see appropriate
schedule.
Check every month:
•Check function of all interior and exterior lights
•Check tires for wear and proper air pressure
•Check engine oil fluid level
•Check windshield washer solvent fluid level
•Check and drain fuel filter/water separator
Check every six months:
•Check lap/shoulder belts and seat latches for wear and function
•Check air pressure in spare tire
•Check that externally-mounted spare tire is tight (see Owner’s Guide)
•Check power steering fluid level
•Check washer spray, wiper operation and clean all wiper blades
•Check parking brake for proper operation
•Check and lubricate all hinges, latches and outside locks
•Check and lubricate door rubber weatherstrips
•Check and clean body and door drain holes
•Check safety warning lamps (brake, ABS, air bag, safety belt) for
operation
•Check cooling system fluid level and coolant strength
•Check battery connections and clean if necessary
•Check clutch fluid level, if equipped
General Owner’s Information
49